
|
Roasted Brussels Sprouts
https://ift.tt/2BGluLG
How do you feel about Brussels sprouts? Do you love them, or hate them? Over the last few years, I feel like they’ve been getting more and more popular, and I couldn’t be happier about it! Brussels sprouts are some of my favorite fall veggies – they’re fresh and healthy, but still hearty, and they pair well with all sorts of seasonings. But, in my opinion, the key to loving Brussels sprouts is preparing them the right way. No one’s clamoring for more boiled or steamed sprouts – they’re often bitter, and they have an unappealing mushy texture. So if you’re still on the fence about them, try this roasted Brussels sprouts recipe. They come out of the oven with golden brown centers and crackly, crisp outer leaves. I love them straight off the sheet pan, but when they’re dressed with this easy Lemon, Thyme, and Parmesan seasoning, even the biggest Brussels sprouts skeptics can’t resist them.
How to Cook Brussels SproutsMaking perfect, crispy baked Brussels sprouts is easy! Here’s what you need to do: First, trim and chop the Brussels sprouts. Chop off and discard any dry or woody stems at the bottom of the sprouts. Then, slice larger sprouts in half, leaving smaller ones whole. Aim for all your veggies to be a similar size so that they cook evenly.
Next, season the sprouts. Toss them with olive oil and generous pinches of salt and pepper. Transfer them to a parchment-lined baking sheet, and arrange them in an even layer with their cut sides facing down. This way, you’ll get nice browning on the cut sides of the sprouts, and their exposed leaves will become deliciously crisp as they bake. It’s ok to have a few loose leaves mixed in with the whole sprouts – they come out lightly charred and irresistibly crunchy. Finally, it’s time to bake! Transfer the sheet pan to a 425-degree oven and bake for 30 minutes or so, until the veggies are tender and golden brown around the edges. Enjoy!
Roasted Brussels Sprouts Serving SuggestionsFirst and foremost, roasted Brussels sprouts are a delicious side dish. Serve them plain, simply seasoned with olive oil, salt, and pepper, or dress them up! Drizzle them with a bit of balsamic vinegar or lemon juice and toss them with feta or Parmesan cheese, herbs, red pepper flakes, and nuts or pepitas. Find my favorite lemon Parmesan seasoning in the recipe below, or head to this post for more variations! You can also turn these roasted Brussels sprouts into a meal on their own. Here are a few easy ideas to get you started:
More Brussels Sprouts RecipesI hope you love making these oven roasted Brussels sprouts, but don’t stop there! You can also enjoy them raw or sautéed. Here are a few of my other favorite ways to prepare them:
Do you have any favorite Brussels sprouts recipes? Let me know in the comments!
More Roasted Vegetable RecipesIf you love this recipe, try roasting one of these veggies next:
Other posts you may enjoy...
The post Roasted Brussels Sprouts appeared first on Love and Lemons. Recipes via Love and Lemons https://ift.tt/2h2Uz32 October 24, 2019 at 07:36AM #recipies
0 Comments
Rainbow Chard & Feta Cheese Börek
https://ift.tt/2Pq3Xj5 Thin yogurt brushed dough sheets are like magical blankets that can get kids and adults to eat practically anything they are wrapped around. These hand-pies are called Börek and originate from Turkey, but we first tried them at our favorite cornershop and are addicted to them ever since. Recipes via Green Kitchen Stories https://ift.tt/2LQcbQy October 24, 2019 at 05:35AM #recipies
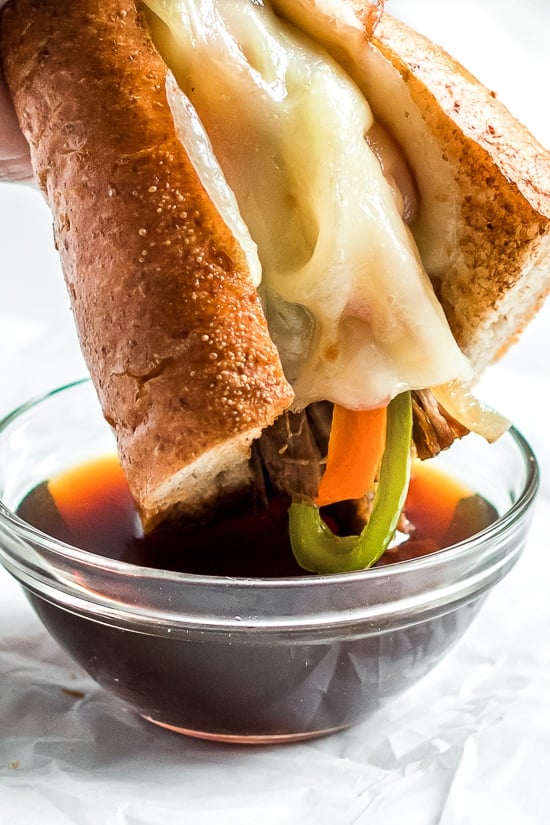
Slow Cooker French Dip Sandwich with Caramelized Onions
https://ift.tt/2N5pk6j Slow Cooker French Dip Sandwich with Caramelized Onions filled with beef, melted cheese and au jus (beef broth) for dipping. The perfect weekend crock pot recipe!
Slow Cooker French Dip SandwichSometimes the only thing I want for dinner is a hot sandwich. This Crock Pot French Dip sandwich satisfies that craving and those caramelized onions at the end make it amazing!! And is there anything better than dipping a sandwich in that delicious au jus? I think not! The post Slow Cooker French Dip Sandwich with Caramelized Onions appeared first on Skinnytaste. Recipes via Skinnytaste https://ift.tt/2ix3Luq October 23, 2019 at 10:44AM #recipies
Air Fryer Avocado Fries
https://ift.tt/2PdSnHI Perfectly crispy on the outside with a creamy inside, these Air Fryer Avocado Fries are terrific served alongside a simple spicy ranch dip. Photography Credit: Nick Evans Avocado fries are the perfect mix of crispy and creamy. Who knew that when you take slices of avocado, bread them, and then fry them in an air fryer, you end up with a snack that’s so good I still can’t believe everyone isn’t eating them all the time. If you like guacamole and chips, you’ll love these! The Trick For Great Avocado FriesAvocado fries are just what they sound like: strips of avocado that are breaded (I like using panko breadcrumbs) and then fried. They’re traditionally baked or made in a deep fryer, but they work great in the air fryer! The trick to good avocado fries is all about which avocados you use. You should use slightly under-ripe avocados for avocado fries. Not completely firm, but not soft. If they are ripe enough for guacamole, they are too ripe for avocado fries. The perfect avocado for avocado fries will give very slightly to pressure and be green underneath the stem or cap. It should not be mushy at all. Why You Should Use an Air Fryer For Avocado FriesAir frying is perfect for avocado fries because it quickly crisps the exterior of the “fry” and makes it crunchy and browned – all without overcooking the inside and turning the avocado to mush. It’s also fast and easy. While one avocado air-fries, you can bread the next one and be ready to fry when the first batch is done. Just remember it always helps to spray your air fryer basket with a little nonstick spray to prevent sticking. No Air Fryer? How To Bake Avocado FriesIf you don’t have an air fryer, no worries! Just spray a baking sheet with nonstick spray, and then bake the avocado slices at 350˚F for around 12 minutes, or until they are golden brown. What to Serve with Avocado FriesA sprinkle of coarse salt and a squeeze of lime juice is nice, but optional, as these avocado fries are great on their own. If you want a dip, though, I like to serve them with spicy ranch, or as it’s known in my kitchen, a simple mix of ranch dressing and sriracha hot sauce. More Air Fryer Recipes to Try!Air Fryer Avocado Fries RecipeIngredients
For the dipping sauce:
Special equipment:Method1 Slice the avocados: Cut the avocados in half and remove the pits. Use a large spoon to scoop out each avocado half in one piece. Slice each half into 5 slices, lengthwise.
2 Make the panko mixture and dip the avocados: In a medium bowl, stir together panko breadcrumbs, parmesan cheese, and black pepper. Whisk eggs together in a separate bowl. Dip each avocado slice in egg and then coat well with panko mixture.
3 Fry the avocado slices: Spray the air fryer basket with nonstick spray. Place as many avocado fries as possible, without touching, into the air fryer basket. You should be able to fit a whole avocado (10 fries). Air fry the fries at 350˚F for 3 minutes per side. They should be crispy and golden brown. Repeat with the remaining batches. Alternatively, bake the avocado slices in a 350˚F oven for 10-12 minutes, or until they're golden brown.
4 Serve: Let the fries cool briefly before serving. Sprinkle with salt and lime juice, if desired, or serve with the dipping sauce. Cooked avocado fries don't keep very well, so only cook as many as you intend to eat!
Hello! All photos and content are copyright protected. Please do not use our photos without prior written permission. Thank you! Products We LoveThis post may contain links to Amazon or other partners; your purchases via these links can benefit Simply Recipes. Read more about our affiliate linking policy. Recipes via Simply Recipes https://ift.tt/2F9fkDA October 23, 2019 at 09:10AM #recipies
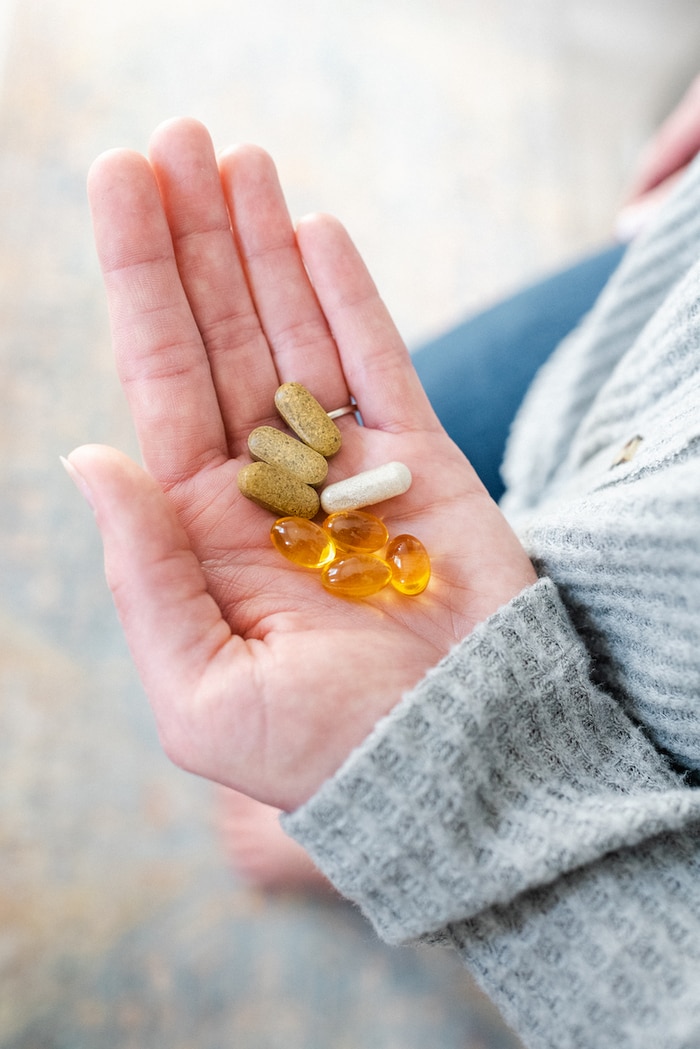
What Supplements I’m Taking During Pregnancy
https://ift.tt/2BA6oqZ
One question I’ve been asked a ton since becoming pregnant is what supplements I’m taking. In this post I’m sharing my full supplement routine. This post is sponsored by New Chapter.
As a holistic nutritionist I am a firm believer in getting nutrients from food first, but I also understand that sometimes we’re not able to get everything we need from the food we eat, especially during times of physical change, like pregnancy, postpartum, healing from an illness, etc. Supplements are no substitute for a nutritious diet, but they can help fill in the gaps to keep our bodies strong and healthy. With pregnancy, there are certain vitamins and minerals that our bodies need more of and that are helpful for baby’s development, so it’s important to have a regular supplement routine.
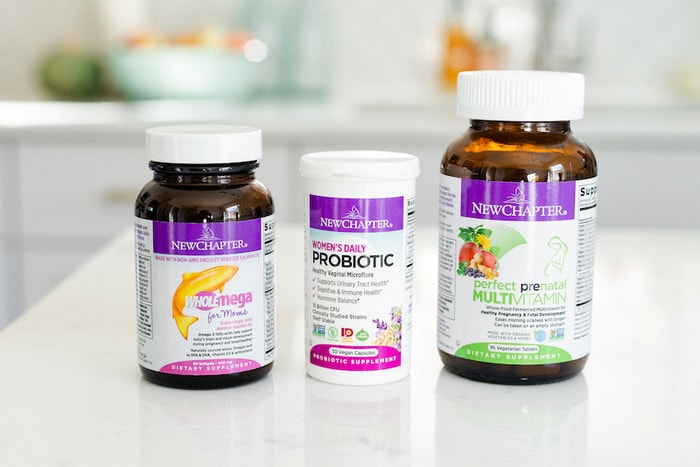
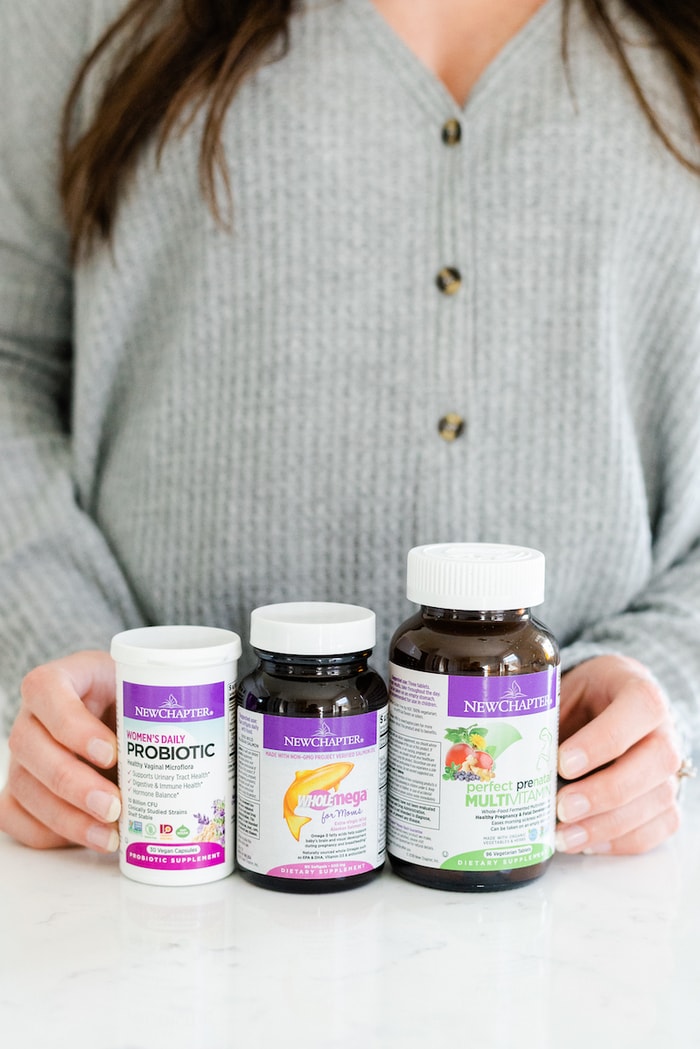
Prenatal VitaminNo matter how healthy you eat, doctors recommend that you start taking prenatal vitamins a couple months before trying to conceive just to ensure you’re getting all the nutrients you need and priming your body for the conception process. Taking a prenatal vitamin is just like taking a multivitamin, you’re simply filling any nutritional gaps that your diet isn’t providing. Of course there are a ton of important nutrients for growing a baby, but one of the most important is folate, which is essential for preventing neural tube defects. (source) Before getting pregnant I was taking a prenatal gummy vitamin, but as soon as I found out I was pregnant I wanted to switch to something without added sugar. I did a little research and found New Chapter Perfect Prenatal, and I’ve been taking this prenatal vitamin ever since. What I love about this specific brand is that their prenatal vitamins are organic, Non-GMO and made with high-quality, whole-food, fermented ingredients. The fact that the vitamins and minerals are derived from whole foods and fermented makes it easier for our bodies to digest and absorb the nutrients. This is key because one big concern with supplements is how well they are actually absorbed and assimilated by the body.
Other important things in New Chapter’s Perfect Prenatal vitamins that not all prenatal vitamins have, include:
Taking prenatal vitamins before you become pregnant is a great idea. It will do no harm and as an added bonus, prenatal vitamins tend to make your hair and nails extra strong and shiny!
DHA SupplementAt my very first doctor’s appointment, which confirmed I was indeed pregnant, the doctor asked if I was taking a prenatal DHA supplement. DHA stands for Docosahexaenoic acid, which is an omega-3 fatty acid that is a primary structural component of the human brain, cerebral cortex, skin and retina. I knew all about the benefits of taking fish oil/Omega-3 supplements (and they were part of my routine pre-pregnancy), but it was my first time hearing about it being really important during pregnancy as well. But it makes sense, right? Your baby’s brain is developing in there! For a second, I wondered if my prenatal vitamin had DHA it in it because some prenatal vitamins do include it, but honestly most prenatal vitamins don’t. After that appointment I found the Wholemega for Moms, which is New Chapter’s DHA supplement for women who are pregnant or breastfeeding, and added that to my routine. Wholemega for Moms includes the critical prenatal DHA and other Omega-3s that support healthy brain and eye development for baby during pregnancy and breastfeeding. (source) These good fats from fish also support a positive mood and heart-health for mamas. The salmon oil used for New Chapter’s Wholemega supplement is 100% sustainably caught and sourced only from Certified Responsible Alaska Fisheries.
ProbioticsWhile the prenatal and DHA supplements are probably the most important supplements I’ve been taking during pregnancy, I also know that gut health is key, so I’ve been taking a daily probiotic specifically designed for women as well. New Chapter Women’s Daily Probiotic promotes a healthy vaginal environment that naturally defends against problematic yeasts and infectious bacteria and also protects the urinary tract. To be honest, I’m so happy I’m taking a probiotic because dealing with a vaginal infection while also being pregnant sounds miserable. Of course, these probiotics also promote healthy immune function and gut health, which enhances your ability to absorb nutrients from food. This particular probiotic supplement includes:
As a reminder, this is my experience and I’m sharing what supplements worked for me during pregnancy. Please be sure to consult your doctor before adding any supplements into your routine. *These statements have not been evaluated by the Food and Drug Administration. This product is not meant to diagnose, treat, cure, or prevent any disease The post What Supplements I’m Taking During Pregnancy appeared first on Eating Bird Food. Recipes via Eating Bird Food https://ift.tt/1L45wsH October 23, 2019 at 07:01AM #recipies
Worms in Dirt Chocolate Pudding Recipe
https://ift.tt/2W3DOrh Worms in dirt chocolate pudding is a Halloween classic for a reason: it's delightfully ghoulish and just so happens to be incredibly delicious! Get in on the fun with our from-scratch recipe made with real chocolate milk.  This post was written in partnership with America’s milk brands and farm families. Worms and dirt aren’t necessarily words that you see associated with food. But when Halloween comes around, all bets are off when it comes to creating spooky food for the kids! If you’ve yet to make worms in dirt chocolate pudding, it’s super easy. And here we’re making them extra chocolatey thanks to a from-scratch pudding made with real chocolate milk. To assemble, you simply crumble chopped chocolate sandwich cookies (the dirt!) on top of the pudding and place a few gummy worms into the crumbs. Delightfully gross! Make Ahead StrategiesWhen making pudding from scratch, you need to let it cool in the refrigerator for at least 3 hours before serving, but letting it chill overnight is really best. For this recipe, you can make the pudding up to 5 days ahead of time. You can even crumble the cookies in a resealable bag and leave the crumbs in the bag until you’re ready to make the desserts. Just assemble the worms in “dirt” right before serving them! Prep for ChillingWhen making pudding from scratch you will end up with “pudding skin” on top of each cup unless you place a piece of parchment or wax paper on the warm pudding before chilling it. Some folks like the pudding skin and find the paper too fussy, while others live for super smooth pudding. You decide which route suits you best! What’s the Best Chocolate To Use?When making chocolate pudding from scratch, pick your favorite chocolate to eat! If you like your chocolate sweeter, pick a milk chocolate or semi-sweet chocolate. If you prefer a less sweet dessert, go with a bittersweet chocolate or one with a higher cacao percentage. Worms in Dirt Chocolate Pudding RecipeIngredientsFor the pudding:
To assemble:
MethodHide Photos1 Combine pudding ingredients: Place the cocoa powder, cornstarch, chocolate milk and salt in a large saucepan and stir to incorporate the dry ingredients into the milk mixture.
2 Cook the pudding: Cook on high heat until the mixture starts to boil, then reduce heat to a simmer. Cook until the mixture starts to thicken, about 3 to 5 minutes. 3 Temper the egg: Place an egg in a large bowl and beat it with a whisk. Slowly drizzle a little bit of the hot chocolate mixture into the bowl with the egg, whisking continuously. Continue to slowly add the chocolate mixture, whisking well, until you've incorporated all of it. The mixture should still be warm.
4 Fold in the chocolate: Add the chopped chocolate and stir until the chocolate has completely melted.
5 Chill: Divide the pudding into four cups. If you don’t want a skin to form, place a piece of parchment paper on top of the surface of the pudding. (Omit if you don't mind the pudding skin.) Chill for 3 hours or overnight in the refrigerator.
6 Prepare the "dirt": Place the chocolate vanilla sandwich cookies in a large gallon resealable bag. Using a rolling pin, crush the cookies into crumbs.
Hello! All photos and content are copyright protected. Please do not use our photos without prior written permission. Thank you! This post may contain links to Amazon or other partners; your purchases via these links can benefit Simply Recipes. Read more about our affiliate linking policy. Recipes via Simply Recipes https://ift.tt/2F9fkDA October 22, 2019 at 11:48AM
Worms in Dirt Chocolate Pudding
https://ift.tt/2W3DOrh Worms in dirt chocolate pudding is a Halloween classic for a reason: it's delightfully ghoulish and just so happens to be incredibly delicious! Get in on the fun with our from-scratch recipe made with real chocolate milk. This post was written in partnership with America’s milk brands and farm families. Worms and dirt aren’t necessarily words that you see associated with food. But when Halloween comes around, all bets are off when it comes to creating spooky food for the kids! If you’ve yet to make worms in dirt chocolate pudding, it’s super easy. And here we’re making them extra chocolatey thanks to a from-scratch pudding made with real chocolate milk. To assemble, you simply crumble chopped chocolate sandwich cookies (the dirt!) on top of the pudding and place a few gummy worms into the crumbs. Delightfully gross! Make Ahead StrategiesWhen making pudding from scratch, you need to let it cool in the refrigerator for at least 3 hours before serving, but letting it chill overnight is really best. For this recipe, you can make the pudding up to 5 days ahead of time. You can even crumble the cookies in a resealable bag and leave the crumbs in the bag until you’re ready to make the desserts. Just assemble the worms in “dirt” right before serving them!
|


 7 Assemble: Divide the cookie crumbs over the four pudding cups. Place three gummy worms into the cookie crumb layer, making sure to “bury” a little bit of the gummy worm end as if the worm is coming out of the dirt. Serve immediately. Enjoy with a glass of real dairy milk!


 Arugula Salad with Lemon & Fennel |
 Roasted Cauliflower Hazelnut Salad |
 Kale & White Bean Crostini |
 Kale Stem Pesto |
 Citrus Cabbage Salad |
 Kale Salad with Carrot Ginger Dressing |
The post How to Cook Farro appeared first on Love and Lemons.
Recipes
via Love and Lemons https://ift.tt/2h2Uz32
October 22, 2019 at 08:30AM
Spaghetti with Butternut Leek Parmesan Sauce
https://ift.tt/2BsLeek
Recipes
via Skinnytaste https://ift.tt/2ix3Luq
October 21, 2019 at 09:34AM
https://ift.tt/2BsLeek
Something magical happens to pasta when you combine spaghetti with a creamy butternut sauce made with leeks, sage, garlic and Parmigiano Reggiano. You’ll swear this is full of cream and butter, but it’s not!
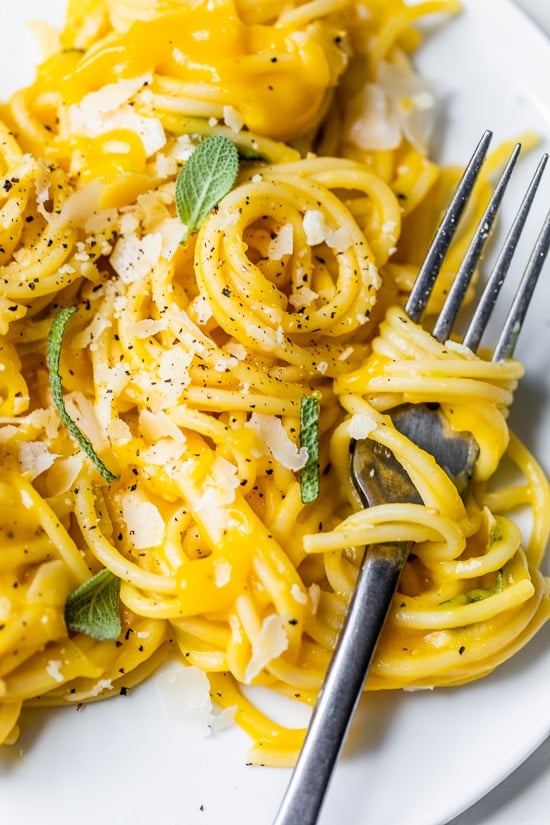
Spaghetti with Butternut Parmesan Sauce
It’s super easy to make with only a few ingredients, and is very filling. Perfect for Meatless Mondays, or any night of the week. You may also like this spicier Butternut Pasta with Spicy Sausage and Spinach version. And for a pasta dish made with pumpkin puree, try this Cheesy Baked Pumpkin Pasta.
The post Spaghetti with Butternut Leek Parmesan Sauce appeared first on Skinnytaste.
Recipes
via Skinnytaste https://ift.tt/2ix3Luq
October 21, 2019 at 09:34AM

The Flat Belly Fix
This is the only 21-day rapid weight loss system that allows you to easily lose an average of 1 lb a day for 21 days without feeling hungry or deprived. The unique and brand new techniques used in this System are proven SAFE. And they do not cause the rebound weight gain common to all the other rapid weight loss systems that are not backed by the latest science. The Flat Belly Fix System takes advantage of a recent scientific discovery that proves the effective weight loss power of an ancient spice. Combined with other cutting-edge ingredients in the patent-pending Flat Belly Fix Tea™ — that you can make right in your own kitchen in minutes — this System is the quickest, easiest and most enjoyable way to quickly get the body you desire and deserve. Click Here
Categories
All
Gluten Free
Pancakes
Protein
Archives
November 2020
October 2020
September 2020
August 2020
July 2020
June 2020
May 2020
April 2020
March 2020
February 2020
January 2020
December 2019
November 2019
October 2019
September 2019
August 2019
July 2019
June 2019
May 2019
April 2019
March 2019
February 2019
January 2019
December 2018
November 2018
October 2018
September 2018
August 2018
July 2018
June 2018
May 2018
April 2018
March 2018
February 2018
January 2018
December 2017
November 2017
 RSS Feed
