
|
Cranberry Sweet Potatoes
https://ift.tt/3kSNlNA A simple yet festive holiday side dish that's sure to wow thanks to the addition of dried cranberries, cranberry juice and cranberry sauce!  This post is written in partnership with Ocean Spray® Give your sweet potatoes a new spin this holiday with a triple infusion of cranberries! While sweet potatoes are a classic for many families, this is a great year to mix things up. Since they’re naturally sweet, these root veggies don’t need much in the sugar department. Instead, the crisp taste of cranberry juice and cranberry sauce join forces to make a glaze with cinnamon, cloves, and the fresh zing of orange rind. Just a hint of brown sugar and plumped dried cranberries for garnish and you’re well on your way to a memorable holiday meal. VIDEO! How to Make Cranberry Sweet PotatoesHow Do I Prepare the Sweet Potatoes?Do you love to peel potatoes? We didn’t think so. These spuds are boiled in their jackets, and the skin practically falls off with just a little coaxing. To cut down on cooking time, cut them in half, and they should be done after about twenty minutes, depending on their size. They should be just tender but still a little firm, since they’ll go back into the oven with the glaze. Can I Make Cranberry Sweet Potatoes in Advance?The benefit of boiling the potatoes is that you can assemble everything up to one or two days ahead of time. Cook, peel, and slice the potatoes, spoon on the glaze, and put them in a pretty baking dish. When dinnertime nears, they’ll be ready to pull out of the fridge and pop right into the oven. Cut Down on Dishes This Year!Making a big meal can be stressful. There’s timing to consider and, of course, you want to serve everything warm (oh the struggle!) And this is one of the reasons we love this recipe: you make it directly in the dish you’ll bake and serve it in. So go ahead and change it up with a truly scrumptious and low-maintenance side dish this year! Cranberry Sweet Potatoes RecipeIngredientsFor the potatoes
For the cranberry topping
Method1 Boil the sweet potatoes: In a large pot, cover the unpeeled sweet potatoes with cold water. Add the 2 teaspoons of salt and bring to a boil. Reduce the heat to a low simmer and cook for 20 to 25 minutes, or until tender but still firm when pierced with the tip of a knife (Exact time depends on the size of your potatoes.)
Drain potatoes and transfer to a cutting board to cool. Once cool enough to handle, pull off the skins and cut potatoes into 3/4-inch-thick rounds. 2 Preheat the oven to 425ºF. Generously butter a 9 X 13-inch baking dish or equivalent. 3 Make the cranberry syrup/glaze: In a small pot over medium-high heat, whisk the cranberry juice cocktail, jellied cranberry sauce, butter, brown sugar, orange zest, cinnamon, cloves, and remaining 1/8 teaspoon salt until the syrup boils and the mixture is smooth, about 2-3 minutes.
4 Assemble and bake the potatoes: Layer the potato slices in the prepared baking dish and pour the cranberry syrup over them. Bake for 30 to 40 minutes, or until the syrup bubbles and the potatoes brown at the edges.
5 Soften the cranberries: While the potatoes are baking, in a microwave-safe bowl or measuring cup, heat the Craisins® Dried Cranberries and cranberry juice cocktail for 30 to 45 seconds, or until warm. Let them soak for 20 minutes to soften and plump. Drain.
6 Serve the potatoes: Sprinkle the softened cranberries over and around the potatoes and serve. Hello! All photos and content are copyright protected. Please do not use our photos without prior written permission. Thank you! This post may contain links to Amazon or other partners; your purchases via these links can benefit Simply Recipes. Read more about our affiliate linking policy. Recipes via Simply Recipes https://ift.tt/2F9fkDA November 4, 2020 at 10:00AM #recipies
0 Comments
How to Make Oatmeal For Babies
https://ift.tt/3kY2RYF
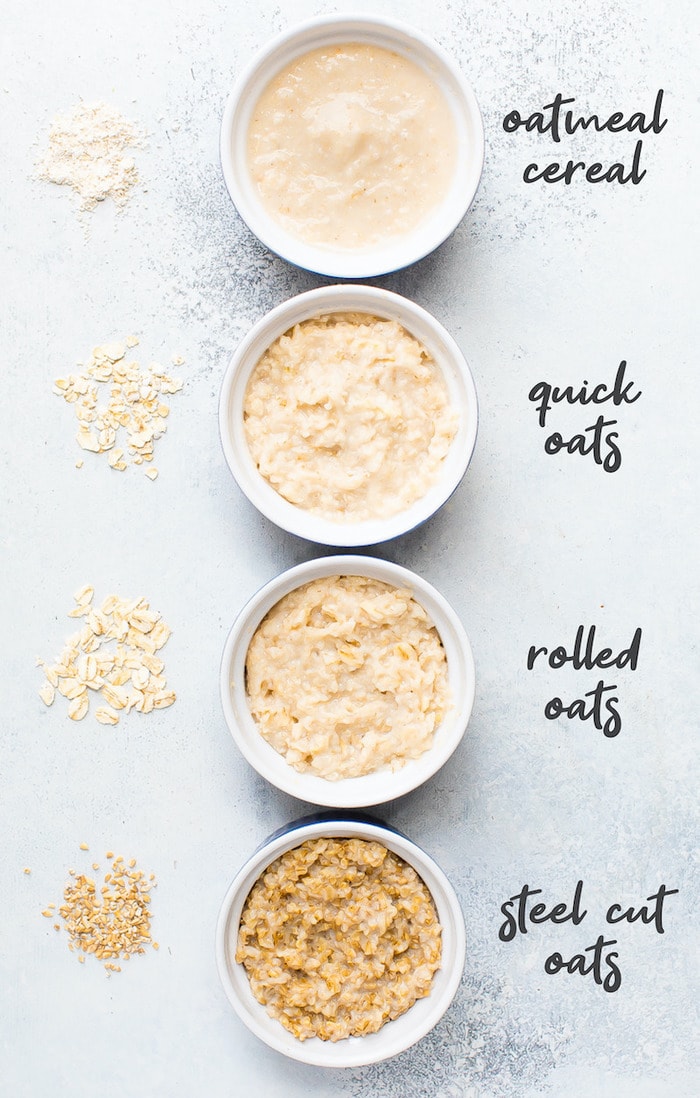
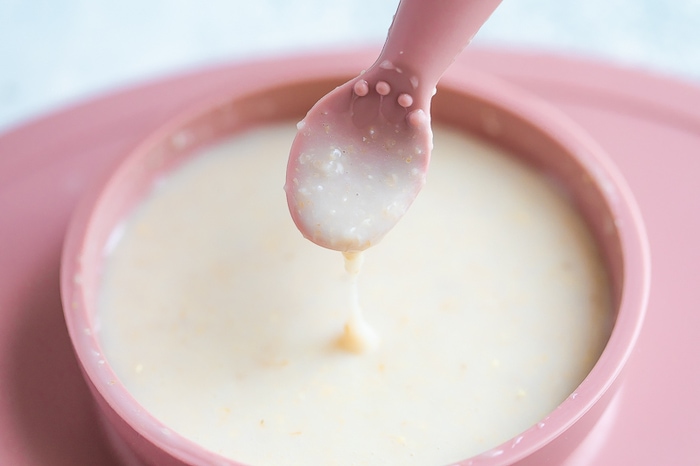
As an oatmeal lover myself I had a feeling that my little one, Olivia, was going to like it as well and turns out I was right… she’s a big fan! That said, when I first thought about giving her oatmeal I wasn’t sure what type was best and how to prepare it. I had so many questions… What type of oats are best? Are rolled oats too thick for babies? Do you cook the oats in breast milk or add it after? If you’re a new mama/papa, you might be wondering the same things. Luckily, I’ve done all the research and I’m here to help. For starters, oatmeal is a great food for babies and many pediatricians suggest some sort of baby cereal (like oatmeal) as a first food because it’s mild, easy to digest and has a low risk for causing an allergic reaction. Store-bought baby oatmeal is available, but it’s basically just oat flour (or ground up rolled oats) and it’s super easy to make yourself at home! One thing to note is that packaged baby cereals are typically fortified with iron and if you make oatmeal cereal at home the iron content won’t be as high.
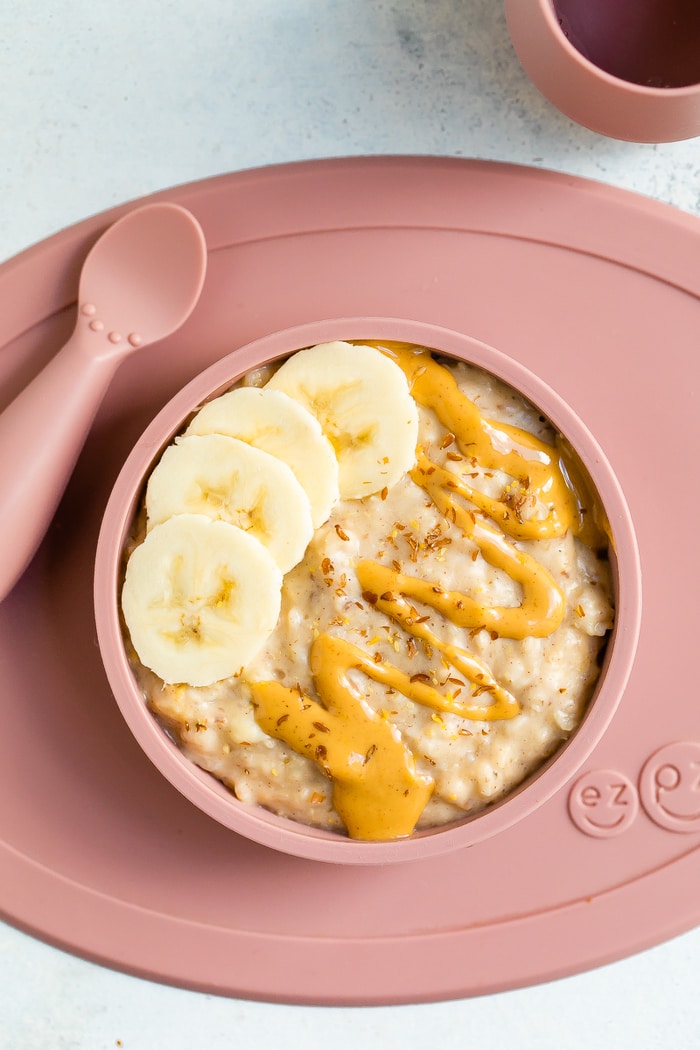
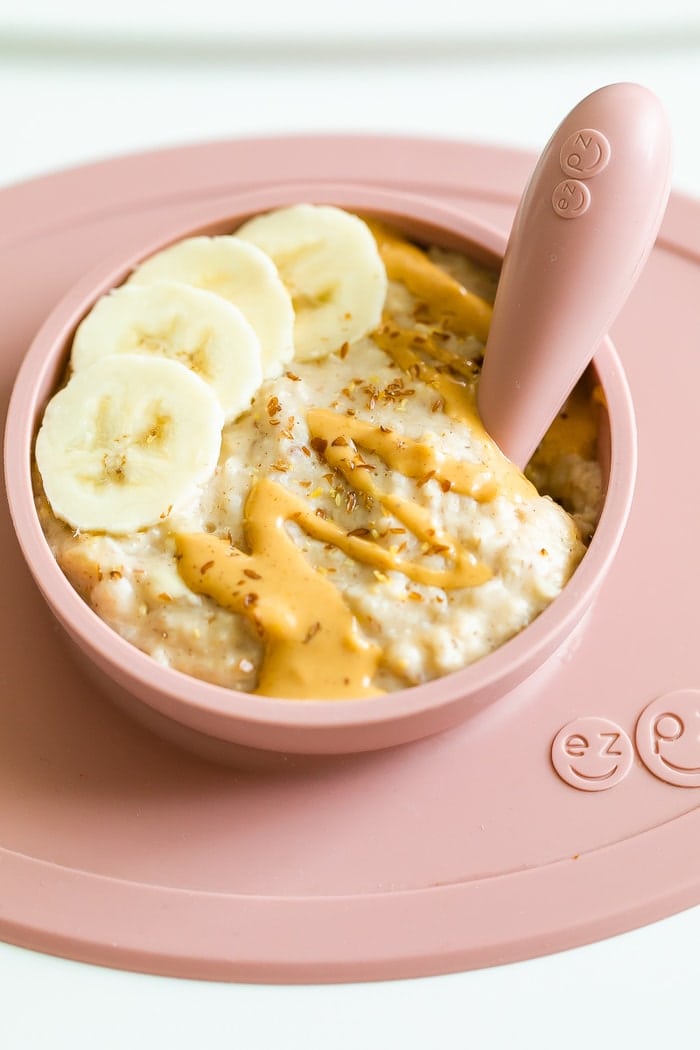
When starting solids with Olivia, we skipped the baby cereal all together and went with veggies and fruits. The first food I gave her was steamed and pureed sweet potatoes, thinned with breast milk. After introducing several pureed fruits and veggies, we started giving her oatmeal. It was probably around 7 1/2 months so we went straight to quick oats and rolled oats, cooked the way I’m sharing in the recipe below. In the beginning I thinned the oatmeal with breast milk, but now I make her oats the same way I like mine, without adding any additional liquid. How to Make Oatmeal for BabiesHere I’m covering the basic method for cooking different types of oatmeal for your baby. Of course, feel free to add mix-ins and toppings to give the oats more flavor and variety when your baby is ready. |


 Cauliflower Mashed Potatoes |
 Cauliflower Soup |
 Parsnip Puree |
 Red Curry Kuri Squash Soup |
 Sweet Potato Appetizer Bites |
 Roasted Delicata Squash |
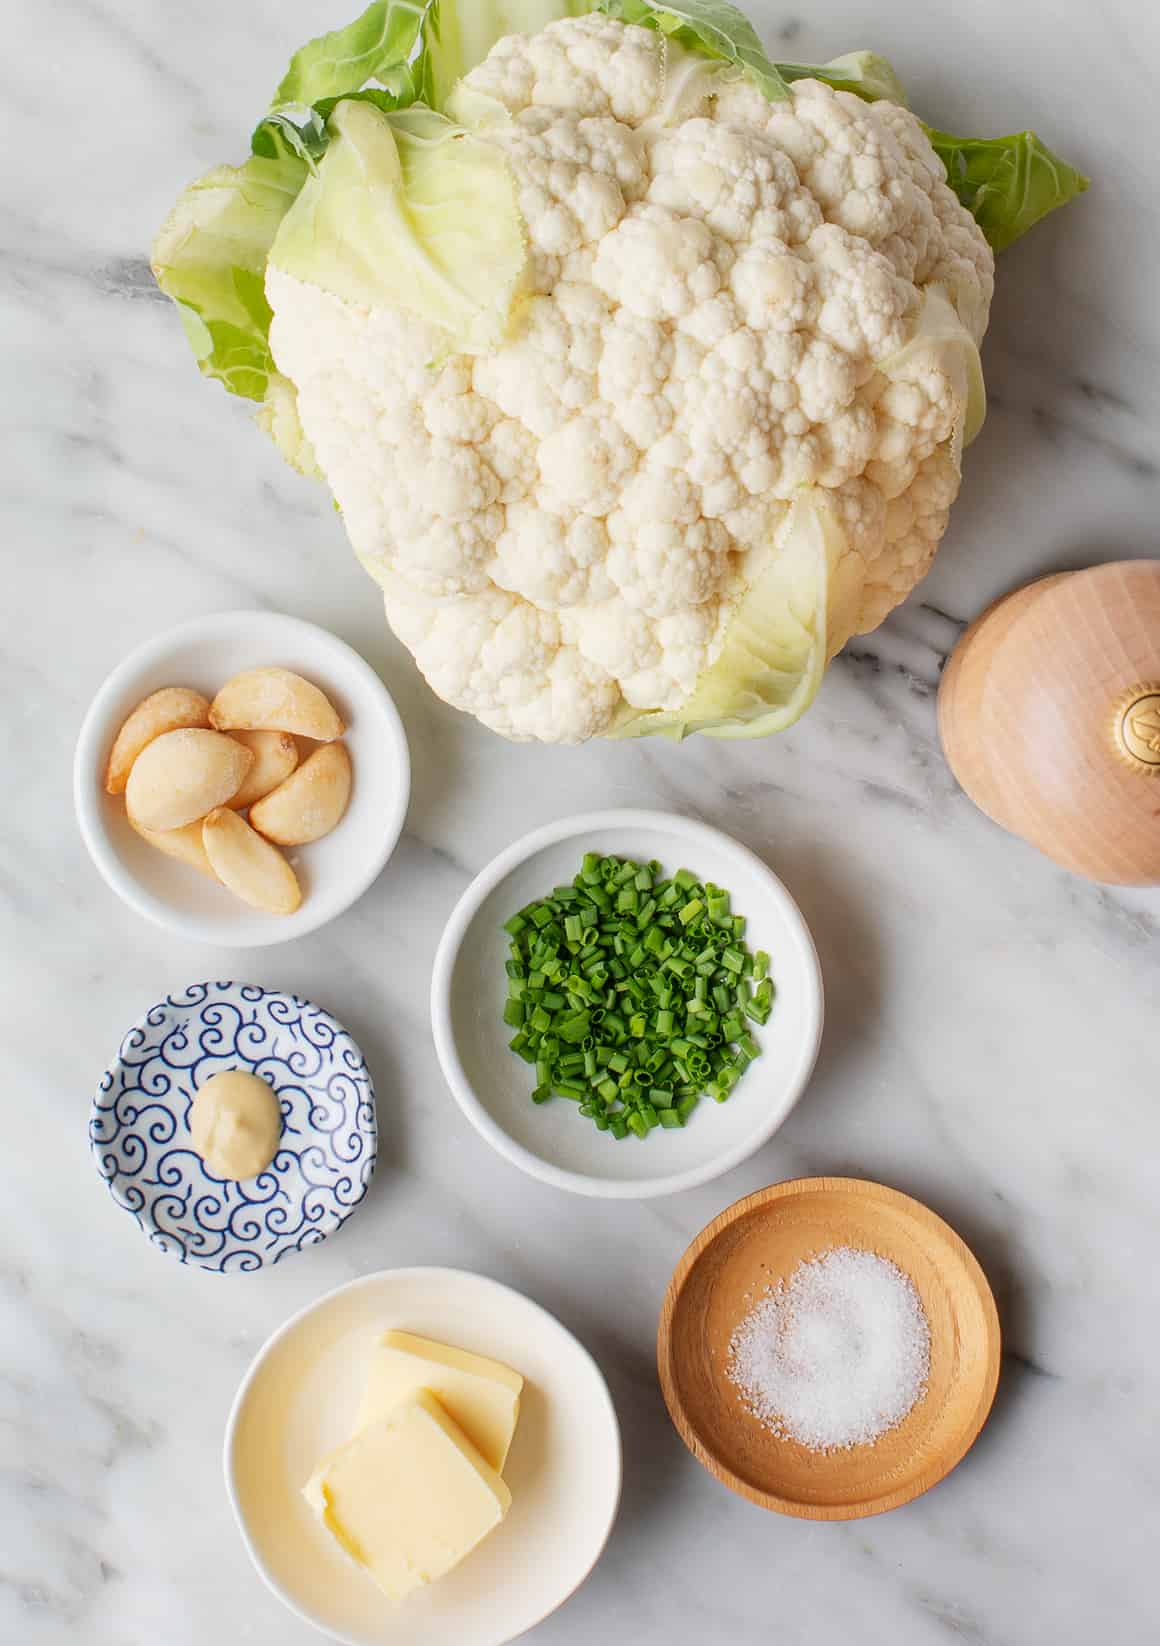
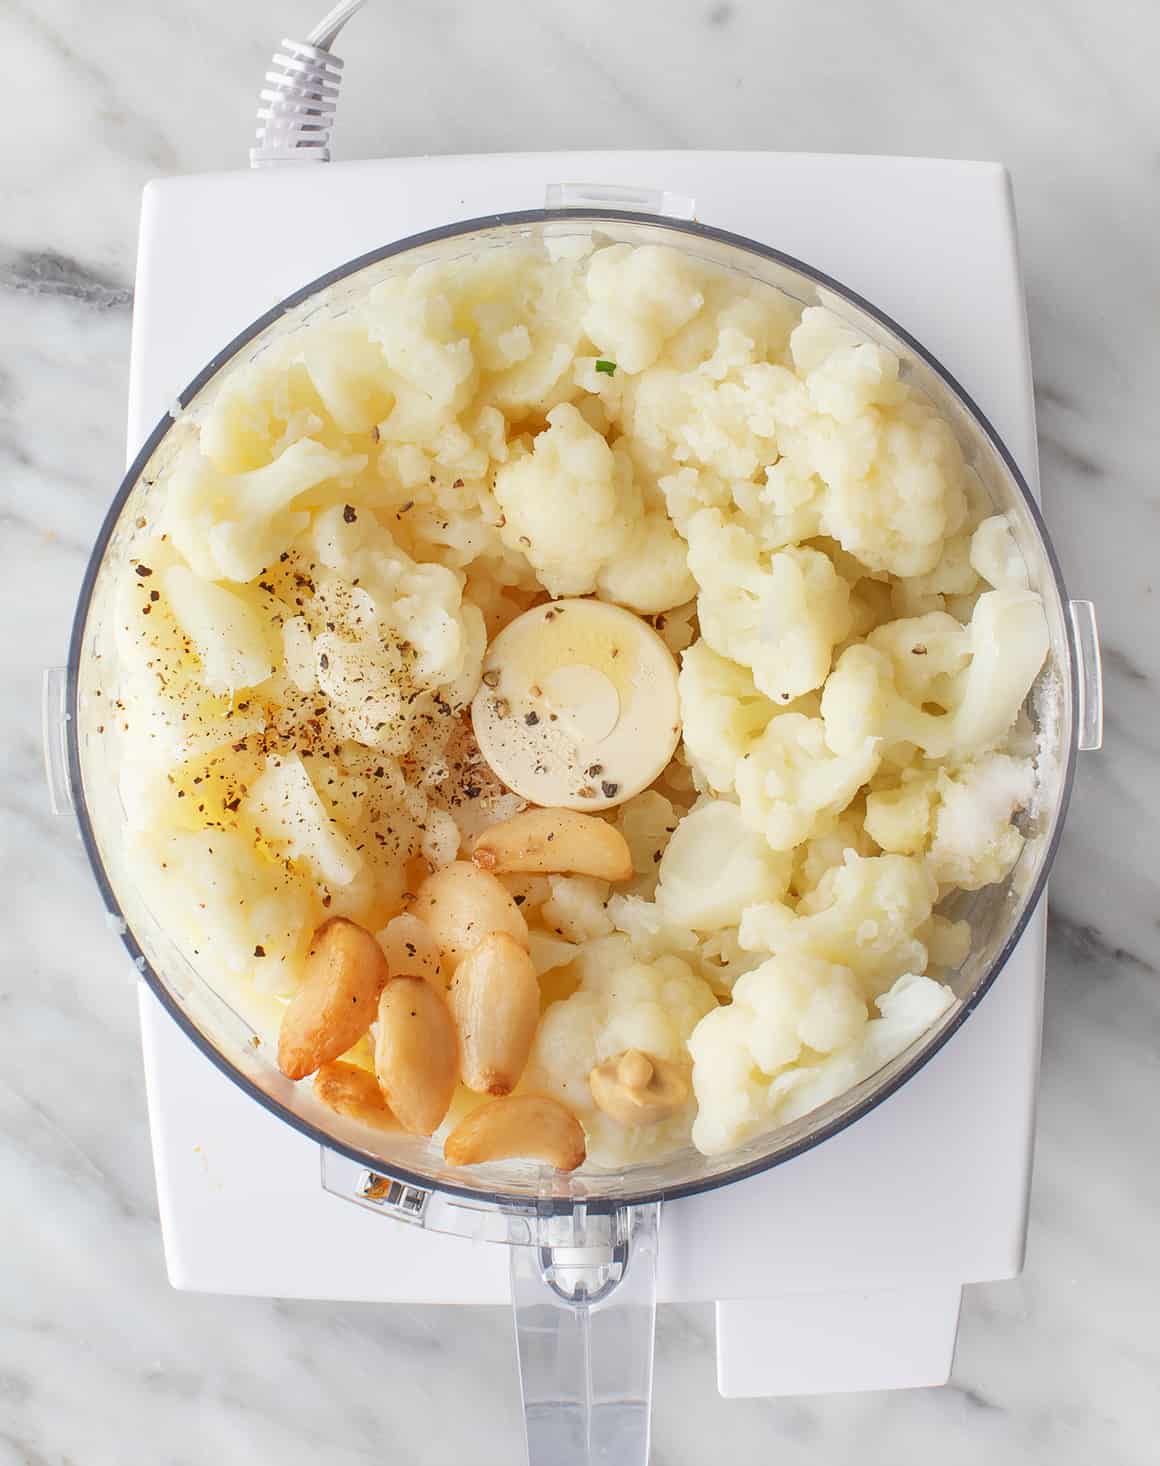
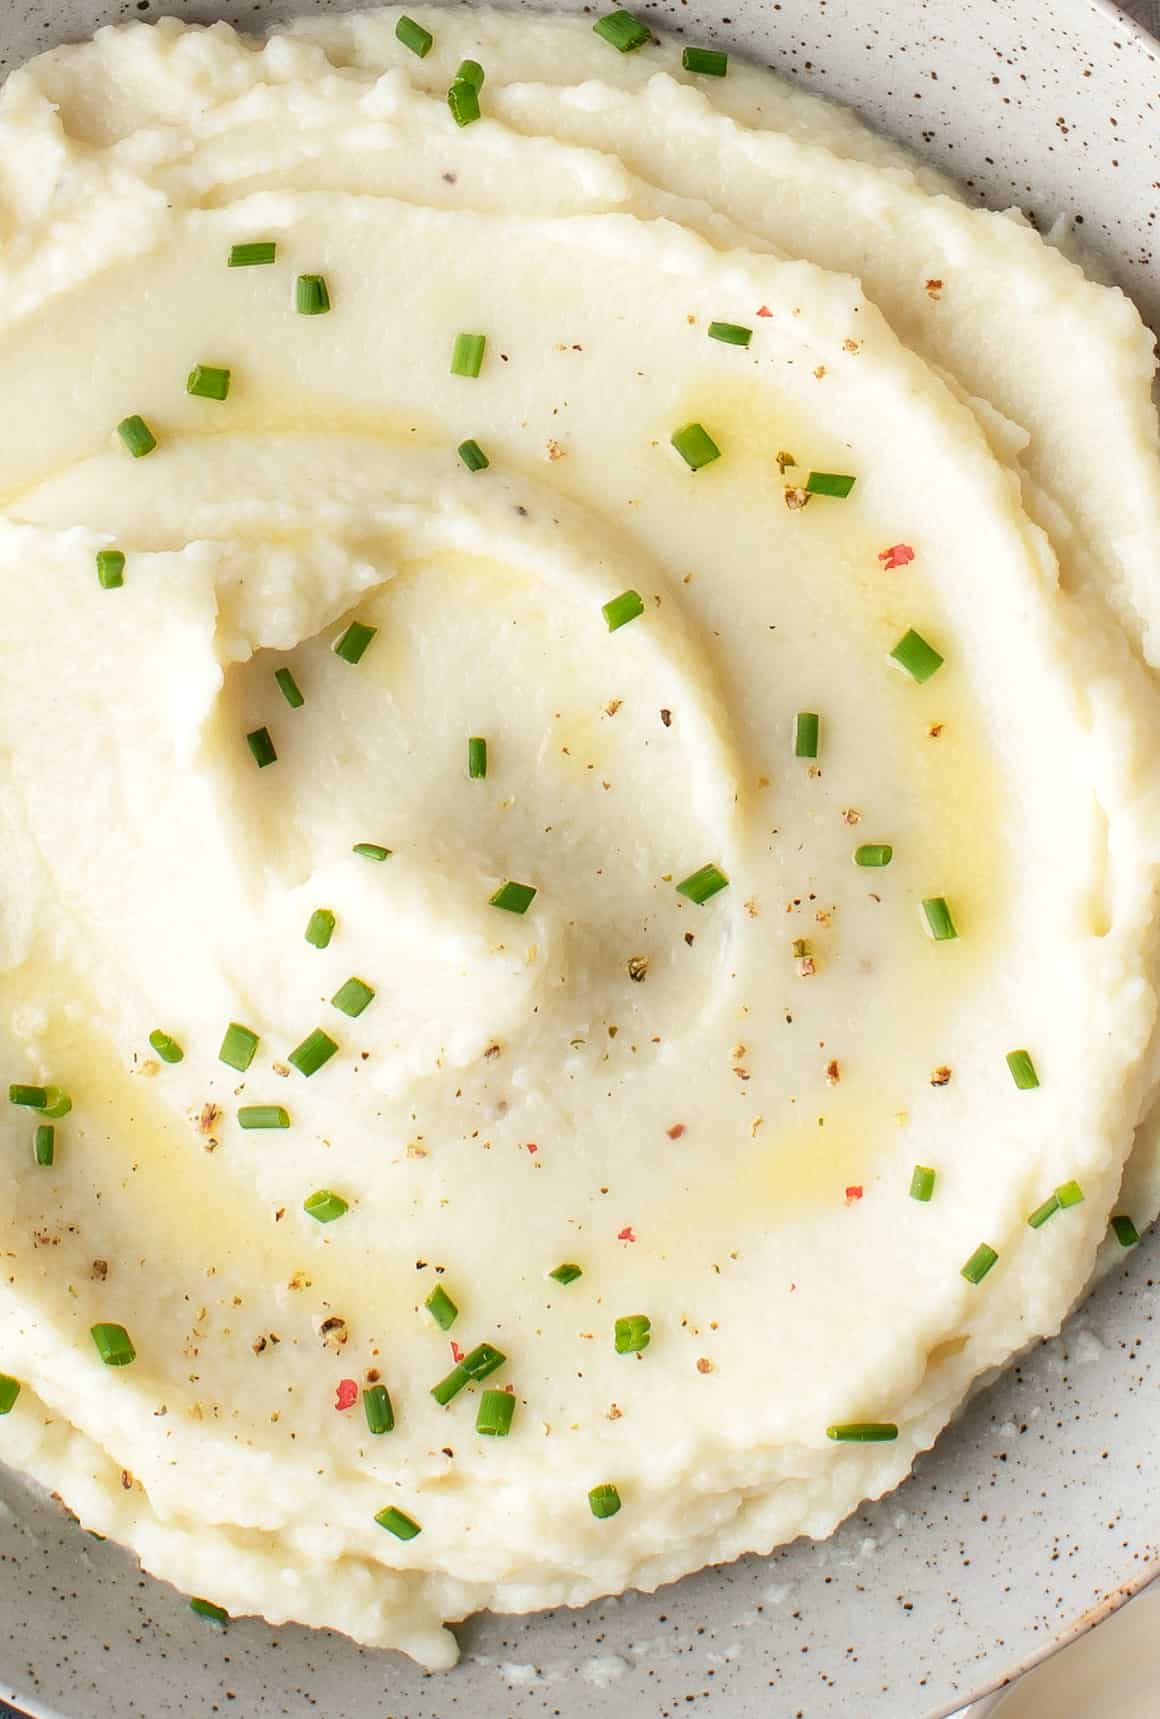
The post Garlic Mashed Cauliflower appeared first on Love and Lemons.
Recipes
via Love and Lemons https://ift.tt/2h2Uz32
November 3, 2020 at 08:09AM
#recipies
Roasted Garlic
https://ift.tt/3oWnuHc
Click here to browse more recipes!
Click here to browse more recipes!
Recipes
via Love and Lemons https://ift.tt/2h2Uz32
November 3, 2020 at 08:02AM
#recipies
https://ift.tt/3oWnuHc
Have you ever roasted garlic in the oven? As it cooks, your kitchen fills with an amazing savory scent. It’s the kind of mouthwatering aroma that’s guaranteed to make you hungry, even if you’ve just finished lunch. If you ask me, this smell alone is enough reason to learn how to roast garlic at home.
But of course, the main reason to make roasted garlic is the taste. Unlike raw garlic, roasted garlic doesn’t have any sort of bite. Its flavor is sweet, mellow, nutty, and rich. It also softens as it roasts, becoming tender, creamy, and spreadable. Blend it into a soup or a sauce, fold it into mashed potatoes, or spread it onto bread. No matter what you’re cooking, adding roasted garlic will instantly make it more flavorful and complex.

How to Roast Garlic
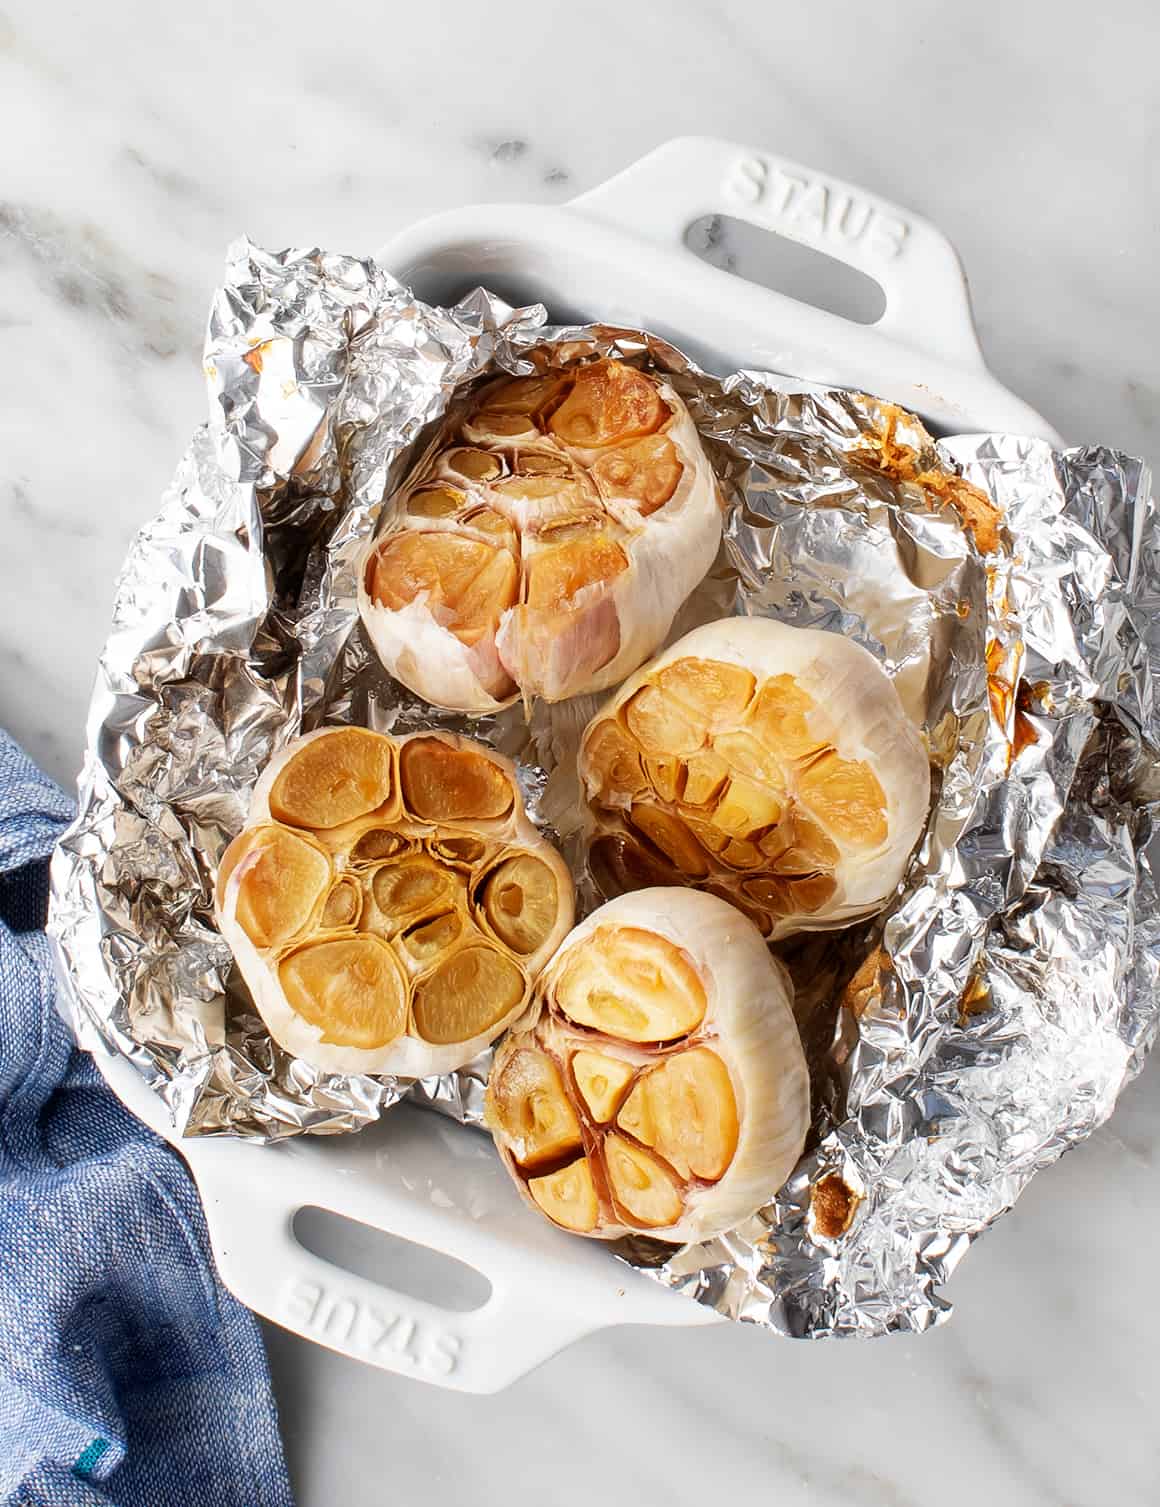
In many of my recipes, I ask you to roast individual garlic cloves. In those cases, my instructions will differ from the ones you find here. You’ll wrap the unpeeled garlic in foil with a drizzle of olive oil and roast it for about 20-30 minutes. Typically, the garlic is roasting along with something else, so the oven temperatures in those recipes will vary.
If you don’t use roasted garlic often and you want to make a recipe that calls for a couple of cloves, that’s a great way to go. However, once you try oven roasted garlic, you might find yourself using it more than you’d expect. I encourage you to make it in bulk, roasting a few heads of garlic at a time. Add some to whatever you’re cooking that day, and freeze the rest. Stored in an airtight container, peeled, roasted garlic cloves will keep in the freezer for up to 2 months.
For larger quantities, here’s my method for how to roast garlic:
First, trim the garlic. Use a sharp knife to slice 1/4 inch off the top of a garlic bulb.

Then, add olive oil. Place the garlic cut-side-up in a piece of aluminum foil, and drizzle olive oil over the top. Sprinkle it with salt, too. I like to use a small ramekin or baking dish so that the garlic stays cut-side-up while it bakes.

Next, bake! Wrap the garlic in foil, and roast at 350°F for 40-60 minutes, or until the cloves are deeply golden brown and tender. That’s it! Peel and freeze the garlic, or try one of the serving suggestions below.

How to Use Roasted Garlic
Roasted garlic is a fantastic way to add rich, nutty flavor to spreads, sauces, soups, and more! Have fun experimenting with it in your cooking. To get you started, here are a few of my favorite ways to use it:
- In dips. Blend a roasted garlic clove into white bean dip or hummus. If you want a stronger garlic flavor, add one clove at a time to suit your tastes.
- In mashed potatoes. Who doesn’t love roasted garlic mashed potatoes?! Try it in these classic mashed potatoes, this creamy cauliflower mash, or this parsnip puree. (No, the last two aren’t technically potatoes, but they’re still really great. ? )
- In pasta. Blend roasted garlic into this creamy butternut squash sauce or this pumpkin pasta sauce. It’s also fantastic in the filling of my butternut squash ravioli.
- In soups. Blend roasted garlic into your favorite creamy soups! I love it in my curried cauliflower soup, creamy cauliflower soup, and vegan tomato soup.
- On pizza. Want to put roasted garlic front and center? Add whole cloves to your next homemade pizza! It’s a delectable topping for homemade focaccia too.
In the mood for something simpler? Mash the garlic into a paste, and spread it onto crusty bread like butter.

More Favorite Cooking Basics
Loved learning how to roast garlic? Check out one of these posts next:
- How to Cook Spaghetti Squash
- What is Fennel? (And How to Cook It)
- How to Cook Asparagus
- Sautéed Mushrooms
- Roasted Broccoli
- Oven Roasted Potatoes
- How to Make Cauliflower Rice
Other posts you may enjoy...
|
Cauliflower Mashed Potatoes |
 Roasted Beets with Citrus |
 Roasted Garlic Mashed Potatoes |
 Creamy Polenta |
 Roasted Sweet Potatoes |
 Sautéed Beet Greens |
The post Roasted Garlic appeared first on Love and Lemons.
Recipes
via Love and Lemons https://ift.tt/2h2Uz32
November 3, 2020 at 08:02AM
#recipies
Kathy’s Vegan Breakfast Sandwich
https://ift.tt/35Vx97X
Hello, hello! With little miss Rosalie here, my schedule has been very unpredictable lately, one thing has remained consistent.. breakfast! This is it. My go-to the past few months. I lovingly call it, Kathy’s Vegan Breakfast Sandwich. If you follow me on Instagram, you most certainly have seen some variation of this creation in my... The post Kathy’s Vegan Breakfast Sandwich appeared first on HealthyHappyLife.com.
This is a summary, images and full post available on HHL website!


Recipes
via HealthyHappyLife.com https://ift.tt/2X1PMCd
November 2, 2020 at 02:16PM
#recipies
https://ift.tt/35Vx97X
Hello, hello! With little miss Rosalie here, my schedule has been very unpredictable lately, one thing has remained consistent.. breakfast! This is it. My go-to the past few months. I lovingly call it, Kathy’s Vegan Breakfast Sandwich. If you follow me on Instagram, you most certainly have seen some variation of this creation in my... The post Kathy’s Vegan Breakfast Sandwich appeared first on HealthyHappyLife.com.
This is a summary, images and full post available on HHL website!
Recipes
via HealthyHappyLife.com https://ift.tt/2X1PMCd
November 2, 2020 at 02:16PM
#recipies
Pumpkin Pistachio Energy Balls
https://ift.tt/3ejGKsX
Recipes
via Skinnytaste https://ift.tt/2ix3Luq
November 2, 2020 at 11:34AM
#recipies
https://ift.tt/3ejGKsX
Pumpkin Pistachio Energy Balls
These no-bake Pumpkin Pistachio Energy Balls literally taste like little bites of pumpkin pie. Made with cashews, pistachios, dates, pumpkin and spices.

Pumpkin Pistachio Energy Balls
You can whip these up in less than 15 minutes. They’re perfect for a morning or afternoon snack, or for an after-dinner dessert. I store my energy balls in the freezer (I like them super cold), but you can also keep them in the fridge. And for a healthy chocolate dessert version, these Chocolate Fudge Snow Balls are delish and great for the holidays.
What is an energy ball?
Energy balls are packed with nutrient-rich and immune-boosting foods! Pumpkin is full of beta carotene, as well as fiber and minerals. Pistachios and cashews are full of good fats, and cinnamon is loaded with antioxidants. And for sweetness, I used Medjool dates in place of sugar.
Hello, I’m Heather K. Jones! I’m a dietitian and a wellness guide, and I work with Gina on the Skinnytaste cookbooks.
I work with women who struggle with emotional eating, overeating or food or body image issues of any sort, and have a ton of FREE resources, articles and videos to help you Love Yourself Healthy RIGHT HERE, including this powerful 30-day Master the Weight Loss Mindset Challenge.
Also, during this challenging time I’m offering FREE emotional eating support and guidance twice a month (the first and third Wednesday of each month) inside my Feel Better Eat Better Facebook group right here. So, if you could use some extra love and support, please join me!
Don’t you just love pumpkin season? These no-bake Pumpkin Pistachio Energy Balls literally taste like little bites of pumpkin pie. One of my dietitian friends recently made these for me, and they’re super moist with just the right amount of pumpkin and spice.
Remember, your body is an amazing, self-healing machine! Every minute of every day it’s working to keep you healthy and alive, and one of the best ways to support your body and boost your immunity is to fuel it with nutrient-rich foods, like these seriously delicious energy balls.
Pumpkin Pistachio Energy Balls
Prep Time: 15 mins
Cook Time: 0 mins
Total Time: 15 mins
These no-bake Pumpkin Pistachio Energy Balls literally taste like little bites of pumpkin pie.
- ½ cup raw pistachios
- ¼ cup raw cashews
- 10 pitted Medjool dates
- ¼ cup canned or homemade pumpkin purée
- Pinch sea salt
- ½ teaspoon pumpkin pie spice
- ½ teaspoon cinnamon
- ½ teaspoon vanilla extract
-
Place ¼ cup pistachios in a food processor fitted with a metal blade.
-
Process until nuts resemble coarse sand. Transfer to a small bowl and set aside.
-
Add cashews and remaining ¼ cup pistachios to the food processor and process until finely ground.
-
Add the dates, pumpkin purée, spices and vanilla extract and continue to process until ingredients are combined and smooth. At this point, you may adjust spices, if desired.
-
Using a spoon (or your hands), scoop and roll mixture into 9 equal (golf-ball-size) balls.
-
Roll each ball in the reserved pistachios and serve immediately or store in the freezer or the fridge.
Serving: 1ball, Calories: 138kcal, Carbohydrates: 24g, Protein: 3g, Fat: 5g, Saturated Fat: 0.5g, Sodium: 37mg, Fiber: 3g, Sugar: 19g
Blue Smart Points: 6
Green Smart Points: 6
Purple Smart Points: 6
Keywords: energy balls
posted November 2, 2020 by Gina
Recipes
via Skinnytaste https://ift.tt/2ix3Luq
November 2, 2020 at 11:34AM
#recipies
5 Weeknight Italian Recipes to Make and Share
https://ift.tt/3kTRBwu
Recipes
via Simply Recipes https://ift.tt/2F9fkDA
November 2, 2020 at 09:08AM
#recipies
https://ift.tt/3kTRBwu
This post is written in partnership with Red Gold.
We’re entering the season of holiday celebrations, and while we love a fancier roast or special appetizer, the brunt of the cooking we’re doing is still focused on weeknight dinners the whole family will love.
Not surprisingly, Italian recipes are always a home-run, featuring cans of steam packed fresh tomatoes, grated cheese, perfectly al dente pasta, creamy polenta and tender meats.
Red Gold American grown tomatoes really anchor these dinner recipes thanks to their true tomato flavor (and never anything artificial).
From a Sausage Polenta Casserole to Roast Chicken on Angel Hair, these are great recipes to double and share with a neighbor or friend who could use a little boost. After all, we may not be able to share a meal with a large group this season, but we’re finding new ways to connect and share.
This post may contain links to Amazon or other partners; your purchases via these links can benefit Simply Recipes. Read more about our affiliate linking policy.
Recipes
via Simply Recipes https://ift.tt/2F9fkDA
November 2, 2020 at 09:08AM
#recipies

The Flat Belly Fix
This is the only 21-day rapid weight loss system that allows you to easily lose an average of 1 lb a day for 21 days without feeling hungry or deprived. The unique and brand new techniques used in this System are proven SAFE. And they do not cause the rebound weight gain common to all the other rapid weight loss systems that are not backed by the latest science. The Flat Belly Fix System takes advantage of a recent scientific discovery that proves the effective weight loss power of an ancient spice. Combined with other cutting-edge ingredients in the patent-pending Flat Belly Fix Tea™ — that you can make right in your own kitchen in minutes — this System is the quickest, easiest and most enjoyable way to quickly get the body you desire and deserve. Click Here
Categories
All
Gluten Free
Pancakes
Protein
Archives
November 2020
October 2020
September 2020
August 2020
July 2020
June 2020
May 2020
April 2020
March 2020
February 2020
January 2020
December 2019
November 2019
October 2019
September 2019
August 2019
July 2019
June 2019
May 2019
April 2019
March 2019
February 2019
January 2019
December 2018
November 2018
October 2018
September 2018
August 2018
July 2018
June 2018
May 2018
April 2018
March 2018
February 2018
January 2018
December 2017
November 2017
 RSS Feed
