
|
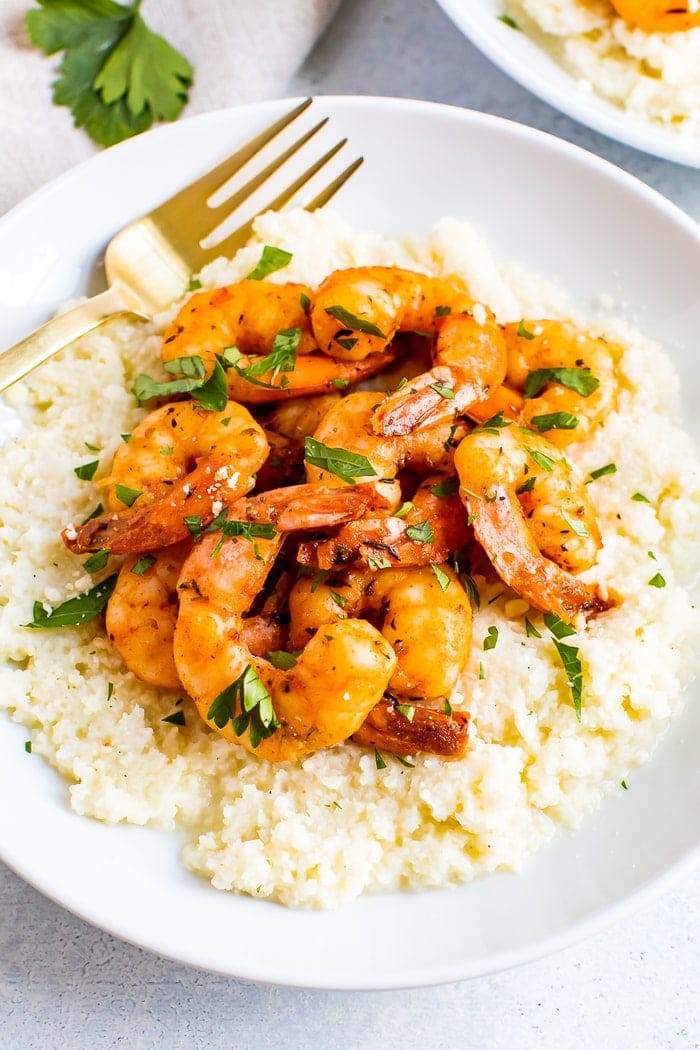
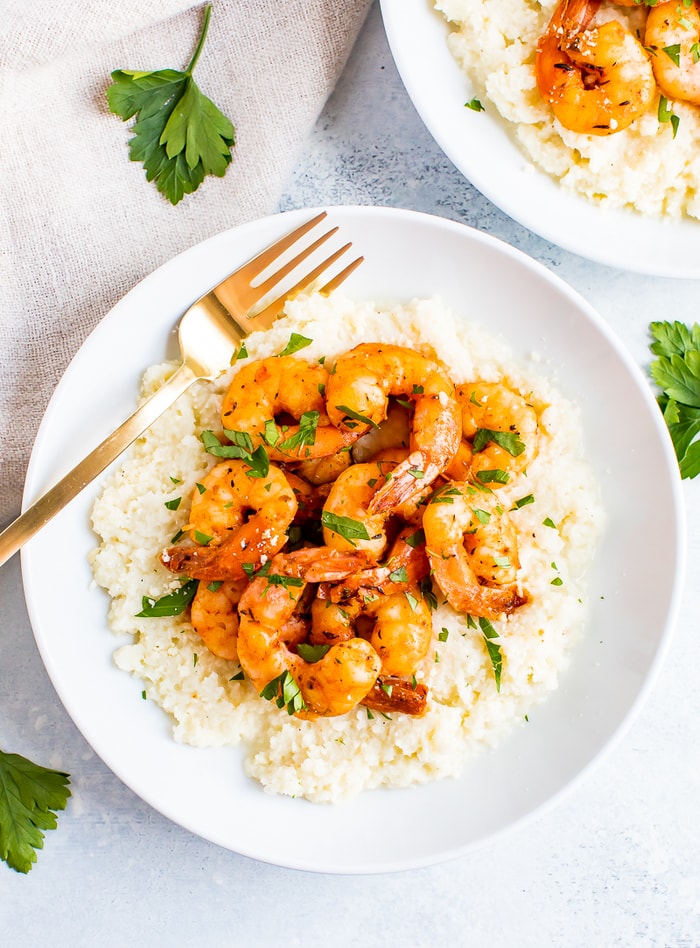
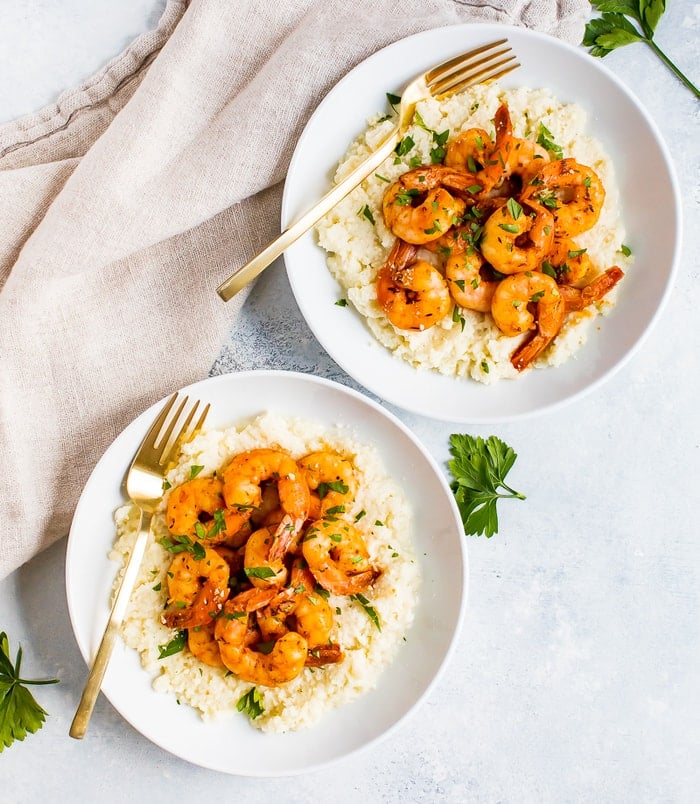
Cauliflower Grits with Blackened Shrimp
https://ift.tt/2K03Yqt
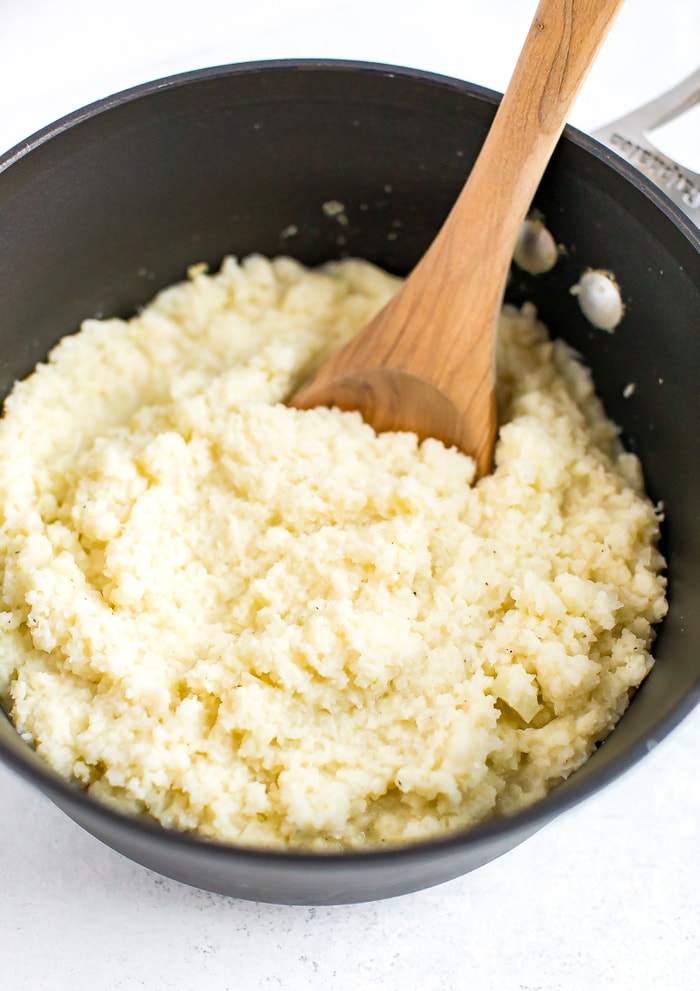
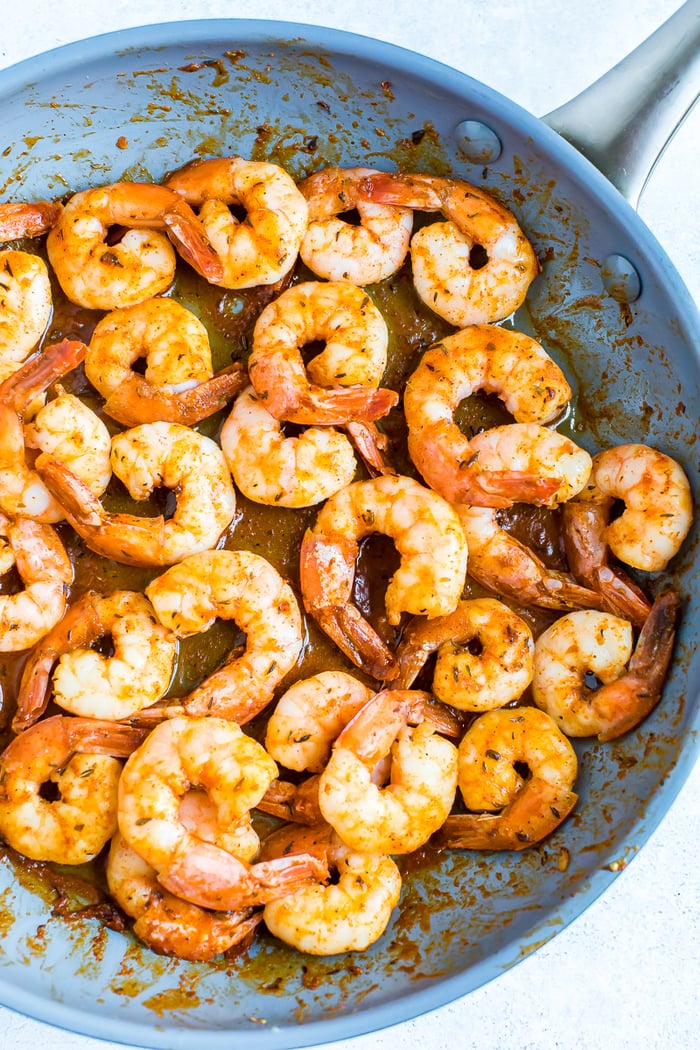
Did you grow up eating grits? It is definitely a southern comfort food dish, but I know a lot of people who have never tried them before! Traditionally, grits are made by boiling cornmeal with milk or water – similar to porridge or oatmeal. They are often served as a side for breakfast or dinner and they can be sweet (with butter and sugar) or savory (with butter, cheese and/or bacon). Shrimp and grits is a quintessential southern dish that’s served for dinner. If you go to any southern restaurant, you’ll likely see shrimp and grits on the menu. Obviously, this cheesy and buttery dish can be a pretty indulgent meal so I decided to lighten up the classic recipe and use cauliflower in place of cornmeal to make low-carb shrimp and grits.
What do Cauliflower Grits Taste Like?The taste of grits, regular or cauliflower, totally depends on the flavors used to season them because they’re quite bland on their own. In these cheesy cauliflower grits, the cauliflower takes on the flavor of the cheese and the spicy shrimp we’re serving on top. I kept this recipe pretty simple with milk, butter, salt and pepper but you can add in any additional flavors you’d like! I think a rosemary and garlic version would also be delicious. |


 Coconut Loaf |
 Chocolate Almond Breeze Smoothie |
 Best Zucchini Bread |
 Oatmeal Breakfast Cookies |
 Apple Muffins |
 Raspberry Crumble Bars |
The post Chocolate Zucchini Bread appeared first on Love and Lemons.
Recipes
via Love and Lemons https://ift.tt/2h2Uz32
July 26, 2019 at 09:42AM
The Friday Buzz! Collapsible Water Bottles, Grilling Eggs, and Cookbooks Galore!
https://ift.tt/32S9rr0
Recipes
via Simply Recipes https://ift.tt/2F9fkDA
July 26, 2019 at 09:01AM
https://ift.tt/32S9rr0
Print

Welcome to The Friday Buzz, our roundup of all good things, good advice, good feelings. It’s the happy hour of blog posts! Up this fabulous week… Collapsible Water Bottles, Grilling Eggs, Cookbooks Galore, and more!
Ack! July is almost over and I just finished my third trip of the month and have one left to go! It’s been super busy, and I’m looking forward to a relaxing August. I’m envisioning lotsa trips to the coast, and yes, I said COAST!
Remember, I’m in Oregon, so we live the “coast life”… not the beach life. We show up with jackets and pants and bring plenty of blankets. The first dip into the ocean is absolutely frigid, but pretty soon, it just numbs your feet right up and you can splash for a few hours! P.S. This is my favorite beach so far! Have you ever been? Our friend, Bev over at Bev Cooks just spent a month there and wrote about her stay. You should definitely check it out.
Want to know what else you should check out? What’s going on with our Simply Recipes Team! It’s so fun to chat with them (virtually, of course) and hear about what they’re diggin’ as humans!
OUR FAVORITES FROM THE WEEK
- Cool & Collapsible: Megan introduced us to these leak-proof, collapsible water bottles. I may have ordered 328 immediately because they are the coolest things around!
- Grilling is thrilling! Have you ever made grilled eggs?! They sound quite interesting, but I’m always up for trying new things! You know what I’ll be doing this weekend!
- Meme Mania! Summer stumbled upon Meme Appetit on Instagram—memes from Bon Appetit‘s videos–and has declared it to be the greatest treasure known to humankind.
- Blueberries Year-Round: Our contributor Sally Vargas just released a The Blueberry Cookbook and it’s must for blueberry lovers!
- Tasting Pennsylvania: Also…. Carrie will soon be releasing her cookbook Tasting Pennsylvania! It looks FABULOUS. You go, girl!
- Queen of Comfort: I’ve fallen down an Amazon clothes shopping rabbit hole. I’ve been living in this dress all summer long and have no plans to stop. It’s cute AND comfy, which means you can’t go wrong with that!
- Life Before Cell Phones… Just in case you needed a good laugh today, I thought this was pretty funny!
MEANWHILE ON INSTAGRAM
I was shocked when a few people commented on how they would skip the bacon in this guacamole. Hold up. SKIP THE BACON?! I thought bacon was supposed to make everything taste better. Weigh in here about what you think.
READER COMMENT OF THE WEEK
Sher commented on our Swedish Meatballs and said:
Fantastic! I have made these three times now, in 5 weeks. I had a recipe years ago and remembered that it included Holland House white cooking wine and dried onions so the last 2 times I prepared this I sautéed 2 tablespoons grated onion, 2 Tablespoons dried onion and I poured in 1/3 cup of cooking wine and let cook a couple minutes, right before I added the beef stock. I love it both ways but do think that the wine adds some zing to the sauce. when I use wine I also cut the sour cream in half. Thank you so much!!! Best Swedish meatballs recipe I have found in 15 yrs.
Making a dish three times in five weeks is definitely something! So glad you loved it, Sher!
Cheers to a scorching weekend. Stay cool!
This post may contain links to Amazon or other partners; your purchases via these links can benefit Simply Recipes. Read more about our affiliate linking policy.
Recipes
via Simply Recipes https://ift.tt/2F9fkDA
July 26, 2019 at 09:01AM

The Flat Belly Fix
This is the only 21-day rapid weight loss system that allows you to easily lose an average of 1 lb a day for 21 days without feeling hungry or deprived. The unique and brand new techniques used in this System are proven SAFE. And they do not cause the rebound weight gain common to all the other rapid weight loss systems that are not backed by the latest science. The Flat Belly Fix System takes advantage of a recent scientific discovery that proves the effective weight loss power of an ancient spice. Combined with other cutting-edge ingredients in the patent-pending Flat Belly Fix Tea™ — that you can make right in your own kitchen in minutes — this System is the quickest, easiest and most enjoyable way to quickly get the body you desire and deserve. Click Here
Categories
All
Gluten Free
Pancakes
Protein
Archives
November 2020
October 2020
September 2020
August 2020
July 2020
June 2020
May 2020
April 2020
March 2020
February 2020
January 2020
December 2019
November 2019
October 2019
September 2019
August 2019
July 2019
June 2019
May 2019
April 2019
March 2019
February 2019
January 2019
December 2018
November 2018
October 2018
September 2018
August 2018
July 2018
June 2018
May 2018
April 2018
March 2018
February 2018
January 2018
December 2017
November 2017
 RSS Feed
