
|
Greek Yogurt Pancakes
https://ift.tt/2T33qot
I am so excited to share this recipe with you because 1) who doesn’t love pancakes?! And 2) they’re packed with protein which means they’ll help to keep you full longer than traditional pancakes. Always a win in my book!
I love that these pancakes are easy enough for a weekday breakfast, but also fancy enough for a weekend brunch. I can totally see a pancake brunch bar in my future… You could offer different pancake mix-ins and toppings and everyone could create their ideal pancake stack. Mmm! Who’s coming over? Why Use Greek Yogurt?As you could tell from the title of this blog, these are Greek yogurt pancakes! But what role does the yogurt play in this recipe? When recreating recipes or adding healthy ingredients to recipes, I always make sure the ingredients serve a purpose. Greek yogurt takes place of the liquid and oil you’d typically find in a traditional pancake recipe! It’s also a healthy replacement for buttermilk. So if you’re craving traditional buttermilk pancakes but want a lighter, more nutritious recipe, this is for you! You can use a flavored Greek yogurt if you wish, but I recommend plain Greek yogurt so you can control the flavor and sweetness on your own.
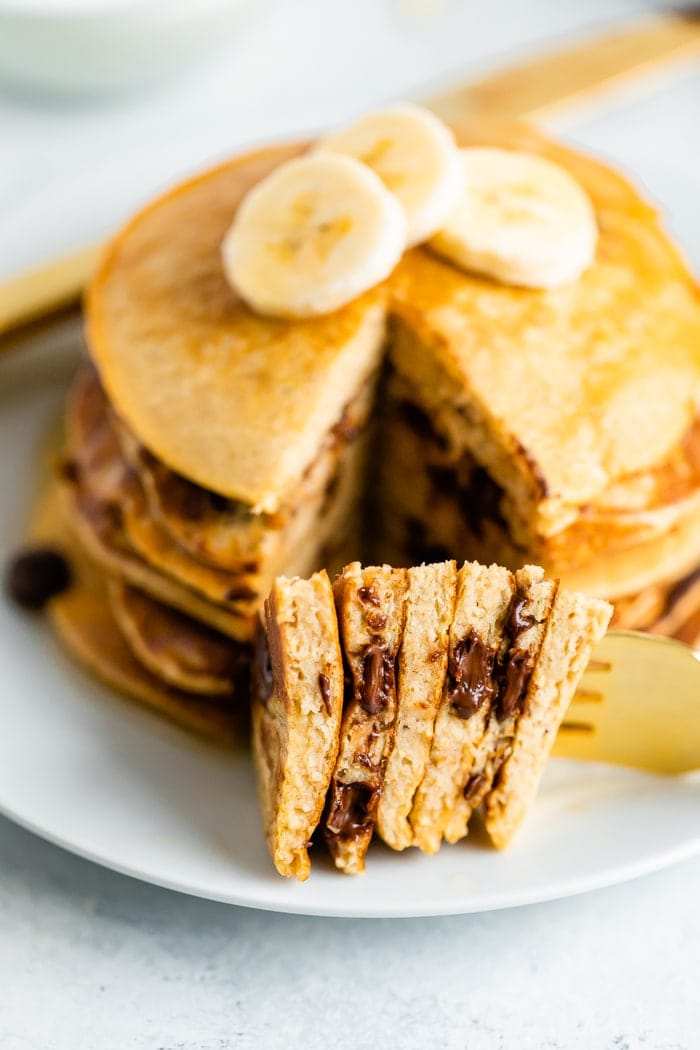
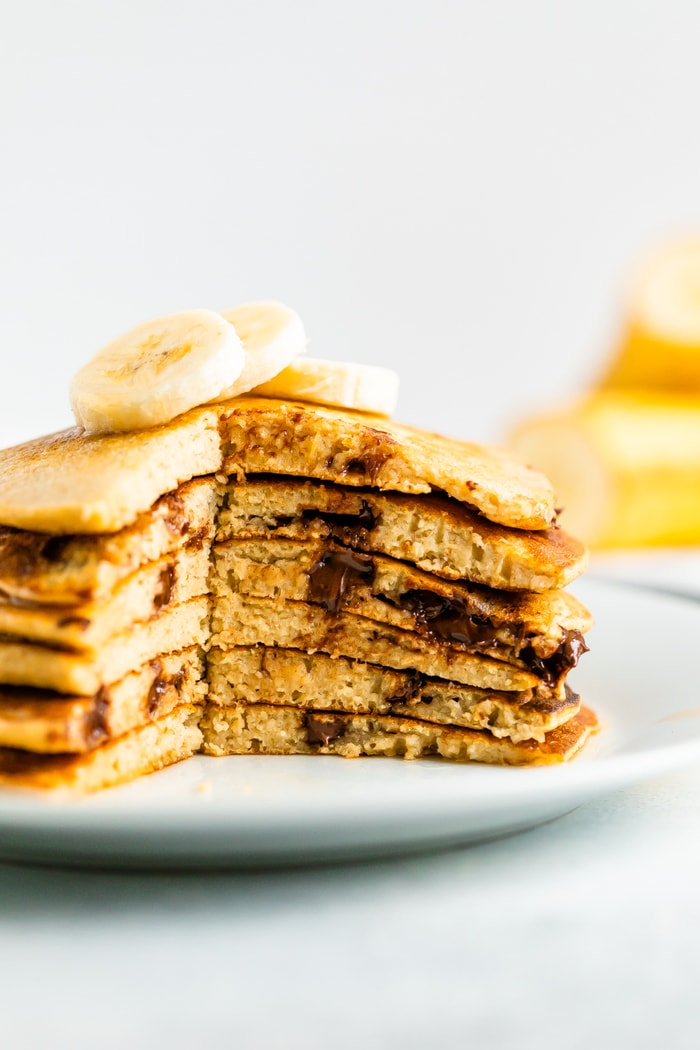
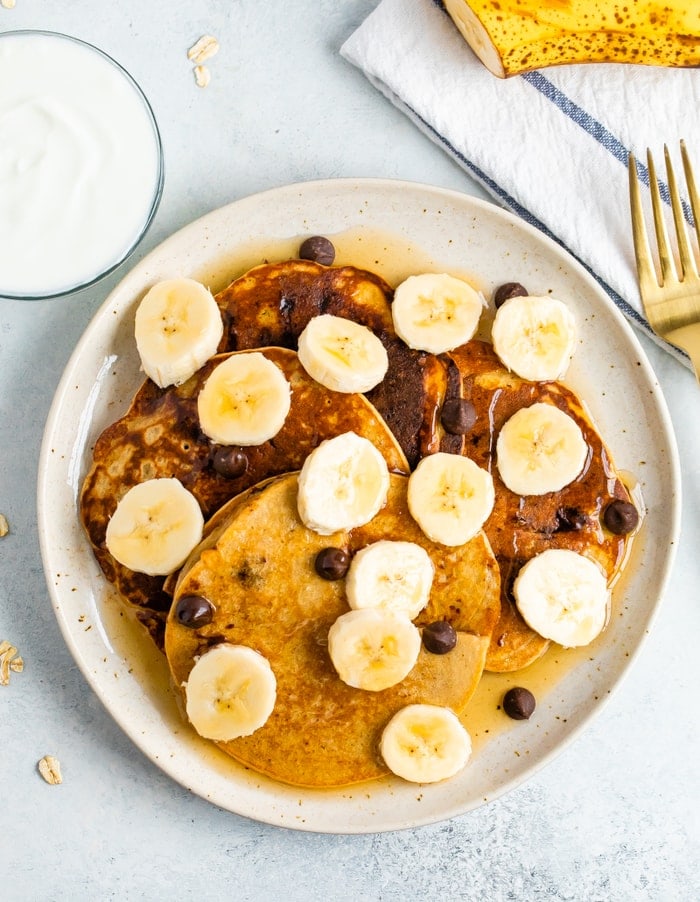
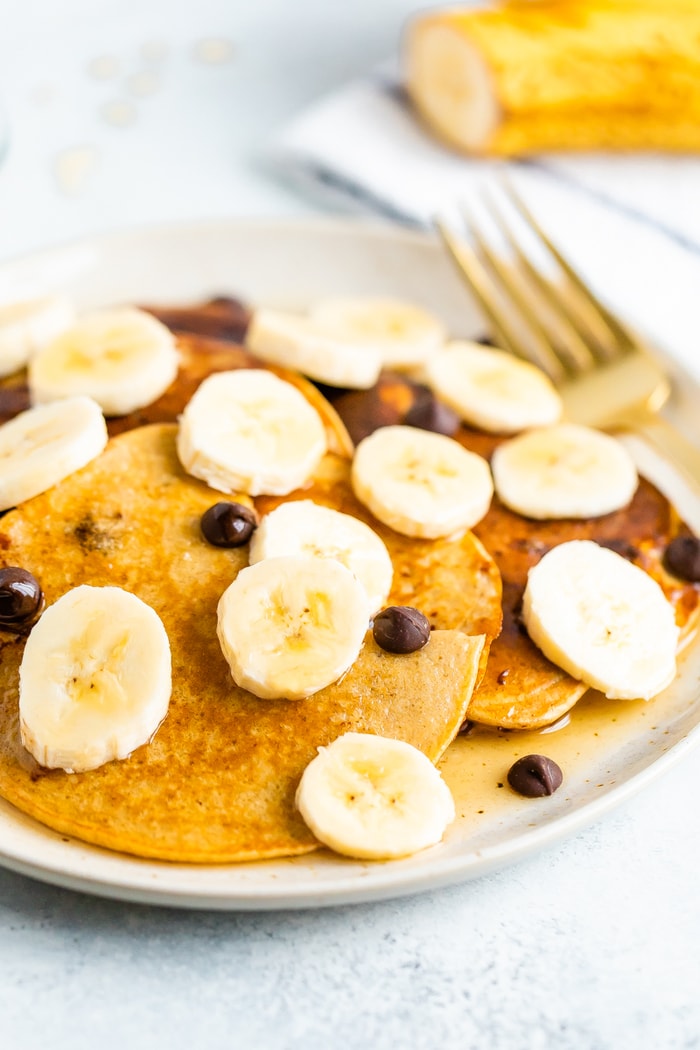
How to Serve Greek Yogurt PancakesI like to serve these pancakes with banana slices, chocolate chips and maple syrup and/or nut butter for drizzling. And I always love fresh fruit paired with pancakes because it’s a light and refreshing side that goes great with a warm breakfast! You could also so a breakfast meat for more protein, but these pancakes have plenty of protein on their own.
How to Make Greek Yogurt PancakesThese pancakes are so easy because the batter is made in your blender! Place the banana, eggs, oats, plain Greek yogurt, cinnamon, baking powder and sea salt in a blender and blend until smooth. I love using a blender to fully mix the ingredients and whip some air into the mixture which helps make these light and fluff. After blending, stir in the chocolate chips. Heat a non-stick skillet over low-medium heat and spray with cooking spray. Don’t turn the heat up too much. Pancakes should be cooked low and slow! Once the pan is hot, pour 1/4 cup of pancake batter on the skillet and practice patience! Be sure to cook until little bubbles form throughout the batter and you can easily lift the pancake with a spatula. Flip and cook for another 1-2 minutes, or until the pancake is cooked through. Top with your desired toppings and enjoy!
Are You a Pancake Fan? Here Are More Recipes to Try!
If you make these Greek yogurt pancakes be sure to leave a comment and star rating letting me know how they turned out for you! You reviews are so helpful for the EBF team and other readers. Print Greek Yogurt Pancakes
DescriptionProtein packed, chocolate chip Greek yogurt pancakes that mix up in no time, right in your blender! Perfectly fluffy and delicious. Ingredients
Instructions
Nutrition
Keywords: greek yogurt pancakes The post Greek Yogurt Pancakes appeared first on Eating Bird Food. Recipes via Eating Bird Food https://ift.tt/1L45wsH February 26, 2020 at 07:08AM #recipies
0 Comments
11 Casseroles to Double and Freeze
https://ift.tt/3c3KhKy Get ahead of the game with these 11 incredible casseroles. They are freezer-friendly, make-head magic meal ideas. Keep one for yourself and give one to someone else. Continue reading "11 Casseroles to Double and Freeze" » Recipes via Simply Recipes https://ift.tt/2F9fkDA February 25, 2020 at 09:02AM #recipies
Vegan Parmesan Cheese
https://ift.tt/2SV6zGK
This vegan Parmesan cheese recipe is my new favorite condiment. It’s sharp, bright, savory, and rich, and as far as I can tell, it’s great on just about anything. I’ve made vegan Parmesan in the past, but this time, I added one extra ingredient: lemon zest! Its bright flavor brought extra complexity to the savory, nutty mixture, and now, I can’t get enough of it. I keep a big jar on hand in the freezer, and I reach for it anytime a dish needs an extra punch of umami flavor. If you’re dairy-free, trying to incorporate more plant-based foods into your diet, or just out of Parmesan, you have to try this recipe! Of course, this vegan Parmesan cheese can’t step in for actual cheese in every scenario. I wouldn’t substitute it for Parmesan when the cheese is essential for creating a creamy sauce, like in my fettuccine Alfredo. However, it’s a fantastic vegan alternative to dairy anytime you’d garnish something with grated or shaved Parmesan. Think salads, pastas, pizza, etc. Once you have it on hand, you’ll sprinkle it over everything!
Vegan Parmesan Cheese Recipe IngredientsMy vegan Parmesan cheese recipe calls for four simple ingredients:
Pulse the ingredients in a small food processor until they form a coarse meal with a soft, crumbly texture. Be careful not to process the vegan Parmesan cheese for too long, or the mixture will turn into cashew butter! If your food processor is too large to make a single batch, feel free to double the recipe. Store any leftovers in the fridge for up to 5 days, or freeze them in an airtight container for up to a month. There’s no need to thaw frozen vegan Parmesan cheese before you use it. Because of its fine texture, it thaws in a snap, so sprinkle it directly onto whatever you’re eating!
What to Do with Vegan Parmesan CheeseThis simple vegan Parmesan cheese is a yummy umami topping for all sorts of recipes. Here are just a few of my favorite ways to use it:
How do you like to use vegan Parm? Let me know in the comments!
More Plant-Based Cooking ComponentsIf you love this recipe, try making one of these vegan cooking components next:
Other posts you may enjoy...
The post Vegan Parmesan Cheese appeared first on Love and Lemons. Recipes via Love and Lemons https://ift.tt/2h2Uz32 February 25, 2020 at 07:58AM #recipies
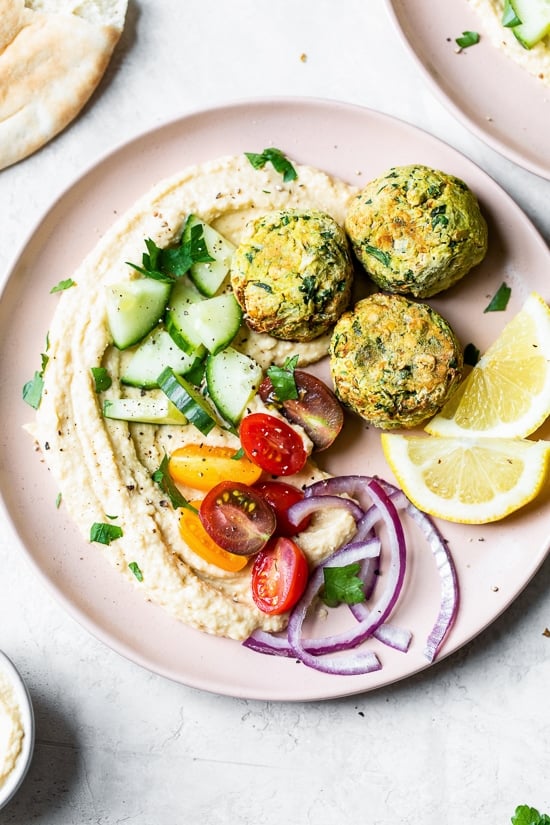
Air Fryer Falafel
https://ift.tt/2TbRWhh This easy Falafel recipe is made quicker and healthier in the air fryer with canned chickpeas – no deep frying!
|


 Chickpea & Cauliflower Tomato Stew |
 Cauliflower Soup |
 Oyster Mushroom Soup |
 Crispy Baked Falafel |
 Roasted Garlic Mashed Potatoes |
 Creamy Potato Soup |
The post Polenta with Chimichurri & Mushrooms appeared first on Love and Lemons.
Recipes
via Love and Lemons https://ift.tt/2h2Uz32
February 23, 2020 at 09:30AM
#recipies
New Orleans Beignets
https://ift.tt/37RaMiX
Recipes
via Simply Recipes https://ift.tt/2F9fkDA
February 23, 2020 at 09:03AM
#recipies
https://ift.tt/37RaMiX
1 Start the dough: In the bowl of a stand mixer fitted with the paddle attachment, combine 3 cups of flour, salt, and 2 tablespoons of sugar.
2 Bloom the yeast: In a 4-cup measuring glass or medium bowl, combine the warm milk (it should be about 100°F), remaining tablespoon of sugar, and yeast, and allow it to sit until foamy, about 5 minutes.
3 Make the dough: Beat the egg into the foamy milk mixture and add the mixture to the mixing bowl of flour. Mix by hand or using the paddle attachment with your stand mixer set to low or medium low, until you get a wet dough with shaggy dry bits throughout. This can take anywhere from 30 seconds to 1 1/2 minutes depending on how you’re mixing.
Swap out the paddle attachment for the dough hook. Add the melted butter. Set the mixer to medium-low until the butter is incorporated, about 1 minute.
4 Knead the dough: Turn the mixer up to medium or medium-high (depending on the size and weight of your mixer) and knead on the hook for about 6 minutes. The dough should be tacky to the touch but not so wet that you can’t handle it.
5 Shape the dough and let it rise: Shape the dough into a ball and place it in a greased bowl. Cover with plastic and allow it to rise until doubled in size, 1-2 hours depending on the temperature of the room.


6 Set up your frying and dusting stations: Fill a large 4-quart pot with a few inches of vegetable oil (about 2 quarts). Set a cooling rack over a baking sheet and place it next to the pot of oil along with tongs.
Sift 3 cups of powdered sugar into a medium-sized mixing bowl and set next to the rack and a sheet pan.
7 Cut the dough and heat the oil: Once the dough has risen, turn it out onto a floured surface and roll it out into an oblong shape (about 10 inches by 14 inches and 1/4 inch thick). Cut the dough into 12 rough rectangles and cover with a flour-dusted tea towel to rest while you heat the oil.


8 Fry the beignets: Heat the frying oil to 325℉. Fry the beignets in batches until golden, about 1 1/2 to 2 minutes per side.


9 Drain and coat the beignets in sugar: Use your tongs or a frying spider to lift the beignets out of the frying oil and place them on the baking rack.
Let some of the fat drain off for about a minute before covering in powdered sugar. You want to coat them with sugar while the beignets are still hot, but not straight out of the fryer dripping in oil. Drop the drained beignets into the bowl with the powdered sugar. Turn to coat. Repeat with the remaining beignets.

10 Serve: Serve warm with another generous dusting of powdered sugar and hot coffee on the side.
Recipes
via Simply Recipes https://ift.tt/2F9fkDA
February 23, 2020 at 09:03AM
#recipies
Blinis with Avocado Cream and Buckwheat Crunch
https://ift.tt/2SZIeyg
Want to impress your guests with a party platter full of colorful vegan blinis. Here is how you do our blinis with two different toppings.
Recipes
via Green Kitchen Stories https://ift.tt/2LQcbQy
February 22, 2020 at 12:08PM
#recipies
https://ift.tt/2SZIeyg
Want to impress your guests with a party platter full of colorful vegan blinis. Here is how you do our blinis with two different toppings.
Recipes
via Green Kitchen Stories https://ift.tt/2LQcbQy
February 22, 2020 at 12:08PM
#recipies
Creamy Polenta
https://ift.tt/2HO7Mt2
Click here to browse more recipes!
Click here to browse more recipes!
Recipes
via Love and Lemons https://ift.tt/2h2Uz32
February 22, 2020 at 11:47AM
#recipies
https://ift.tt/2HO7Mt2
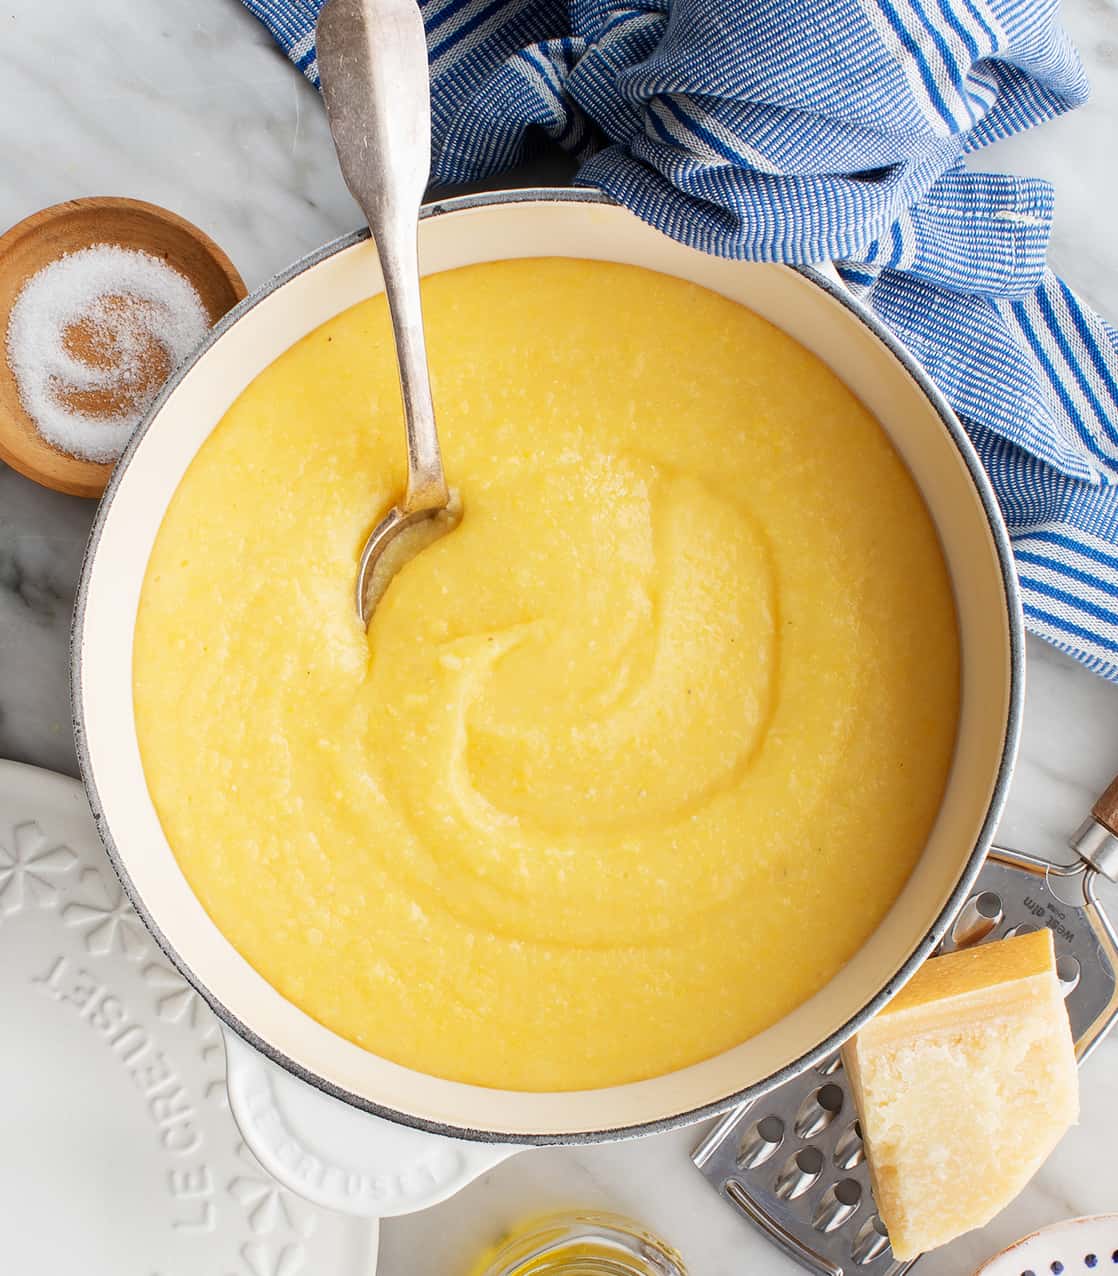
Everyone raves about Italian pasta and pizza, but if you ask me, polenta deserves just as much love. A north Italian porridge made of coarsely ground cornmeal, polenta is wonderfully creamy, with a lightly sweet, buttery corn flavor. Unlike oat porridge, it’s not a traditional breakfast food. Though I do eat it for breakfast on occasion (see page 49 of Love and Lemons Every Day!), I most often enjoy this smooth, savory porridge for dinner. Topped with cheese, herbs, cooked vegetables, or a flavorful sauce, it transforms into a mouthwatering comfort food.
Below, you’ll find my go-to method for making creamy, soft polenta in no time, plus my favorite ways to serve it. Try it once, and it’ll have a permanent place in your rotation of potatoes, pasta, and bread. It’s simple, healthy, and, most importantly, delicious.
How to Make Polenta
Polenta has a reputation for being a finicky dish – it can take up to an hour of stirring over the stove, and it’s easy to end up with a lump-filled mess instead of a smooth porridge. But when I want polenta, I want it now, so I developed an easy method for making creamy “instant” polenta.
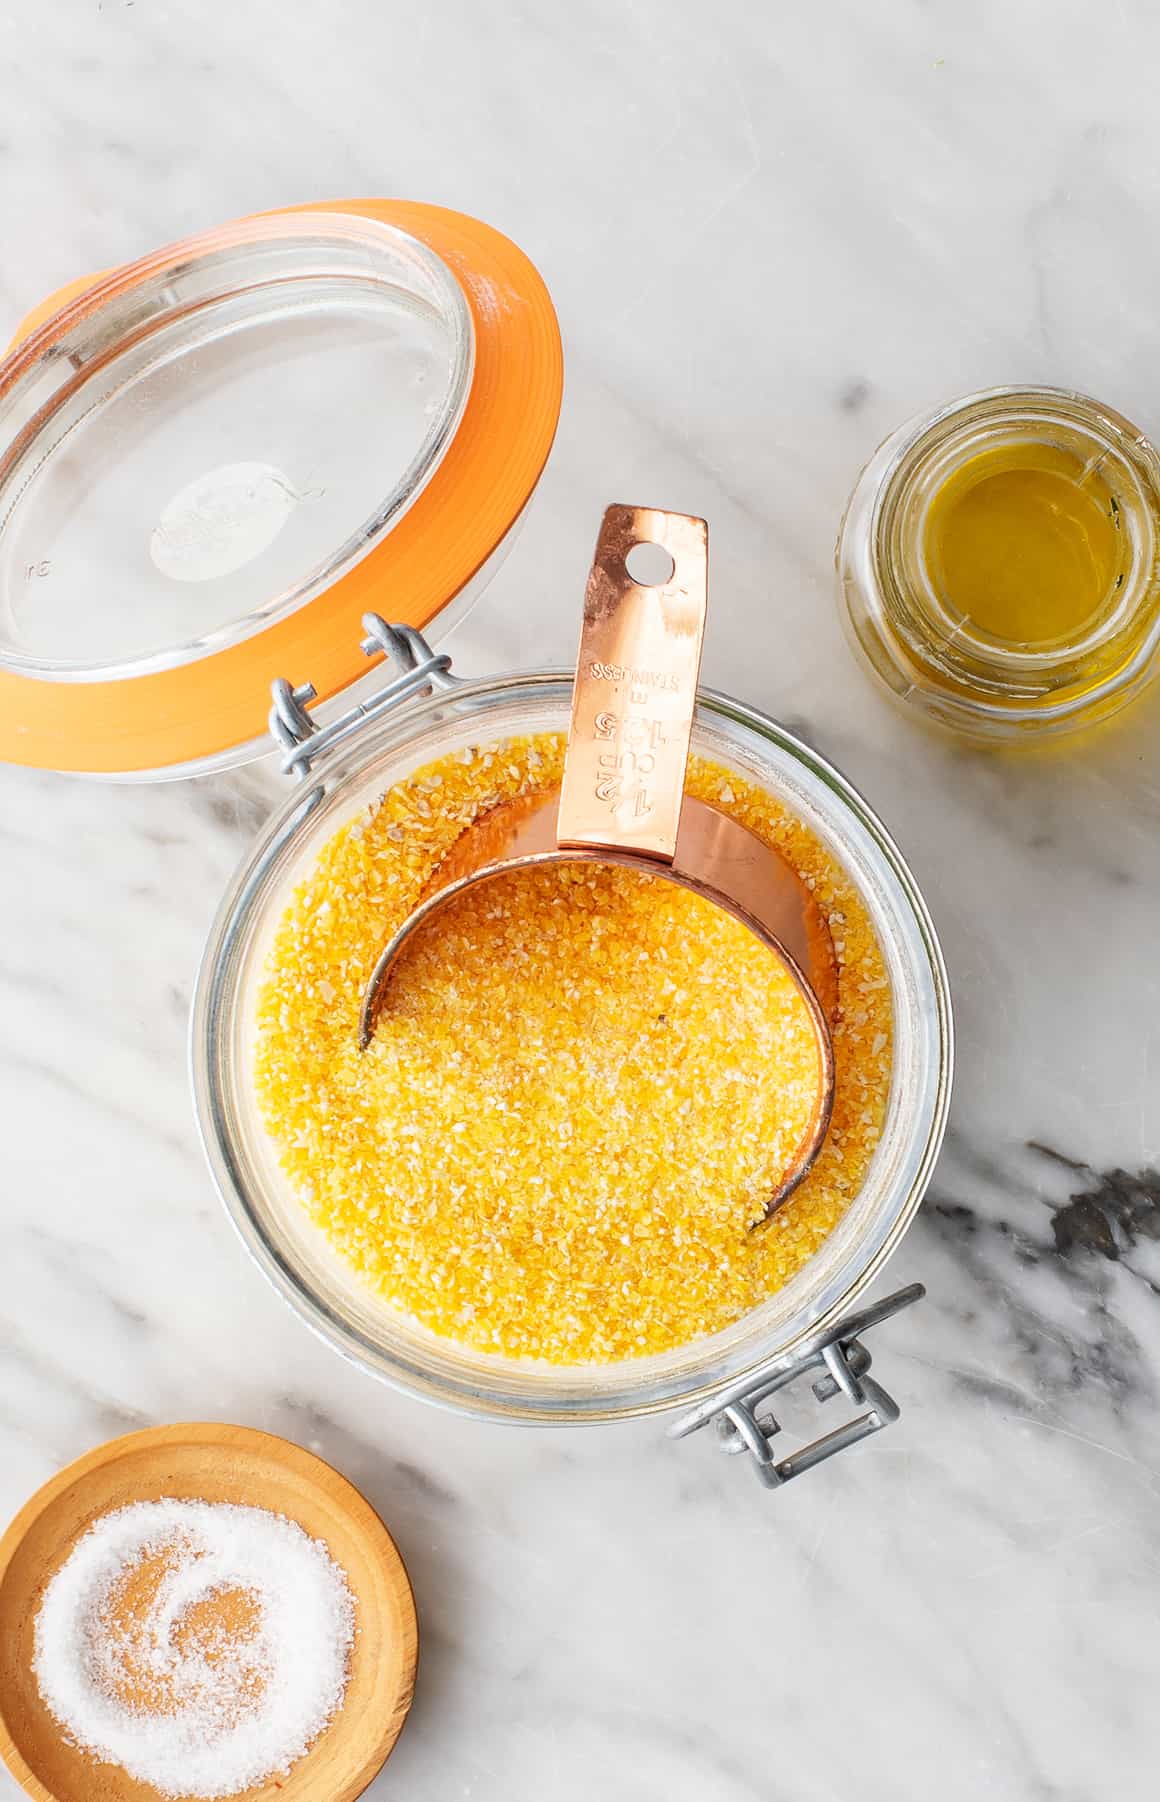
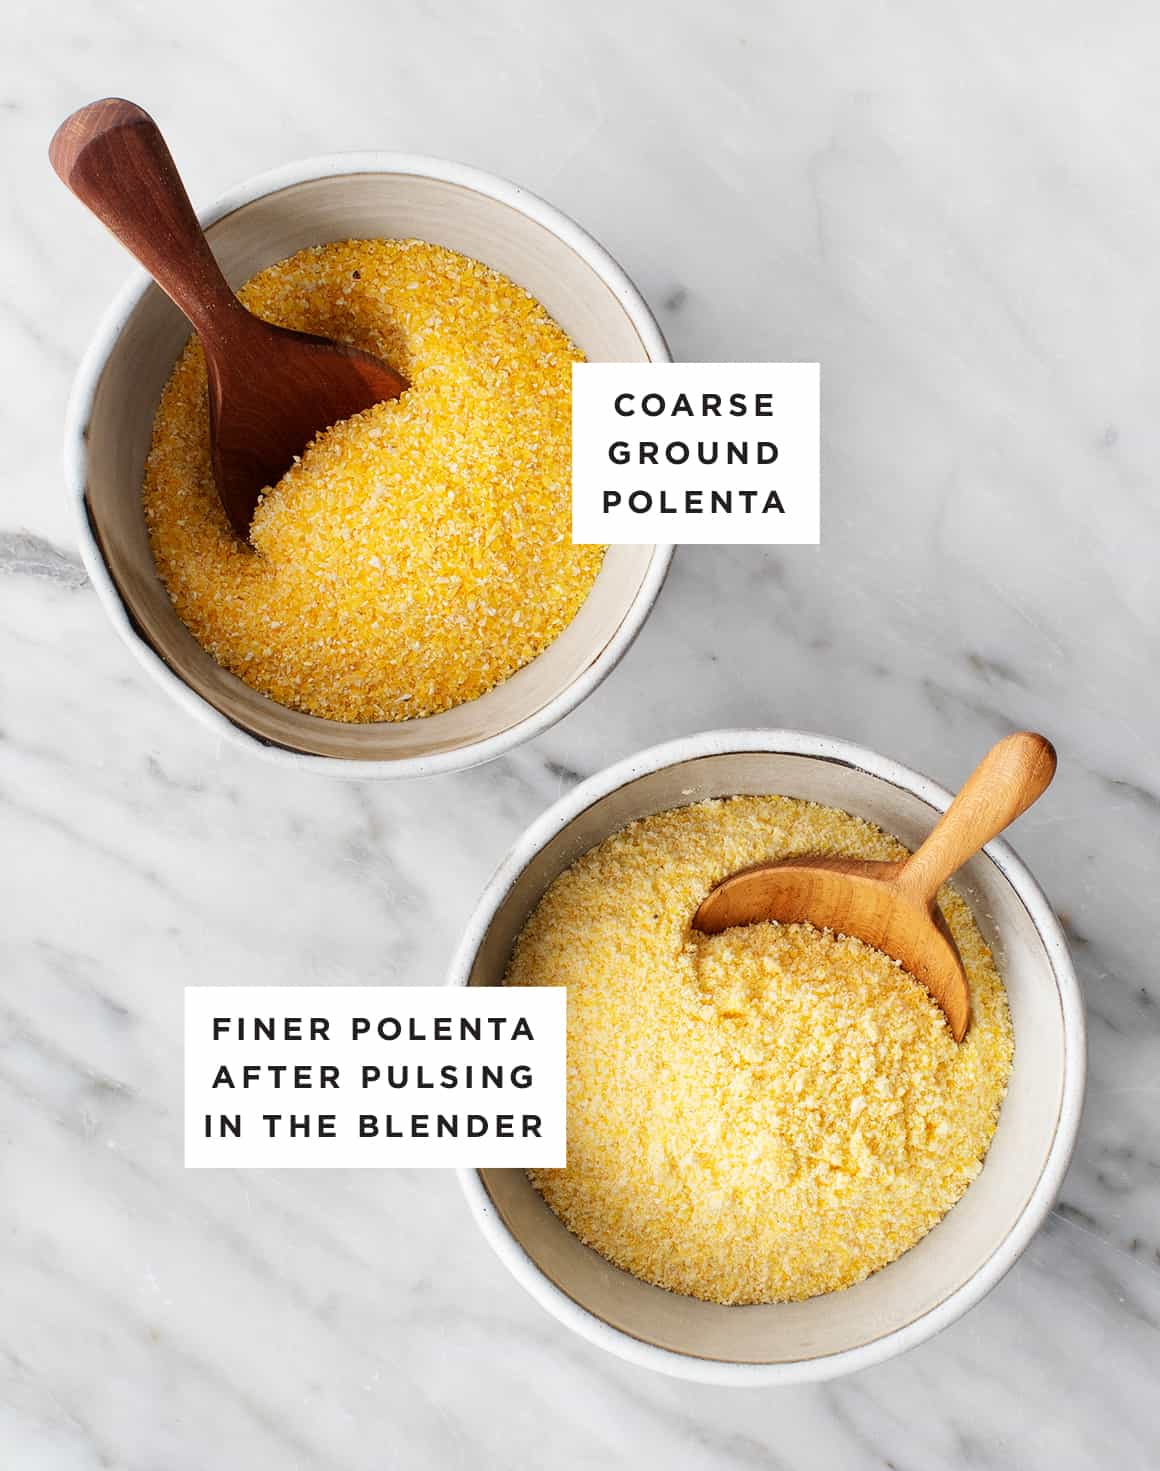
Before I start cooking, I pulse the cornmeal in the blender so that the granules are less coarse. Made with this fine cornmeal, polenta is extra creamy, and it cooks in a fraction of a time. Once you try this method, you won’t make it any other way! Note: this method works perfectly with Bob’s Red Mill’s Coarse Ground Polenta.
After you pulse the cornmeal in the blender, sift through it with your fingers to break up any clumps. Then, bring 3 cups of water to a simmer in a saucepan, and gradually add the polenta, whisking constantly.
Add an additional cup of water to the pan and continue to cook, stirring, for 15 minutes. Reduce the heat as needed if the polenta starts to boil. If the porridge becomes too thick, stir in up to 1/2 cup more water.
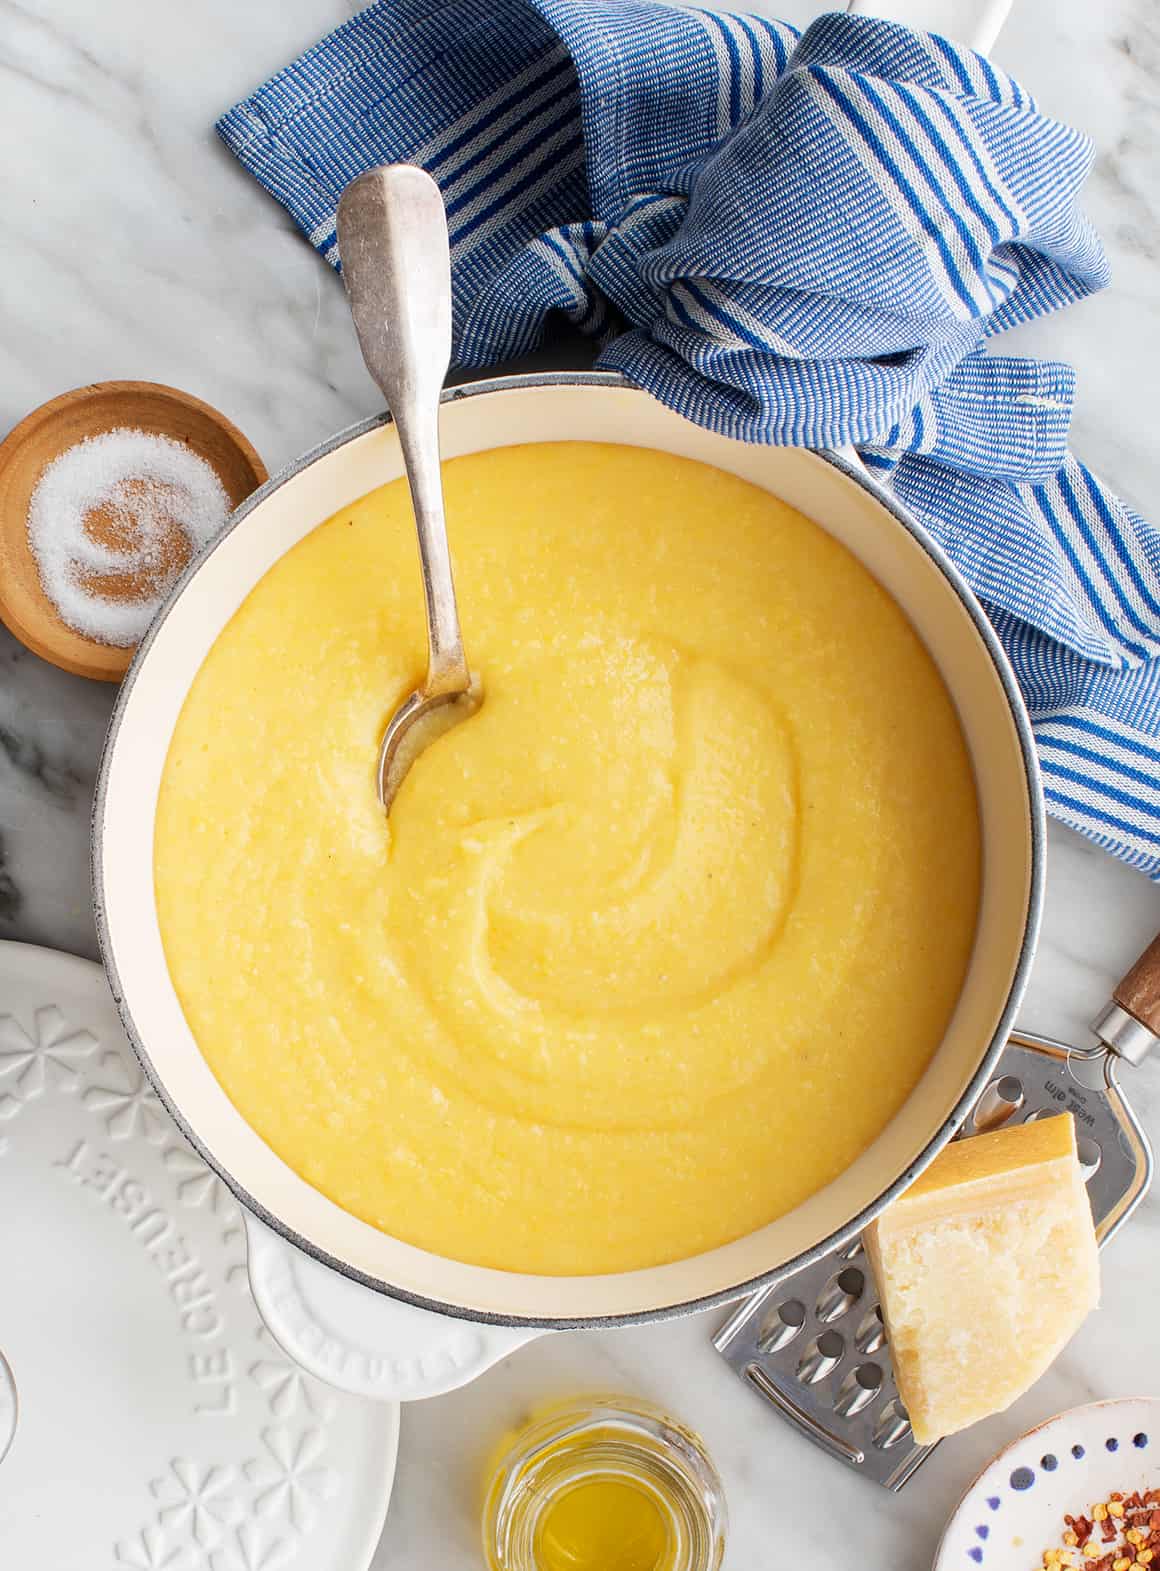
Turn off the heat and add a glug of olive oil and a pinch of salt. Let it stand, covered, for 5 minutes before you eat. Enjoy!
Polenta Recipe Tips
- Sift through the blended cornmeal before you cook it. After you pulse the cornmeal in the blender, the fine grounds will have a tendency to stick together. To avoid ending up with large lumps in your cooked polenta, sift through the blended cornmeal with a fork or your fingers to break up any clumps.
- Whisk constantly as you pour the cornmeal into the boiling water. Lumps are the biggest pitfall in making polenta, but it’s easy to avoid them. Pour the cornmeal into the water gradually – NOT all at once – and whisk constantly as you do it. The constant whisking will evenly disperse the cornmeal grounds in the water, so they won’t have a chance to clump together.
- It’ll thicken as it sits. Cooked polenta thickens quickly, so if you don’t plan to eat it right away, you’ll likely need to thin it before you serve it. Reheat the thickened polenta on the stove over low heat, adding more water or olive oil, as needed, to thin it to your desired consistency. Make sure to taste and adjust the seasonings before you serve it. After you add the extra liquid, it’ll likely need another pinch of salt.
Polenta Serving Suggestions
Polenta is a fantastic blank canvas for flavorful toppings. Most simply, I enjoy it as a side dish with a shower of grated Parmesan cheese and freshly cracked black pepper. On occasion, I’ll add roasted chickpeas or toasted pine nuts for crunch. Otherwise, I’ll top it with a cooked veggie and a punchy sauce to make it a meal on its own:
- Cooked veggies are the perfect way to add hearty texture, richness, and flavor to creamy polenta. Try pairing it with roasted broccoli, Brussels sprouts, tomatoes, butternut squash, or cauliflower, with grilled mixed vegetables or zucchini, or with sautéed mushrooms.
- A punchy sauce is key for transforming this from a side dish into a show-stopping entrée. I especially like it with homemade marinara sauce, pesto, or chimichurri.
How do you like to serve polenta? Let me know in the comments!
More Cooking Components
If you loved learning how to make polenta, try making one of these healthy cooking components next:
- Perfect Brown Rice
- Fluffy Quinoa
- Herbed Farro
- Couscous
- Lentils (any variety!)
- Baked Tofu
- Smoky Marinated Tempeh
Other posts you may enjoy...
 60 Best Brunch Recipes |
 Healthy Freezer Meals |
 Kale Salad with Carrot Ginger Dressing |
 How to Cook Perfect Brown Rice |
 25 Easy Pasta Recipes |
 Sauteed Mushrooms |
The post Creamy Polenta appeared first on Love and Lemons.
Recipes
via Love and Lemons https://ift.tt/2h2Uz32
February 22, 2020 at 11:47AM
#recipies

The Flat Belly Fix
This is the only 21-day rapid weight loss system that allows you to easily lose an average of 1 lb a day for 21 days without feeling hungry or deprived. The unique and brand new techniques used in this System are proven SAFE. And they do not cause the rebound weight gain common to all the other rapid weight loss systems that are not backed by the latest science. The Flat Belly Fix System takes advantage of a recent scientific discovery that proves the effective weight loss power of an ancient spice. Combined with other cutting-edge ingredients in the patent-pending Flat Belly Fix Tea™ — that you can make right in your own kitchen in minutes — this System is the quickest, easiest and most enjoyable way to quickly get the body you desire and deserve. Click Here
Categories
All
Gluten Free
Pancakes
Protein
Archives
November 2020
October 2020
September 2020
August 2020
July 2020
June 2020
May 2020
April 2020
March 2020
February 2020
January 2020
December 2019
November 2019
October 2019
September 2019
August 2019
July 2019
June 2019
May 2019
April 2019
March 2019
February 2019
January 2019
December 2018
November 2018
October 2018
September 2018
August 2018
July 2018
June 2018
May 2018
April 2018
March 2018
February 2018
January 2018
December 2017
November 2017
 RSS Feed
