
|
Goldfish Chicken Tenders
https://ift.tt/2ElFx49 Mashing up new ingredients into something familiar but slightly different is a great way to show kids how fun cooking can be. As a parent, this is a priority of mine in the kitchen. These Goldfish Chicken Tenders are a perfect example. 4-INGREDIENT CHICKEN TENDERS!We seem to have a never-ending supply of Goldfish cheese crackers at our house. I find them everywhere. In the car. In the couch. On the floor. One time I time found a Goldfish cracker in my shower. So finding a few cups of the super crispy, cheesy crackers to use on some chicken tenders was not hard. (I did not, however, repurpose the ones I found throughout the house.) All the other things you need for this recipe are basic pantry staples—flour, eggs, and of course, chicken tenders. While you could fry these, I prefer to bake them. The crackers get really crispy and form a satisfying crust, and cleanup is much easier if you bake them. If you don’t have an endless supply of Goldfish crackers in your house, like I do, you can also substitute crushed Cheez-Its, Ritz crackers, or any crispy cracker you have in your pantry. 
KIDS LOVE COLORSIf you make brightly colored food, it’s much more likely your kids will be into it. They love color! These bright orange chicken tenders were a total delight to my kids. They had never seen anything like it and therefore loved them. I suspect the presence of Goldfish helped, too, but I can’t be sure. COOKING THE BEST CHICKEN TENDERSThere are a few tips I can give you to cooking great chicken tenders.
 
HOW TO REHEAT LEFTOVER CHICKEN TENDERSIf you have leftovers and need to reheat them, please, oh please, do not put these in the microwave. They will turn into a sad, soggy orange heap. The fastest way to reheat them is in a skillet over low heat with a little oil. That will warm them through and preserve the crispy crust. If you are reheating a large batch, you can bake them a second time in the oven for about 8 minutes at 350°F. until they are warmed through and crispy again. 
These Goldfish Chicken Tenders make a surprisingly delicious sandwich. As in, I will probably only eat them in sandwich form if/when I make them for my family again. I just loaded them up on a soft sub roll with a smear of mayonnaise, some shredded iceberg lettuce, and some banana peppers. The lettuce and peppers give some nice crunch and acidity to the sandwich. So delicious! 
My kids thought these were an absolute hoot. My four-year old kept saying, “Why they Goldfish on my chicken?!” Meanwhile, my two-year old, whose vocabulary is limited, just kept saying, “It orange. It orange.” Yes. It orange. And they scarfed these down! Possibly the most interesting report came from my wife, who was very skeptical that these would be good. She tried one, squinted directly at me, pondered various other chicken tenders I’ve made over the years, tried another bite . . . tried another bite . . . tried another bite . . . never admitted that she liked them . . . tried another bite. AND SO ON. MORE BREADED CHICKEN RECIPES TO TRY!Products We LoveThis post may contain links to Amazon or other partners; your purchases via these links can benefit Simply Recipes. Read more about our affiliate linking policy. Recipes via Simply Recipes https://ift.tt/2F9fkDA February 20, 2019 at 09:02AM
0 Comments
Healthy Sheet Pan Chicken Sausage and Roasted Veggies
https://ift.tt/2TZSOEO Broccoli, sweet potatoes and red onion come together with chicken sausage for a simple, healthy sheet pan meal that’s delicious and perfect for busy weeknights. So many of you are requesting simple recipes lately… ask and you shall receive! Truth be told, almost all my dinner recipes are super simple so I’m glad we’re on the same page.
I personally LOVE sheet pan dinners because you can throw everything onto one pan, bake it and voila! A delicious, healthy dinner is ready to go. PLUS you only have to wash one pan (and a cutting board). Score! This particular sheet pan dinner doesn’t get much simpler. We’re using pre-cooked organic chicken sausage links. Dinner sausage, to be exact! I love the Bilinski and Applegate Farms brands! There are a ton of flavors to choose from so pick whichever flavor combo sounds the best! I usually go for the mild or spicy Italian, but have been eyeing the more “fun” flavors like cilantro lime or apples and honey. YUM!
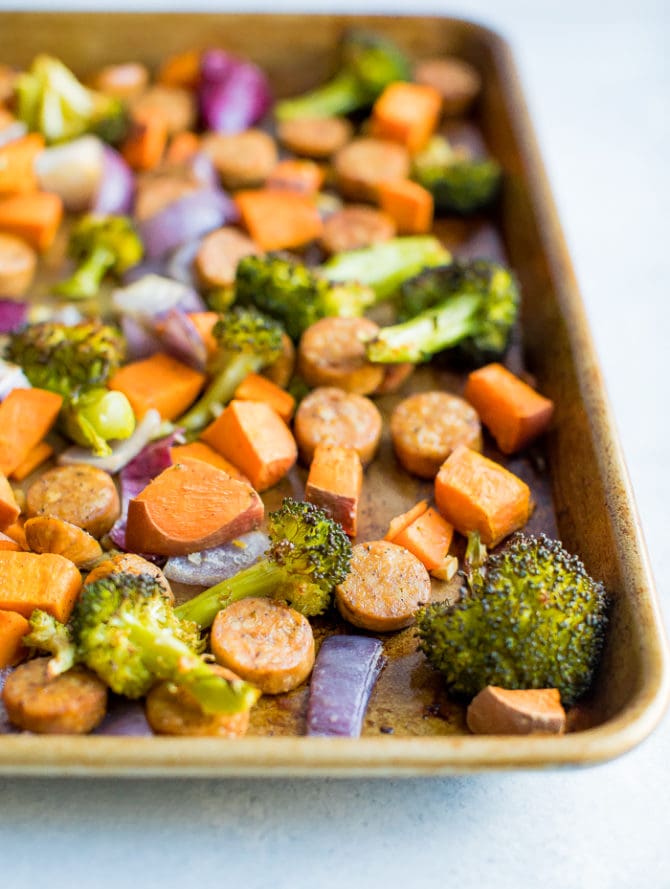
I paired the chicken sausage with a bunch of roasted veggies. I chose sweet potatoes, broccoli, onions and garlic because they’re some of my favorites, but you can literally do any combination of your favorite veggies. And if you’re short on time, there is no shame in buying pre-chopped veggies to make this dinner even faster.
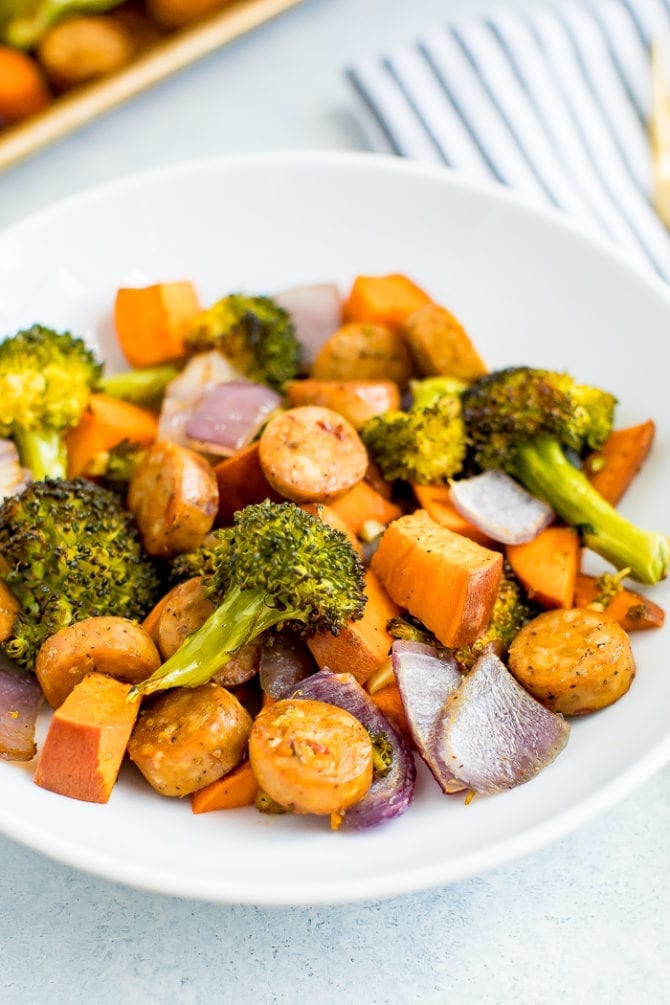
You can eat this meal as is (just meat and veggies) or serve it over your favorite grain like brown rice or even quinoa. The dish has plenty of flavor on it’s own, but I topped ours with sriracha because I love a little heat. And if you know me, you know I basically top all things savory with hot sauce. It’s a thing. Enjoy this healthy dinner the next time you think you don’t have time to throw a healthy meal together! I bet it will quickly become part of your weekly dinner rotation.
If you make these healthy magic cookie bars please be sure to leave a comment and star rating below letting me know how they turn out. Your feedback is so helpful for the EBF team and other EBF readers. Print DescriptionBroccoli, sweet potatoes and red onion come together with chicken sausage for a simple, healthy sheet pan meal that’s delicious and perfect for busy weeknights. Ingredients
Instructions
Nutrition
Keywords: sheet pan chicken sausage Want more sheet pan meals?
The post Healthy Sheet Pan Chicken Sausage and Roasted Veggies appeared first on Eating Bird Food. Recipes via Eating Bird Food https://ift.tt/1L45wsH February 20, 2019 at 05:27AM
West African Peanut Chickpeas
http://bit.ly/2BTnhh5 These West African Peanut Chickpeas over sticky white rice make for a soothing and satisfying plant-based meal. The chickpeas are coated in smoky peanut sauce with hints of tomato, ginger, garlic and lime with an echo of a traditional West African Peanut Stew. Only in a hearty bowl format. This fast and flavorful meal can be yours in under a half hour..Read more » This is a summary, images and full post available on HHL website! Recipes via Healthy. Happy. Life. http://bit.ly/ygHPsr February 19, 2019 at 05:16PM
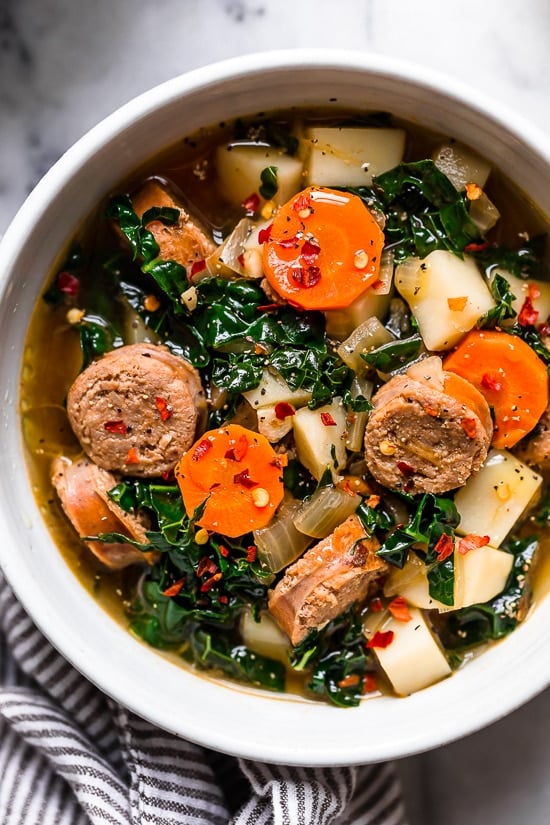
Kale and Potato Soup with Turkey Sausage
http://bit.ly/2IpUhD7 Kale and Potato Soup with Turkey Sausage is an easy, hearty soup made with kale, potatoes, carrots and turkey or chicken sausage.
Kale and Potato Soup with Turkey SausageThis quick and easy soup is the perfect one-pot meal, and a tasty way to enjoy kale, which is high in vitamins K, A and C with both antioxidant and anti-inflammatory benefits. Great for dinner, or meal prep if you like batch cooking because this recipe is freezer-friendly and tastes great reheated. A few more hearty soup recipes are Leftover Ham Bone Soup with Potatoes and Cabbage, Chicken Soup with Spinach and Whole Wheat Acini di Pepe and Chicken Sweet Potato and Kale Soup. Recipes via Skinnytaste http://bit.ly/2ix3Luq February 19, 2019 at 09:55AM
Coconut Golden Milk
http://bit.ly/2BKc8ie I am a beverage junkie. I typically have at least two going at once, a water bottle in my car that constantly needs refilling, and a mostly empty tea cup next to my nightstand. I’m always looking for a compelling drink—and if it can feed me on a deeper level, so much the better. Case in point: I used to drink coffee, but many moons ago after my twins were born, I could not really drink it anymore. My stomach decided it was just NOT down with that level of acidity and despite the fact that I love the smell of it and sometimes still have decaf (and then usually regret it), I mostly switched to tea and more therapeutic beverages. That’s where Golden Milk comes in. 
WHAT IS GOLDEN MILK?Golden Milk is a warm beverage that nourishes and balances you, which is especially nice during the winter months for those of us living in colder climates. Its roots are in Ayurveda, India’s ancient holistic healing system. Golden Milk is a combination of sweet, bitter, astringent, pungent, and spicy flavors. Also sometimes called Turmeric Latte or Turmeric Milk, it typically contains turmeric, ginger, black pepper, and cinnamon mixed with whole cow’s milk and sweetened with honey. Some versions add ground cardamom and/or ghee (clarified butter). In Ayurveda, golden milk (or haldi doodh) is a tonic often consumed before bed—warm milk can make you sleepy. But you can drink it any time of day and I personally like it as an alternative to coffee. It happens to be good for you, too; turmeric is known to help support the body’s various systems (digestive, circulatory, respiratory). Some of us who like it are also known to drink it when we feel under the weather, as turmeric and ginger are loaded with antioxidants. And as for the black pepper, it’s not unusual to encounter black pepper and turmeric together (in curry powder, for instance). These ingredients have a history of being nutritionally symbiotic—it’s believed the compounds in black pepper help with the absorption of the compounds in turmeric. MY FAVORITE WAY TO MAKE GOLDEN MILKMy riff on golden milk goes like this. I use coconut milk instead of the traditional cow’s milk because I don’t drink cow’s milk. I also happen to love the way coconut milk creates a really rich, thick beverage, and the way coconut plays with the other flavors. It’s a natural pairing, and not uncommon. But you can certainly use any kind of milk you have, dairy or otherwise. I also like to use maple syrup instead of honey. For me, I feel like honey gets lost among some of the more assertive flavors, and I like the way maple syrup plays with everything else in the drink. But that’s just strictly personal preference. You could certainly use the traditional honey if that’s what you have or prefer. Ayurvedic principles recommend adding it after you heat the drink because heating honey reduces its beneficial properties. I’ve also tried Golden Milk with coconut sugar (use about 2 teaspoons). Finally, you could use date sugar—dates are what’s called sattvic in Ayurveda, bringing balance and harmony to the mind and body—but it’s expensive and not always easy to find. WHAT IS TURMERIC?This root is in the same family as ginger and shares some of its pungency, but not its spicy heat, per se. It’s what typically gives curry powder mixes its telltale bright yellow hue (but again, not its heat!). As is often the case with foods that are brightly colored and found in nature, turmeric is loaded with antioxidants, making it a great ingredient for a warming, nourishing beverage like this one. Antioxidants have anti-inflammatory properties, and avoiding or reducing prolonged inflammation in the body is generally thought to be good for our health. GROUND OR FRESH TURMERICThe recipe calls for ground turmeric because it distributes well in liquid, and it’s also more widely available than turmeric root. However, if you find fresh turmeric, I see no reason why you can’t grate some into the drink just as you would the ginger. You might want to strain the finished beverage before drinking it if you don’t like the prospect of swallowing little flecks of grated turmeric. 
HOW TO SERVE GOLDEN MILKGolden Milk is typically served warm, which is how I also prefer to drink it. I usually warm it gently over low heat. If you are new to the flavor of turmeric, boiling the milk (the traditional way to prepare it in Ayurveda) reduces the bitterness in the turmeric. However, there’s nothing stopping you from drinking this cold from the fridge! I’d just make sure you stir or shake it up in order to reintegrate the coconut milk since sometimes the fat separates from the rest of the liquid. I don’t do this, but if the little stray fibers from grated ginger bother you, strain off the milk through a fine mesh sieve before you drink it. HOW TO STORE GOLDEN MILKI store anything I don’t drink immediately in a covered glass jar or container and refrigerate it. I have noticed that Golden Milk tends to become more pungent after it sits for 2 to 3 days in the refrigerator. But it really is best consumed right away—it kind of makes you slow down to both make it and enjoy it. TRY THESE OTHER WARMING DRINKS!Recipes via Simply Recipes http://bit.ly/2F9fkDA February 19, 2019 at 09:06AM
Lasagna
http://bit.ly/2Ioz5gS Prepare the Bolognese Meat Sauce1 Make the soffritto: Combine pancetta, onion, celery, and carrot in sauté pan with butter and cook over medium heat until onion turns pale gold. 2 Add the beef, pork, sausage to the soffritto, and increase the heat to high; cook until browned. Sprinkle with the ground clove, cinnamon, and pepper. 3 Stir in tomatoes, bring to a simmer and reduce the heat to medium. Cook over medium heat for 15 minutes. If you are using whole canned tomatoes, break them up as you add them to the sauce. 4 Add milk and season with sea salt. Then turn down the heat and let simmer for 2 and 1/2 hours. Stir at least every 20 minutes. Whenever the sauce simmers down to the point that it is sticking to the bottom of the pan, just add 1/4 cup of water and scrape up the browned bits from the bottom and continue to cook. Make the Béchamel sauce5 Make the roux: Heat the milk until almost boiling in a heavy bottomed sauce pan. In a separate pan melt the unsalted butter with the flour over low heat. Stir rapidly with a spoon. Cook this for 1 minute and then remove from the heat. (See Wikipedia on Béchamel Sauce for more information on this sauce.) 6 Slowly add half the milk to the roux: Slowly add half the hot milk to your butter and flour mixture. During this process stir constantly. 7 Add remaining milk, thicken the sauce: Return the milk, butter, flour mixture to low heat until the sauce begins to thicken. Add the remaining milk slowly while stirring working it into the thickened sauce. Continue to stir until it comes to a boil. 8 Season, stir: Season with some sea salt, and continue stirring until the right consistency has developed. If any lumps form, beat them out rapidly with a whisk until they dissolve. Remove from heat. Prepare the Lasagna9 Cook the lasagna noodles: Preheat oven to 375°F. Cook the lasagna according to instructions. About 8 minutes in 6 quarts of boiling salted water. Drain, rinse with cold water. Lay the individual lasagna noodles out on kitchen towels, not touching, so they do not stick together while you layer the casserole. 10 Layer the lasagna: Spread a little olive oil around the inside of a 13x9-inch baking pan. Make sure your baking pan is non-reactive - pyrex or stainless steel. Do not use an aluminum pan as it will react with the acidity of the sauce and ruin the flavor. Put a layer of lasagna noodles down first. Layer on a third of the bolognese sauce, then a third of the bechamel sauce. Sprinkle with grated Parmesan. Repeat two more times. Top with a final layer of noodles and sprinkle with grated Parmesan. 11 Bake: Tent the casserole with aluminum foil. Put lasagna into the middle rack of a pre-heated 375°F oven. Bake for 20-30 minutes, until the top begins to get lightly browned. Remove from oven and let cool 5-10 minutes before serving. Recipes via Simply Recipes http://bit.ly/2F9fkDA February 19, 2019 at 08:01AM
Puerto Rican Rice Stew with Shrimp and Pigeon Peas (Asopao de Camarones y Gandules)
http://bit.ly/2NcCmi5 Most cultures have some version of a comforting, hearty rice stew in their diets. The Chinese have congee, West Africans have jollof, and U.S. Southerners have gumbo. Puerto Ricans have their very own version, which we call asopao. Much like its international counterparts, asopao’s consumption isn’t relegated to the winter months — there really isn’t a “winter” in Puerto Rico, so asopao is a dish that is enjoyed year-round. That said, this asopao can be particularly comforting in the colder months. |
 THE DAD ADD: MAKE A SANDWICH!
 THE REPORT CARD
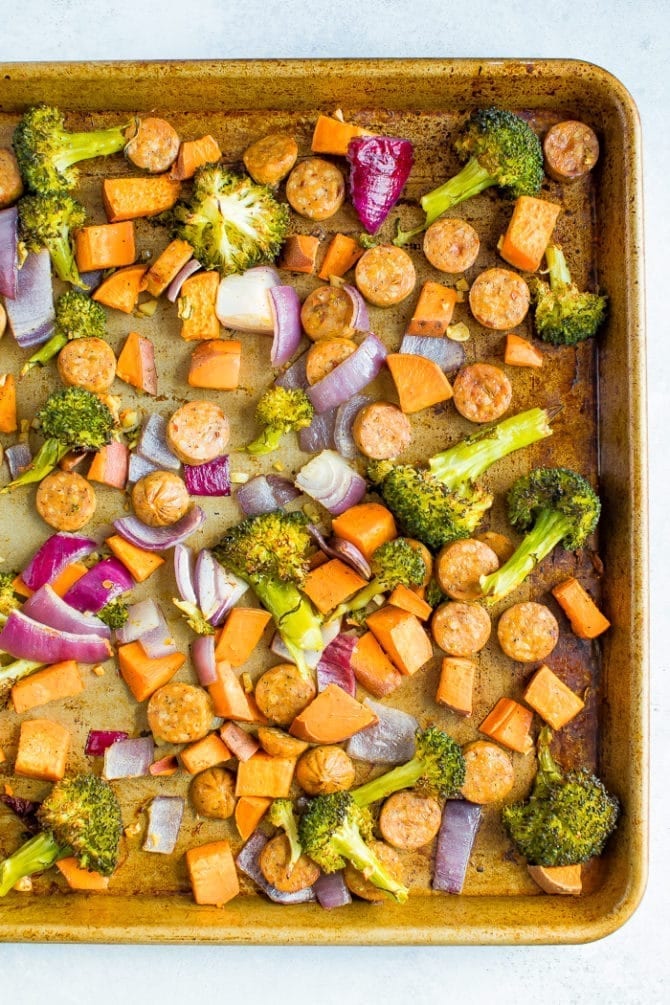


 Gluten-free Almond Coconut Bars |
 Chocolate Almond Breeze Smoothie |
 Peanut Soba Spring Rolls |
 Vegan Black Bean Quinoa Burger |
 Super Seedy Crackers |
 Jessica's Pistachio Oat Squares |
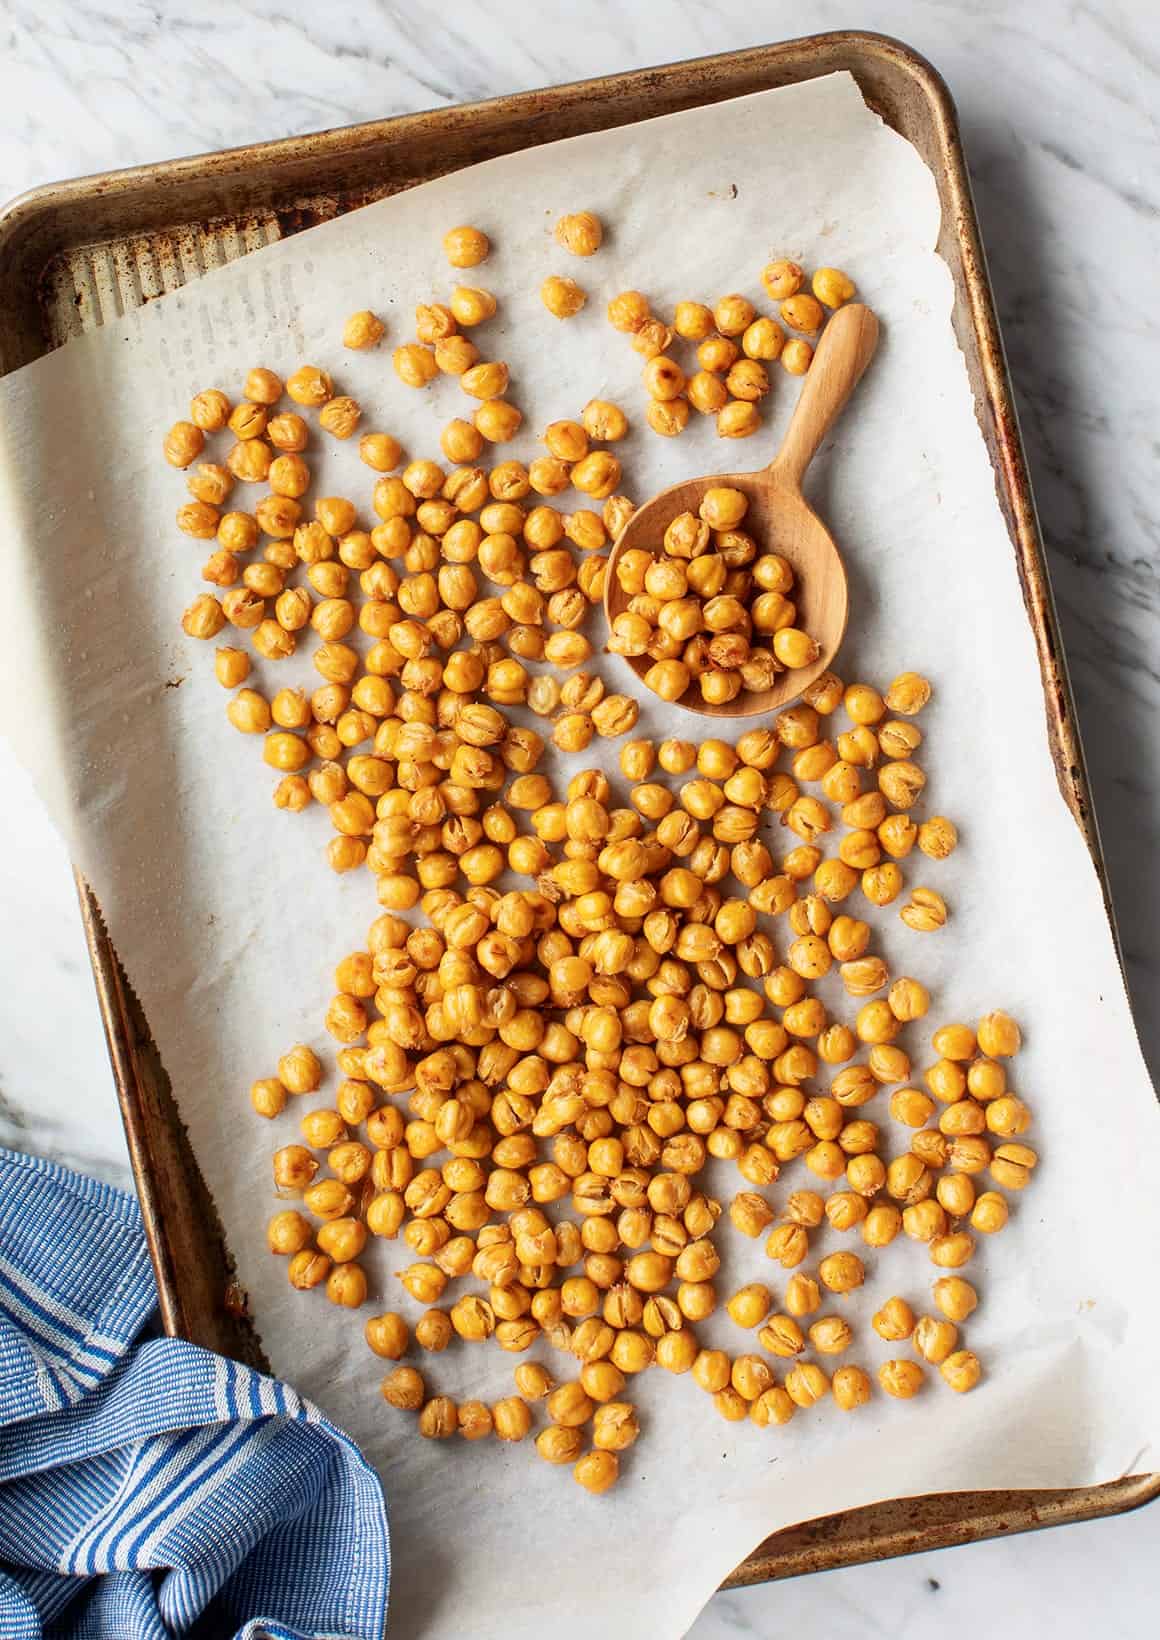
The post Roasted Chickpeas appeared first on Love and Lemons.
Recipes
via Love and Lemons http://bit.ly/2h2Uz32
February 18, 2019 at 07:24AM
Herbes de Provence Skillet Chicken with Potatoes and Greens
http://bit.ly/2tpUOKU
Recipes
via Simply Recipes http://bit.ly/2F9fkDA
February 17, 2019 at 09:05AM
http://bit.ly/2tpUOKU
One pan? Yes, please! This French Herbes de Provence skillet chicken uses chicken tenders, potatoes, olives, and spinach make quick work for this weeknight, freezer friendly meal.
Photography Credit: Alison Bickle
Sometimes you just need a meal in your back pocket. Herbes de Provence Skillet Dinner is that meal for me.
We always have potatoes and onions on the countertop, and the refrigerator is rarely without a leafy green and jar of olives. Toss them together with some marinated chicken from the freezer, and dinner is ready in a snap!
THE BEST CHICKEN FOR THIS RECIPE
Skip over split breasts and boneless skinless chicken breast halves for this recipe. You want thinly sliced chicken breast, chicken tenderloins or chicken tenders.
A thick breast would take too long to cook, and your vegetables would be overdone by the time the chicken finished. The thinner cut also gives you better seasoning distribution because more of every bite is coated with marinade.

SHOPPING FOR THE VEGETABLES
Potatoes: I use small golf-ball-sized baby or b-sized potatoes because I want them to cook quickly. You can use larger potatoes if that’s what you have on hand, just cut them into rough half-inch cubes.
Swiss Chard: I love Swiss chard because it has a very slight earthy flavor similar to beets but not as strong. Try to find chard with white stems. If you use rainbow chard with red or yellow stems the color will leech into the sauce and you will have pink or yellow sauce. If you don’t mind colorful sauce, then by all means get crazy with the rainbow chard. If Swiss Chard isn’t your thing substitute chard for spinach.
Olives: It may seem strange to add olives and potatoes together, but they are match made in heaven. I buy whole pimento stuffed Spanish olives and slice them in half, but I think this would also work well with Queen Olives or Kalamata Olives, just make sure they are pitted.
Swap the vegetables as needed! If you don’t have the vegetables I used on hand, don’t worry about it! Serve the chicken with a side salad over pasta or with a vegetable of your choice. Anything goes!
SEASON THE VEGETABLES AT THE END
Toward the end of the recipe, remove the chicken and tent it with foil. It’s easier season the vegetables and coat them in additional spices and butter once the chicken is removed. Don’t worry you’ll put everything back together before bringing dinner to the table.

THE BEST SKILLET TO USE
You’re packing a lot of food into one skillet. It’s best to use a 12-inch skillet (measured across the top) to ensure you have enough room for all of the chicken and vegetables.

HOW TO MAKE AHEAD AND FREEZE
Stock up on chicken when it’s on sale. Commit 10 minutes to label the bag and make the marinade. Toss the marinade and the chicken in the bag. Freeze it flat to save on freezer space.
Rest easy because the chicken tastes great with or without the vegetables! When a busy workweek hits, take the chicken from the freezer to the fridge in the morning. When you return home from work you can have chicken on the table in under 30 minutes!
- Use a gallon-size freezer bag that you press to seal rather than those with a zipper slide.
- Write the date, name of the recipe, and SimplyRecipes.com so you can easily find the recipe later.
- Add the chicken and marinade ingredients to the bag.
- Squeeze as much air as possible out of the bag and close it.
- Smoosh around the chicken until its well coated in marinade.
- Lay flat to freeze.
This will keep in the freezer for up to 6 months, and up to 48 hours thawed in the refrigerator.
Not a planner? No biggie! You could still make this whole dish start to finish in one night and have dinner ready in 40 minutes or less.
More Great Freezer Meals!
Herbes de Provence Skillet Chicken with Potatoes and Greens Recipe
PrintIngredients
For the marinade:
- 1 1/2 pounds boneless skinless chicken tenders, tenderloin, or thinly sliced chicken breasts
- 1 1/2 tablespoons herbes de Provence
- 1 1/4 teaspoons Kosher salt
- 1 teaspoon freshly ground pepper
- Zest of one lemon
- 1 1/2 tablespoons lemon juice
- 3 cloves minced garlic
- 2 tablespoons olive oil
For the vegetables:
- 2 teaspoons olive oil
- 3 tablespoons butter, divided
- 1 1/2 pounds B-sized or baby potatoes
- 1/2 yellow onion
- 1/2 teaspoon Kosher salt
- A few cracks of freshly ground pepper
- 2 handfuls (2 packed cups) Swiss chard or spinach
- 1/3 cup halved pimento-stuffed Spanish olives
- 1 teaspoon red wine vinegar
Method
1 Label the bag: Use a sharpie to write the date and title of the recipe on a gallon-sized zip top bag so you can easily find it on SimplyRecipes.com when you want to cook it. Alternatively, write the cooking instructions on the bag, and date it.

2 Combine the ingredients: Roll down the opening of the bag a little just so you don’t accidently get raw chicken juices on the outside of the zip top. Add the chicken, spices, zest, lemon juice, garlic and olive oil.
Remove as much air as possible and seal the bag. Smoosh the chicken around so it’s coated in the marinade.
3 Lay the chicken flat in the freezer and freeze for up to 6 months:
Alternatively, you could skip the freezer and let it marinade in the fridge for a couple of hours and up to two days, then cook it according to the directions below.
4 Thaw the chicken before cooking: When ready to cook, take the chicken out of the freezer in the morning before you go to work, and it will be ready to cook by the end of the day.
5 Prepare the vegetables: If the b-sized potatoes are larger than a golf ball, quarter them; if they are smaller just half them. Slice the onion. Wash the Swiss chard, remove the stems and chop them. Then cut the leaves into strips about an inch thick. Cut the olives in half.
6 Cook the chicken: Set a large skillet over medium heat add 2 teaspoons of olive oil. Once the oil shimmers, add the chicken and any marinade in the bag.
If any chicken is folded up, unfold it so it lays flat in the pan. Cook the chicken for 2 minutes, then flip it.
7 Add the vegetables: Add the potatoes, onion, and 1/4 cup water to the pan with the chicken. Cover with a lid. Let everything simmer together for about 10 minutes.
8 Finish the potatoes and make the sauce: Remove the chicken to a plate (leaving the vegetables in the skillet) and tent with foil. Add the remaining 2 tablespoons of butter, 1/4 teaspoon of salt and a few cracks of freshly ground pepper to the skillet. Stir the potatoes.
Turn the heat up to medium high to reduce the liquid and finish cooking the potatoes uncovered. This should take about 2 to 3 minutes depending on how much liquid is in the pan.
When you can easily pierce the potatoes with a fork, add the chard leaves and chopped stems, olives, and red wine vinegar. Toss gently until the greens are just wilted.
9 Serve: Nestle the chicken back into the pan. Bring the whole thing over to the table and serve.
Hello! All photos and content are copyright protected. Please do not use our photos without prior written permission. If you wish to republish this recipe, please rewrite the recipe in your own unique words and link back to Herbes de Provence Skillet Chicken with Potatoes and Greens on Simply Recipes. Thank you!
PrintProducts We Love
This post may contain links to Amazon or other partners; your purchases via these links can benefit Simply Recipes. Read more about our affiliate linking policy.
Recipes
via Simply Recipes http://bit.ly/2F9fkDA
February 17, 2019 at 09:05AM
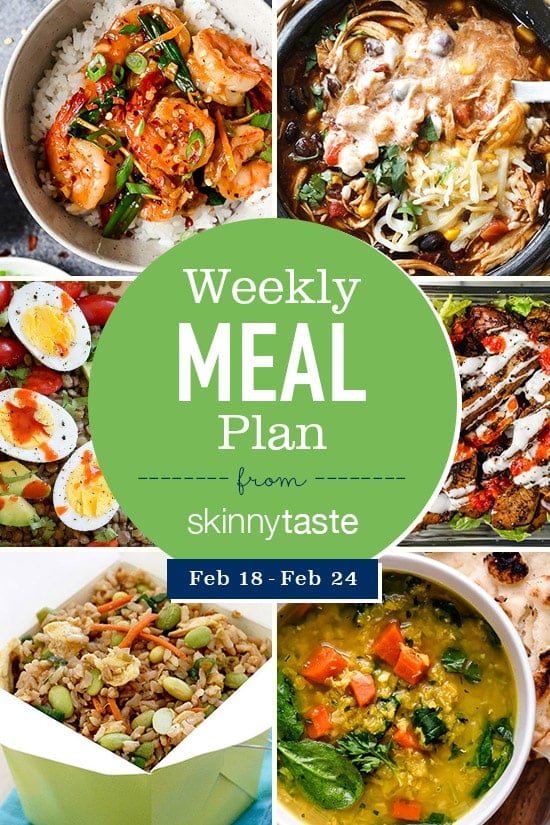
Skinnytaste Meal Plan (February 18-February 24)
http://bit.ly/2SEt30q
Recipes
via Skinnytaste http://bit.ly/2ix3Luq
February 16, 2019 at 11:15PM
http://bit.ly/2SEt30q
A free 7-day flexible weight loss meal plan including breakfast, lunch and dinner and a shopping list. All recipes include calories and Weight Watchers Freestyle™ SmartPoints®.
If you’re new to my meal plans, I’ve been sharing these free, 7-day flexible healthy meal plans (you can see my previous meal plans here) that are meant as a guide, with plenty of wiggle room for you to add more food, coffee, beverages, fruits, snacks, dessert, wine, etc or swap recipes out for meals you prefer, you can search for recipes by course in the index. You should aim for around 1500 calories* per day.
There’s also a precise, organized grocery list that will make grocery shopping so much easier and much less stressful. Save you money and time. You’ll dine out less often, waste less food and you’ll have everything you need on hand to help keep you on track.
Lastly, if you’re on Facebook join my Skinnytaste Facebook Community where everyone’s sharing photos of recipes they are making, you can join here. I’m loving all the ideas everyone’s sharing!
Also, if you don’t have the Skinnytaste Meal Planner, now would be a great time to get one to get organized for 2019! There was a print error last year, but it’s perfect now! You can order it here!
THE DETAILS:
Breakfast and lunch Monday-Friday, are designed to serve 1 while dinners and all meals on Saturday and Sunday are designed to serve a family of 4. Some recipes make enough leftovers for two nights or lunch the next day. While we truly believe there is no one size fits all meal plan, we did our best to come up with something that appeals to a wide range of individuals. Everything is Weight Watchers friendly, I included the updated Weight Watcher Freestyle Points for your convenience, feel free to swap out any recipes you wish or just use this for inspiration!
The grocery list is comprehensive and includes everything you need to make all meals on the plan. I’ve even included brand recommendations of products I love and use often. Cross check your cabinets because many condiments you’ll notice I use often, so you may already have a lot of them.
And last, but certainly not least, this meal plan is flexible and realistic. There’s plenty of wiggle room for cocktails, healthy snacks, dessert and dinner out. And if necessary, you can move some things around to make it work with your schedule. Please let me know if you’re using these plans, this will help me decide if I should continue sharing them!
MONDAY (2/18)
B: PB + J Yogurt (6)
L: Food Cart-Style Chicken Salad with White Sauce* (8)
D: Red Lentil Soup with Spinach* (1) and 1 mini naan (or flatbread) (5)
Totals: Freestyle™ SP 20, Calories 1,008**
TUESDAY (2/19)
B: 2 hard-boiled eggs (0) and an orange (0)
L: Food Cart-Style Chicken Salad with White Sauce (8)
D: Instant Pot Chicken Taco Chili (0) with 2 tablespoons reduced fat cheese blend (1), 1 tablespoon light sour
cream (1) and 1 ounce avocado (1)
Totals: Freestyle™ SP 11, Calories 863**
WEDNESDAY (2/20)
B: PB + J Yogurt (6)
L: Food Cart-Style Chicken Salad with White Sauce (8)
D: LEFTOVER Instant Pot Chicken Taco Chili (0) with 2 tablespoons reduced fat cheese blend (1), 1 tablespoon
light sour cream (1) and 1 ounce avocado (1)
Totals: Freestyle™ SP 17, Calories 915**
THURSDAY (2/21)
B: 2 hard-boiled eggs (0) and an orange (0)
L: Food Cart-Style Chicken Salad with White Sauce (8)
D: One-Pot Spaghetti and Meat Sauce (8) and 1 ½ cups romaine*** (0) with 2 tablespoons Skinny Caesar Dressing
(2)
Totals: Freestyle™ SP 18, Calories 991**
FRIDAY (2/22)
B: 6 ounces plain nonfat Greek yogurt (0) with ½ cup sliced strawberries (0), 1 tablespoon chopped peanuts (2),
and 1 teaspoon honey (1)
L: LEFTOVER One-Pot Spaghetti and Meat Sauce (8) and 1 ½ cups romaine (0) with 2 tablespoons Skinny Caesar
Dressing (2)
D: Honey Garlic Shrimp (2) with Asian Edamame Fried Rice (4)
Totals: Freestyle™ SP 19, Calories 1,018**
SATURDAY (2/23)
B: Eggs and Tomato Breakfast Melts (3) and 1/2 cup grapes (0)
L: Asian Lettuce Wrap Chicken Chopped Salad (8)
D: DINNER OUT!
Totals: Freestyle™ SP 11, Calories 544**
SUNDAY (2/24)
B: 3 Czech Crepes with Berries and Cream (6)
L: Lentil Bowls with Avocado, Eggs and Cholula (2) (Recipe x 2)
D: Slow-Cooker Banh Mi Rice Bowls (10)
Totals: Freestyle™ SP 18, Calories 970**
**Prep Chicken Salad Sunday night for lunch Mon-Thurs. Freeze any leftover soup you/your family won’t eat
**This is just a guide, women should aim for around 1500 calories per day. Here’s a helpful calculator to estimate
your calorie needs. I’ve left plenty of wiggle room for you to add more food such as coffee, beverages, fruits,
snacks, dessert, wine, etc.
***Chop extra 1 ½ cups romaine for lunch Friday
Recipes
via Skinnytaste http://bit.ly/2ix3Luq
February 16, 2019 at 11:15PM

The Flat Belly Fix
This is the only 21-day rapid weight loss system that allows you to easily lose an average of 1 lb a day for 21 days without feeling hungry or deprived. The unique and brand new techniques used in this System are proven SAFE. And they do not cause the rebound weight gain common to all the other rapid weight loss systems that are not backed by the latest science. The Flat Belly Fix System takes advantage of a recent scientific discovery that proves the effective weight loss power of an ancient spice. Combined with other cutting-edge ingredients in the patent-pending Flat Belly Fix Tea™ — that you can make right in your own kitchen in minutes — this System is the quickest, easiest and most enjoyable way to quickly get the body you desire and deserve. Click Here
Categories
All
Gluten Free
Pancakes
Protein
Archives
November 2020
October 2020
September 2020
August 2020
July 2020
June 2020
May 2020
April 2020
March 2020
February 2020
January 2020
December 2019
November 2019
October 2019
September 2019
August 2019
July 2019
June 2019
May 2019
April 2019
March 2019
February 2019
January 2019
December 2018
November 2018
October 2018
September 2018
August 2018
July 2018
June 2018
May 2018
April 2018
March 2018
February 2018
January 2018
December 2017
November 2017
 RSS Feed
