
|
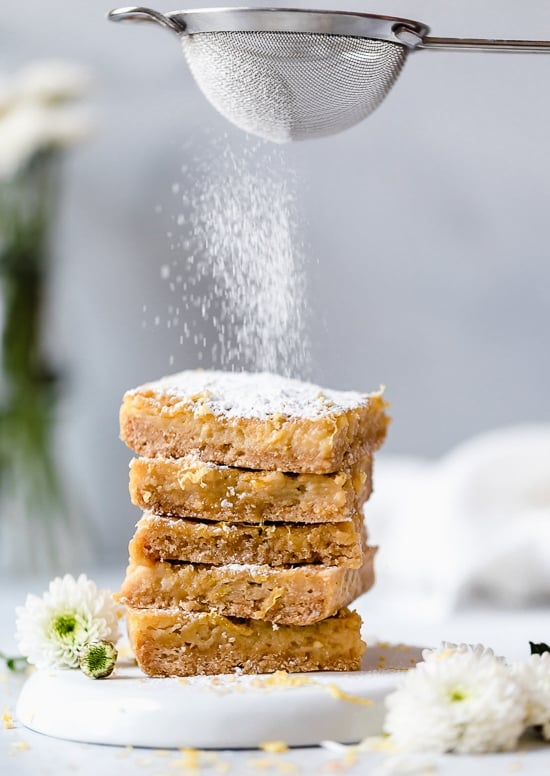
Honey Lemon Bars
https://ift.tt/2JU5Djy Pucker Up! These sweet and tangy Honey Lemon Bars made with fresh lemon, lemon zest and honey and a whole wheat shortbread crust are a little lighter than traditional lemon bars, but are so tasty and hard to resist.
I love a good sweet and tangy lemon treat. Some of my other favorite lemon treats are Lemon Cheesecake Yogurt Cups, Pink Lemonade Confetti Cupcakes and Lemon Cranberry Scones. Recipes via Skinnytaste https://ift.tt/2ix3Luq March 31, 2019 at 07:57PM
0 Comments
Crispy Sweet Potato Pancake Lettuce Wraps
https://ift.tt/2Vba6zu 1 Make the nuoc cham sauce: Combine 1 tablespoon of the sugar, 1 1/2 tablespoons of the lime juice, and the water. Taste the limeade, and if needed, add the remaining 1 teaspoon sugar and/or 1 1/2 teaspoons lime juice; dilute with water if you go too far. If there’s an unpleasant tart-bitter edge, add the vinegar to rounds things out. Finally, add the fish sauce to create a bold, forward finish. If desired, add the chiles and/or garlic. Set aside. You should have 1/2 cup of nuoc cham, and this can be made and refrigerated up to 8 hours before serving.
2 Salt and squeeze out the sweet potato and carrot: In a large bowl, combine the grated sweet potato, carrot, and salt. Massage with both hands until wet and squishy, about 1 minute. Transfer the grated veggies to a piece of muslin or a non-terry dish towel, and wrap the veggies in the towel. Standing over the sink, firmly squeeze and twist to expel moisture. Dump the veggies into a dry bowl.
3 Assemble the pancake batter: Add the green onion, mixing with a fork to distribute well. Mix in the pepper, fish sauce, cornstarch, and rice flour. Add the egg, break it up with a fork, and mix well. Press the mixture down to compact it, and then divide into 8 portions like a pie, using a 1/4 cup measuring scoop.
4 Fry the pancakes: Warm a large nonstick skillet over medium heat, then add about 2 tablespoons of oil to film the bottom. Fry in two batches, 4 pancakes at a time. For each one, use a fork and your fingers to scoop up the 1/4 cup portions of the potato-and-carrot mixture (one wedge of the "pie"). Deposit into the skillet, spreading and flattening the mixture with the measuring cup bottom and fork to make a 3 1/2-inch-wide pancake (mine often look like Australia). Fry for about 3 minutes, until bits of the fringe-like edges are richly brown and crisp. Drizzle 2 to 3 teaspoons of oil on top of the pancakes, then wield 2 spatulas to carefully flip each one over. (The pancakes are delicate, so 2 spatulas are super handy.) Fry for about 3 minutes longer, until crisp and brown underneath. Cool on a rack. Fry the remaining batch.
5 Assemble and serve the lettuce wraps: Serve with the lettuce, herbs, and sauce. Invite guests to build their own lettuce leaf wraps containing a piece of pancake (pass scissors or use forks/fingers to break up the pancakes into smaller pieces suitable for wrapping up), with 2 or 3 herb leaves and/or torn cilantro sprigs. Dip in the sauce and eat. These are really best the day they are made.
Recipes via Simply Recipes https://ift.tt/2F9fkDA March 31, 2019 at 09:01AM
Double Vanilla Cupcakes
https://ift.tt/2HN4Hvv  Hands up if you love VANILLA! These Double Vanilla Cupcakes are infused with velvety, sweet vanilla flavor in both the cake and the frosting. Make them for a birthday, office party, or "just because"! Photography Credit: Elise Bauer Let’s Celebrate Vanilla!It raises my hackles when someone calls something “plain vanilla.” Plain? Plain?! Are they insane?! There’s nothing plain about vanilla! Given, I’m a little more passionate about the spice than most (if it wasn’t apparent enough). Heck, I named my blog after the stuff. I have no less than nine varieties of vanilla beans in my pantry! Not to mention six kinds of vanilla extract – three of them homemade. Vanilla oil, vanilla sugar, chopped up vanilla beans. I even keep a dried bean in the filter of my vacuum so the place smells like vanilla when I clean. Different Types of VanillaEven when we discuss the flavor of vanilla, there’s nothing plain about it. Mexican vanilla has a velvety, sweet and creamy scent that begs to be made into puddings. Tahitian vanilla has a heady aroma of figs, that reminds me of summers eating the sticky fruits stuffed with cheese and honey. The dark and rummy smell of Madagascar vanilla hint at a slight, musky nose of tobacco. My favorite, the Tonga vanilla bean which, after deep inhale, will bombard you with images of black cherries. A True Vanilla Cupcake RecipeAny of these beans are perfect in this delightful vanilla cupcake recipe, a recipe that I’m very proud of. It’s a fantastic way to show off vanilla, a spice that does love center stage. I like to think of vanilla as my humble, endearing, sweet-smelling obsession. Personally, I feel this particular vanilla cupcake recipe will seduce you to the way of vanilla as well. If you don’t have a vanilla bean you can get away with just the vanilla extract, but this vanilla cupcake recipe is infinitely better with the beans. Ways to Use the Leftover Vanilla Bean PodWhile they can be expensive (buy online), keep in mind that even after you scrape the seeds out of the pod, you can use the pod many times over. Steeping the pod into cream for ice cream, pop it in a bottle of vodka for homemade extract, or in a jar of sugar for vanilla sugar are just some suggestions. No matter which way you choose, these homemade vanilla cupcakes will be delicious. Other FrostingsThis recipe includes a recipe for (you guessed it) vanilla-infused frosting! If you’re looking for something a little different, though, try a cream cheese frosting or even this extra-rich chocolate frosting! Want More Cupcakes?!Updated March 31, 2019 : We spiffed up this post to make it sparkle! No changes to the original recipe. Double Vanilla Cupcakes RecipePrintIngredientsFor the cupcakes:
For the frosting:
Method1 Preheat oven to 350°F and prepare the cupcake pan: Line a 12-cup muffin or cupcake tin with cupcake liners and set aside. 2 Steep vanilla bean pod and seeds in hot milk: While the oven preheats, cut open and scrape out the seeds of a vanilla bean. Place the seeds, empty bean, and the milk in a small saucepan. Warm over medium heat for a few minutes until the milk is just starting to steam. Be careful not to boil or scald the milk. Remove from heat and allow the milk to cool with the vanilla beans. After it cools, remove the bean pod. (Wash it and then place it out to dry so it can be used again.) 3 Whisk together dry ingredients In one bowl whisk together the flour, baking powder, and salt. 4 Whisk vanilla milk, extract, and sour cream: In another bowl whisk together the vanilla-steeped milk, vanilla extract, and sour cream. 5 Begin making the cupcake batter: Beat the butter in the bowl of a stand mixer fitted with a beater attachment for about 3 minutes on medium speed, then add the sugar and beat until light and fluffy, about 3 minutes. Add the egg and beat for 30 seconds. Add the egg whites, one at a time, beating for 30 seconds each. Scrape down the sides of the mixing bowl. 6 Finish the cupcake batter: Add half the flour mixture to the batter and mix on low until combined. Then add all of the milk mixture, and mix to combine. Finally, add the remaining flour mixture and mix until just combined and you see no more visible dry flour. Be careful not to over-mix. 7 Bake: Divide the batter evenly between the cupcake liners in the muffin tin. Bake at 350° F for 18-20 minutes or until slightly golden brown. Rotate the pan after 10 minutes to ensure even baking. Be sure to keep a close eye as these can get over-baked quickly. 8 Cool: Allow the cupcakes to cool for a few minutes in the pan, then carefully transfer them to a wire rack to cool completely. 9 Frost when cupcakes are cool: Beat the butter for the frosting and slowly add in the powdered sugar. Scrape the seeds out of the vanilla bean (or vanilla extract if using) and beat in. Frost each cupcake individually and serve. Cupcakes are best served the same day they are made, though will keep fairly well for a few days in an airtight container at room temperature. Hello! All photos and content are copyright protected. Please do not use our photos without prior written permission. If you wish to republish this recipe, please rewrite the recipe in your own unique words and link back to Double Vanilla Cupcakes on Simply Recipes. Thank you! PrintProducts We LoveThis post may contain links to Amazon or other partners; your purchases via these links can benefit Simply Recipes. Read more about our affiliate linking policy. Recipes via Simply Recipes https://ift.tt/2F9fkDA March 31, 2019 at 08:08AM
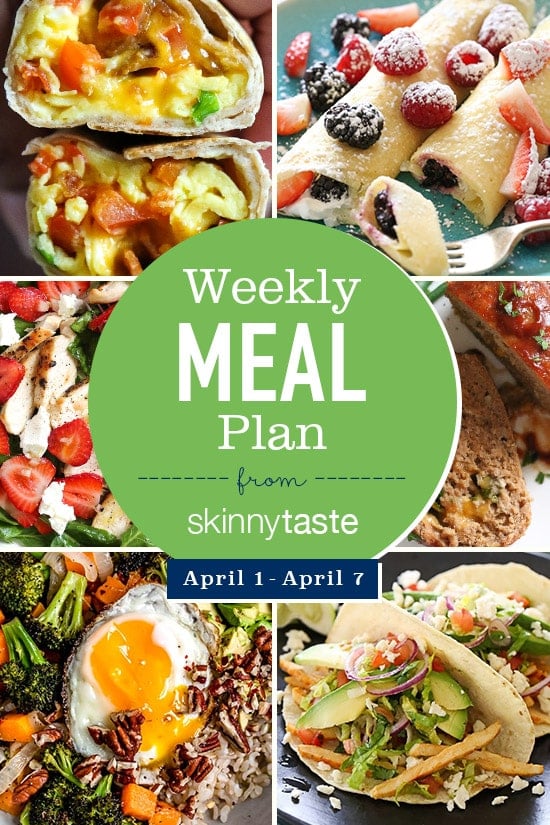
Skinnytaste Meal Plan (April 1-April 7)
https://ift.tt/2Oxda6o A free 7-day flexible weight loss meal plan including breakfast, lunch and dinner and a shopping list. All recipes include calories and Weight Watchers Freestyle™ SmartPoints®.
Hi guys! Spring is in the air, can you feel it? Bring on the farmers markets! I will be doing a book signing next Sunday April 7th, hosted by Le Creuset at Woodbury Common Premium Outlets, from 2 PM – 3:30 PM. The address if Le Creuset 869 Adirondack Way, Central Valley, New York 10917. If you are in the area stop by and say hi! I will also have book signings at their Mohegan Sun loaction April 13th and their Wrentham location April 14th. Save the date! If you’re new to my meal plans, I’ve been sharing these free, 7-day flexible healthy meal plans (you can see my previous meal plans here) that are meant as a guide, with plenty of wiggle room for you to add more food, coffee, beverages, fruits, snacks, dessert, wine, etc or swap recipes out for meals you prefer, you can search for recipes by course in the index. You should aim for around 1500 calories* per day. There’s also a precise, organized grocery list that will make grocery shopping so much easier and much less stressful. Save you money and time. You’ll dine out less often, waste less food and you’ll have everything you need on hand to help keep you on track. Lastly, if you’re on Facebook join my Skinnytaste Facebook Community where everyone’s sharing photos of recipes they are making, you can join here. I’m loving all the ideas everyone’s sharing! If you wish to get on the email list, you can subscribe here so you never miss a meal plan! Also, if you don’t have the Skinnytaste Meal Planner, now would be a great time to get one to get organized for 2019! There was a print error last year, but it’s perfect now! You can order it here! THE DETAILS:Breakfast and lunch Monday-Friday, are designed to serve 1 while dinners and all meals on Saturday and Sunday are designed to serve a family of 4. Some recipes make enough leftovers for two nights or lunch the next day. While we truly believe there is no one size fits all meal plan, we did our best to come up with something that appeals to a wide range of individuals. Everything is Weight Watchers friendly, I included the updated Weight Watcher Freestyle Points for your convenience, feel free to swap out any recipes you wish or just use this for inspiration! The grocery list is comprehensive and includes everything you need to make all meals on the plan. I’ve even included brand recommendations of products I love and use often. Cross check your cabinets because many condiments you’ll notice I use often, so you may already have a lot of them. And last, but certainly not least, this meal plan is flexible and realistic. There’s plenty of wiggle room for cocktails, healthy snacks, dessert and dinner out. And if necessary, you can move some things around to make it work with your schedule. Please let me know if you’re using these plans, this will help me decide if I should continue sharing them! MONDAY (4/1) Totals: Freestyle™ SP 16, Calories 1,001** TUESDAY (4/2) WEDNESDAY (4/3) Totals: Freestyle™ SP 17, Calories 819** THURSDAY (4/4) Totals: Freestyle™ SP 15, Calories 882** FRIDAY (4/5) Totals: Freestyle™ SP 15, Calories 1,083** SATURDAY (4/6) Totals: Freestyle™ SP 9, Calories 511** SUNDAY (4/7) *Freeze any leftover burritos you/your family won’t eat. Prep Cobb Salad Sunday night, if desired **This is just a guide, women should aim for around 1500 calories per day. Here’s a helpful calculator to estimate Recipes via Skinnytaste https://ift.tt/2ix3Luq March 30, 2019 at 11:41AM
Asparagus and Ricotta Bruschetta
https://ift.tt/2TLaxPs This bruschetta is simple fare, but take a bite, close your eyes, and swoon over creamy, lemon-scented ricotta topped with the first delicate asparagus of the season. It’s finally spring. Carpe diem! With so few ingredients, the devil is in the details with this recipe, as it always is when it comes to simple food. Not to say you should overcomplicate it, but a few little tweaks take it from good to scrumptious. WHAT IS BRUSCHETTA?Bruschetta (pronounced broo-skeh-tah) is nothing more than toast—Italian style! The word comes from the Italian “bruscare,” which means to roast over coals. Large oval or round-ish slices of chewy, crusty bread are typically grilled, brushed with olive oil, and scraped with a garlic clove. If the slices are large and you want manageable size pieces, you can cut them in halves or quarters after grilling and topping them. If it’s not grilling season, you can toast the bread under the broiler instead. To get the elusive chewy center, a broiler or a grill function in the same way: high heat to toast the outside without drying out the slice all the way through. Depending on the heat of your broiler or grill, the timing can vary. Just keep your eye on it, and turn it as soon as it browns. Bruschetta is often topped with chopped tomatoes when they are in season, but there are many variations! After making this version with asparagus, try:
WHAT IS THE BEST BREAD FOR BRUSCHETTA?When you’re buying the bread, think like an Italian! The bread should be crusty on the outside and somewhat dense and chewy on the inside (as opposed to airy). I prefer sourdough because of its extra boost of flavor, but it’s not a deal breaker. In fact, the bread in Tuscany has no salt, so the Italians seem to manage well with unseasoned bread when it’s topped with good olive oil, salt, and tasty bits. Buy the whole unsliced loaf and cut it by hand into 1/2-inch thick slices. You want them to be at least 1/2-inch thick to support the toppings. When toasted, the thick slices become crisp and brown on the outside and stay slightly chewy on the inside—a signature attribute of good bruschetta. Yum! You will find many bruschetta recipes using a sliced baguette as a base. They are good for smaller bite-sized crostini, but with this recipe, you are aiming for larger pieces of bread with a sturdy texture that will make delicious toast. A baguette will work, but it’s not my first choice. Also stay away from ordinary sandwich bread, rye bread, and brioche. THE BEST RICOTTA TO BUYI’ve been spoiled because a local market here in New England carries a brand of ricotta that is hand-dipped, ultra-creamy, and firm. I know, that’s a mean little tease, but you don’t need that brand to make this dish delicious! Just look for the best whole milk ricotta your market carries--or make your own! Since ricotta is a major player in this flavor combination, I like to use whole milk ricotta rather than part skim; it has a rich, velvety flavor and texture that complements the asparagus. HOW TO BUY THE BEST ASPARAGUSAsparagus is best and freshest when grown locally and in season, which usually means spring months for most parts of the United States. It’s definitely worth the wait. The tips should be closed and compact, and the spears should be sturdy, smooth (not wrinkled), and hydrated. Most asparagus you find in the market is green, but you could encounter purple or white varieties as well, which would also be fine to use. For this recipe, buy asparagus thick enough to peel—think thicker than a pencil. If you don’t plan on peeling them, then don’t worry about the size. Any tender asparagus will do. I prefer to peel asparagus for reasons I outline in the next section. HOW TO PREPARE ASPARAGUSI’m going to ask you to do a little bit of work on this one. I want you to peel the bottom half of the spears. It’s ten minutes of extra time, tops, I promise! Why? Peeling the stalk leads to tender and sweet spears when cooked. If you follow the common practice of snapping the stalks at their breaking point when you bend them to eliminate the tough and woody bottoms, you lose about one-third of the spears. Peeling them removes some of the toughness, and you need only cut off about one inch from the bottom of the stalk, so you can keep (and eat!) most of the stalk. To peel your asparagus, do the following:
That’s it! Very thick stalks can be peeled and cut in half lengthwise, if that’s all you can find. WHAT’S THE BEST OLIVE OIL?You don’t need fancy olive oil for bruschetta, but if you happen to have it, now is the time to pull it out! A fruity extra-virgin olive oil would pair well with the asparagus in bruschetta. Extra-virgin oil comes from the first pressing of the olives, usually within a day or two of harvesting. It is extracted from the olives by mechanical means (with low heat and no chemicals), has low acidity, and just tastes better than olive oil without the extra-virgin label. (Those other types might be labeled as pure, light, or simply olive oil.) CAN I MAKE THIS AHEAD OF TIME?The ricotta, lemon, herbs, and spices can be mixed together at least a day ahead of time, covered, and kept in the refrigerator. It’s best to cook the asparagus and toast the bread the day you serve it. But since life can get busy, you can make the asparagus ahead of time by following these few tips:
PUTTING IT ALL TOGETHERNow that you know how to toast the bread, what kind of ricotta to buy, and how to cook the spears, you are in business! Slather those toasts with olive oil, ricotta, and your perfectly cooked asparagus. Sprinkle with plenty of salt and pepper, a little more olive oil, and serve with lemon wedges if you like. MORE FAVORITE SPRING ASPARAGUS RECIPES!Recipes via Simply Recipes https://ift.tt/2F9fkDA March 30, 2019 at 09:09AM
Simply Recipes 2019 Meal Plan: April Week 1
https://ift.tt/2YuDm6i  Simply Recipes 2019 Meal Plan: April Week 1Make the most of this week by leaving the meal plan to us! Peas and asparagus dishes welcome Spring while pizza and tostadas quell those comfort food cravings! This week please welcome, Rachel Knecht, and her meal plans! Rachel is a recipe tester here on Simply Recipes and the blogger behind Baking with Rachel. The month of April feels like a fresh start and one that I am excited to embrace. As tender heads of lettuce, juicy strawberries, and bundles of asparagus make their way to the produce aisle; I am inspired to refresh our family meals. Meal planning used to feel daunting. Over the years I have come up with a few strategies to make the task easier. First, I keep a list of all the meals that are sure hits. These meals change depending on the season, but, honestly, I can eat grilled cheese sandwiches anytime of the year! To save even more time, each day of the week has a theme (Monday = Pasta, etc). The themes give the week a natural variety without having to think too hard. I plan meals on Sunday and give each family member a chance to give input. Then I write the chosen meals on a whiteboard to remind me what’s for dinner. For me, getting into the habit of meal planning has helped keep the week running smoothly. I hope this week’s meal plan helps simplify your week, too. This post may contain links to Amazon or other partners; your purchases via these links can benefit Simply Recipes. Read more about our affiliate linking policy. Recipes via Simply Recipes https://ift.tt/2F9fkDA March 30, 2019 at 09:08AM
Tilapia with Olives, Mushrooms, and Tomatoes
https://ift.tt/2OyfrhZ One of our favorite tilapia recipes! This quick and easy one-pan meal is cooks the tilapia with onions, garlic, diced tomatoes, mushrooms, and olives. Photography Credit: Elise Bauer Tilapia FiletsTilapia, a tasty farm-raised fish originally from Africa, has become more and more popular here in the States. Tilapia recipes are abundant, and the fish is easy to prepare as long as you buy filets. I recently brought home a whole tilapia from our local Asian fish market and made quite a mess of trying to fillet it myself. Dad pitched in, with no more luck than I, and we ended up throwing the pieces (you couldn’t quite call them fillets anymore) into a fish stew. Now we know better. Just buy the straight fillets. 
Fresh Tilapia RecipeTilapia are mild tasting, and fresh vegetables can really shine and highlight this relatively inexpensive fish. Here is a quick and easy way of cooking tilapia, a one-pan way of preparing this versatile fish that we found years ago from Better Homes and Gardens. The preparation is similar to Veracruz-style in this tilapia recipe, shallow poached on top of a bed of sliced onions, tomatoes, green olives, and mushrooms. It’s fresh, easy, and delicious. What to Serve with TilapiaThis tilapia is practically a meal unto itself! This said, a piece of crusty bread or a scoop of rice would go quite well alongside. Want more Easy Fish Recipes?Updated March 29, 2019 : We spiffed up this post to make it sparkle. No changes to the original recipe. Tilapia with Olives, Mushrooms, and Tomatoes RecipePrintFeel free to use any tender white fish fillet with this recipe, for example cod or red snapper. Ingredients
Method1 Cook the onions and garlic: Heat olive oil in a large skillet over medium heat. Add the sliced onions and cook until translucent, about 5 minutes. Add the garlic and cook a minute more.
3 Make the sauce: Add the canned tomatoes and their juices. Add the sliced mushrooms, chopped olives, oregano, salt and pepper. Bring to a simmer. 4 Add the fish: Lay the fish fillets gently on top of the onion tomato olive mixture and spread a little sauce over the fish.
Return to a simmer (it's just the juices from the tomatoes that are simmering). Lower the heat to low and cover the pan. Cook or 8 to 10 minutes or until the fish easily flakes when tested with a fork. 4 Serve: Use a wide spatula to lift the fillets from the pan to a serving plate. Spoon sauce over fish. Serve with rice, and/or crusty bread. Hello! All photos and content are copyright protected. Please do not use our photos without prior written permission. If you wish to republish this recipe, please rewrite the recipe in your own unique words and link back to Tilapia with Olives, Mushrooms, and Tomatoes on Simply Recipes. Thank you! PrintThis post may contain links to Amazon or other partners; your purchases via these links can benefit Simply Recipes. Read more about our affiliate linking policy. Recipes via Simply Recipes https://ift.tt/2F9fkDA March 29, 2019 at 08:00AM
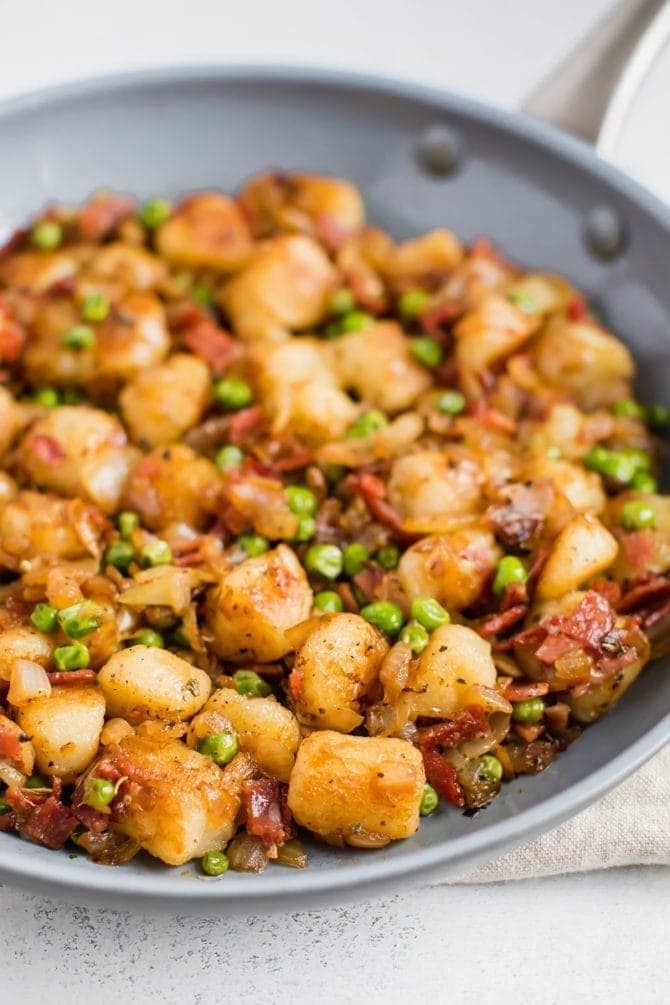
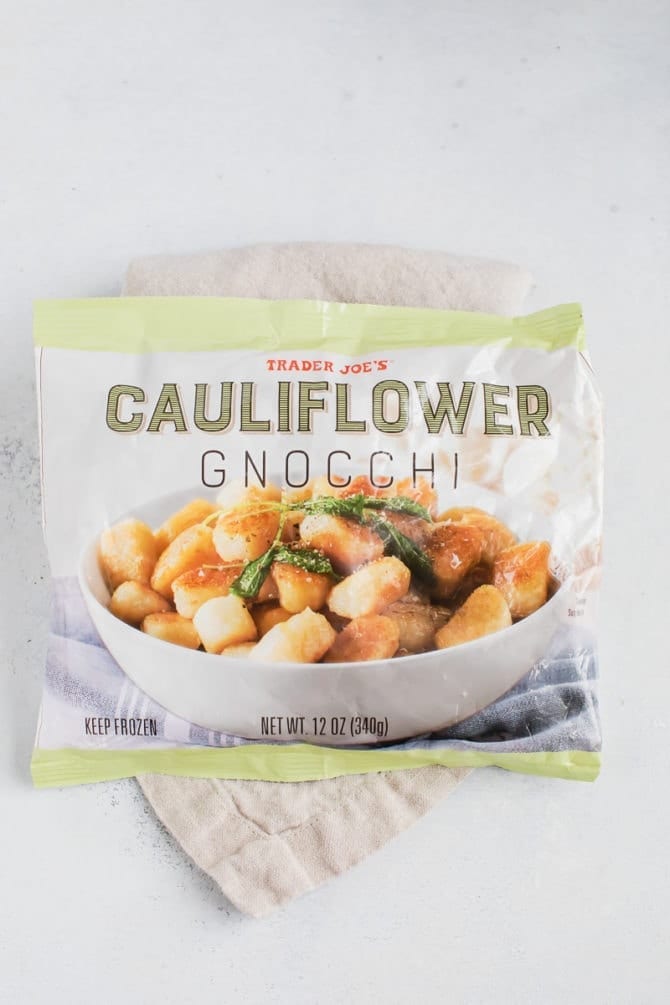
Pan Roasted Cauliflower Gnocchi With Onions, Peas and Turkey Bacon
https://ift.tt/2U4dwaL Looking for more ways to turn the Cauliflower Gnocchi from Trader Joe’s into a meal? Try this pan roasted cauliflower gnocchi with onions, peas and turkey bacon. I think I’ve found my new favorite way to eat the cauliflower gnocchi from Trader Joe’s. It’s a super simple combo, so flavorful and easy peasy to whip up. What more could you ask for?
A little backstory… last year around this time Trader Joe’s launched their cauliflower gnocchi and the world has become obsessed. I’m honestly not a huge gnocchi person so this product didn’t excite me much, plus it was always sold out at my local store so I was super late to the cauliflower gnocchi scene.
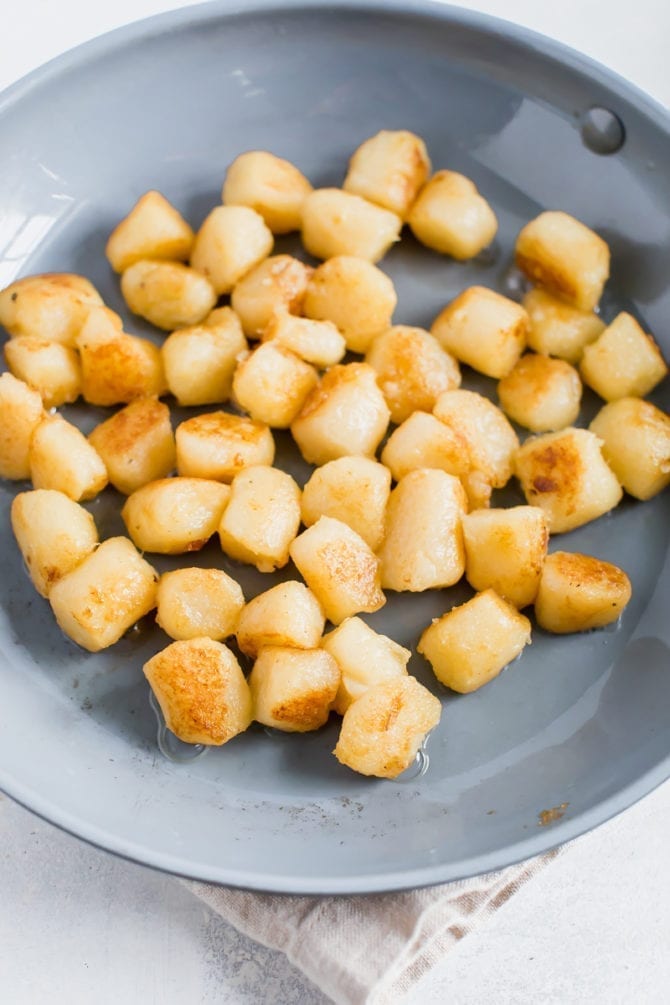
Don’t Follow the Instructions on the PackageThat said, I finally had a chance to try it last year and based on warnings from other cauliflower gnocchi fanatics I didn’t follow the package instructions. The package mentions boiling or microwaving the gnocchi and adding water if you pan-sauté them. Do NOT follow these instructions. You’ll end up with mushy, sticky cauliflower gnocchi and it will be sad.
So far the best way I’ve found to cook the cauliflower gnocchi is to pan roast it in a little olive oil or butter. The first time I made the cauli gnocchi I pan roasted it with butter and served it with Rao’s homemade pasta sauce. It tasted totally fine, but I wasn’t blown away. Isaac on the other hand LOVED it and couldn’t stop raving about how much it tasted like regular gnocchi. Needless to say, I knew I needed to find a way to cook cauliflower gnocchi that both Isaac and I would enjoy. This pan-roasted cauliflower gnocchi with onions, peas and turkey bacon totally fits that bill!
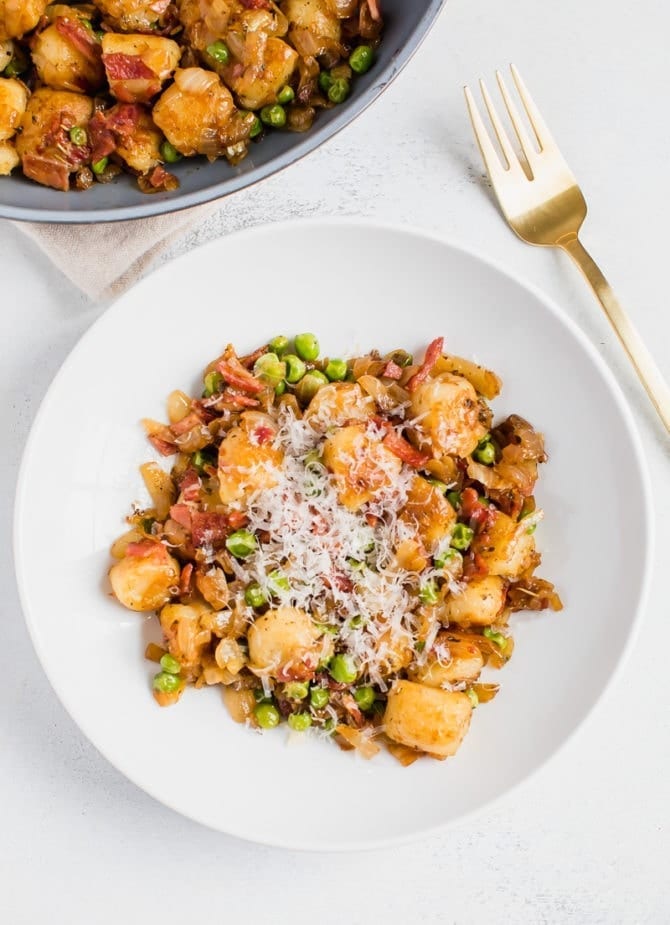
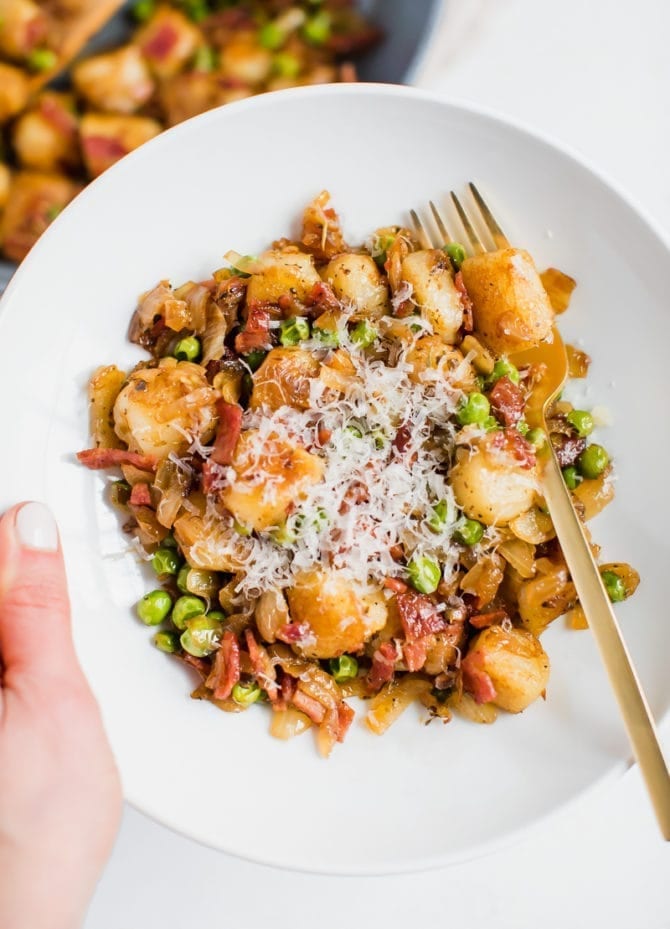
I love the combo of the pan-roasted gnocchi with the caramelized onions, sweet peas, savory and crisp bacon and the parm. These things are all great on their own, but they’re so amazing together. Now that I’ve found one way that I really enjoy the cauliflower gnocchi, I’m excited to experiment and try some different preparation techniques. I’m thinking I might try a cauliflower gnocchi sheet pan dinner next!
If you make this pan roasted cauliflower gnocchi recipe, be sure to leave a comment and star rating below letting me know how they turn out. Your feedback is super helpful for the EBF team and other EBF readers! Print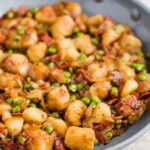 DescriptionTurn Trader Joe’s cauliflower gnocchi into a quick weeknight meal with onions, peas and turkey bacon. Ingredients
Instructions
Notes
Nutrition
Keywords: pan roasted cauliflower gnocchi The post Pan Roasted Cauliflower Gnocchi With Onions, Peas and Turkey Bacon appeared first on Eating Bird Food. Recipes via Eating Bird Food https://ift.tt/1L45wsH March 29, 2019 at 07:17AM
Skillet Chicken Parmesan
https://ift.tt/2OvVdoP Good old-fashioned chicken Parmesan gets the skillet treatment in this one-pot dish. Serve with rice or spaghetti for comfort food at its finest—and fastest! Photography Credit: Nick Evans One of the first classic Italian dishes I mastered was a traditional chicken Parmesan. It’s a special dish but does require some serious work. A classic chicken Parmesan recipe will probably take a few hours to fry, bake, and clean up. As a reward, however, it’ll make a huge amount of food. This Skillet Chicken Parmesan has all the same flavors as the traditional version, but is ready in much less time. Plus, everything is made in one oven-safe skillet! Can you say easy cleanup?! EASY CHICKEN PARM IN ONE SKILLETThe only thing you need to make this recipe happen is a good oven-safe skillet for cooking everything. I use a cast iron skillet with high sides. First, I bread and then lightly fry the chicken on the stovetop in a little olive oil. You could use any oil you have, but I like the flavor olive oil gives. Once the chicken is fried, remove the chicken from the pan and pour out the oil (you can save it for a few other fry sessions if you want). Then cook the onions, garlic, and sauce in the same skillet. Not only does this save on cleanup because you don’t need to clean it before re-using it, but you get a lot of flavor by scraping up the bits stuck to the pan from the chicken fry. Once the sauce comes together, nestle the chicken pieces back in the skillet and bake it quickly in the oven to finish cooking the chicken and melt the cheese on top. Done deal! 
Low-Carb Chicken Parm OptionI like to bread my chicken cutlets for this skillet version, but if you wanted a lighter option, and one that required even LESS cleanup, here’s what you do. Eliminate the breading, add a small amount of olive oil to the skillet, and just pan sear the chicken cutlets until they are almost cooked through (four to five minutes per side). Then finish the recipe as listed, and you end up with a low-carb version of chicken Parmesan with no breading! HOW TO SERVE CHICKEN PARMESANI normally serve this Chicken Parmesan over spaghetti, but feel free to experiment with it, as the flavors are great on so many things. You could serve it over rice and be just fine, or with a big piece of crusty bread and a salad. HOW TO STORE AND REHEATChicken Parmesan keeps really well in the fridge for four to five days, or you could freeze it once it has cooled off. I find that it reheats the best in the oven with some of the sauce. If the sauce is too thick out of the fridge, thin it out with some water before reheating the dish. In a 325°F oven, heat the chicken for about 20 minutes to warm everything thoroughly and re-melt the cheese. LOOKING FOR MORE EASY CHICKEN RECIPES?Skillet Chicken Parmesan RecipePrintIngredients
Special equipment:
Method1 Preheat oven to 400°F. Heat olive oil in a 12-inch oven-safe skillet over medium heat. 2 Bread the chicken: Prepare your breading stations by stirring the salt and pepper with the flour in one bowl, whisking the egg in a second bowl, and measuring breadcrumbs and Parmesan cheese into a third bowl. Coat chicken cutlets with seasoned flour. Dust off any extra flour. Transfer chicken cutlets to egg mixture and coat. Then transfer to the breadcrumbs and coat. Place breaded chicken on a plate.
3 Fry the chicken: You'll know the oil is ready when a few breadcrumbs sizzle immediately when added to the oil (325°F). Add breaded chicken cutlets and fry for 4 minutes per side. The chicken should be 90 percent cooked through at this point; it should not be 100 percent cooked through. Remove chicken from the skillet, and carefully pour the olive oil into a bowl to cool, leaving about a tablespoon in the skillet. Don’t rinse out the skillet.
4 Make the sauce: Add the onion and garlic to skillet and cook over medium-low heat for 2 minutes, until onion is translucent. Add the marinara sauce and bring to a low simmer. 5 Finish the chicken Parm: Add the chicken back to the skillet in the sauce. Top each chicken piece with a slice of mozzarella cheese. Place the skillet in the oven and bake for 10 to 12 minutes until the sauce is bubbling, the cheese is melted, and the chicken registers 165°F in the thickest parts.
6 Serve: Serve chicken Parmesan immediately over pasta, rice, or even with bread and a salad. Garnish with red pepper flakes and fresh basil.
LEFTOVERS! Leftover chicken Parmesan can be stored in the fridge for 4 to 5 days once it has cooled. For best results, reheat chicken Parm in a 325° F oven with some of the sauce until the cheese is re-melted. Hello! All photos and content are copyright protected. Please do not use our photos without prior written permission. If you wish to republish this recipe, please rewrite the recipe in your own unique words and link back to Skillet Chicken Parmesan on Simply Recipes. Thank you! PrintProducts We LoveThis post may contain links to Amazon or other partners; your purchases via these links can benefit Simply Recipes. Read more about our affiliate linking policy. Recipes via Simply Recipes https://ift.tt/2F9fkDA March 27, 2019 at 09:03AM
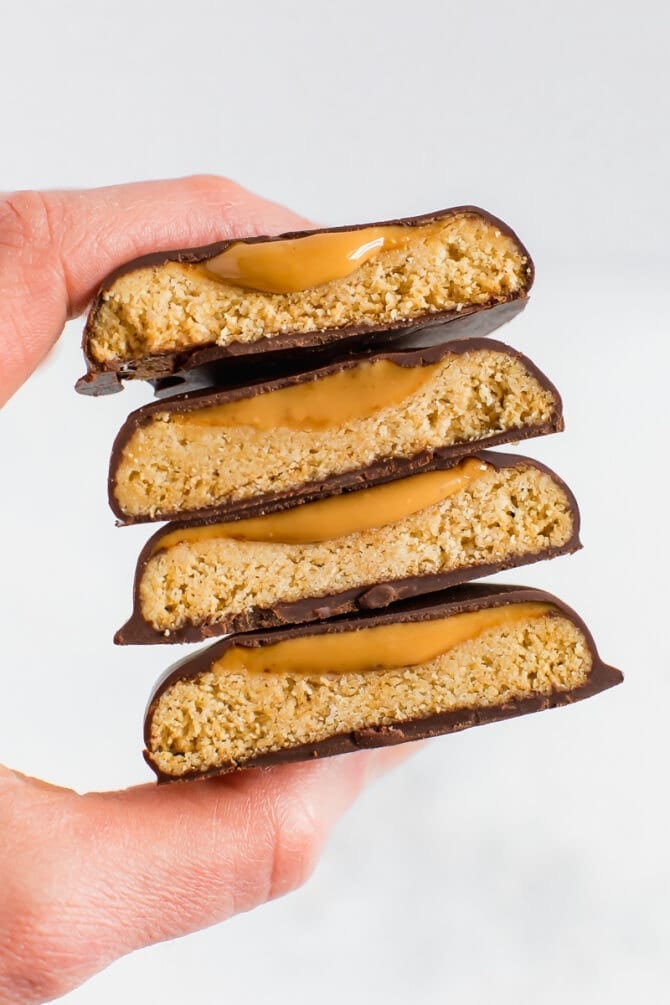
Homemade Healthy Tagalongs
https://ift.tt/2JHrY3D Make healthy Tagalongs at home with only 7 simple ingredients. We’re using almond flour cookies, peanut butter and melted chocolate chips to create a vegan and gluten-free version of this Girl Scout classic! I am so dang excited to share this recipe because everyone has been obsessed with my healthy Girl Scout cookie recreations. Both the 4-Ingredient Samoas and Healthier Thin Mints were a major hit so I know you’re going to love these Healthy Tagalongs. Early taste-testers have said that they’re the best Girl Scout cookie recreation yet and given my love for all things peanut butter and chocolate, they’re definitely on the top of my list too!
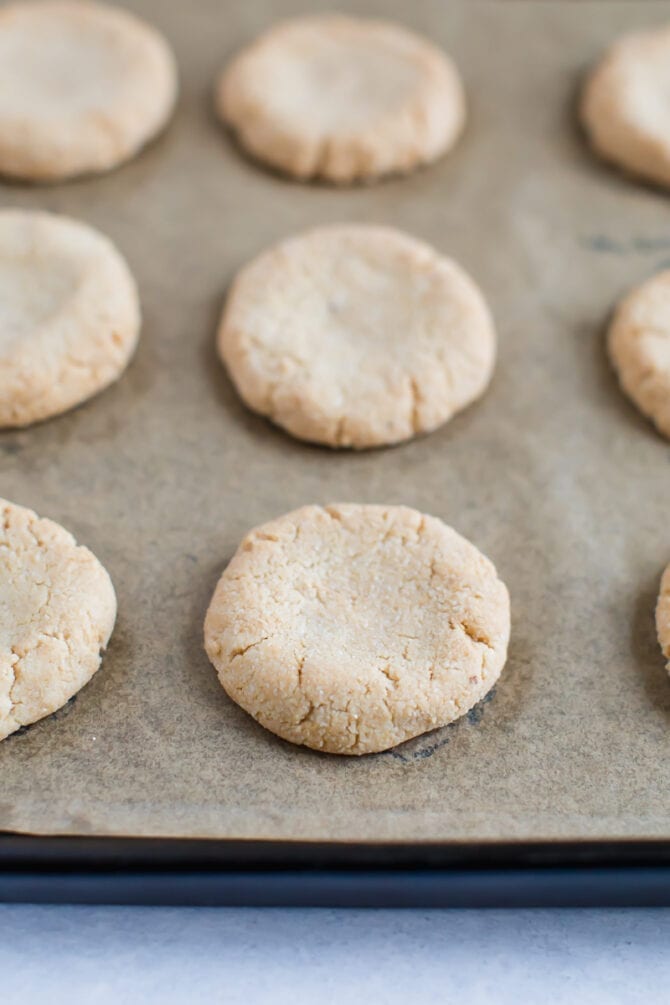
There are three main steps to making these healthy tagalongs:
They’re super simple to make… the hardest part might be waiting for the cookies to bake or maybe it’s waiting for the chocolate to set… either way, the whole process doesn’t take long so before you know it you’ll be diving in to these tasty peanut butter chocolate cookies.
When I think of my top flavor combinations of all time, peanut butter and chocolate are at the top of the list. Over the years I’ve made:
… this list could truly go on for pages, but you get the idea. I LOVE the combination of salty peanut butter with sweet chocolate. It’s seriously a match made in heaven.
I think another reason I’m obsessed with these cookies (besides the flavor) is the texture! The crunchy cookie center is soooo satisfying. Don’t get me wrong, I love protein balls that taste like cookies, but sometimes they aren’t satisfying when I’m craving the real deal. My brain can tell when I’m eating a cookie and when I’m eating a cookie-wanna-be!
I’m so glad this recipe is finally in your hands. I know it will be hard to share these cookies with friends and family (you’ll want to save them all for yourself), but share the love! Let’s make Girl Scout cookie season a little healthier for everyone.
If you make these homemade healthy tagalongs be sure to leave a comment and star rating letting me know how they turned out! Your feedback is so helpful for the EBF team and other EBF readers. Print DescriptionMake healthy Tagalongs at home with only 7 simple ingredients. We’re using almond flour cookies, peanut butter and melted chocolate chips to create a vegan and gluten-free version of this Girl Scout classic! Ingredients
Instructions
Nutrition
Keywords: healthy tagalongs The post Homemade Healthy Tagalongs appeared first on Eating Bird Food. Recipes via Eating Bird Food https://ift.tt/1L45wsH March 27, 2019 at 07:07AM |
|


 RSS Feed
