
|
Changua (Colombian Milk and Egg Soup)
https://ift.tt/36i59ug Changua (Colombian Milk and Egg Soup) is a typical breakfast in Bogotá, the capital of Colombia where my mom was born. It’s also know to cure hangovers.
In Colombia, Changua is served for breakfast with bread either in the soup or on the side. It’s also known to help with a hangover, so I thought it would be great to share for the New Year just in case you had one champagne too many. The post Changua (Colombian Milk and Egg Soup) appeared first on Skinnytaste. Recipes via Skinnytaste https://ift.tt/2ix3Luq December 31, 2019 at 03:50PM #recipies
0 Comments
Red Lentil Dal
https://ift.tt/2Q8XAQU This easy Indian dal is ready in under an hour, and makes a satisfying vegetarian lunch or dinner. Serve with rice or naan. This soup also keeps well and can be frozen for up to three months. Photography Credit: Elise Bauer One of the things I love about red lentils is that they cook up so quickly. Unlike their sturdier brown and green lentil cousins, when cooked, red lentils quickly fall apart into a smooth mush-like consistency. So, if you get a late morning hankering for some lentils, you can easily whip up a batch in time for lunch. Dal: A Staple Indian RecipeThis red lentil dal recipe comes by way of my friend Kerissa Barron, who spent several months living and traveling through India. According to Kerissa, every region of India has its own version of the Indian staple dal, which is essentially lentil soup. This particular version comes out of the state of West Bengal and features Bengali five spice, called panch phoran, a fragrant blend of fennel seed, fenugreek, black sesame seed, cumin seed and mustard seed. In West Bengal and throughout India, dal is eaten at nearly every meal, serving as a sauce, a soup and a way to mash and stick food together (traditionally they eat with their hands in this region). I’ve made Kerissa’s recipe a couple of times and love the flavors and how easy it is to make. Do you have a favorite Indian dal recipe? Please let us know about it in the comments. What to Serve with DalYou can serve dal as a simple meal with a side of rice, naan, or papadams. You can also serve dal as a side dish for chicken or lamb. How to Store and Freeze DalDal will keep refrigerated for about five days and can be gently reheated on the stovetop or in the microwave. You can also freeze dal for up to three months (try this method). Try These Other Indian RecipesRed Lentil Dal RecipeTo create a garlic paste, finely chop the garlic, then sprinkle with a little kosher salt (to act as an abrasive) and crush with the side of a large chopping knife over the mixture until garlic breaks down and becomes paste-like. No fresh tomatoes? You can substitute with 1 cup of canned crushed tomatoes. Ingredients
Method1 Cook the lentils: Place 1 cup of red lentils in a metal sieve. Rinse well with cold water. Pour cleaned lentils into a medium sauce pan. Add 3 cups of water. Bring lentils and water to a boil. Reduce heat, cover and simmer for 10 minutes or until the lentils are soft.
2 Blanch and chop the tomatoes: While the lentils are cooking in step 1, bring a separate small pot of water to a boil. Score the peel of the tomatoes with a sharp knife in the shape of an "X". Place the tomatoes in the boiling water and blanch for one minute. Remove the tomatoes to a bowl to cool. Once cool, peel the tomatoes and cut out and discard the tough stem end. Chop the tomatoes, or mash them, and set aside. 3 Sauté the onions with seasonings: After the lentils in step 1 have cooked at least 5 minutes, start preparing the onions and spices. In a medium saucepan, heat the oil over medium heat. Add the chopped onions. Cook until translucent, about 3 minutes. Add garlic paste and cook for 1 minute more, stirring continuously, making sure that the garlic does not burn. Add the Bengali five spice. Cook and stir for another 2-3 minutes. Add bay leaf and turmeric. Stir.
4 Add cooked lentils: To the onions and spices, add the cooked lentils along with the lentil cooking water. Add salt. Cook for 10 minutes.
5 Finish the soup: Add lime juice and tomatoes. Cook for 3-5 more minutes. Adjust salt if necessary. Stir in chopped cilantro and remove from heat. Garnish with more chopped cilantro. Serve with basmati rice or naan bread.
Hello! All photos and content are copyright protected. Please do not use our photos without prior written permission. Thank you! This post may contain links to Amazon or other partners; your purchases via these links can benefit Simply Recipes. Read more about our affiliate linking policy. Recipes via Simply Recipes https://ift.tt/2F9fkDA December 30, 2019 at 04:05PM #recipies
Vegetable Samosas with Mint Cilantro Chutney
https://ift.tt/2ZDqwn6 1 Make the chutney: Combine cilantro, mint, lemon juice, garlic cloves, jalapeños, ginger root, salt, and cumin seeds in a blender or food processor. It should be a thick enough to coat a samosa when dipped. If you want it thinner, add 2 to 3 tablespoons of water. Transfer the chutney to a bowl, cover it, and wait until the samosas are ready.
2 Begin making the samosa dough: In a large mixing bowl, combine all-purpose flour and salt.
3 Drizzle in the ghee: Drizzle the melted ghee or vegetable oil around the flour mixture. Pick up a handful of the dough and rub it between your palms to mix the ghee as evenly into the flour as possible.
4 Check the ratio of flour to ghee: To see if the flour to ghee ratio is good enough to make crispy pastry, hold a portion of mixture in your hand and make a tight fist, then open it. The mixture should hold its shape.
5 Add water: Add water to the flour one to two tablespoons at a time while kneading. Knead into a smooth, firm dough. This should take about 5 minutes. Wrap the dough in cling wrap or cover with damp cloth until ready to fill the samosas.
6 Make the filling: Set a medium pot filled with water over medium high heat. Add the peeled quartered potatoes, and bring them to a boil. Boil the potatoes until they are fork tender, about 15 minutes. Set a large skillet over medium high heat and add the oil. Once the oil shimmers, add the cumin seeds to the skillet. Once they sputter, turn the heat down to medium and add the onion. Sauté for 3-4 minutes until the onion is softens. Add jalapeno, coriander, garam masala, ground turmeric, and salt. Give it a quick stir. Add the peas. Drain the potatoes and add them to the skillet. Using the back of a wooden spoon or a potato masher, coarsely mash the mixture, leaving no large chunks of potatoes. Stir to combine. You want it mixed well. In the end, the filling should be relatively dry and thick. Set aside to cool completely before filling the samosas.
7 Knead the dough: While the filling is cooling, unwrap the dough, and knead it again for a couple minutes to make it smooth.
8 Divide and shape the dough: Divide into 6 equal parts. Roll each into smooth balls, and cover with a damp cloth. Pick one ball, press between your palms to flatten, and lightly dab the surface of dough with oil or ghee. This prevents the rolling pin from sticking to the dough. Resist the urge to dust the countertop with flour, as the loose flour will burn when you drop the dough in the oil to fry, giving the samosa an off taste. Use a rolling pin to flatten the dough into a circle 6 inches in diameter, 1 mm thickness. Cut in half so you have two half-moon shapes. If you’re having a difficult time rolling out the dough, place the round between pieces of wax paper or parchment.
9 Fill the samosa: Pick one half and brush the edges with water using your finger. Pick one edge of the dough and place it on top of the other edge, making a cone shape. Gently pinch along the edges of the cone, making sure they are sealed. Add 1 1/2 tablespoons of filling into the cone. This should fill it 3/4 of the way. Brush water on the edges of the cone's opening, and pinch the edges together to close the samosa. Repeat with the rest of the dough. Cover sealed samosas with a damp cloth. In the end, you should have 12 samosas.
10 Fry the samosas: In a deep pot, add the oil and heat to 200°F over medium heat. Add the samosas to the oil and fry in batches; do not overcrowd the pot. Fry until the samosas begin to turn golden. Once the samosas are golden, increase the heat to medium high, bringing the temperature up to 350°F, and cook for another 5 minutes until the samosas have darkened to a deeper brown. Take the samosas out of the oil and transfer them to plate lined with paper towels. Reduce the heat back to medium or medium low, until the oil temperature drops back to 200°F before going forward with the next batch of samosas. Getting this part right for a samosa is the trickiest part. If you start with high temperature oil, the pastry will turn soggy and oily. So, starting with warm oil and then increasing the heat is the way to go here.
11 Serve: Serve immediately with a side of green cilantro mint chutney. Recipes via Simply Recipes https://ift.tt/2F9fkDA December 30, 2019 at 09:06AM #recipies
Slow Cooker Shredded Chicken
https://ift.tt/368qrdG
I love having shredded chicken on hand for easy meal prep. It’s a lean protein and is so dang versatile, I feel like it can be added to most meals! With that said, there are so many different ways to cook shredded chicken and I’ve tried just about every method, but using the slow cooker is hands-down my favorite method. I first shared my slow cooker shredded chicken method in the post for my healthy curried chicken salad, but the instructions are kind of hidden in that post, so I figured I’d create this post as a resource so it’s easy to find whenever you want to make shredded chicken. That said, once you make it for the first time you likely won’t need to look at a recipe again — it’s that easy.
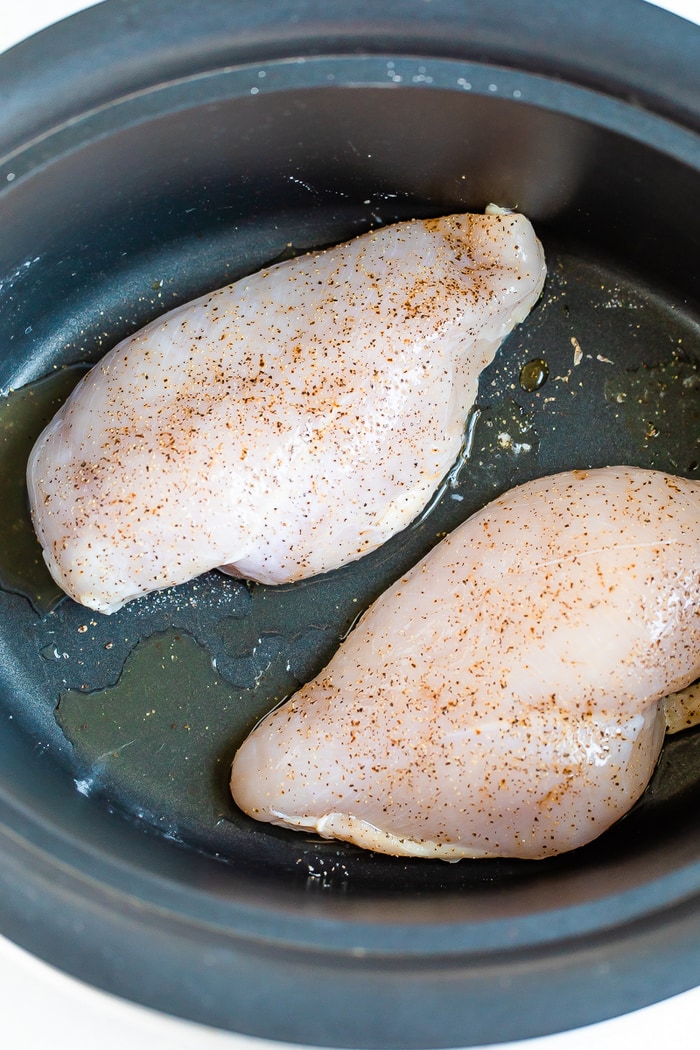
Slow Cooker Shredded ChickenWhile this method takes longer than the rest, I still love shredded chicken made in the slow cooker. It cooks up perfectly every time. It’s not too dry, not too wet… and it’s easy to shred. To make it, simply put your boneless skinless chicken breasts or boneless skinless chicken thighs in the slow cooker, season with any seasonings you want to add, cover and cook on low for 3-4 hours or on high for 2 hours. That’s it! I know it’s tempting to want to add liquid, like water or broth to the slow cooker with your chicken, but you don’t need it — the chicken will release it’s own juices and it won’t dry out! I do like adding a little apple cider vinegar to help tenderize the meat, but it’s optional.
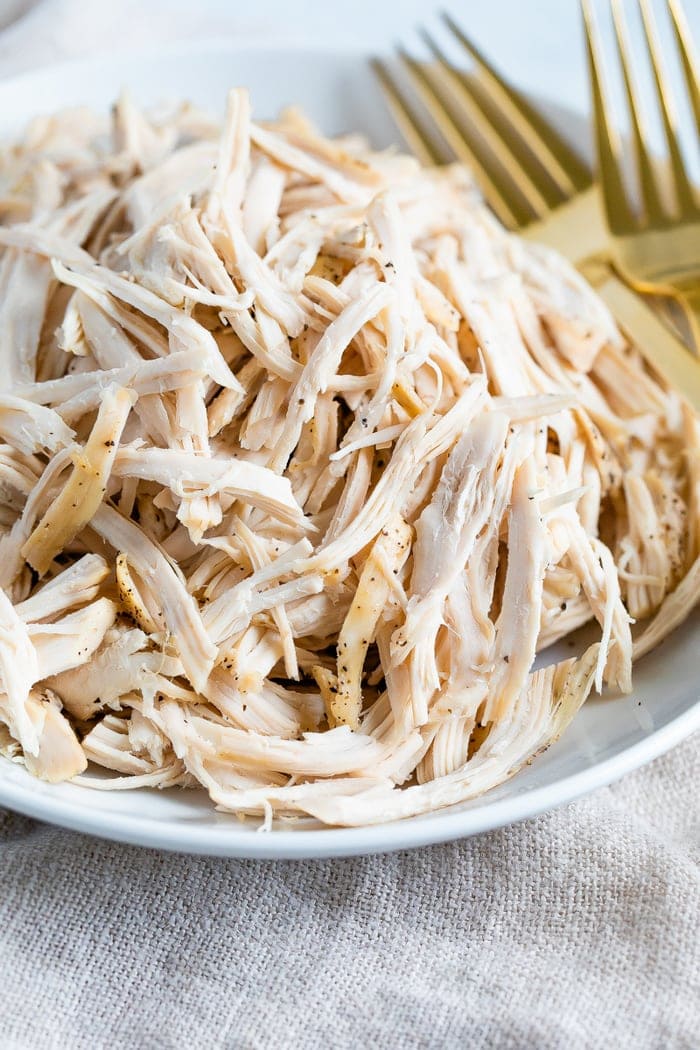
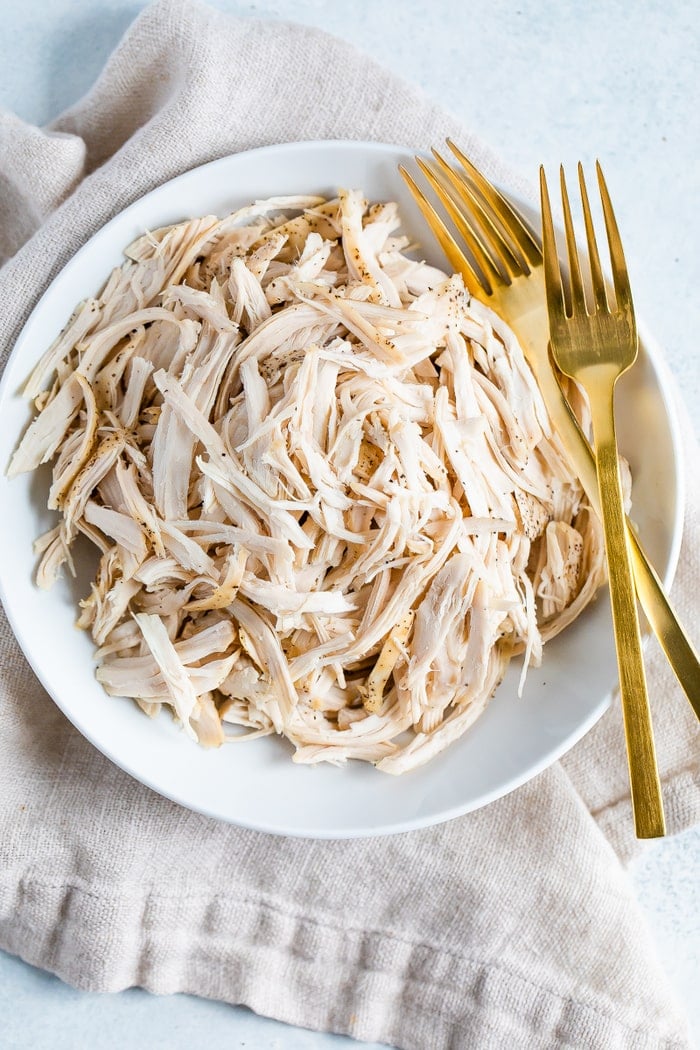
The Best Way to Shred ChickenOnce the chicken is cooked, you’ll just transfer it to a plate or shallow bowl, let it cool down a bit and then shred it. I recommend shredding the chicken while it’s still warm because it’s much easier than shredding cold meat. I like to use two forks, but it can also be easier to use your hands to pull the pieces apart! Just be sure the chicken is cool enough to touch if you’re using your hands.
Other Ways to Cook Shredded Chicken:Instant PotThis method is new to me as I didn’t get on the Instant Pot train until about a year ago, but it’s awesome because it is SO FAST! Place four boneless, skinless chicken breasts in the Instant Pot and add 1 cup broth or water and any seasonings you’d like. Put the lid on, turn to seal, cook for 15 minutes and then quick release the pressure. Remove the chicken and shred with two forks or by hand. Shredded chicken in under 30 minutes? YUP! Stove TopPlace chicken and any vegetables or seasoning in a sauce pan or pot. Cover the chicken completely with broth or water and bring to a boil. Reduce heat and simmer for 20 minutes or until chicken is cooked through. Remove the chicken and shred with two forks or by hand. This method is awesome because you can cook tender, shredded chicken without any kitchen appliances on the counter! OvenPlace chicken in a baking dish and add any seasonings you’d like. Add a little bit of water to the bottom of the pan and cover with foil or an oven-safe lid. This makes sure your chicken doesn’t come out super dry! Bake at 375ºF for 25-35 minutes, until the chicken is cooked through. Remove from the oven and shred away!
Ways to Use Shredded ChickenOh my! There are so many different ways to use shredded chicken in recipes including:
Can You Freeze Shredded Chicken?Yes! This is a great meal planning hack – shred your chicken ahead of time and freeze for the week (or weeks!) ahead. Pro tip: portion out your chicken rather than putting a whole bunch in one freezer container, that way you can just take out the container or ziplock and add the meat to your soup, skillet or sauce. Healthy Recipes with Shredded Chicken
If you try this slow cooker shredded chicken, please be sure to leave a comment and star rating below letting me know how it turned out. Your feedback is super helpful for the EBF team and other EBF readers. Print Slow Cooker Shredded Chicken
DescriptionThis slow cooker shredded chicken recipe is so easy and makes the best shredded chicken every time — only 4 ingredients needed! Ingredients
Instructions
Keywords: shredded chicken The post Slow Cooker Shredded Chicken appeared first on Eating Bird Food. Recipes via Eating Bird Food https://ift.tt/1L45wsH December 30, 2019 at 07:02AM #recipies
Skinnytaste Meal Plan (December 30-January 5)
https://ift.tt/2SIzTAR A free 7-day flexible weight loss meal plan including breakfast, lunch and dinner and a shopping list. All recipes include calories and updated WW Smart Points.
Meal PlanI hope everyone had a great holiday and I wish you all the happiest and healthiest New Year! What is your “lucky” meal for ringing in the new years? Black-eyed peas, lentils, pork , greens? If so, any of these recipes Black-Eyed Pea Dip (on this weeks plan), Lentil salad, Raw Kale Salad can be paired with your favorite pork dish (or any other meat you prefer!) WW has changed their plan to now include a Blue, Purple and Green Plan. All the recipes on my blog are updated for the Blue plan. I’ve been updating all my recipes (over 2000) and have completed 2019 with the other two colors, and I am working my way down so please be patient. Why Should Everyone Meal Plan?Meal planning is a great way to organize your meals for the week ahead. You also save time and money in the supermarket! And of course, planning ahead helps you stick to your goals! About The Meal PlanIf you’re new to my meal plans, I’ve been sharing these free, 7-day flexible healthy meal plans (you can see my previous meal plans here) that are meant as a guide, with plenty of wiggle room for you to add more food, coffee, beverages, fruits, snacks, dessert, wine, etc or swap recipes out for meals you prefer, you can search for recipes by course in the index. You should aim for around 1500 calories* per day. There’s also a precise, organized grocery list that will make grocery shopping so much easier and much less stressful. Save you money and time. You’ll dine out less often, waste less food and you’ll have everything you need on hand to help keep you on track. Lastly, if you’re on Facebook join my Skinnytaste Facebook Community where everyone’s sharing photos of recipes they are making, you can join here. I’m loving all the ideas everyone’s sharing! If you wish to get on the email list, you can subscribe here so you never miss a meal plan! Also, if you don’t have the Skinnytaste Meal Planner, now would be a great time to get one to get organized for 2019! There was a print error last year, but it’s perfect now! You can order it here! THE DETAILS:Breakfast and lunch Monday-Friday, are designed to serve 1 while dinners and all meals on Saturday and Sunday are designed to serve a family of 4. Some recipes make enough leftovers for two nights or lunch the next day. While we truly believe there is no one size fits all meal plan, we did our best to come up with something that appeals to a wide range of individuals. Everything is Weight Watchers friendly, I included the updated WW Blue SP for your convenience, feel free to swap out any recipes you wish or just use this for inspiration! The grocery list is comprehensive and includes everything you need to make all meals on the plan. I’ve even included brand recommendations of products I love and use often. Cross check your cabinets because many condiments you’ll notice I use often, so you may already have a lot of them. And last, but certainly not least, this meal plan is flexible and realistic. There’s plenty of wiggle room for cocktails, healthy snacks, dessert and dinner out. And if necessary, you can move some things around to make it work with your schedule. Please let me know if you’re using these plans, this will help me decide if I should continue sharing them! MONDAY (12/30) Totals: Freestyle™ SP 19B 25G 16P, Calories 1,032** TUESDAY (12/31) Totals: Freestyle™ SP 25B 30G 26P, Calories 1,153** WEDNESDAY (1/1) Totals: Freestyle™ SP 19B 22G 19P, Calories 978** THURSDAY (1/2) Totals: Freestyle™ SP 22B 23G 18P, Calories 892** FRIDAY (1/3) Totals: Freestyle™ SP 20B 23G 12P, Calories 999** SATURDAY (1/4) Totals: Freestyle™ SP 16B 16G 15P, Calories 539** SUNDAY (1/5) Totals: Freestyle™ SP 23B 25G 23P, Calories 1,099** *Freeze any leftover you/your family won’t eat. Green salad includes 6 cups romaine, 2 scallions and ½ cup each **This is just a guide, women should aim for around 1500 calories per day. Here’s a helpful calculator to estimate The post Skinnytaste Meal Plan (December 30-January 5) appeared first on Skinnytaste. Recipes via Skinnytaste https://ift.tt/2ix3Luq December 29, 2019 at 05:39PM #recipies
Classic Mimosa Recipe
https://ift.tt/39r4R6u
If I’m hosting a special occasion brunch, you can bet that mimosas will be on the menu. Light, fresh, and festive, they’re perfect for celebrating everything from Mother’s Day to Christmas. With citrus in peak season and New Year’s right around the corner, I thought now would be a great time to share my classic mimosa recipe. Whether you make it for a New Year’s brunch, any holiday gathering, or a lazy weekend morning, I hope you enjoy it. Cheers, friends! How to Make MimosasMaking a mimosa couldn’t be simpler, as it only requires 2 basic ingredients: chilled sparkling wine and orange juice. That’s it! For this cocktail, you don’t even need ice. In fact, for the best results, you should avoid using it, as it will dilute and diminish the wine’s carbonation. For a really cold, bubbly cocktail, chill the wine and orange juice the night before you plan to make mimosas. When you’re ready to serve, pour the wine into a tilted champagne flute, letting it run down the inside of the glass to avoid losing carbonation. Top the wine with the orange juice, taste and adjust, and enjoy! I like to use a 50/50 ratio of dry sparkling wine to orange juice in my mimosas, but make sure you taste and adjust your drink to your liking. You may prefer as much as 2 parts sparkling wine to 1 part orange juice, or the opposite if you like a less alcoholic cocktail.
Mimosa Recipe Tips
More Favorite Brunch RecipesAny brunch fare goes well with a mimosa! Check out my 60 Best Brunch Recipes for a host of sweet and savory ideas, or try any of these delicious recipes:
Other posts you may enjoy...
The post Classic Mimosa Recipe appeared first on Love and Lemons. Recipes via Love and Lemons https://ift.tt/2h2Uz32 December 29, 2019 at 10:00AM #recipies
Easy Smothered Pork Chops
https://ift.tt/354ZXsf These smothered pork chops really hit the spot. Thick cut pork chops are pan seared and smothered in onion gravy — just what you need to chase away the winter blues. Make it a meal and serve it over mashed potatoes! Photography Credit: Marta Rivera My family will never turn down a slab of meat that’s been drenched in gravy! These classic Smothered Pork Chops are just the comforting dish my family craves during the cooler months. Hearty thick-cut pork chops (because, let’s be honest, bigger is better) are seasoned, then seared in a cast iron skillet, creating crispy browned bits of flavor that are later used to develop a robustly flavored gravy. WHAT IS THE BEST CUT FOR PORK CHOPS?A center-cut rib chop is the best cut of pork to use in this recipe. Because it comes from the loin of the hog, the least used part of the animal’s body, this means the meat from this area is more tender than cuts from parts of the pig that are used more often. The center-cut rib chop gives you the best of the hog—a tender cut of meat with just enough fat around the edges to help season the dish, plus a bone, which retains moisture as you cook the meat (but is easy to remove later). Choose chops that are a bright pink color with creamy white fat around the edges.
HOW TO TELL WHEN PORK IS COOKEDThe USDA recommends cooking your pork to at least 145°F, and I recommend cooking them no higher than 165°F. The chops will continue to cook for 5-10 minutes after they’re removed from the stove, which means they’ll dry out if left to cook too long. Try not to let them exceed 170°F. TROUBLESHOOTING GRAVYFixing gravy to suit your tastes is pretty simple. Here are some tips:
HOW TO MAKE GRAVY GLUTEN FREEThere are so many gluten-free thickeners on the market these days. I like to use a mixture of 2 teaspoons of cornstarch mixed with a tablespoon of cold water to thicken the gravy. This slurry is used in place of the flour and added to the pan with the beef stock. WHAT CAN I USE IN PLACE OF HEAVY CREAM?If you want to make this dish a little less rich, omit the heavy cream in the gravy, or use whole milk instead. WHAT TO SERVE WITH SMOTHERED PORK CHOPS?For me, mashed potatoes are the preferred accompaniment for smothered pork chops. Spuds are a great vessel for transporting this rich gravy to your mouth. An easy green salad will complete the meal. STORE AND REHEAT LEFTOVERSLeftovers may be kept for 72 hours in the fridge and reheated in the microwave until warmed through. MORE PORK RECIPES FOR DINNEREasy Smothered Pork Chops RecipeIngredients
Method1 Season and sear the pork: In a large (12 to 14-inch) skillet set over medium-high heat, add the oil. While the oil is heating, sprinkle one side of the pork chops with salt and pepper. Place the chops into the hot pan, seasoned side down, and sear for 4 minutes, or until they are a dark, golden brown. While the first sides are searing, season the top side with more salt and pepper. Flip the chops over and cook for another 4 minutes. Transfer the chops from the pan to a platter. You may have to do this in batches for a good sear.
2 Sauté the vegetables: Add the onion and garlic to the pan and cook them over medium heat, stirring frequently for 3-4 minutes or until they are softened and become a deep golden color.
3 Make the roux: Once the onions and garlic are cooked down but still a little glossy, sprinkle flour over the veggies. If the onions aren’t glossy, add 1 tablespoon of oil before adding the flour. Cook the flour for one minute to remove the raw, starchy taste from it. Add 1/4 cup of beef stock to the pan and use your spoon to scrape up the browned bits from the bottom of the pan. The mixture will look like a very thick paste at this point.
4 Finish making the gravy: Combine the cream with the rest of the beef stock and pour this liquid into the pan. Add the rosemary sprigs and bring the mixture up to a gentle simmer, stirring frequently, until thickened.
5 Return the chops to the pan to finish cooking: Nestle the pork chops into the simmering gravy, then cover the pan. Allow the chops to simmer in the thickened gravy for 10 minutes, or until their internal temperature reaches at least 145°F and no higher than 165°F.
6 Serve the chops: Place the pork chops over a bed of mashed potatoes and smother them in the onion gravy. Hello! All photos and content are copyright protected. Please do not use our photos without prior written permission. Thank you! Products We LoveThis post may contain links to Amazon or other partners; your purchases via these links can benefit Simply Recipes. Read more about our affiliate linking policy. Recipes via Simply Recipes https://ift.tt/2F9fkDA December 29, 2019 at 09:00AM #recipies
Simply Recipes 2019 Meal Plan: December Week 5
https://ift.tt/37lC6G7  Simply Recipes 2019 Meal Plan: December Week 5Let’s finish 2019 strong and welcome 2020 with a meal plan sure to satisfy you and your family. We're kicking off the week with a vegetarian soup of farro, mushrooms and spinach, bringing some good luck to you with Hoppin’ John, and rounding things out with Teriyaki Chicken Lettuce Wraps. This month, please welcome back Aaron Hutcherson and his meal plans! Aaron is a regular contributor here on Simply Recipes and the blogger behind The Hungry Hutch. Happy New Year! For anyone who partied a little bit too hard ringing in 2020, try a detox smoothie to soothe your hangover. We’re also making Hoppin’ John, a dish of black-eyed peas and rice traditionally eaten on New Year’s Day to bring wealth and prosperity. There are various possible stories as to how the tradition started, but I’m a fan of the dish and like to eat it regardless of what happens to my bank account. And as eating healthier tends to be on many people’s list of resolutions, the rest of the week is full of recipes on the lighter side. Think a lovely vegetarian farro soup, steamed salmon, lettuce wraps, and a bright steak salad. All satisfying without detracting from your goals. I even added a bonus recipe, because, well, why not? Hello, 2020! This post may contain links to Amazon or other partners; your purchases via these links can benefit Simply Recipes. Read more about our affiliate linking policy. Recipes via Simply Recipes https://ift.tt/2F9fkDA December 28, 2019 at 09:01AM #recipies
Instant Pot Refried Beans
https://ift.tt/2QpYAz7 1 Combine the beans, water and salt: Add the pinto beans, water, and salt to the pressure cooker and stir to dissolve the salt. At this point, you can let the beans soak for 8-10 hours, or cook them right away. You can also cook the beans in their soaking water, or drain and replace with fresh water if you like. It’s up to you!
2 Cook the beans: When you’re ready to cook the beans, secure the pressure cooker lid in its sealed position. Select the manual setting on your pressure cooker (or the bean setting, if it has one) and set the time for 20 minutes at high pressure for soaked beans, or 25 minutes at high pressure for unsoaked beans. (It will take about 15 minutes for the pot to come up to pressure before the cooking program begins.)
3 Release the pressure: When the cooking program ends, let the pressure release naturally—this will take about 35 minutes. (When cooking foods like beans, grains, and fruit sauces in a pressure cooker, it’s best to let the pressure release naturally to avoid a hot, spurty mess.) Open the pot. If the beans are not cooked through at the end of the cooking program, close the pot and cook them for another 5 or 10 minutes. You’ll need to let the pressure release naturally for at least 15 minutes before opening the pot once more, to prevent any liquid spurting out of the pressure cooker lid.
4 Drain the beans: Ladle out 1 1/2 cups of the cooking liquid and reserve. Next, wearing heat-resistant mitts, lift the inner pot out of the pressure cooker and drain the beans in a colander. Rinse out the inner pot, wipe it dry, and place it back in the pressure cooker housing. 5 Sauté the fat and onions: Reset the pressure cooker’s cooking program by pressing the cancel button, then select its medium sauté setting and add the bacon fat, lard, or olive oil. Once the fat has melted (if using olive oil, heat for a minute or two), add the onions and sauté them for about 3 minutes, just until softened but not browned. Cancel the sauté program and turn off your pressure cooker, then add the beans (they should still be steaming hot).
Add 3/4 cup of the reserved cooking liquid and stir to combine. Continue adding the cooking liquid a little at a time until the beans reach your desired texture. (I like to use a full cup.) They will also thicken as they sit. Taste for seasoning, adding salt if needed.
7 Serve or keep: At this point, you can serve the beans right away, or set your pressure cooker to its “Keep Warm” setting, cover the pot, and let the beans sit, covered, for up to 10 hours. Spoon the beans into bowls or onto serving plates, sprinkle with cheese, and serve warm, with lime wedges and hot sauce at the table. Recipes via Simply Recipes https://ift.tt/2F9fkDA December 28, 2019 at 09:01AM #recipies
Chamb’ and Bubbly (Chambord Kir Royale)
https://ift.tt/2sgwAGf It’s almost New Year’s Eve! Whether you have a big all-night party planned—or you’re me, and hope to maybe make it to 10pm before conking out—there should be a sparkling wine cocktail to mark the occasion! And I have the perfect thing: Chamb’ and Bubbly. Yes, Chamb’ and Bubbly, as my husband hilariously dubbed it in honor of one of the greatest SNL skits of all time. Technically I’m talking about a Chambord Kir Royale, which is made by mixing champagne or sparkling wine with Chambord, a French raspberry liqueur that is just as good as it sounds. This drink is sparkling, festive, and perfect for sipping as you sing Auld Lang Syne. It’s Chamb’ and Bubbly. ABOUT CHAMBORD LIQUEURChambord is a deluxe liqueur made in the Loire Valley. According to its website, Chambord is made from blackberries and raspberries “soaked in French spirits” for six weeks, pressed, then expertly blended with French cognac, Madagascar vanilla, herbs, and raspberry and blackberry extracts. It’s a deep purple color, with a lovely silky and sweet (but not cloyingly so) raspberry flavor. And obviously you get a lot of other notes in there, too, like vanilla, orange, a little honey. It is crazy delicious. Once you have a bottle, it’s time to get adventurous: Pour it over pancakes or ice cream for a decadent treat, or swap it for the simple syrup in an Old Fashioned, Blueberry Margarita, or your favorite cocktail. It works well with vodka, rum, gin, even bourbon, so there is room to play around! SPARKLING WINE RECOMMENDATIONSHave a $70 bottle of champagne just hanging around in your fridge? Put it back right now. Don’t even look at it for this drink. You’re making a sparkling wine cocktail with an assertive berry liqueur. Sparkling wine is the less-showy date in this pairing. If you were buying a suit, we’d be talking solid, everyday-blue-suit territory here—something sensible, able to be dressed up or down. You do not need the sparkling wine equivalent of a tux for this party. I bought a $13 bottle of Blanc de Blancs De Perriere Brut from my local wine store, and it was great for this drink. It’s nice that it’s a French sparkling wine to go with the French Chambord, but no need to be that regional. Any inexpensive sparkling wine, prosecco, or even cava will work! THE CORRECT ORDER TO MIX A CHAMBORD KIR ROYALEAlmost every other recipe I’ve seen for a Chamb’ and Bubbly calls for adding the Chambord to the glass first, and then pouring in the sparkling wine. But the label on the Chambord bottle says to do the opposite: Pour the sparkling wine first, then top with the Chambord. I tried it both ways, and I can confidently say the best order is sparkling wine first, Chambord second. Do what the French say, that’s my motto! When I added Chambord first and poured the sparkling wine into it, the wine bubbled almost to overflowing and the two ingredients did not mix. The Chambord mostly stayed at the bottom of the flute—you could even see a color gradation, paler at the top and more concentrated at the bottom—and my first few sips were basically just sparkling wine. But when I poured the Chambord into a flute of sparkling wine, it fizzed for a bit then perfectly mixed to create that lovely, uniform raspberry color, every sip full of Chambord goodness. So, to recap: Fill the flute with sparkling wine first, then pour in the Chambord. MORE FESTIVE HOLIDAY COCKTAILS:Recipes via Simply Recipes https://ift.tt/2F9fkDA December 27, 2019 at 09:10AM #recipies |
|


 6 Mash the beans: For a chunky texture, use a potato masher to mash the beans as much as you like. For a smooth texture, use an immersion blender to purée them.


 RSS Feed
