Feel Healthy Today
  • Home
  • Recipes
  • Health News
  • Fitness News
  • Weight Loss
  • Contact
  • Subscribe

Recipes

Mushroom Stroganoff

9/30/2020

0 Comments

 
Mushroom Stroganoff
https://ift.tt/2EM25xW

This healthy mushroom stroganoff made with shiitake, baby portabella, and cremini mushrooms and noodles in a light creamy sauce is a quick and easy meal, perfect for Meatless Mondays!

This healthy stroganoff with shiitake, baby portabella, and cremini mushrooms with noodles in a light creamy sauce is a quick and easy meal, perfect for Meatless Mondays!
Mushroom Stroganoff

I love beef stroganoff, but I wanted to see if there was a way to make it vegetarian for days I want to go meatless. I played around with this Mushroom Stroganoff until we were sick of it, but it was well worth it! This recipe was a huge hit in my house. For more of my favorite Meatless Monday pasta recipes, try Fettuccini with Winter Greens and Poached Egg, Cheesy Baked Pumpkin Pasta, and Spaghetti with Mushrooms, Garlic, and Oil.

Mushroom Stroganoff in a plate with a fork.

Making stroganoff without the beef was challenging. I wanted to keep the flavor of the beef and keep it creamy yet light. The variety of mushrooms gives this pasta nice textures and flavor, and the Worcestershire sauce and tomato paste help give it some of that beef flavor I was looking for. The bonus of making it with just veggies is that you can eat more but with fewer calories and less fat.

What is stroganoff sauce made of?

This stroganoff sauce starts with a roux of flour and butter, which helps thicken the sauce and finishes with sour cream to make it creamy. The other ingredients in the sauce are below:

  • Vegetable broth
  • Worcestershire sauce
  • Tomato paste
  • Thyme
  • Salt
  • Pepper
  • White wine or sherry

If you prefer not to cook with wine, use more broth instead.

As a kid, I always topped my stroganoff with grated Parmesan cheese. It is completely optional, but I personally think Parmesan makes any noodle dish go from good to great. Hope you enjoy!

Mushroom Stroganoff Variations:

  • If you can’t find a particular mushroom or would like to save money, use all white button mushrooms.
  • To make this mushroom stroganoff vegetarian, use a vegan Worcestershire sauce.
  • Use whole wheat noodles instead of No-Yolk noodles if you prefer.
  • Serve the mushrooms and sauce over spaghetti squash to save on carbs and calories.
  • Add chicken or beef, like tri-tip sirloin or flank steak for a heartier meal.
  • Sub the white wine or sherry with more broth. 
  • Swap parsley for thyme.
  • If you’re looking for a sour cream substitute, try plain Greek yogurt.
  • Make gluten-free stroganoff by using gluten-free flour and pasta.

mushrooms in a skilletMushroom StroganoffThis healthy stroganoff with shiitake, baby portabella, and cremini mushrooms with noodles in a light creamy sauce is a quick and easy meal, perfect for Meatless Mondays!

More Mushroom Recipes You’ll Love:

Mushroom Stroganoff

Prep Time: 10 mins

Cook Time: 15 mins

Total Time: 25 mins

This healthy mushroom stroganoff made with shiitake, baby portabella, and cremini mushrooms and noodles in a light creamy sauce is a quick and easy meal, perfect for Meatless Mondays!

  • 1 tablespoon butter
  • 1/2 cup chopped onion
  • 2 tbsp unbleached all-purpose flour
  • 2 cups fat-free, less-sodium vegetable broth (or beef if you're a carnivore)
  • 1 tbsp Worcestershire sauce
  • 1 tsp tomato paste
  • 5 oz sliced Cremini mushrooms
  • 8 oz sliced baby Bella mushrooms
  • 3.5 oz Shiitake mushrooms
  • 1/4 tsp thyme
  • salt and pepper to taste
  • 2 tbsp white wine or sherry
  • 1/4 cup reduced-fat sour cream
  • 8 oz uncooked noodles, No-Yolk noodles
  • 1 tbsp minced fresh flat-leaf parsley for garnish
  • Cook noodles in a pot of salted water according to package directions, I like to under-cook them a bit so I can mix it with the sauce and let it finish cooking.

  • Meanwhile, while the water starts to boil for the noodles, heat a large nonstick skillet over medium-high heat.

  • Melt butter over medium heat and add onions to the pan. Cook 2 - 3 minutes over medium-low heat. Add flour; stir with a wooden spoon for 30 seconds.

  • Gradually add broth, Worcestershire sauce, and tomato paste, stirring constantly.

  • Add mushrooms, thyme, salt and pepper; stir and cook 4-5 minutes or until thickened and bubbly, stirring constantly.

  • Add wine; bring to a boil, reduce heat, and simmer 4 minutes. Remove from heat; let stand 30 seconds.

  • Stir in sour cream; add noodles, mix well and garnish with parsley if desired.

Serving: 11/2 cups, Calories: 268kcal, Carbohydrates: 52.5g, Protein: 12.5g, Fat: 3.5g, Saturated Fat: 2g, Cholesterol: 8.5mg, Sodium: 312mg, Fiber: 7g, Sugar: 4.5g

Blue Smart Points: 9

Green Smart Points: 12

Purple Smart Points: 12

Points +: 7

Keywords: mushroom pasta, mushroom spaghetti, Mushroom Stroganoff, vegetarian pasta dishes, vegetarian stroganoff

posted September 30, 2020 by Gina

Get new free recipes and exclusive content delivered right to your inbox:


Recipes

via Skinnytaste https://ift.tt/2ix3Luq

September 30, 2020 at 04:14PM
#recipies
0 Comments

Editors Picks: Baking Pans

9/30/2020

0 Comments

 
Editors’ Picks: Baking Pans
https://ift.tt/3cLevmm

When that first chilly gust of wind hits your neck sometime in late September and makes you reach for a sweater, do you know what time it is? “Fall,” you say. Yes, fall. But more importantly … it’s the beginning of baking season!

While not an official day on the calendar, it might as well be. Summers have their berry pies and fresh fruit muffins, but fall is baking’s dream date. Give me your falling leaves and chilly evenings, it says, and I will give you every way to bake an apple, pear tarts and pear cakes, decadent chocolate cakes, cheesecakes, pumpkin pies and pecan pies, oatmeal muffins, and Brookies. (Because they’re wonderful year-round).

If you want to be set to bake this season, check out our list of essential, editor-approved baking pans. This collection will enable you to bake almost anything your tastebuds desire!

This post may contain links to Amazon or other partners; your purchases via these links can benefit Simply Recipes. Read more about our affiliate linking policy.


Recipes

via Simply Recipes https://ift.tt/2F9fkDA

September 30, 2020 at 09:53AM
#recipies
0 Comments

Healthy Apple Butter

9/30/2020

0 Comments

 
Healthy Apple Butter
https://ift.tt/3cHJW0K

This healthy homemade apple butter is made in the slow cooker without any added sugar. Enjoy as a spread on toast or stir into a warm bowl of oatmeal.

As soon as the weather turns, I am rapidly making as many fall flavored treats I can think of! I typically make at least one batch of apple butter each year. If you’ve never made or tried it, it is super versatile, naturally sweet and absolutely delicious! And despite its name, there’s no actual butter involved! If you’re looking for a way to use up quite a few apples, here’s your recipe.

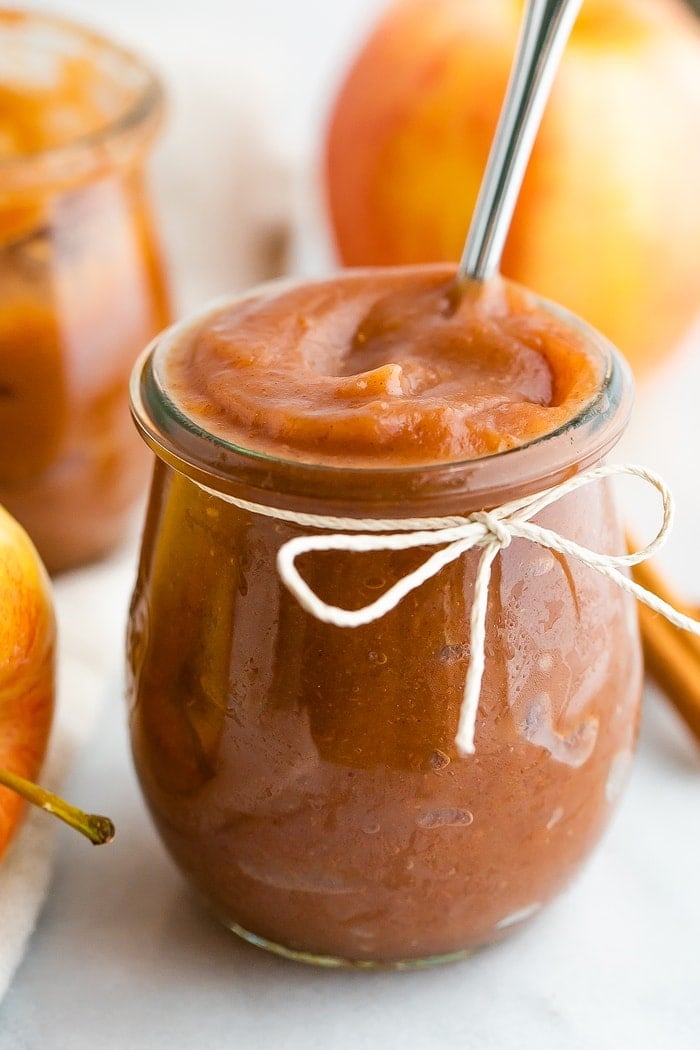
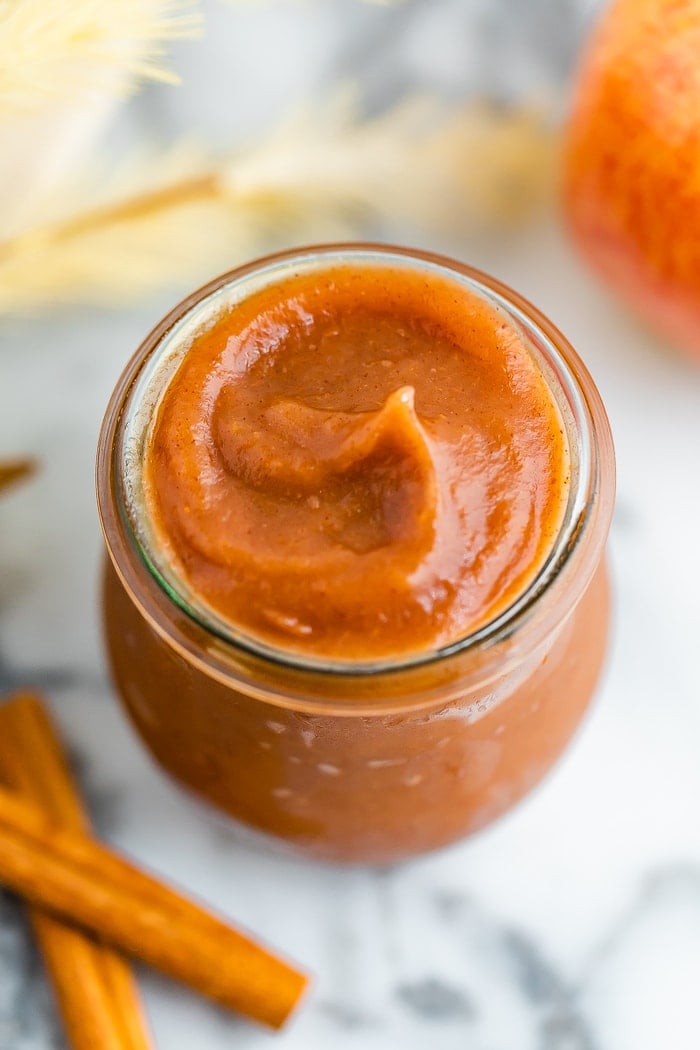
Apple butter in a jar with a twine bow tied around the jar.

Apple Butter Ingredients:

  • apples – I recommend a sweeter variety like Gala or Honeycrisp.
  • apple cider vinegar or water – I used apple cider vinegar and really liked the tanginess it added to the apple butter but you can simply use water if you don’t have ACV or don’t want your apple butter to be tangy at all.
  • cinnamon
  • vanilla extract
  • ground cloves
  • ground nutmeg
  • sea salt

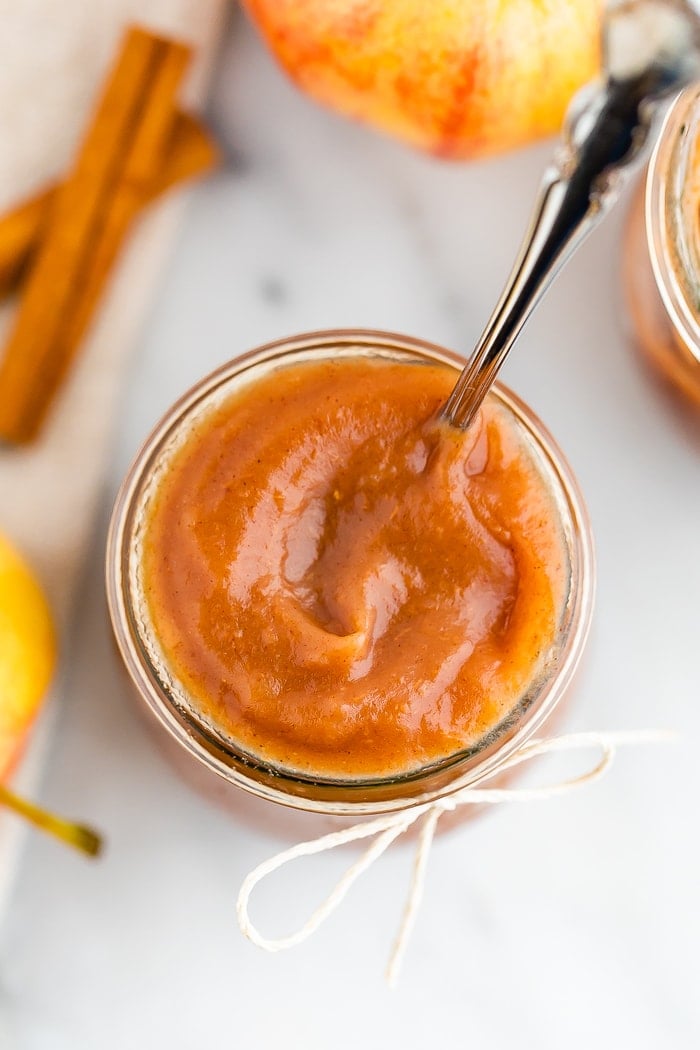
Bird's eye view of a jar with a spoon and filled with apple butter. The jar has a twine bow tied around it.

The Difference Between Apple Butter and Applesauce

Both apple butter and applesauce are made by cooking apples with water, spices and sugar (if using). The main difference between the two is that apple butter is cooked longer so the mixture becomes a thick, caramelized consistency. Applesauce is soft and creamy too, but is typically a thinner, lighter consistency. The other difference is that apple butter is usually spiced with an array of spices like cinnamon, cloves, nutmeg and vanilla. Occasionally you’ll see cinnamon applesauce, but most of the time applesauce is plain.

So basically, you start making applesauce and just keep on cookin’ it down to get to apple butter!

How to Make Apple Butter

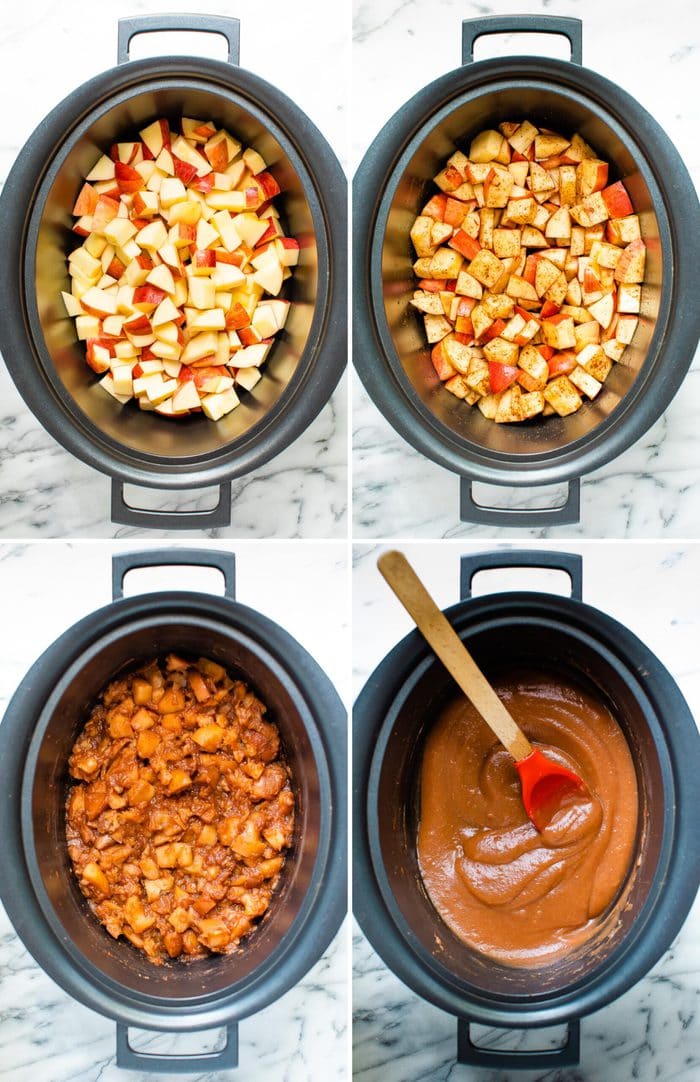
Core and slice: Core and slice your apples. You can peel them if you’d like, but there’s no need. The peels will soften as the apples cook and blend right up! Add your apples to a slow cooker or crock-pot.

Mix and cook: Add the apple cider vinegar or water and spices into the slow cooker. Stir all ingredients together, cover the pot and set to cook on low. Cook for 15 hours.

Blend: When the apple mixture is done cooking, the liquid will be reduced and the apples will be soft and darker in color. Your kitchen should smell amazing! Turn off the slow cooker and let the apples cool for about 30 minutes. Use an immersion blender to puree the apples until smooth. Another option is to transfer the mixture into a blender and blend until completely smooth.

Four photos of the stages of making apple butter in a slow cooker. 1. Chopped apples in the slow cooker. 2. Cinnamon topped on the apples. 3. Apples cooked. 4. Apples puréed into butter,

How to Eat Apple Butter

Apple butter is similar to a preserve or jam. Here are some ways I like to enjoy it:

  • On bread or toast
  • Mixed into overnight oats
  • As a topping for pancakes or waffles
  • Swirled into baked goods before baking or just a spread after they’re done baking
  • As a sandwich spread
  • As a spread for a charcuterie board
  • Brushed on chicken for the last few minutes of cooking
  • Serve it up as baby food – I didn’t know if Olivia would be keen on apple butter because of the spices but she LOVED it. I gave it to her straight up and stirred some into her oatmeal.

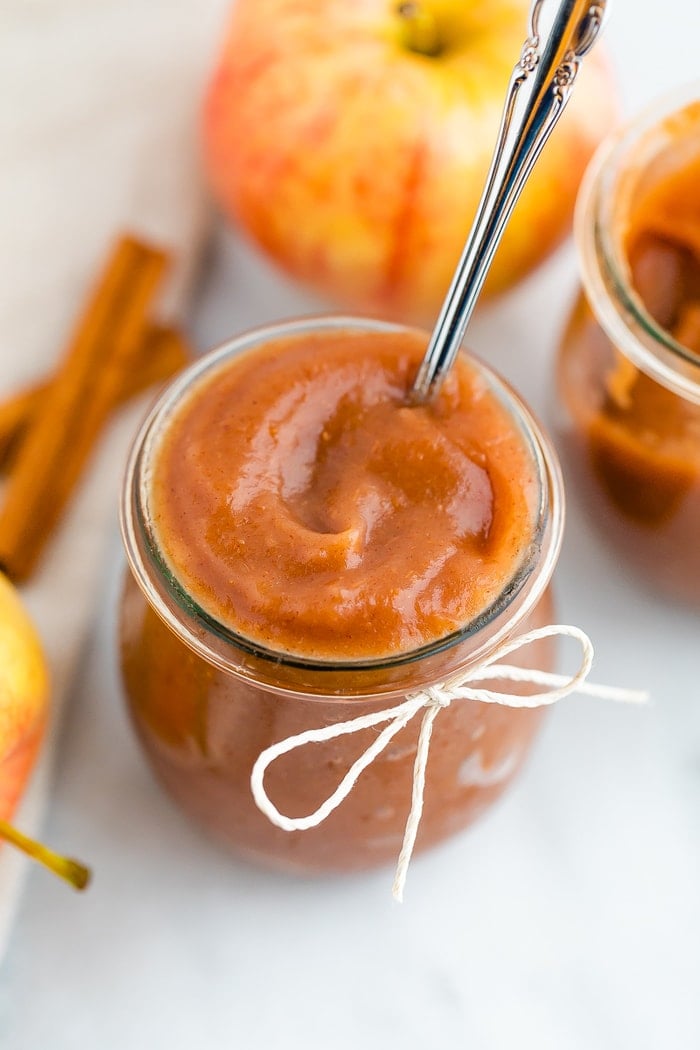
Glass jar filled with apple butter and decorated with a twine bow.

How to Store Apple Butter

After letting the apple butter cool completely, portion into airtight storage containers. I filled 2 8 oz canning jars with this recipe. Homemade apple butter lasts about three weeks in the fridge and for up to a year in the freezer. I usually keep one jar in the fridge and put the rest in the freezer to enjoy at a later time or to give as a gift!

Bird's eye view of a jar filled with apple butter.

More Apple Recipes to Try:

  • Apple Pie Overnight Oats
  • Healthy Apple Crisp with Oatmeal Pecan Topping
  • Apple Cinnamon Baked Oatmeal
  • Apple Samoas with Date Caramel
  • Healthy Apple Crumble Bars
  • Fuji Apple Salad

If you make this healthy homemade apple butter, please be sure to leave a comment and star rating below. Your feedback is super helpful for the EBF team and other readers who are thinking about making the recipe. 

Print
Apple butter in a jar with a twine bow tied around the jar.

Healthy Apple Butter


★★★★★

5 from 1 reviews

  • Author: Brittany Mullins
  • Prep Time: 15 minutes
  • Cook Time: 15 hours
  • Total Time: 15 hours 15 minutes
  • Yield: 1 1/2 cups
  • Diet: Vegan
Print Recipe
Pin Recipe

Description

This healthy homemade apple butter is made in the slow cooker without any added sugar. Enjoy as a spread on toast or stir into a warm bowl of oatmeal.


Ingredients

  • 6 medium apples (choose a sweet variety like Gala or Honeycrisp)
  • 1/4 cup apple cider vinegar (or water)
  • 1/2 Tablespoon ground cinnamon
  • 1/2 teaspoon pure vanilla extract
  • 1/8 teaspoon ground cloves
  • 1/8 teaspoon ground nutmeg
  • pinch of sea salt

Instructions

  1. Place cored and sliced apples (not peeled) into a large slow cooker or crock-pot.
  2. Add apple cider vinegar (or water) and spices. Stir all ingredients together, cover and let it cook for 15 hours on low.
  3. The liquid will reduce and the apples will be very soft, dark in color and smell heavenly. Turn the slow cooker off, let the mixture cool for about 30 minutes and then use an immersion blender to puree the apples until smooth. Another option is to carefully transfer the apples to a blender and blend until completely smooth.
  4. Once the apples are pureed, turn the slow cooker on high and heat the apple butter for 1-2 hours, uncovered. This will help it thicken and caramelize.
  5. Once the apple butter is the consistency you like, turn off the slow cooker and let the apple butter cool for 30 minutes before transferring into airtight containers for storage. Let the apple butter cool completely in the containers or jars before placing in the fridge.
  6. For storage: apple butter will keep in the fridge for up to 3 weeks or up to a year the freezer.

Equipment

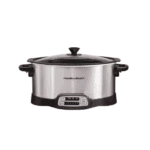
Silver Hamilton Beach slow cooker on a white background.

slow cooker

Buy Now →
Vitamix on white background.

vitamix blender

Buy Now →

Notes

  • If you want to make canned apple butter, I recommend doubling this recipe and following these apple butter canning instructions.
  • Category: Sauces/Condiments
  • Method: Slow Cooker
  • Cuisine: American

Nutrition

  • Serving Size: 2 tablespoons
  • Calories: 51
  • Sugar: 8g
  • Sodium: 13mg
  • Fat: 0g
  • Saturated Fat: 0g
  • Unsaturated Fat: 0g
  • Trans Fat: 0g
  • Carbohydrates: 14g
  • Fiber: 3g
  • Protein: 0g
  • Cholesterol: 0mg

Keywords: apple butter

Did you make this recipe?

Tag @eatingbirdfood on Instagram and hashtag it #eatingbirdfood

The post Healthy Apple Butter appeared first on Eating Bird Food.


Recipes

via Eating Bird Food https://ift.tt/1L45wsH

September 30, 2020 at 07:06AM
#recipies
0 Comments

Apple Pie Bars with Crumble Topping

9/29/2020

0 Comments

 
Apple Pie Bars with Crumble Topping
https://ift.tt/2EIRIuN

For me, the smell of autumn is the scent of apple pies baking and cooling in the kitchen. And though I love baking a classic apple pie, sometimes I don’t feel like going through the process of making pie crust, chilling it, and rolling it out. Apple pie bars are my easy solution!

Apple pie bars feed a crowd! No need to worry about using a pie server and knife to cut out messy slices. The bars can be brought to a gathering or individually wrapped as gifts to lift someone’s spirits and to serve up and share with ease.

On top of all that, the bars are easy to make.

The dough you make for the crust doubles as the crumb topping. A little addition of optional pecans along with the rolled oats means the pie bars have texture and crunch to balance the sweet apple filling packed with all those glorious warm spices like cinnamon and nutmeg.

Think of these bars as a great fall flavor treat that you can hold in your hand.

Apple pie bars with pecan oat crumb topping stacked on a platter with apples behind them.

WHAT APPLES ARE BEST FOR APPLE PIE BARS?

I like to use a mix of different apples for these bars, as each apple tends to have different characteristics.

Some are tart, some are firm, some mushy, and some softer. If you use a mix of apples (I use two or three different varieties), you get more interesting texture and apple flavor.

I recommend using Granny Smith apples, which are almost always firm and tart in the mix. They ensure that your filling has some bite, firmness, and texture, without being completely mushy like applesauce. I also like to pick a sweeter apple.

For sweet apple options I like:

  • Braeburn
  • Jonagold
  • Gala
  • Jazz
  • Cortland
  • Honeycrisp apples are super sweet and crisp.
  • Pink Lady and Opal apples are nicely balanced with acidity and sweetness.

And if you’re lucky enough to get a hold of Gravenstein or Arkansas Black apples, both heirloom apples, grab a bunch. They are some of my favorite apples and I look for them every year. Their season is fleeting but they have great intense apple flavor.

Certain apples are better for sauces where they are prized for disintegrating easily. This means they are best to avoid for an apple bar (or pie) recipe. For this recipe, stay away from:

  • Red Delicious
  • Rome
  • McIntosh

For more information on the best apples for baking, check out the Guide to Apples.

Easy apple pie bars cut into rectangles and set on a white background. Apples are in partial view to the left.

THE BEST NUTS FOR CRUMB TOPPING?

These bars use pecans in the topping for crunch and flavor. If you aren’t a fan of pecans, you can easily swap out the same amount for another kind of nut. Any of these would work:

  • Walnuts
  • Pistachios
  • Almonds

If you are allergic to nuts or don’t like them in your desserts, just omit them. Instead, add an additional 1/2 cup of rolled oats in place of the nuts.

To up the “crunch” factor, try sprinkling two tablespoons of sparkling sugar or turbinado sugar (sometimes sold under the name brand Sugar in the Raw). The larger sugar crystals will give a sweet crunch to the top of the bars.

HOW TO DRESS UP APPLE PIE CRUMBLE BARS!

The beauty of these apple bars is the simplicity in making them!

Make a crumbly dough, use half for the crust, layer it with some sliced apples tossed in sugar and spices, then crumble the remaining dough over the top with some nuts. Once baked and cooled, dust it with a little powdered sugar to fancy them up a bit.

But you can take the bars in a few different directions. Try mixing up the spices in the filling. I kept the filling of the bars straightforward with a heavy dose of cinnamon and a touch of nutmeg. But any wintery warm spice works!

Add an additional 1/4 to 1/2 teaspoon of these spices to take it up a notch:

  • Ground ginger
  • Cloves
  • Mace
  • Allspice
  • Ground cardamom
  • Black pepper
  • Coriander
  • Chinese five-spice blend

And, if you have a super well-stocked pantry or want to splurge on some esoteric spices, grains of paradise and long pepper both add warmth and earthy depth that folks won’t be able to place, but that blends wonderfully with apple.

Side view of apple pie crumble bars stacked on a platter. Sliced apples and a thick crust are visible.

MAKE CARAMEL APPLE PIE BARS

Skip the powdered sugar step in this recipe and drizzle the top of the apple bars with caramel. You can even get more fancy pants and, after you drizzle the bars with caramel, sprinkle them with a bit of finishing salt for salted caramel apple pie bars!

Make it easy on yourself and use a store-bought caramel sauce or make your own homemade caramel sauce. Either way, the results are sure to be fantastic.

HOW TO STORE, FREEZE, AND REHEAT APPLE PIE BARS

These bars are best eaten the day they’re baked (as most desserts are), but they keep surprisingly well.

To Store: Keep the bars layered between pieces of parchment paper in an airtight container in the fridge for up to three days. The longer they are in the fridge, the more the crust and crumb soften.

To Freeze: Yes, you can freeze these bars! Place them on a parchment-lined baking sheet and put in the freezer until frozen solid (about two hours).

To store the frozen apple pie bars transfer them to an airtight container or resealable freezer ziptop bag, with a piece of parchment paper between layers, for up to three months. Thaw them overnight in the fridge before serving.

To Reheat: You can refresh the bars by placing them on a baking sheet and warming them in a toaster oven or regular oven at 350°F for 10 to 15 minutes. Be sure to dust the bars with more powdered sugar right before serving, as the powdered sugar tends to absorb into the bar as it sits.

MORE DELICIOUS FALL BAR RECIPES


Recipes

via Simply Recipes https://ift.tt/2F9fkDA

September 29, 2020 at 09:15AM
#recipies
0 Comments

12 Recipes to Prep this Weekend and Freeze

9/29/2020

0 Comments

 
12 Recipes to Prep this Weekend and Freeze
https://ift.tt/3im5n97
Weekday meals need to be quick, family-friendly, and delicious! Plan ahead and prep breakfast, lunch and dinner options on the weekend to stash in the freezer! It’s a true time saver (and stress reducer) for busy work weeks.

Continue reading "12 Recipes to Prep this Weekend and Freeze" »


Recipes

via Simply Recipes https://ift.tt/2F9fkDA

September 29, 2020 at 09:00AM
#recipies
0 Comments

Homemade Soft Pretzels

9/29/2020

0 Comments

 
Homemade Soft Pretzels
https://ift.tt/2S5MIDI

Soft pretzels

If you love fall baking but need a break from pumpkin spice, make homemade soft pretzels! Way back in the early years of Love and Lemons, Jack and I shared a vegan soft pretzel recipe that continues to be one of the most popular recipes on the site. A few weeks ago, when we were in the mood for a fun weekend project, we decided to give the old recipe a go. Our homemade pretzels came out pretty well, but we thought we could make them even better.

This soft pretzel recipe is a new and improved version of the old one. It’s still vegan (no eggs or butter here!), and the pretzels are fantastic. They’re soft and chewy, with a classic sweet and salty pretzel flavor. I think you’ll love them, but almost more importantly, I think you’ll love making them. This is a great recipe for a cool, gray day, when nothing sounds better than holing up in a warm kitchen and making something that’s just as fun as it is delicious. Let’s bake!

Soft pretzel recipe ingredients

Soft Pretzel Recipe Ingredients

Good news! You only need a few ingredients to make this easy soft pretzel recipe:

  • All-purpose flour – This recipe calls for quite a bit of flour – 4 1/2 cups! – so measuring it accurately is important. Too much flour, and your dough will be dry. Too little, and it will be wet and sticky. I recommend using the spoon-and-level method for a precise flour measurement.
  • Active dry yeast – It helps the dough rise and makes the soft pretzels puff up as they bake.
  • Maple syrup – It activates the yeast and adds a subtle sweetness to the dough.
  • Water – To best activate the yeast, make sure your water is warm when you start making this soft pretzel recipe. We aim for 105°-115°F.
  • Extra-virgin olive oil – It adds richness to the dough, helping create the soft pretzels’ addictive chewy texture. A neutral-flavored oil, such as sunflower oil or canola oil, will work here too.
  • And salt – A soft pretzel essential! You’ll add fine sea salt to the dough. Then, once you’ve shaped the pretzels, you’ll sprinkle them generously with coarse sea salt.

Find the complete recipe with measurements below.

Hands shaping ball of dough

How to Make Pretzels

Making this homemade pretzel recipe is a blast! Here’s how it goes:

First, make the dough. Activate the yeast by mixing it with the water and maple syrup. When the mixture foams, pour it into the bowl of a stand mixer fitted with a dough hook. Add the flour, salt, and oil, and mix on medium-low speed until a cohesive dough forms around the hook.

Ball of dough in a large bowl

Then, let it rise. Transfer the dough to a lightly floured work surface and form it into a ball. Brush a large bowl with oil and place the dough inside. Cover the bowl with plastic wrap and set it aside for 60 to 90 minutes, until the dough has almost doubled in size.

8 pieces of soft pretzel dough on marble

Next, shape the pretzels! After the dough rises, turn it out onto a clean, unfloured work surface, and divide it into 8 pieces.

Hands rolling homemade pretzel dough rope

Roll one into an 18-inch rope.

Hands bending rope of pretzel dough into U-shape

Grab the ends of the dough rope, and bend it into a U-shape.

Hands twisting soft pretzel dough

Cross one of the ends of the rope over the other, leaving a wide loop of dough below them. Then, wrap the dough ends around each other again to create the pretzel’s twist.

How to make pretzels - hands shaping dough on marble

Finally, fold the twist towards you, into the center of the dough loop, to make a pretzel shape. That’s it! Repeat with the remaining dough.

Last but not least, boil and bake. Boil the pretzels one at a time in a baking soda bath. Use a slotted spoon to lift each one out of the pot and place it on a parchment-lined baking sheet. Sprinkle it generously with coarse salt, and use a sharp knife to create a 4-inch slit at the bottom of each pretzel.

When all the soft pretzels are boiled and salted, transfer them to a 450° oven and bake until they’re golden brown and puffy. Enjoy!

soft pretzels on a baking sheet

Homemade Soft Pretzel Recipe Tips

  • Add more water or flour if you need to. If the dough seems too dry or wet when you’re mixing it together, don’t worry! Before it rises, you have some wiggle room to adjust its consistency. If it’s super dry and not coming together in the stand mixer, add water, 1 tablespoon at a time, until it does. Conversely, if it’s wet and sticky, add 1 tablespoon of flour at a time until it forms a cohesive, pliable dough.
  • Let the dough rise somewhere warm. Yeast responds to warmth, so, for an extra productive rise, stick the dough somewhere warm. We like to put ours on a sunny windowsill!
  • Boil and salt the pretzels one by one. In a traditional pretzel recipe, an egg wash or melted butter helps bind the coarse salt to the pretzels. We choose not to use eggs or butter in order to keep this recipe vegan, so it’s important that you sprinkle each pretzel with salt right after you boil it, while the dough is still wet. For the best results (and calmest salting process), I recommend boiling and salting each pretzel one by one.
  • Serve them with sauce. Not going to lie, these homemade soft pretzels are delicious on their own, especially when they’re still hot from the oven. But who doesn’t love soft pretzels with dipping sauce?? Make these guys even more fun and flavorful by dunking them in spicy mustard, vegan cheese, chipotle sauce, or vegan ranch dressing.

Homemade soft pretzel recipe

More Favorite Baking Recipes

If you love this soft pretzel recipe, try one of these fun baking projects next:

  • Homemade Bagels
  • Pita Bread
  • Rosemary Focaccia Bread
  • No-Knead Bread
  • Cinnamon Rolls
  • Pumpkin Bread
  • Apple Crumble Pie
  • Or any of these 25 Super Fun Baking Recipes!
Click here to browse more recipes!

Other posts you may enjoy...


Socca Recipe

kale & walnut pesto + easy uses / loveandlemons.com
Easy Kale Pesto


How to Make Homemade Crackers


Best Guacamole


BEST Hummus


Avocado Toast
Click here to browse more recipes!

The post Homemade Soft Pretzels appeared first on Love and Lemons.


Recipes

via Love and Lemons https://ift.tt/2h2Uz32

September 29, 2020 at 08:57AM
#recipies
0 Comments

Chicken Taco Poblano Rice Bowls

9/29/2020

0 Comments

 
Chicken Taco Poblano Rice Bowls
https://ift.tt/3idk6TI

Chicken Taco Poblano Rice Bowls

These quick and easy Chicken Taco Poblano Rice Bowls are perfect for dinner or to make ahead for meal prep! Made in a skillet, with diced chicken breast, poblano peppers, corn, pico de gallo and cheese.

Chicken Taco Poblano Rice Bowls in a glass meal prep container.
Chicken Taco Poblano Rice Bowls

This healthy chicken taco rice bowl recipe takes boring chicken breast and makes it exciting with taco spices and veggies. They are servedover brown rice instead of a tortillas. Great for dinner or to make ahead for meal prep. For more Mexican-inspired bowl recipes, try my Chipotle Chicken Bowls, Spicy Pork Brussels Bowls, Shrimp Fajita Bowls, and Quinoa Huevos Rancheros Bowls.

Chicken Taco Poblano Rice Bowls with a fork.

These chicken taco and rice bowls are ready in under thirty minutes and are very family-friendly since they are so customizable. Set out all the toppings, and your family members can skip any they don’t like. Plus, these bowls are great for meal prep. You can cook the chicken, veggies, and rice ahead of time and then assemble the bowls and top with the pico de gallo, cheese, and sour cream at dinner time. You can also put all the ingredients, including the toppings, in a glass container and take it with you to work for an easy lunch.

How to Make Taco Seasoning from Scratch

I season the chicken with my homemade taco seasoning blend. Of course, you could buy it, but it’s super simple to make homemade taco seasoning with spices you probably already have. And making it yourself is less processed, and you can control the amount of sodium. All you have to do is mix all the spices below in a small bowl:

  • garlic powder
  • cumin
  • kosher salt
  • chili powder
  • sweet paprika
  • dried oregano

How to Make Pico de Gallo from Scratch

Pico de gallo is a fresh tomato salsa that’s perfect on top of tacos, chips, and so much more. To make pico de gallo from scratch, combine chopped tomatoes, onion, and cilantro and season with lime juice and salt. You can also add some chopped jalapeno if you prefer it spicy.

Chicken Taco Bowl Tips and Variations:

  • Sub the chicken for boneless chicken breast, steak or ground meat.
  • Swap the poblano pepper for bell pepper or jalapeño to make it spicy.
  • Add black beans for more protein and fiber.
  • Top your bowl with sliced avocado or guacamole.
  • Add some hot sauce or fresh jalapenos for some extra spice.
  • Switch out the brown rice for cauliflower rice for a low-carb bowl.
  • Use my Cilantro Lime Rice or my cauliflower rice version as the base instead of brown rice.

To Meal Prep: Divide chicken and rice into four meal-prep containers. Pack the pico de gallo and toppings in a separate container. Keep covered and refrigerate up to four days. To reheat, microwave in 30-second intervals until heated through.

Chicken Taco Poblano Rice Bowls in a glass meal prep container.Chicken Taco Poblano Rice Bowls in a glass meal prep container.Chicken Taco Poblano Rice Bowls in a glass meal prep container.

More Chicken Taco Recipes You’ll Love:

Chicken Taco Poblano Rice Bowls

Prep Time: 10 mins

Cook Time: 15 mins

Total Time: 25 mins

These quick and easy Chicken Taco Poblano Rice Bowls are perfect for dinner or to make ahead for meal prep!

  • 1 1/4 pounds organic boneless skinless chicken breasts, cut 1/2 inch cubes, from 3 small
  • 2 teaspoons olive oil
  • 1 medium red onion, peeled and diced
  • 1/4 cup cilantro, minced plus more for garnish
  • 1 poblano pepper, seeded and diced
  • 1 roma tomato, cored and diced
  • 1 lime, halved
  • taco seasoning, see below
  • kosher salt
  • 1 cup frozen or fresh corn kernels
  • 3 cups cooked brown rice, heated (use cauliflower rice for low-carb)
  • 1/4 cup cheddar-jack cheese
  • 1/4 cup 2% sour cream or Greek yogurt, optional

Taco seasoning:

  • 1 teaspoon garlic powder
  • 1 teaspoon cumin
  • 1 teaspoon kosher salt
  • 1/2 teaspoon chili powder
  • 1/2 teaspoon paprika
  • 1/2 teaspoon oregano
  • Dice the chicken into small pieces. Combine taco seasoning in a small bowl and set aside.

  • To make the pico de gallo, set 3 tablespoons of the diced onion aside and place it in a bowl with tomato, cilantro, 2 teaspoons lime juice, 1/4 teaspoon salt. Set aside.

  • Add oil to a large skillet over medium-high heat. When hot, add the chicken and cook until it starts to brown, 2 to 3 minutes.

  • Add the remaining onion, poblano pepper and taco seasoning to the skillet and cook until it softens, 2 to 3 minutes. Add 1/2 cup water and corn. Cook 1 to 2 minutes then remove from heat.

  • Divide rice in 4 bowls, top with chicken, cheese, pico de gallo and optional sour cream.

Serving: 1bowl, Calories: 475kcal, Carbohydrates: 52g, Protein: 40.5g, Fat: 12g, Saturated Fat: 4g, Cholesterol: 116mg, Sodium: 407.5mg, Fiber: 6g, Sugar: 3.5g

Blue Smart Points: 8

Green Smart Points: 11

Purple Smart Points: 3

Keywords: chicken bowls, chicken breast recipes, skillet chicken


posted September 29, 2020 by Gina


Recipes

via Skinnytaste https://ift.tt/2ix3Luq

September 29, 2020 at 08:53AM
#recipies
0 Comments

Simple Chocolate Protein Shake

9/28/2020

0 Comments

 
Simple Chocolate Protein Shake
https://ift.tt/36shkrx
Frosty and creamy, yet light and hydrating, protein-packed and naturally sweet, this Simple Chocolate Protein Shake is one to add to your day anytime you need a protein boost that packs a chocolate-flavored punch!… Hello! I’m alive. Promise. It’s been a whirlwind six weeks after having miss Rosalie. And these days (and nights) have been... The post Simple Chocolate Protein Shake appeared first on HealthyHappyLife.com.

This is a summary, images and full post available on HHL website!


Recipes

via HealthyHappyLife.com https://ift.tt/2X1PMCd

September 28, 2020 at 05:27PM
#recipies
0 Comments

Bacalao Guisado (Salt Cod Stew)

9/28/2020

0 Comments

 
Bacalao Guisado (Salt Cod Stew)
https://ift.tt/30cdG0D

Bacalao Guisado, or salted cod stew, is a rich, tomato-based stew flavored with onions, peppers, and garlic, then bulked up with potatoes. The only salt in this dish comes from rehydrated, flaked codfish. The whole lot is spooned over rice and served on its own, or with a side of sliced avocado.

Salted Cod Stew is one of Puerto Rico’s most popular foods and often served during Lent. It’s also the dish that made me realize that I was different from most of my schoolmates.

My mother was very traditional when it came to the meals she cooked at home, so she never sent me to school with sandwiches for lunch. Whatever was for dinner the previous night became tomorrow’s lunch for us kids. The day I broke the seal on my Tupperware container, and the aromatic smell of cod fish and onions and tomatoes wafted through the air, I became the talk of the lunchroom. Not good talk, either.

They labeled me a “jibara” (a hick or country girl). The fact that I’d never even visited Puerto Rico at that point was irrelevant to my classmates. I was mortified. I swore I’d only bring PB&Js to lunch in the future. But as an adult, this dish has become important to me, because it serves as the link to my Puerto Rican culture.

A dutch oven filled with Puerto Rican Stewed Fish is on a white wooden table with a green and pink linen underneath. White rice is in a casserole dish in the upper left corner.

WHAT IS SALTED COD?

Cod is a round fish with firm, white flesh that flakes easily. To make salted cod the fillets are coated in salt and left to dry, thus preserving the meat for storage and later use.

Salted cod was most likely brought to the Puerto Rico by European sailors who docked at the island’s port during the early 15th or 16th century.

Though this island nation is dependent on the sea’s bounty, Cod is a cold water fish, which means all of it is imported. The mix of cultures who traded and intermingled with the native Tainos brought their own flavors to the island and this dish is one of the delicious representations of that marriage.

WHERE CAN YOU FIND SALTED COD?

Salted cod seems to be common in most of the larger grocers these days. Look for it in the refrigerated section of your supermarket’s fish section. Because it’s not a fresh fish, it’s usually found in bags or boxes near the canned crab meat.

If you live in a city with a high immigrant population, you may be able to find sides of heavily salted, darn near desiccated cod laying on shelves or hanging in the marketplace. This type of cod will require a longer amount of soaking to remove that high amount of salt from it to prepare it for cooking.

Horizontal view of rimmed grey plate with heaping portion of Puerto Rican Cod Fish. White rice and sliced avocado are on the plate along with a fork. Another plate is to the upper right and a dutch oven is partially in view in the upper center. A blue casserole dish is heaped with white rice and is above the plate to the left. A pink and blue patterened linen is under the plate and rice dish.

HOW TO PREPARE SALTED COD?

Salted cod must be soaked and rehydrated to remove most of the salt it’s been preserved in prior to using in your recipes. When cooked as is, its sodium content will make your dishes inedible.

Traditional Soak Method: Soak cod in cold water for at least 8 hours and change the water after 4 hours.

Fast Soak Method: Rinse the exterior layer of salt off before soaking the salted cod in cold water for 45 minutes. Once it’s softened a bit, feel through the meat and remove any remaining bones. Place the cod in a pan, cover with more cold water, and simmer over low heat for 15 minutes. Drain the saltwater and rinse the fillets a final time. Now the cod can be flaked and used in recipes.

I prefer the fast soak method—one hour versus eight hours.

If you’re on a low-sodium diet, the flaked fish can be simmered once again and drained a second time to remove virtually all of the salt.

CAN YOU MAKE BACALAO GUISADO WITH FRESH OR UNSALTED COD?

Bacalao Guisado is traditionally made with salted cod, but fresh cod can be used. It’s the salted cod itself that seasons the stew. To replicate that salinity, you only need to add a teaspoon of kosher salt to the recipe along with the oregano and black pepper.

A close up view of a heaping pot of lenten cod. A blue casserole dish with white rice is behind it. A plate with avocado is in the upper right corner.

WHAT IS RECAO?

One of the most popular ways to season Puerto Rican dishes is with a sofrito that begins with an herb paste called recao. Recao, sometimes called Mexican coriander, is both the name of the herb and the paste. The paste is made by blending recao leaves, which taste verdant and almost garlicky, with onions, garlic, and sweet peppers. You can make it yourself or buy it at the store.

If you can’t find recao paste your local grocery store, and you can’t find the actual herb to make the paste yourself, it’s best just to make a basic sofrito by combining the onions, garlic, and sweet peppers and skipping the racao.

WAYS TO ADAPT THIS RECIPE

Most white fish can be used in this recipe. Haddock, pollack, hake, mahi mahi, catfish, and (my personal favorite) orange roughy are good substitutes for the cod used in this recipe. If using any of these other types of fish, you’ll add a teaspoon of salt to the dish to compensate for the salted cod.

You can also switch up the ingredients. If you’re looking for another version of Salt Cod Stew you might want to check out this Portuguese version made with eggs, olives and loads of olive oil.

WHAT TO SERVE WITH BACALAO GUISADO

Rice is the most common accompaniment to this dish. In some rural parts of Puerto Rico, and among my older family members, a cornmeal mush called funche often accompanies Bacalao Guisado. Funche is just really thick cornmeal polenta. A few slices of avocado or a green salad would also go well with this dish.

Overhead view of a rimmed plate with Puerto Rican Stewed Fish on the left side and sliced avocado and white rice on the right. A fork is on the plate to the right as well. Above the plate is small plate in partial view with sliced avocado on it. Above the avocado is a dutch oven with Lenten Cod recipe in partial view. To the left of the dutch oven is another rimmed plate with stewed codfish and white rice. A bright patterened linen is underneath the plate and white rice is in a blue casserole dish in partial view.

CAN YOU MAKE BACALAO AHEAD OF TIME?

The beauty of this dish is that it grows more flavorful as it sits. You can prepare the Bacalao Guisado the evening before you plan to serve it. Reheat it in a covered dish on the stovetop over medium heat until it’s warmed through. This comes in handy if you’re planning to use the old school, longer soaking time.

CAN YOU FREEZE BACALAO?

If you’re a freezer meal lover like I am, you’ll be happy to know that Bacalao Guisado is freezer-friendly. Add the stew to freezer-safe containers and cover the fish in the liquid to protect it from freezer burn.

MORE INCREDIBLE PUERTO RICAN RECIPES


Recipes

via Simply Recipes https://ift.tt/2F9fkDA

September 28, 2020 at 01:06PM
#recipies
0 Comments

Apple Granola Bars

9/28/2020

0 Comments

 
Apple Granola Bars
https://ift.tt/3i8w7JV

These apple granola bars are the perfect fall snack with dried apple chunks, white chocolate chips and cinnamon. They’re both chewy and crispy at the same time and are so delicious.

I don’t know what it is about this fall but I’m on a total granola bar kick! I think I blame energy ball week. I loved having healthy snacks on hand but if I’m being honest… granola bars take so much less effort than energy balls! No need to roll out the balls, just press and let them set!

When I was brainstorming flavors, I knew I needed to try an apple version. Fall is here and one of my favorite fall activities is stocking up on apples at a local orchard and making as many apple treats as possible. These apple granola bars turned out delicious! They disappear quite quickly in our house!

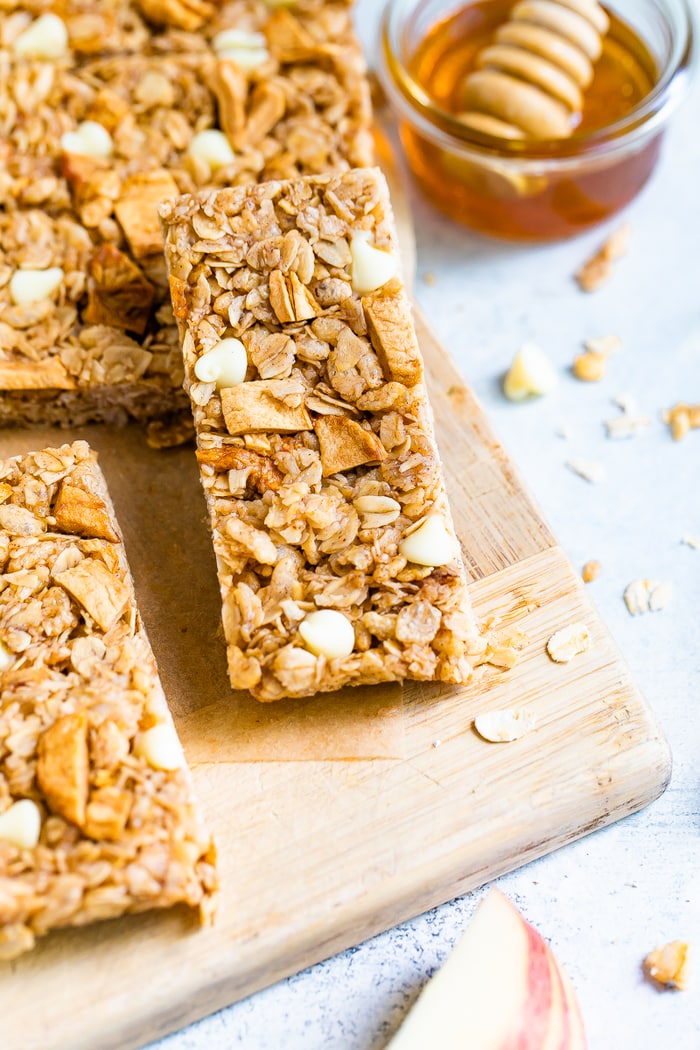
Apple granola bar on a wood cutting board next to a bowl of honey.

Healthier Granola Bars

I’m not sure when the last time you looked at your granola bar ingredient list and nutrition facts but… most are pretty alarming! The ingredient list is so long and half of the ingredients are either synonyms for sugar or are unrecognizable! I wanted to create healthier granola bars that use whole food ingredients, natural sweeteners and have simple ingredient lists. Mission accomplished! These apple granola bars are guaranteed to be a hit with both kids and adults!

Easy Granola Bar Ingredients

  • old fashioned rolled oats
  • brown rice cereal
  • honey
  • coconut oil
  • dried apples
  • white chocolate chips or caramel chips
  • cinnamon
  • vanilla extract
  • sea salt

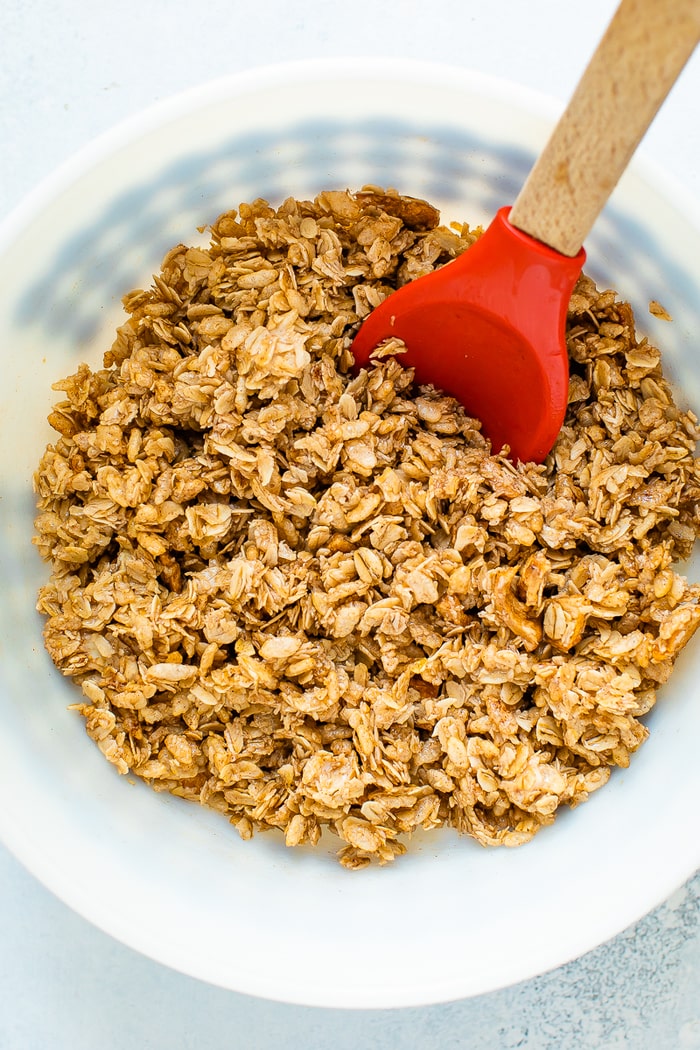
Mixing bowl with oat and apple mixture for granola bars.

How to Make Easy Granola Bars

Prep pan – Start by lining a square baking pan with parchment paper. I like to use large paper clips to clamp it down so it stays in place.

Combine dry ingredients – In a large mixing bowl, combine the oats, cereal, dried apples and chocolate chips.

Create healthy syrup – In a pot on medium heat, combine the honey and coconut oil. Bring the mixture to a boil, stirring continuously. Once bubbling for 30 seconds, remove from the heat and stir in the vanilla extract, cinnamon and salt. Make sure you cook the mixture until it’s bubbling! This reduces the mixture and is what helps hold the bars together.

Combine wet and dry ingredients – Pour the warm mixture into the dry ingredients and mix until everything is well coated. The chocolate chips might melt a bit but that’s okay!

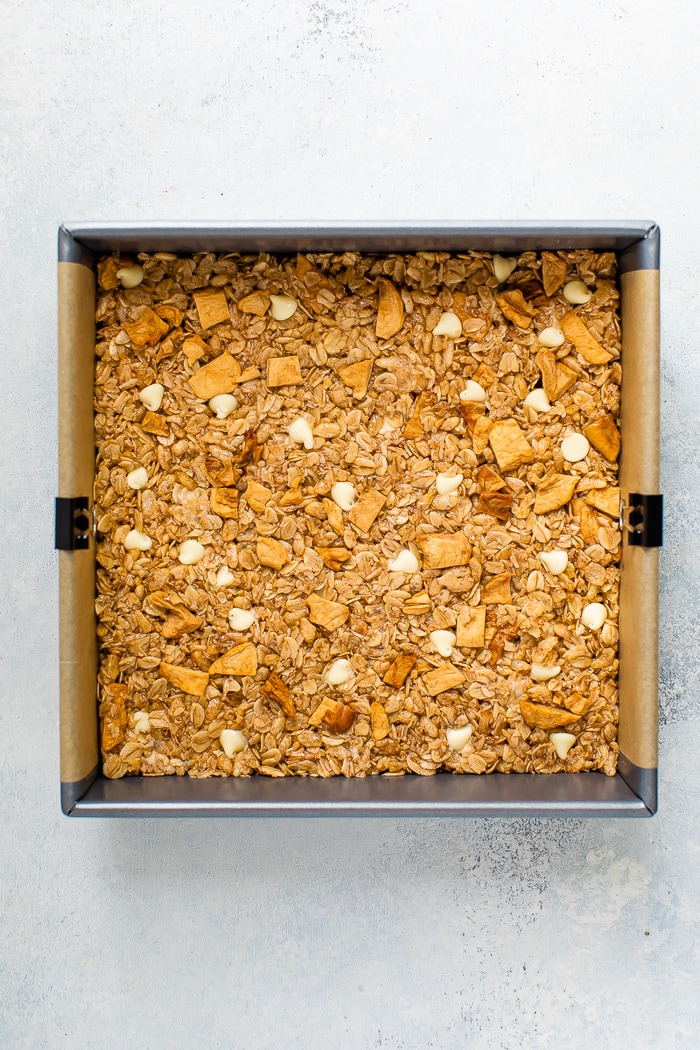
Press mixture – Pour the mixture into the pan lined with parchment paper and lightly press so the mixture is even. Top with remaining apple chunks and chocolate chips and and press firmly with your hands. You’ll really want to press the mixture down well so the bars hold together well. I like to put a piece of parchment paper on top of the mixture so my hands don’t get super sticky.

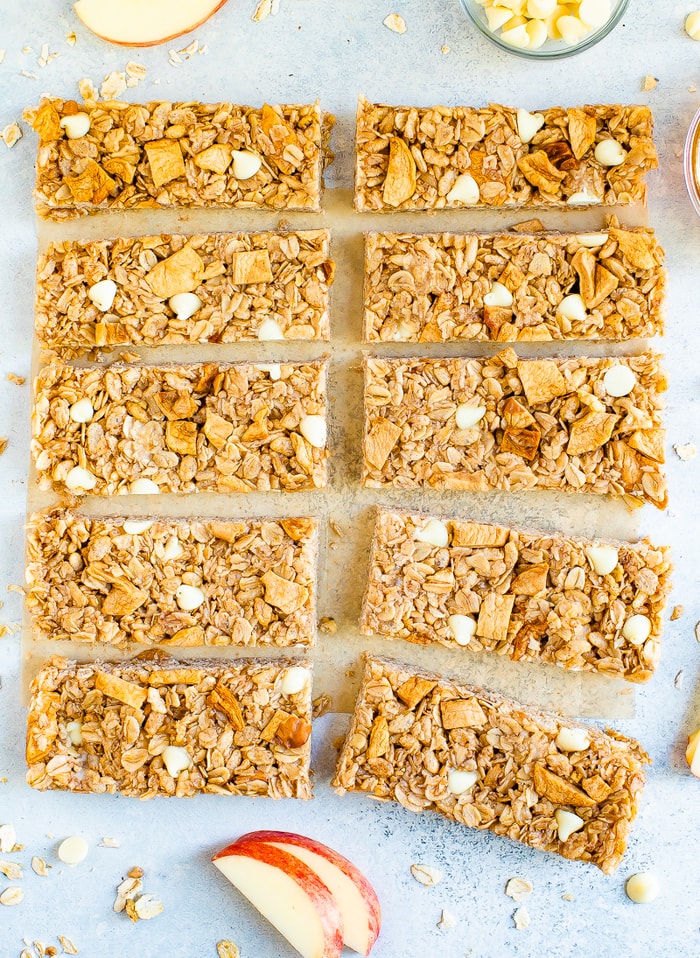
Refrigerate – Once the bars are fully pressed, place the pan in the fridge for two hours to allow the bars to set. Once the bars are solid or hard to the touch, remove them from the pan, place on a cutting board and slice into 10 bars.

Squash baking pan with apple granola bar mixture.

How to Store Granola Bars

These bars will stay together best if you store them in the refrigerator! They will keep for 1 week in an airtight container in the fridge. If you want to store them longer, wrap individually and store in an airtight container in the freezer for up to 2 months.

Ingredient Variations

Wondering about different ingredient substitutions? Here are some that come to mind.

  • Different chips – I used white chocolate chips but these bars with be delicious with peanut butter or caramel chips too. Lily’s makes salted dark chocolate caramel chips that I’m going to have to try out!
  • Different sweeteners – I haven’t tried other sweeteners but I’m guessing it would work with agave, coconut nectar or brown rice syrup. I think maple syrup would be too runny and wouldn’t hold the bars together as well as the other options. If you try a different sweetener, let me know!
  • Dried fruit – of course these are apple granola bars but if you have a different dried fruit on hand, it would still be delicious in this recipe!

10 apple granola bars on a table surrounded by bits of oats and apple slices.

Too Dry or Crumbly?

Two things likely happened if your granola bars are too dry or crumbly:

1. You didn’t let the honey and coconut oil mixture come to a low boil. Cooking until the mixture bubbles reduces the mixture and is the “glue” that holds the bars together!

2. You didn’t press hard enough! You really want to press the mixture into the pan lined with parchment paper. Put your back into it and compact that mixture!

If you can’t “save” your granola bars I bet they’re still delicious enjoyed like granola! Just be sure to follow these tips for next time.

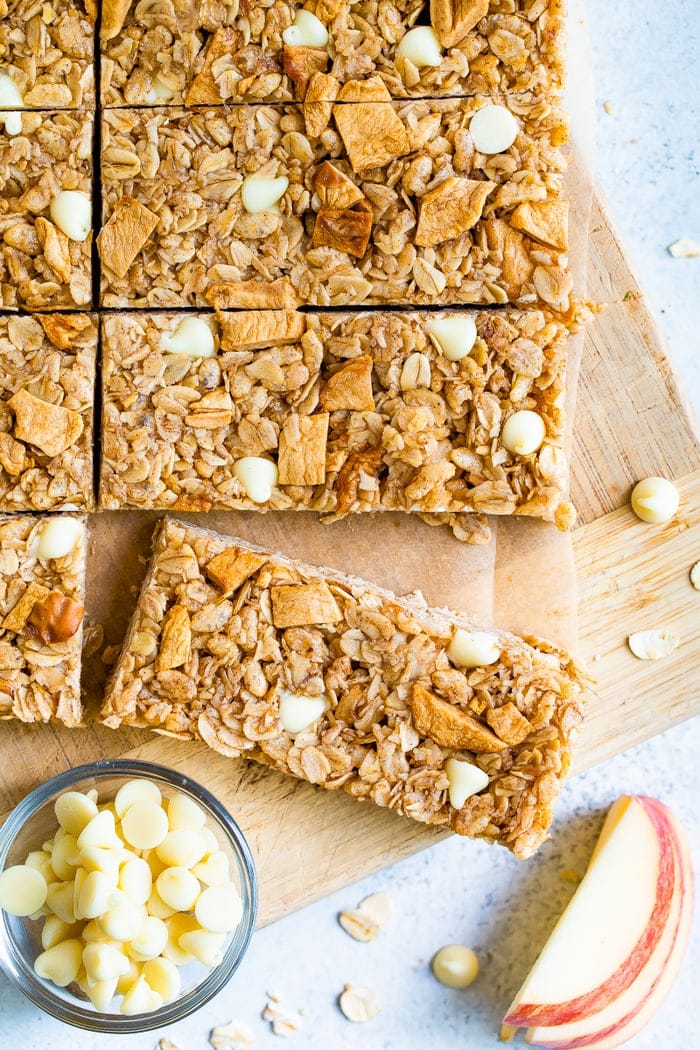
Apple granola bars on a wood board next to a bowl of white chocolate chips and apple slices.

More Granola Bar Recipes to Try:

  • Tahini Fig Bars
  • Fruit and Nut Bars
  • Peanut Butter Chocolate Protein Bars
  • Cranberry Coconut Granola Bars
  • Curry Granola Bars

If you make these apple granola bars be sure to leave a comment and star rating below letting us know how they turned out. Your feedback is so helpful for the EBF team and our readers!

Print
Apple granola bars on a wood board next to a bowl of white chocolate chips and apple slices.

Apple Granola Bars


  • Author: Brittany Mullins
  • Prep Time: 10 minutes
  • Cook Time: 3 minutes
  • Total Time: 13 minutes
  • Yield: 10
  • Diet: Vegetarian
Print Recipe
Pin Recipe

Description

These apple granola bars are the perfect fall snack with dried apple chunks, white chocolate chips and cinnamon. They’re both chewy and crispy and are so delicious.


Ingredients

  • 2 cups old fashioned rolled oats
  • 1 cup brown rice cereal
  • 1/3 cup honey
  • 1/3 cup melted coconut oil
  • 1/4 cup chopped dried apples
  • 2–3 Tablespoons white chocolate chips or caramel chips, divided
  • 1 teaspoon cinnamon
  • 1/2 teaspoon vanilla
  • 1/4 teaspoon sea salt

Instructions

  1. Line an 8×8-inch square baking pan with parchment. I like to use large paper clips to clamp the parchment down so the parchment stays in place.
  2. In a large mixing bowl, combine oats, cereal,  1/8 cup of chopped dried apples and 1 Tablespoon of chocolate chips. Set aside.
  3. In a pot on medium heat, combine honey and coconut oil. Let mixture heat until it starts to bubble, stirring continuously. Once bubbling for 30 seconds, remove from heat and stir in salt, cinnamon and vanilla.
  4. Pour honey mixture into the bowl with the dry ingredients and mix until well coated. The chocolate chips will likely melt a bit, this is okay.
  5. Pour mixture into your parchment lined baking pan and lightly press the mixture so it’s even. Top with remaining dried apple chunks and chocolate chips and really press the mixture down as much as possible. Skipping this step will result in crumbly bars.  I use a piece of parchment to press so that my hands don’t get super sticky.
  6. Cut: Once bars are pressed down firmly, place pan in the fridge for 2 hours to allow the bars to cool and setup. One the bars feel solid/hard to the touch, remove from the pan, place on a cutting board and slice into 10 bars. Serve immediately or save for later.
  7. To store: these bars will stay together best if you store them in the refrigerator. They will keep for 1 week in an airtight container in the fridge. For freezing, wrap them individually and store in the freezer for up to 2 months.

  • Category: Snack
  • Method: No Bake
  • Cuisine: American

Nutrition

  • Serving Size: 1 bar
  • Calories: 198
  • Sugar: 14g
  • Sodium: 78mg
  • Fat: 10g
  • Saturated Fat: 7g
  • Unsaturated Fat: 2g
  • Trans Fat: 0g
  • Carbohydrates: 27g
  • Fiber: 2g
  • Protein: 2g
  • Cholesterol: 0mg

Keywords: apple granola bars

Did you make this recipe?

Tag @eatingbirdfood on Instagram and hashtag it #eatingbirdfood

The post Apple Granola Bars appeared first on Eating Bird Food.


Recipes

via Eating Bird Food https://ift.tt/1L45wsH

September 28, 2020 at 09:03AM
#recipies
0 Comments
<<Previous

    The Flat Belly Detox Drink Fix


    The Flat Belly Fix

    This is the only 21-day rapid weight loss system that allows you to easily lose an average of 1 lb a day for 21 days without feeling hungry or deprived. The unique and brand new techniques used in this System are proven SAFE. And they do not cause the rebound weight gain common to all the other rapid weight loss systems that are not backed by the latest science. The Flat Belly Fix System takes advantage of a recent scientific discovery that proves the effective weight loss power of an ancient spice. Combined with other cutting-edge ingredients in the patent-pending Flat Belly Fix Tea™ — that you can make right in your own kitchen in minutes — this System is the quickest, easiest and most enjoyable way to quickly get the body you desire and deserve. Click Here

    Categories

    All
    Gluten Free
    Pancakes
    Protein

    Archives

    November 2020
    October 2020
    September 2020
    August 2020
    July 2020
    June 2020
    May 2020
    April 2020
    March 2020
    February 2020
    January 2020
    December 2019
    November 2019
    October 2019
    September 2019
    August 2019
    July 2019
    June 2019
    May 2019
    April 2019
    March 2019
    February 2019
    January 2019
    December 2018
    November 2018
    October 2018
    September 2018
    August 2018
    July 2018
    June 2018
    May 2018
    April 2018
    March 2018
    February 2018
    January 2018
    December 2017
    November 2017

    RSS Feed

Powered by Create your own unique website with customizable templates.
  • Home
  • Recipes
  • Health News
  • Fitness News
  • Weight Loss
  • Contact
  • Subscribe