
|
Chicken and Dumplings
https://ift.tt/2GPKzby 1 Heat the chicken stock to a gentle simmer in a medium pot. 2 Brown the chicken: In a large 8-quart or larger thick-bottomed pot, heat the butter or olive oil over medium-high heat. Pat dry the chicken pieces and sprinkle with salt. Working in batches, brown the chicken pieces, placing the pieces skin-side down first; this will render out fat you will use to build the stew later. 3 Poach the chicken in the stock: Once the chicken pieces are browned on all sides, remove them from the large pot, and turn off the heat. Remove and discard the skin from the chicken pieces and put the chicken pieces into the pot of simmering stock. Poach the chicken in the stock until cooked through, about 20 minutes or so. Remove the chicken pieces and set on a tray to cool for a few minutes. When the chicken pieces are cool to touch, pull the meat off the bones and cut into 2-inch chunks. Set aside. 4 Cook the vegetables until softened: Return the heat on the large pot to medium-high. When the pot is hot, add the onion, celery, carrot and thyme and sauté until soft, but not browned, about 4 to 5 minutes. 5 Add the flour and stir well. The flour will absorb the fat in the pot and will stick a little to the bottom. Reduce the heat to medium-low and stir the flour vegetable mixture constantly for 2 to 3 minutes. Do not let it burn. 6 Add sherry, slowly add stock: Get a ladle ready and have the pot of simmering chicken stock nearby. Add the sherry to the flour vegetable mixture. It will sputter and seize up. Add a ladle of hot chicken stock to and stir well. It will be goopy. Add another ladle, then another, stirring all the while, until the broth comes together. Add the rest of the chicken stock and the reserved chicken meat. Increase the heat and bring to a simmer, then reduce the heat to maintain a gentle simmer while you make the dumplings. 7 Make the dumpling batter: Whisk together flour, baking powder, and salt in a medium bowl. Add (optional) chopped fresh herbs. Add melted butter and milk to the dry ingredients. Gently mix with a wooden spoon until mixture just comes together. (Note: do not over-mix or your dumplings will turn out too dense.) 8 Add dumplings to the stew: Drop dumpling batter into the simmering stew by heaping teaspoonfuls, over the surface of the stew. (Note that the dumplings will easily double in size as they cook.) Cover and simmer until dumplings are cooked through, about 15 minutes. Once you have covered the pan, do not uncover and peek while the dumplings are cooking! In order for the dumplings to be light and fluffy, they must steam, not boil. Uncovering the pan releases the steam. If after 15 minutes the dumplings are still not cooked through (use a toothpick or skewer to test), then cover pan again and cook for another 5 to 10 minutes. 9 Finish the stew: Gently stir in peas, parsley, and cream, if using. Add more salt to taste. Ladle portions of meat, sauce, vegetables, and dumplings into soup plates and serve. Note that the stew will continue to thicken the longer it sits. Recipes via Simply Recipes https://ift.tt/2F9fkDA February 28, 2019 at 08:06AM
0 Comments
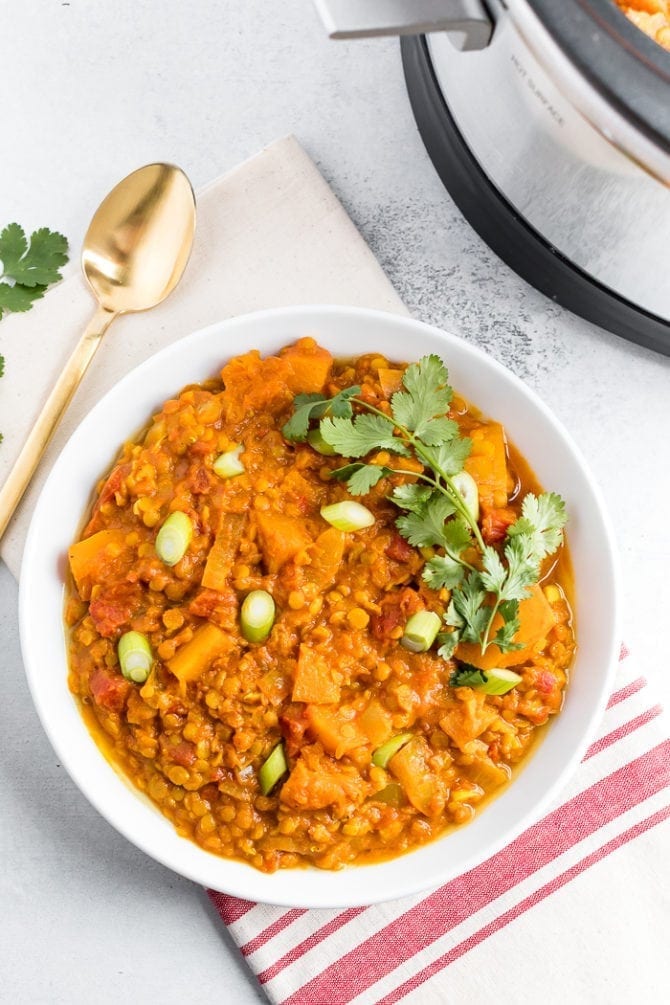
Vegetarian Slow Cooker Stew with Butternut Squash and Red Lentils
https://ift.tt/2H5qmOl A hearty vegetarian slow cooker stew with butternut squash, red lentils, coconut milk and a robust blend of spices. This stew is the perfect way to warm up on a cold day. Vegan + gluten-free. It’s the perfect time of year for this cozy stew. It feels like spring should be right around the corner, but my guess is that half of the U.S. is still covered in snow and doesn’t feel like spring is anywhere near. So for those of you battling cold temps and wanting a simple dinner that will warm you up from the inside out, this stew is for you.
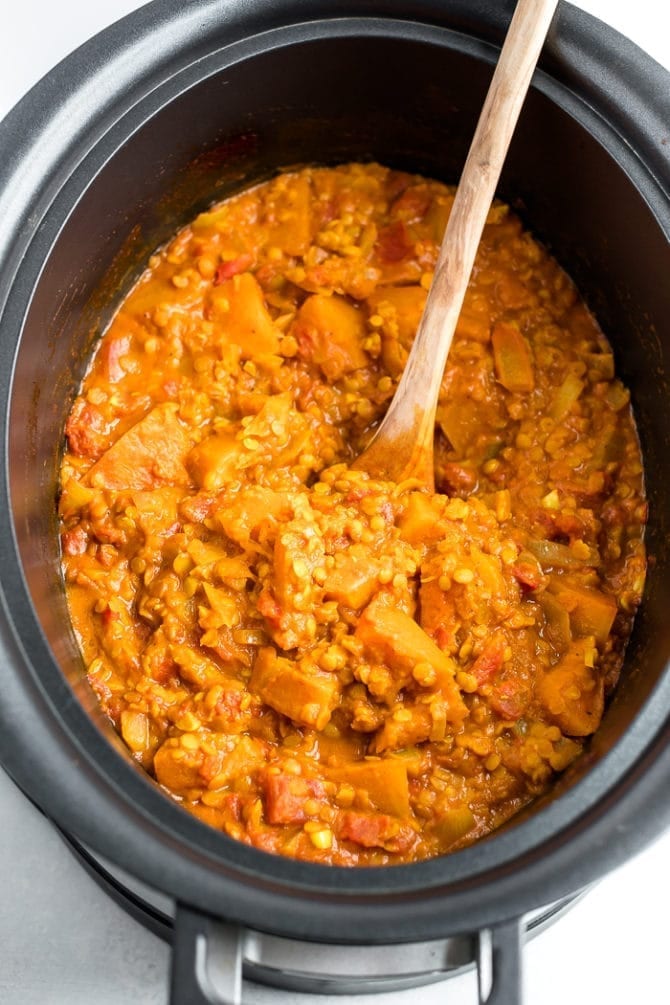
This veggie-packed stew is inspired by my Butternut Squash and Turkey Chili, which is cooked in the Instant Pot. I LOVE this chili so much, but recently wanted to try a completely vegetarian version with extra red lentils and this was the result. It’s so warm, comforting and amazing filling for a vegetarian meal. I love the combo of red lentils with butternut squash, and the unique combo of spices in this soup make it so delicious. I can’t wait for you to try it! I know cooking lentils can be a little intimidating, but this method could not be simpler. I’ll answer some FAQs below, but don’t hesitate to leave a comment if you have any additional questions!
Can you put dried lentils in a slow cooker?Yes! You can put dried, uncooked lentils in a slow cooker with liquid and they will cook through. For this recipe, you’ll put all of your ingredients for the stew in the slow cooker and it’ll work its magic. Do you have to soak lentils before slow cooking?Nope! Lentils are the one of the only dry beans that you don’t need to soak before cooking. You can soak them if you want to speed up the cooking process, but it’s not necessary. On thing to note: You should always rinse your lentils before cooking just to clean them off and remove any stones, debris or shriveled lentils. Once rinsed and sorted, drain and use as directed in the recipe. Can you overcook lentils?Yes, you can overcook lentils – they’ll end up getting super soft and mushy. Follow the directions in this recipe to make sure you don’t end up with mushy lentils from overcooking. How to make Vegetarian Slow Cooker StewThe ingredient list for this recipe might look long and intimidating, but almost half of the ingredients are spices you probably already have in your spice cabinet, so don’t stress! Start by sautéing the chopped onion and garlic in a saucepan (or your slow cooker if it’s stovetop safe!) and add in the spices. I love seasoning multiple layers of a dish – it makes for awesome flavor! Next, add your sautéed onion and garlic to the slow cooker along with the butternut squash, broth, tomatoes, coconut milk, lentils, tomato paste, and apple cider vinegar. Cover and cook on high for 3 hours or on low for 6. You’ll know it’s ready when the lentils and butternut squash are soft and cooked through. Feel free to taste test to make sure. Once the stew is cooked through, you’ll stir in your spinach (if using) and let it sit for a couple of minutes so the greens get a little wilted. Then it’s ready to serve! Enjoy on its own or serve over brown rice or quinoa if you’d like.
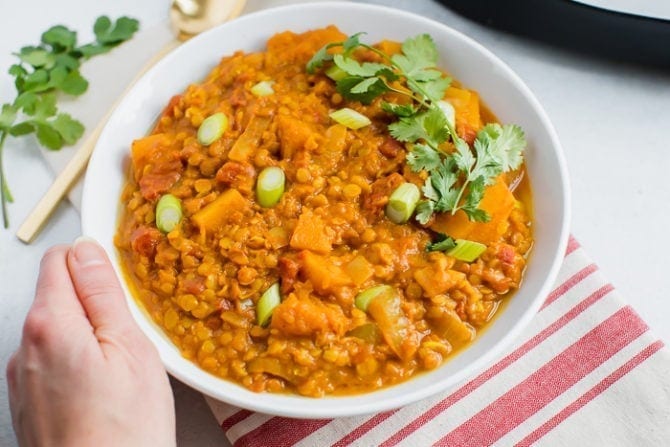
If you make this butternut squash and red lentil stew, please be sure to leave a comment and star rating below letting me know how it turns out. Your feedback is so helpful for the EBF team and other EBF readers. Print DescriptionA hearty vegetarian slow cooker stew with butternut squash, red lentils, coconut milk and a robust blend of spices. This stew is the perfect way to warm up on a cold day. Vegan + gluten-free. Ingredients
Instructions
Nutrition
Keywords: butternut squash and red lentil stew, slow cooker red lentil stew The post Vegetarian Slow Cooker Stew with Butternut Squash and Red Lentils appeared first on Eating Bird Food. Recipes via Eating Bird Food https://ift.tt/1L45wsH February 28, 2019 at 06:23AM
Seattle Smoked Salmon Chowder
https://ift.tt/2NvpgwB This creamy Smoked Salmon Chowder is truly comfort food in a bowl! Made with hot-smoked salmon (full of heart-healthy fats) and a ton of nutrient-packed veggies (onion, celery, carrots, potatoes, corn and cauliflower), it’s a good-for-you soup the whole family will love. Stove top and Instant Pot directions provided.
|
|


 If you make this slow cooker cheesy Mexican quinoa, please be sure to leave a comment and star rating below letting me know how it turns out. Your feedback is so helpful for the EBF team and other EBF readers.


 RSS Feed
