


 Buy Now →
|
Honey Mustard Chicken Wings
http://bit.ly/2Mi99Wj These Honey Mustard Chicken Wings are a go-to party snack. Marinate them with honey, mustard, and soy sauce, and then roast them in the oven. No deep-frying required! Photography Credit: Elise Bauer I love good finger food, don’t you? Here’s an easy recipe for chicken wing drummettes—the part of a chicken wing that looks like a mini drumstick. You marinate the wing drummettes in a mixture of honey, mustard, olive oil, soy sauce, and garlic, and then roast them in the oven until done. Use Drummettes or WingettesYou don’t have to use only drummettes, you can use wingettes or just pieces of chicken, cut the size of drummette. Note that cooking time will vary with different cuts. These were absolutely delicious; we can’t wait to make them again! 
Chicken Wings in the OvenThat’s right — no deep-frying required for these chicken wings. These are roasted in the oven. This makes this party snack a little bit healthier, and also means you can make the entire batch all at once. Easy! For more crispy edges and even cooking, set a metal baking rack inside your baking sheet and lay the drummettes on top. This lifts them off the surface of the baking sheet and lets them cook from all sides. Try These Other Chicken Wing Recipes:Updated May 22, 2019 : We spiffed up this post to make it sparkle. No changes to the original recipe. Honey Mustard Chicken Wings RecipePrintRecipe adapted from Petaluma Poultry, providers of Rocky Range and Rocky Jr. chickens. Ingredients
Method1 Marinate the chicken wings: Rinse and pat dry the chicken wings. Place them in a large bowl or marinade bag. Mix together the marinade ingredients—crushed garlic cloves, honey, mustard, soy sauce, lemon juice, olive oil, salt and pepper—and pour over the chicken wings to coat. Chill for at least an hour or up to 24 hours. 2 Roast the wings: Preheat oven to 400°F. Line a roasting pan with foil and place a baking rack over it. Place the chicken wings in on the rack in a single layer with some space between the wings. Bake for 25-35 minutes, depending on the size of the chicken wings, until cooked through and well browned.
Hello! All photos and content are copyright protected. Please do not use our photos without prior written permission. If you wish to republish this recipe, please rewrite the recipe in your own unique words and link back to Honey Mustard Chicken Wings on Simply Recipes. Thank you! PrintThis post may contain links to Amazon or other partners; your purchases via these links can benefit Simply Recipes. Read more about our affiliate linking policy. Recipes via Simply Recipes http://bit.ly/2F9fkDA May 22, 2019 at 04:06PM
0 Comments
Honey Sriracha Chicken and Broccoli Meal Prep Bowls
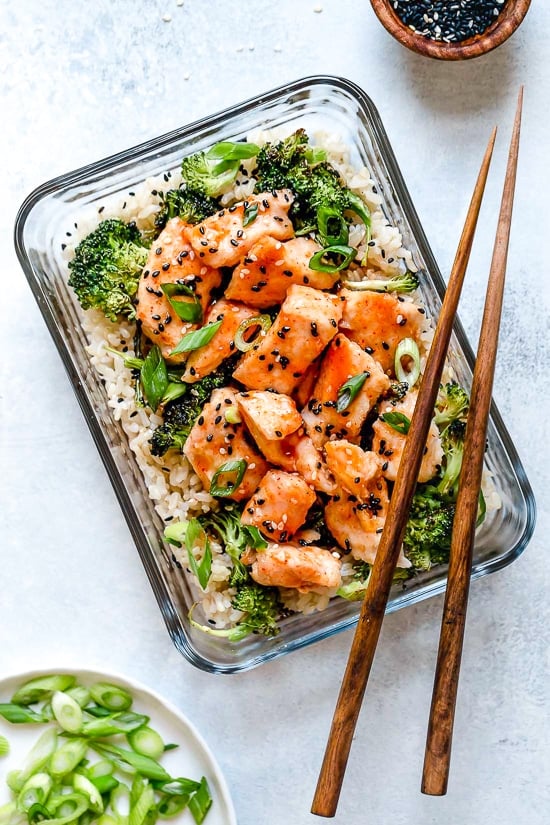
http://bit.ly/2HKtFJA This easy meal-prep honey-sriracha chicken dish, which can also be served as a main dish, is made on a sheet pan and comes together quick!
It’s been a while since I posted a new meal prep recipe, I made this just before my trip to Italy and loved how it turned out. It is simple, sweet and spicy, and so flavorful made with honey, sriracha and sesame oil served over brown rice. Some other meal prep recipes I love to make are this Taco Salad Meal Prep, Greek Chickpea Salad, and these Freezer Breakfast Burritos. Recipes via Skinnytaste http://bit.ly/2ix3Luq May 22, 2019 at 01:04PM
Easy Summer Pasta Salad
http://bit.ly/2VKGFnz
We’re counting down the days until the long weekend! In the meantime, I’m sharing 3 great cookout salads this week (did you catch Monday’s broccoli salad?). I took extra care to make sure that all of these recipes are not just easy, but also easy to make in advance… because I totally get that you don’t want to be futzing with your salad in the car on the way to your picnic. Today’s recipe: pasta salad! Every cookout needs a pasta salad, and this is the one that I’ll be making all summer long. Note: if you do decide to make this in advance, toss on some whole basil leaves before serving to make your salad instantly prettier.
Pasta Salad IngredientsI’ve made many pasta salads before (see here and here), but I realized that I didn’t have a really good classic pasta salad with a vinaigrette dressing on the site. This recipe is easy and fresh – along with the pasta, I toss in juicy cherry tomatoes, tangy feta cheese, a generous handful of arugula, chickpeas for protein, pine nuts & little cucumbers for crunch, and lots of fresh parsley and basil. The dressing is easy to whisk together: it’s a simple combination of lemon, Dijon mustard, extra-virgin olive oil, garlic, and herbes de Provence. If you don’t have herbes de Provence on hand, Italian seasoning would be equally good in its place.
How to Make Pasta SaladMaking this recipe is a breeze! Just follow these simple steps:
My Best Pasta Salad Tips
Easy Pasta Salad Recipe VariationsThis pasta salad is fantastic as-is, but feel free to change it up to match your tastes or the ingredients in your pantry. Here are a few suggestions:
If you love this pasta salad recipe…Try this broccoli salad, this watermelon salad, this couscous salad, or this summer slaw next! Other posts you may enjoy...
The post Easy Summer Pasta Salad appeared first on Love and Lemons. Recipes via Love and Lemons http://bit.ly/2h2Uz32 May 22, 2019 at 09:53AM
Sheet Pan Ranch Pork Chops
http://bit.ly/2Hxn7Pz Sheet pan dinners are lifesavers, and this recipe for Sheet Pan Ranch Pork Chops comes with a bonus: the seasoning mix is also great for homemade dressing or flavoring other meals! Photography Credit: Nick Evans There are so many things I love about this recipe, but let me give you my top three.

What’s in the Ranch Mix?Ranch seasoning packets that you buy at the store are light on the herbs and heavy on the salt and dried buttermilk. They have their time and place, but if you are making it at home, you can use real dried herbs and make something really special. And although you can buy dried buttermilk, I prefer to skip it and just make the dry mix with the spices. I then mix the spices into real buttermilk when I want a batch of ranch dressing or a marinade, like these pork chops. The ranch flavor in this recipe isn’t as strong as a store-bought mix or ranch dressing. It has similar flavors but isn’t quite as tangy. Of course, you can always serve the dish with a side of ranch dressing for more ranch flavor! The recipe for the ranch mix here makes more than you’ll need for the pork chops and veggies—bonus! This seasoning mix can be used very liberally on meats and veggies, or stirred into mayo, Greek yogurt, and buttermilk to make a great salad dressing. The Best Pork Chops for BakingI don’t have a firm recommendation here. It depends on the situation.
It’s personal preference. Generally, I save the bone-in pork chops for grilling and use boneless for this recipe (and not the double cut chops). Make It a Meal!If you put four pork chops on a sheet pan, you’ll have a lot of room left over. Fill that space with delicious roasted veggies! I like a mix of mushrooms, carrots, and new potatoes, but you could use sweet onions, red peppers, or even broccoli florets. The veggies I used need longer to cook than the pork chops though, so I recommend starting them by themselves, roasting them for about 20 minutes, and then stirring them before nestling the pork chops in for the final 20 minutes or so of baking time. Enjoy the real ranch seasonings in this recipe and the easy cleanup! I think your family will love it. MORE SHEET PAN RECIPES TO TRY!Sheet Pan Ranch Pork Chops RecipePrintIf you want to make ranch dressing with the leftover seasoning mix, combine 1/2 cup Greek yogurt, 1/2 cup buttermilk, and 3 tablespoons of ranch seasoning mix in a jar with a lid and shake well. IngredientsFor the homemade ranch mix:
For the sheet pan pork chops:
Method1 Preheat the oven to 400°F. 2 Make the ranch mix: Stir together dried seasoning ingredients in a small bowl and set aside. The recipe won’t use the entire mix, so store leftover seasoning mix in an airtight container in the pantry for up to three months.
3 Prepare the pork chops: Stir 3 tablespoons of ranch seasoning mix with one cup of buttermilk. Add pork chops and allow to marinate for at least 20 minutes, but you could do it a day in advance as well.
4 Roast the veggies: Add vegetables to a medium bowl. Drizzle them with olive oil and toss with 1 tablespoon of ranch seasoning mix. Spread the vegetables out on a sheet pan. Bake for 20 minutes.
5 Add the pork chops: Remove sheet pan and stir veggies. Remove pork chops from the marinade and pat them dry. Then nestle pork chops into the veggies on the sheet pan. Try to make sure everything is in a single layer, but it’s okay if the veggies stack a bit. Sprinkle the sheet pan with a little extra ranch seasoning mix, about 1 teaspoon.
6 Bake the pork chops: Bake pork chops with the veggies for 10 minutes, and then turn them and add another teaspoon of seasoning to the pork chops. Bake them for another 10 minutes and then check them with a meat thermometer. They should reach 145°F in the thickest part; keep in mind they will continue to cook after you remove them from the oven. 7 Serve the pork chops: Let the sheet pan rest for five minutes before serving, then divide vegetables and pork chops between plates.
Leftovers will store great in the fridge for 4 to 5 days. For best results, reheat in a 350°F oven until warm. You can also microwave in 30-second bursts. Hello! All photos and content are copyright protected. Please do not use our photos without prior written permission. If you wish to republish this recipe, please rewrite the recipe in your own unique words and link back to Sheet Pan Ranch Pork Chops on Simply Recipes. Thank you! PrintThis post may contain links to Amazon or other partners; your purchases via these links can benefit Simply Recipes. Read more about our affiliate linking policy. Recipes via Simply Recipes http://bit.ly/2F9fkDA May 22, 2019 at 09:05AM
3 Ingredient Icebox Cake (Dairy-Free + Gluten-Free)
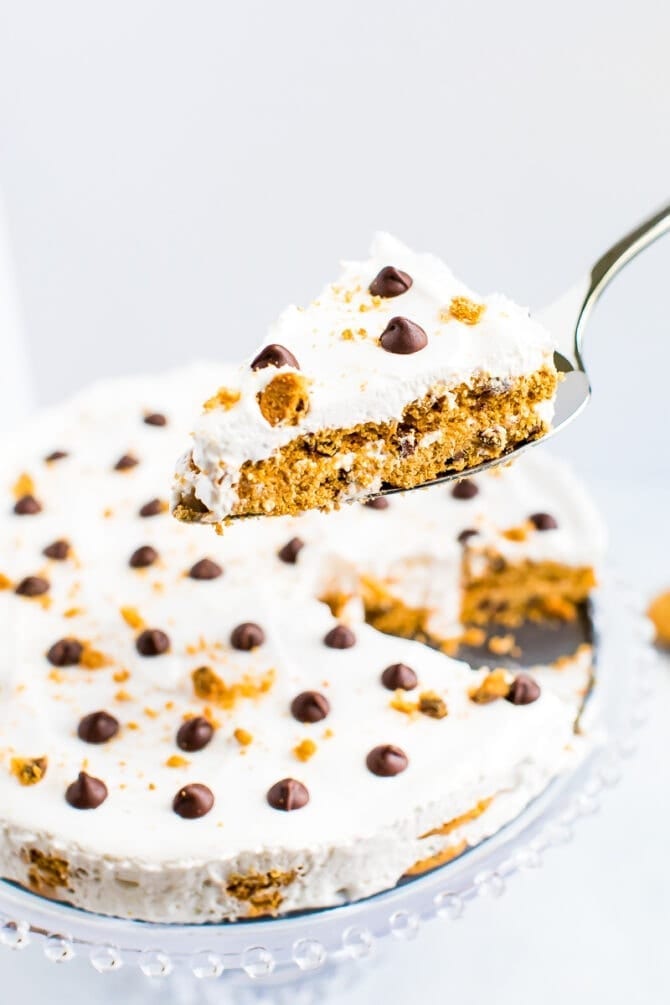
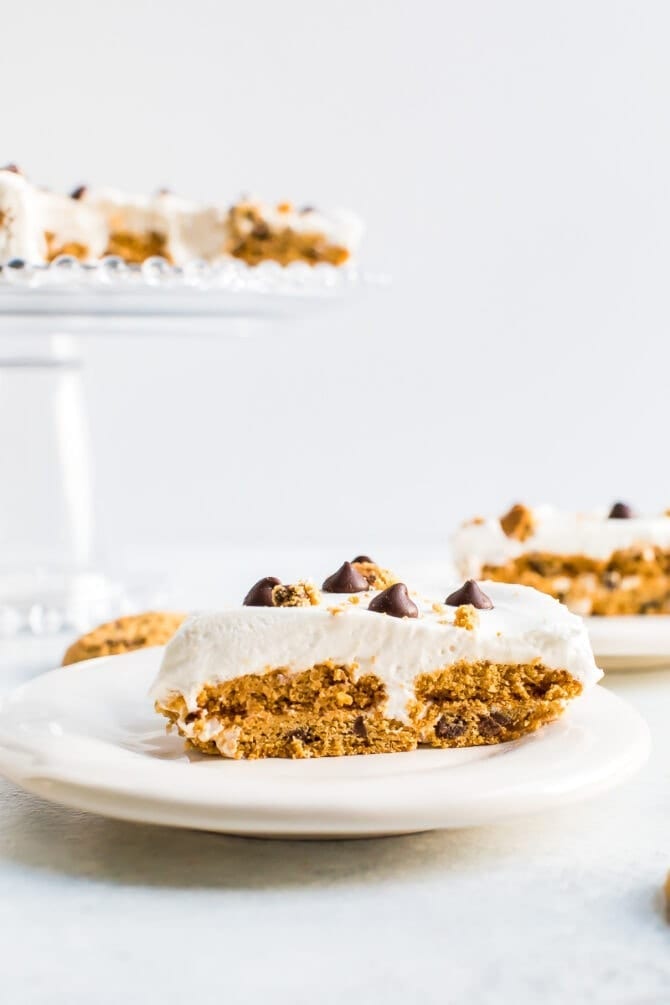
http://bit.ly/2Hwf9WE An upgraded 3-ingredient icebox cake with gluten-free cookies and dairy-free coconut whipped cream. It’s cool, creamy and perfect for summer cookouts and parties. Gluten-free and vegan. I’ve been wanting to share an icebox cake recipe with you for awhile… I figured now was the perfect time so that you can bring this delicious dessert to your Memorial Day cookouts!
The first time I ever heard about icebox cakes was from Maria a few years ago. She was raving about Ina Garden’s Mocha Icebox Cake (made with Tate’s cookies) and mentioned that she makes it for her sister’s birthday each year. I’ve never been a huge regular cake person and have always enjoyed ice cream cakes and cookie cakes more, so the idea of an icebox cake, which is kind of a hybrid of both, immediately piqued my interest. I had to try the recipe for myself so I made Ina’s cake for a Labor Day party and it was a HUGE hit. Ever since I’ve been wanting to make a healthier icebox cake.
Old Fashioned Icebox CakeClassic icebox cakes, like Ina’s, are loaded with heavy ingredients. Traditionally, they’ll have things like vanilla pudding mix, heavy cream or whipped cream, a layer of graham crackers and sometimes even cream cheese. You can imagine how rich and delicious it is! I love layered desserts, and although the ingredients in traditional versions of this cake aren’t exactly EBF friendly, I knew I could create an upgraded version. Healthy Icebox Cake SwapsFor this icebox cake, we’re keeping things super easy with only three simple ingredients:
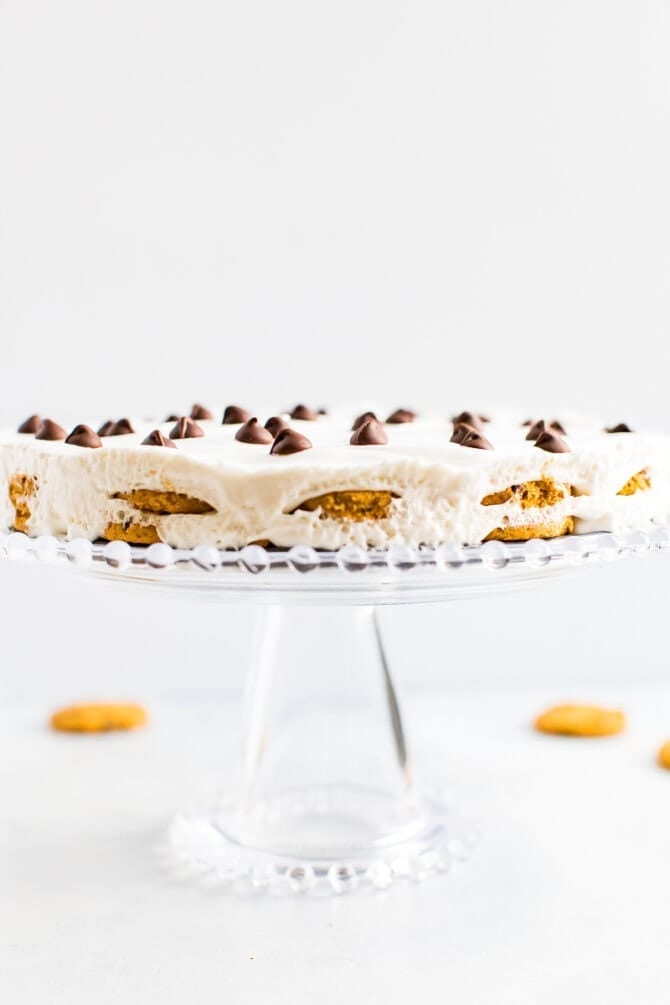
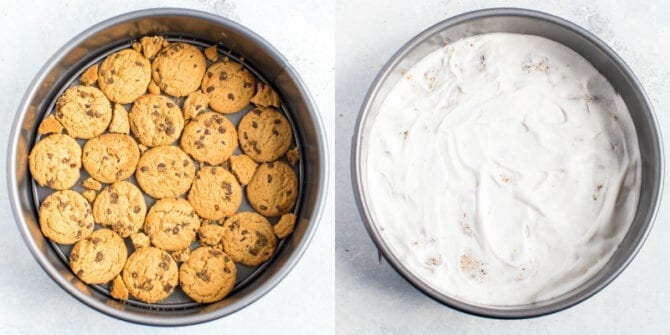
How to Make an Icebox CakeIt’s soooo simple! The basic idea is to layer cookies and whipped cream in a springform pan, on a platter or in a baking dish.
I layered Simple Mills chocolate chip cookies and coconut whipped topping. Top with vegan chocolate chips and cookie crumbs and then chill in the fridge for at least 6 hours (or overnight). Trust me, waiting the six hours is the hardest part of this recipe. The cookies absorb some of the whipped topping and soften… almost cake-like. So good!
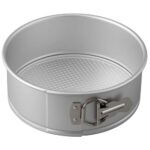
Equipment Needed for an Icebox CakeThe only special equipment needed for an icebox cake is a springform pan, and technically it’s only really needed if you want the cake to look uniform and tidy. Otherwise, you can use a plate/platter, a square or rectangular baking dish or even a bowl to layer your cookies and whipped topping. So don’t stress if you don’t have a springform pan – just opt for a different container. If you make this vegan icebox cake, please be sure to leave a comment and star rating below. Your feedback is super helpful for the EBF team and other EBF readers. Print Vegan Chocolate Chip Cookie Icebox Cake
DescriptionAn upgraded 3-ingredient icebox cake with gluten-free cookies and dairy-free coconut whipped cream. It’s cool, creamy and perfect for summer cookouts and parties. Gluten-free and vegan. Ingredients
Instructions
Equipment
Buy Now →
Nutrition
Keywords: chocolate chip cookie icebox cake More No Bake Desserts for Summer:
The post 3 Ingredient Icebox Cake (Dairy-Free + Gluten-Free) appeared first on Eating Bird Food. Recipes via Eating Bird Food http://bit.ly/1L45wsH May 22, 2019 at 07:04AM
Sunny Day Tofu Sandwich
http://bit.ly/2M2pYUZ This Sunny Day Tofu Sandwich is packed with veggies like avocado, arugula and tomato. Pickles and a secret sauce make things extra flavorful. This tofu-stuffed vegan sandwich is protein packed and perfect on a sunny day! Serve on fluffy ciabatta or your favorite sandwich bread. I love this as a lunchtime sandwich...Read more » This is a summary, images and full post available on HHL website! Recipes via Healthy. Happy. Life. http://bit.ly/ygHPsr May 21, 2019 at 06:59PM
How to Hold a Chef’s Knife
http://bit.ly/2WX7VjO Are you just not sure you're holding your chef's knife right? Do knives in general mystify you? Here are two of the most common ways to hold your chef's knife. PrintPhotography Credit: Alison Conklin A chef’s knife is asset in the kitchen when properly held and wielded. There is little that is more frustrating in the kitchen than using the wrong tool for the job. But if using a large and probably heavy knife is an unfamiliar activity for you, never fear! With practice comes familiarity, and with familiarity comes skill. (I’m reminded of the scene of Meryl Streep as Julia Child in the film Julie and Julia, when she repeatedly chops onions to get the technique right. And ends up with mountains of onions.) |


 Broccoli Pasta Salad |
 Rainbow Kale Salad with Carrot Ginger Dressing |
 Cinco de Mango |
 Arugula Salad with Lemon & Fennel |
 Buddha Bowl with Turmeric Tahini Sauce |
 Best Guacamole |
The post Broccoli Salad appeared first on Love and Lemons.
Recipes
via Love and Lemons http://bit.ly/2h2Uz32
May 20, 2019 at 10:37AM

The Flat Belly Fix
This is the only 21-day rapid weight loss system that allows you to easily lose an average of 1 lb a day for 21 days without feeling hungry or deprived. The unique and brand new techniques used in this System are proven SAFE. And they do not cause the rebound weight gain common to all the other rapid weight loss systems that are not backed by the latest science. The Flat Belly Fix System takes advantage of a recent scientific discovery that proves the effective weight loss power of an ancient spice. Combined with other cutting-edge ingredients in the patent-pending Flat Belly Fix Tea™ — that you can make right in your own kitchen in minutes — this System is the quickest, easiest and most enjoyable way to quickly get the body you desire and deserve. Click Here
Categories
All
Gluten Free
Pancakes
Protein
Archives
November 2020
October 2020
September 2020
August 2020
July 2020
June 2020
May 2020
April 2020
March 2020
February 2020
January 2020
December 2019
November 2019
October 2019
September 2019
August 2019
July 2019
June 2019
May 2019
April 2019
March 2019
February 2019
January 2019
December 2018
November 2018
October 2018
September 2018
August 2018
July 2018
June 2018
May 2018
April 2018
March 2018
February 2018
January 2018
December 2017
November 2017
 RSS Feed
