


 Buy Now →
|
The Friday Buzz: Prom Fails, Ginger Juice, and Good Omens
https://ift.tt/2LFMhNP Here's our roundup of all good things, good advice, good feelings. It’s the literally the happy hour of blog posts! Up this week... Prom fails, ginger juice, "Good Omens", and so much more. Print Welcome to The Friday Buzz, our roundup of all good things, good advice, good feelings. It’s the literally the happy hour of blog posts! Up this week… Prom fails, ginger juice, “Good Omens,” and so much more. Are you an early bird or a night owl? I tend to be a night owl, but with the new school year upon us and school starting so darn early, I am having to quickly adjust my schedule to wake up earlier than I’d ever like to. Once I’m awake, I do okay… it’s just those first 10 minutes are absolutely brutal! I really do admire those who are chipper and ready to go first thing in the morning! If you have any tips on how to become a morning person, SEND THEM MY WAY! I beg of you! Let’s see what the Simply Recipes Team is sending your way this week, shall we? OUR WEEKLY FAVES COMIN’ AT YA!
MEANWHILE ON INSTAGRAMLots of opinions and different ways on you all bake your potatoes! Take a look at the many ways readers are baking them or come see how we bake them! READER COMMENT OF THE WEEKOur reader, Deearr, had some great tips for serving our Fresh Basil Pesto:
As always, cheers to the weekend! This post may contain links to Amazon or other partners; your purchases via these links can benefit Simply Recipes. Read more about our affiliate linking policy. Recipes via Simply Recipes https://ift.tt/2F9fkDA September 20, 2019 at 09:00AM
0 Comments
How to Make Simple Syrup
https://ift.tt/2M2Jb5K Homemade Simple Syrup can be used in cocktails, iced coffee, lemonade, and iced tea. You can also add flavorings to it, and it'll keep in the fridge for a month! Photography Credit: Sally Vargas It’s five o’clock somewhere! Simple syrup is made from just two ingredients—sugar and water—and it’s the thing to have around when it’s cocktail time. You can buy simple syrup, of course, but it’s so much easier and cheaper to make it yourself. What Cocktails Can You Make With Simple Syrup?There are so many! You can use simple syrup in whiskey sours, mojitos, daiquiris, and even margaritas (made from scratch, without the mix). 
What Non-Alcoholic Drinks Can You Make with Simple Syrup?Once you have a bottle of simple syrup in the fridge, you’ll find so many uses for it. Iced coffee is my special pick-me-up on a sleepy afternoon. (I never put sugar in my coffee, but iced coffee with a little sugar is almost like ice cream!) A few drops of this syrup in my glass give me the boost I am craving. Simple syrup is also great in homemade iced tea and lemonade! Other Ways to Use Simple SyrupHow about that bowl of strawberries or a citrus salad? Simple syrup is the key to making a quick dessert, since there’s no waiting for the sugar to dissolve. Add some whipped cream and boom – you’re in business. 
Can You Make Flavored Simple Syrup?Yes, you can! Flavored syrups are fun as well. Here are a few flavoring options:
Use Simple Syrup in These Recipes:How to Make Simple SyrupIngredients
Method1 Dissolve the sugar: In a saucepan over medium heat, stir the water and sugar together. Bring to a boil and adjust the heat to a simmer for 2 to 3 minutes, or until the sugar is dissolved.
2 Remove the pan from the heat and leave to cool completely. 3 Store the syrup: Pour the syrup into a glass jar or bottle, and refrigerate until needed. The syrup will last for about 1 month in the refrigerator and almost indefinitely in the freezer.
Hello! All photos and content are copyright protected. Please do not use our photos without prior written permission. Thank you! Products We LoveThis post may contain links to Amazon or other partners; your purchases via these links can benefit Simply Recipes. Read more about our affiliate linking policy. Recipes via Simply Recipes https://ift.tt/2F9fkDA September 20, 2019 at 08:53AM
Vegetarian Sheet Pan Dinner with Tofu, Chickpeas and Butternut Squash
https://ift.tt/30azMlp
I’m back with another one-pan dinner and this time it’s a vegetarian sheet pan meal. I recently asked in my Facebook group how many nights you prefer to cook during the week. The number of nights differed, but the one thing everyone agreed on was that quick and easy dinners that didn’t take a ton of prep work are where it’s at. I HEAR YA! After recipe testing all day, the last thing I want to do is spend hours in the kitchen making elaborate meals. 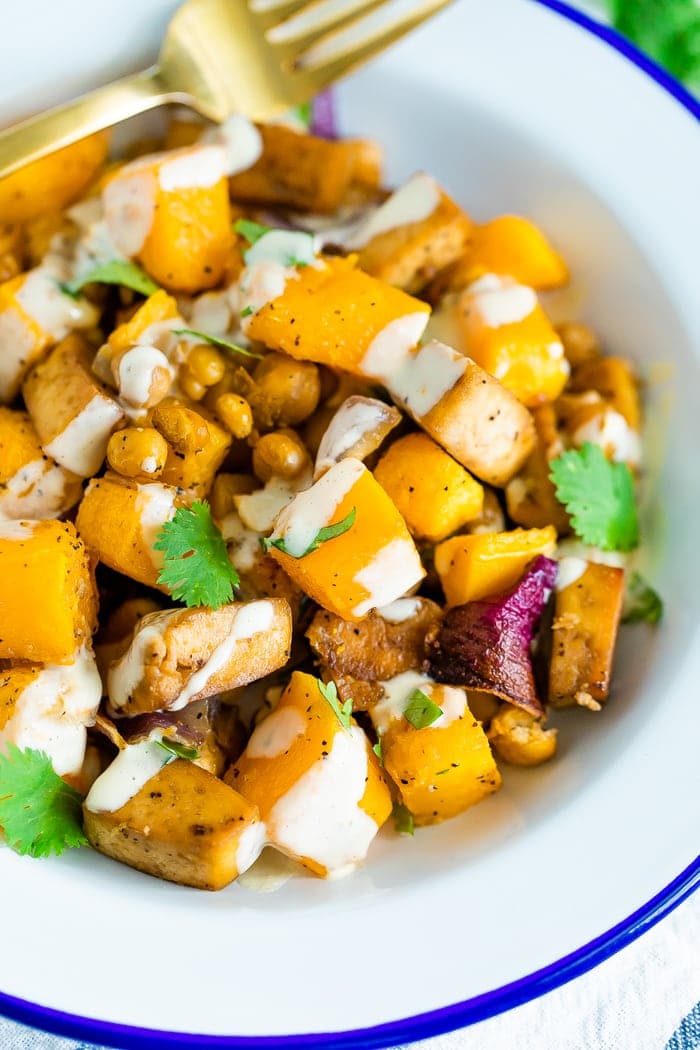 This is where a sheet pan meal comes in! One bowl + one pan and you’re done! This meal is vegan, but honestly, no one will miss the meat. The combination of oven-roasted butternut squash, crispy flavorful tofu, and a delicious creamy tahini sauce makes this one of my favorite sheet pan meals yet! This is a great recipe if you’ve been wanting to try tofu or want to add in a plant-based meal to your week. 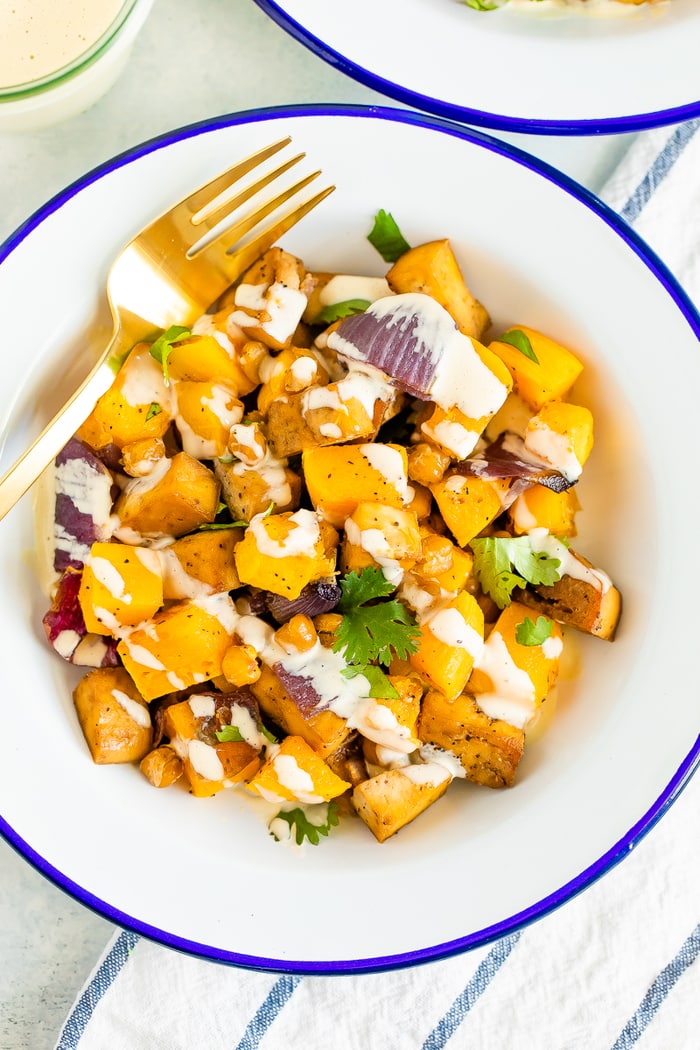 Ingredients Needed for a Vegetarian Sheet Pan Meal
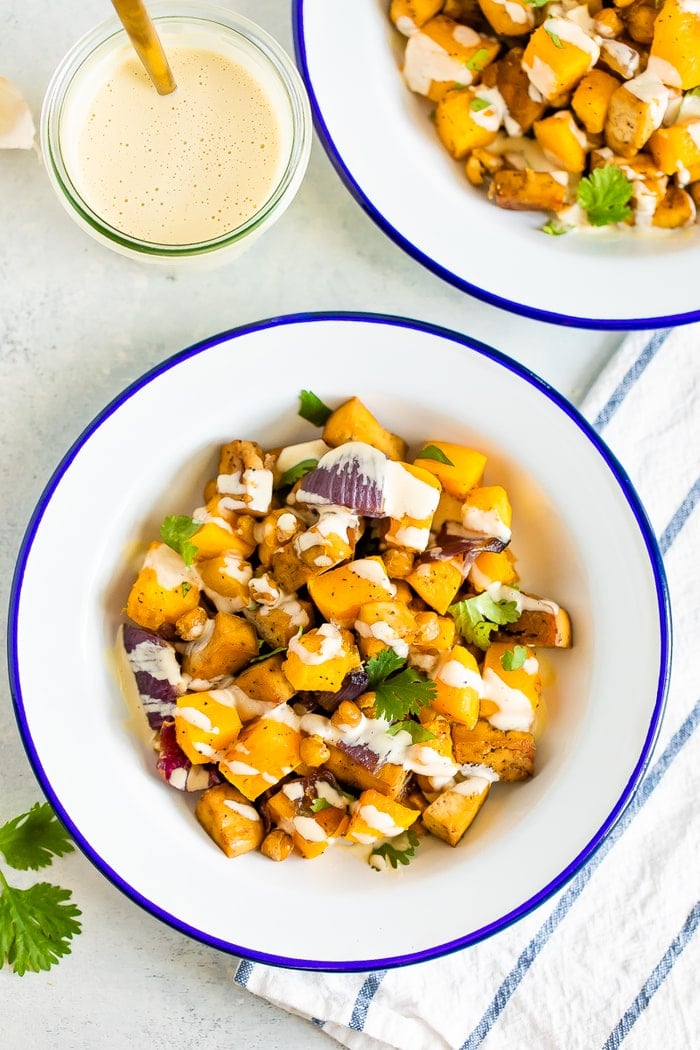 How to Make a Vegan Sheet Pan MealThis sheet pan meal involves tofu, and when you’re cooking with tofu, the first step is *usually* to press it! Drain the liquid from the package, wrap in paper towels or a clean kitchen towel, set some heavy items on the wrapped tofu and literally press the extra liquid out! This allows the tofu to absorb all of the delicious flavors of the marinade. After your tofu is pressed, combine the chopped tofu, liquid aminos, maple syrup and garlic powder in a large bowl. Mix to combine and set aside so it can marinate for at least 30 minutes. 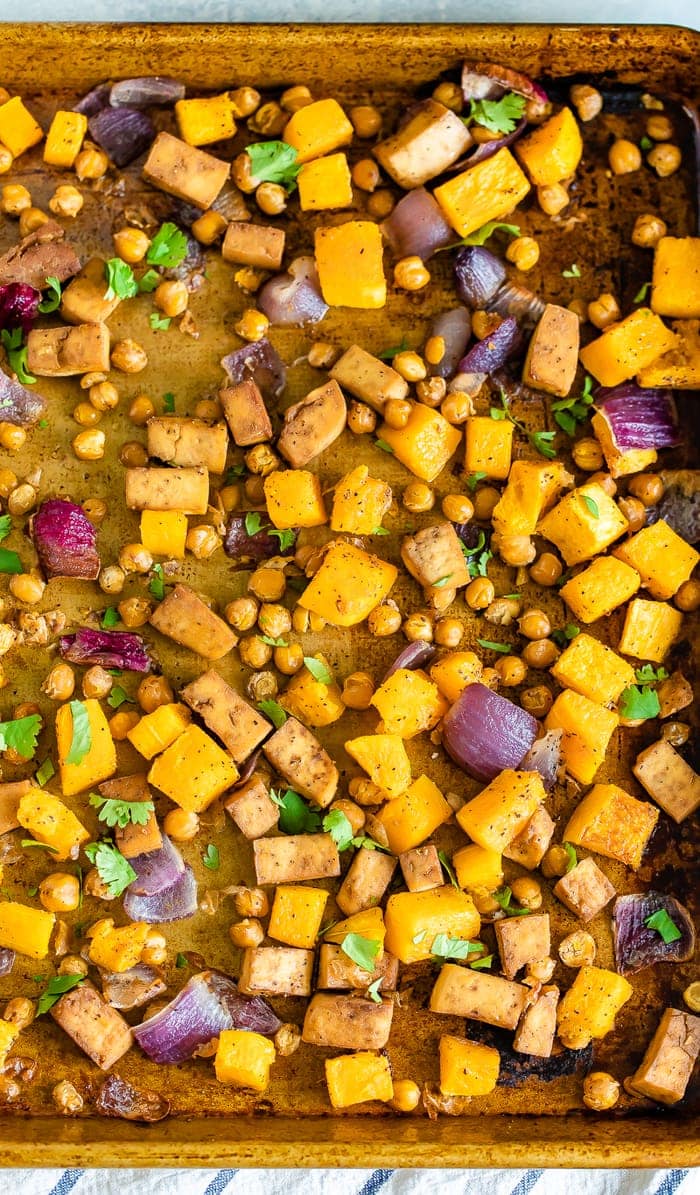 While your tofu marinates, you’ll prep the tahini sauce and veggies! Sure, you could say making this tahini sauce is going the extra mile but it is 1000% worth it. Yes, 1000%. Chop your butternut squash and onion and you’re almost ready to bake! Add the chopped butternut squash, chickpeas, and onion to a large baking sheet. If you want a little less clean up, line your baking sheet with parchment paper. Drizzle with olive oil and sprinkle with salt and pepper. Toss everything to make sure every veggie is coated with a little oil and seasoning! Add the marinated tofu to the pan and toss again. Make sure all of the ingredients are spread out on the sheet pan in a single layer. Roast for 30 minutes in a preheated oven. Remove from the oven, toss all ingredients and place back in the oven for an additional 40 minutes or until the chickpeas are crispy, the tofu is golden brown and the squash is tender. Portion out the roasted butternut squash, chickpea, and tofu mixture onto plates. Drizzle the tahini sauce on top and add cilantro for a garnish! You can never have enough tahini sauce, so I like to serve a little extra on the side! 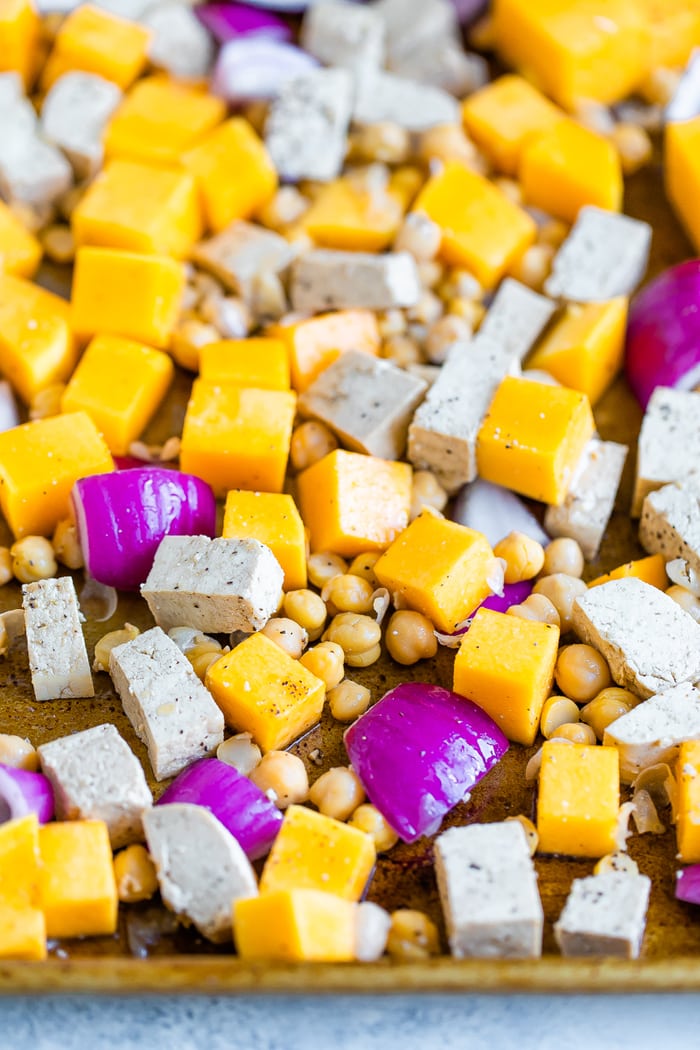 Want More One Pan Vegetarian Dinners?If you try this vegetarian sheet pan dinner, please leave a comment and star rating below. Your feedback on my recipes is so helpful for the EBF team and other EBF readers! Print Butternut Tofu Sheet Pan Dinner
DescriptionThis vegetarian sheet pan dinner features tofu, chickpeas, butternut squash, and red onion. Everything is roasted and served with a creamy tahini sauce for a flavorful, protein-packed meal. Ingredients
Instructions
Nutrition
Keywords: vegetarian sheet pan dinner The post Vegetarian Sheet Pan Dinner with Tofu, Chickpeas and Butternut Squash appeared first on Eating Bird Food. Recipes via Eating Bird Food https://ift.tt/1L45wsH September 20, 2019 at 07:00AM
Vegetarian Spinach and Mushroom Lasagna
https://ift.tt/2LMQy3M 1 Sauté the mushrooms: Place mushrooms in a large (6 to 8 quart) sauté pan on high or medium high heat. Stir them with a wooden spoon or shake the pan from time to time. You may hear them squeak. Sprinkle salt over the mushrooms. The mushrooms will sizzle and then start to release water. (Note that you are not adding fat at this point to the pan; this method of cooking mushrooms in their own moisture is called "dry sautéing.) Once the mushrooms start to release water into the pan, stir in the chopped onions. Cook until the mushrooms are no longer releasing moisture and the mushroom water has boiled away, about 5 minutes more.
2 Make the sauce: Add the olive oil to the mushrooms and stir to coat. Sauté the mushrooms and onions for about a minute. Add the garlic and cook for another minute. Stir in the tomato paste, cook for a minute longer. Reserve 1 cup of the tomato sauce (it will go in the bottom of the casserole dish), and put the remaining cup of tomato sauce into the pot with the mushrooms. Add the large can of crushed tomatoes and one cup of water. Stir in the thyme, sugar, and red pepper flakes. (If you are using dried basil instead of fresh, add it now.) Bring to a simmer, then lower the heat and simmer on a low simmer, for 20 minutes.
3 Boil and drain the lasagna noodles: Once the sauce is simmering, salt the boiling pasta water, and add the dry lasagna noodles to the boiling water. (The water should be at a vigorous, rolling boil.) Stir gently, making sure that the noodles are not sticking to each other. Set the timer for 8 minutes, or however long is indicated on the package of the noodles. Cook uncovered on a high boil. When the noodles are ready (al dente, cooked through but still firm to the bite), drain the noodles in a colander, and rinse them to cool them with cold water. As you rinse them, gently separate them with your fingers so they don't stick to each other.
Prepare a couple large cookie sheets or baking sheets by spreading a tablespoon of olive oil over the baking sheets. Place the lasagna noodles on the sheets, gently coating them with a bit of that olive oil, and spreading them out. This will help keep them from sticking to each other while you finish the sauce and prepare the layered casserole.
4 Assemble the lasagna: Turn off the heat on the stovetop for the sauce. Preheat the oven to 350°F. Spread the one cup of reserved tomato sauce over the bottom of a large (preferably 10x15-inch) casserole dish. (If your casserole dish is smaller, you may need to add another layer as you go through this step.) Place a layer of lasagna noodles down over the tomato sauce, slightly overlapping. (For our 10x15-inch dish, we ultimately fit 3 layers of 6 noodles each, with 2 extra noodles on which to nosh.) Sprinkle half of the ricotta cheese over the noodles, and half of the defrosted, drained, and squeezed out spinach over the ricotta. Sprinkle half of the mozzarella cheese over the spinach, and just a quarter of the pecorino cheese. Then spoon 1/3 of your mushroom sauce over the mozzarella. Sprinkle half of the fresh basil over the sauce.
5 Repeat layers: Repeat the layering process. Place a second layer of noodles over the sauce. Spread the remaining ricotta, spinach, and mozzarella over the noodles. Sprinkle another quarter of the pecorino along with the mozzarella. Top with another third of the mushroom sauce and the remaining fresh basil. Layer your final layer of lasagna noodles over the sauce. Spread the remaining sauce over the lasagna noodles, and sprinkle with the remaining pecorino or parmesan cheese.
6 Cover with foil and bake: Pull out a sheet of aluminum foil large enough to cover the casserole dish. Spread a little olive oil over the inside of the piece of foil (the side that will have contact with the lasagna). Place the foil over the casserole dish and crimp the edges. Bake at 350°F for 25 minutes, then remove the foil and bake uncovered for an additional 25 minutes. Take the lasagna out of the oven when done and let it rest 10 minutes before cutting to serve. Once made, the lasagna will last a week in the fridge. Recipes via Simply Recipes https://ift.tt/2F9fkDA September 19, 2019 at 04:05PM
Air Fryer Bacon Wrapped Scallops
https://ift.tt/34UmUQ7 Air Fryer Bacon Wrapped Scallops are so easy, made with just two ingredients! Elegant enough to impress guests yet easy enough to make any weeknight for your family.
|


 Oatmeal Breakfast Cookies |
 Loaded Sweet Potato Avocado Toast |
 Super Fun Summer Smoothies! |
 Whole Grain Flax Waffles |
 Vegan Coffee Cake Muffins |
 Healthy Breakfast Smoothies |
The post Blueberry Muffins appeared first on Love and Lemons.
Recipes
via Love and Lemons https://ift.tt/2h2Uz32
September 19, 2019 at 07:31AM
Creamy Sweet Potato Soup
https://ift.tt/2LXLUgJ
Recipes
via Simply Recipes https://ift.tt/2F9fkDA
September 18, 2019 at 04:06PM
https://ift.tt/2LXLUgJ
Sweet potato soup balances the sweet and savory with onions, garlic, onions, and leeks, along with a bit of nutmeg and cinnamon. Creamy and satisfying!
Photography Credit: Elise Bauer
Looking for a special soup to serve this holiday season? Consider this creamy sweet potato soup!
How to Make Sweet Potato Soup
We adapted this recipe from one in an old issue of Bon Appétit, changing it up slightly—ditching the maple syrup the original called for (the sweet potatoes are sweet enough), and cutting back on the cream.
We start the soup by cooking a base of onions, celery, and leeks in butter. Then we add sweet potatoes, chicken stock and spices, simmer for 20 minutes, and purée until smooth. At the end we stir in some milk and cream, and add a swirl of sour cream to serve. Easy!
The holiday spices of cinnamon and nutmeg give the soup hints of pumpkin pie and glazed yams, as if someone slipped a little of each into the blender when the soup was being puréed.
What if I Don’t Do Dairy?
Feel free to use another cup of stock instead of the milk and cream, or use coconut milk (canned) or soy milk instead of the milk and cream.
What to serve with this soup
I love creamy soups served with some crusty bread on the side for dipping. Serve the soup as a main on its own, or alongside beef, pork, chicken, or black beans. Because it’s rich and creamy, the soup would do well served with a side salad of fresh lettuce greens tossed in a light vinaigrette.
How to Keep, Freeze and Reheat This Soup
This soup should keep in the fridge for several days, covered.
Typically, soups with cream don’t do well with freezing and reheating. If you want to make the soup ahead of time and freeze it, make it through step 3, leaving out the milk and cream. Freeze the soup, defrost it in a saucepan over low heat until warm, and then add the milk and cream.
WHO DOESN’T LOVE A CREAMY BOWL OF SOUP?
Updated September 18, 2019 : We spiffed up this post to make it sparkle! No changes to the original recipe.
Creamy Sweet Potato Soup Recipe
If you want to make this soup without dairy, feel free to substitute either additional stock, which will result in a thinner soup, or soy milk or coconut milk for the cream and milk in this recipe. Omit the sour cream or yogurt topping, and use olive oil instead of butter.
Ingredients
- 2 tablespoons butter
- 1 medium onion, chopped (about 1 cup)
- 2 celery ribs, chopped
- 1 medium leek, white and light green parts only, sliced (see How to Clean Leeks)
- 1 clove garlic, chopped (1 teaspoon)
- 1 1/2 pounds (about 2 large) orange-flesh sweet potatoes (a.k.a. yams), peeled, cut into 1-inch pieces (about 5 cups)
- 4 cups chicken stock (use vegetable broth for vegetarian option)
- 1 cinnamon stick
- 1/4 teaspoon ground nutmeg
- 1/4 cup heavy cream
- 3/4 cup milk
- Salt
- Pepper
- 1/4 cup sour cream or plain yogurt
Method
1 Cook the onions, celery, leeks, and garlic: Melt the butter in a large, thick-bottomed pot over medium-high heat. Add the chopped onions and sauté for 3 to 4 minutes, then add the celery and leeks and sauté for 5 more minutes until softened. Add the garlic and cook a minute more.

2 Make and simmer the soup: Add the sweet potatoes, chicken stock, cinnamon stick, and nutmeg. Increase the heat to high and bring to a boil. Reduce to a simmer, and simmer uncovered until the sweet potatoes can be easily pierced with a fork, about 20 minutes.


3 Blend the soup: Remove the cinnamon stick. Use an immersion blender to purée the soup or work in batches and purée the soup in a standing blender.

4 Finish the soup: Add the cream and milk to the soup. Heat on medium until the soup is heated through. Add salt and pepper to taste.
Sprinkle with more black pepper and swirl some water-thinned sour cream or plain yogurt over the soup to serve.
Hello! All photos and content are copyright protected. Please do not use our photos without prior written permission. Thank you!
Products We Love
This post may contain links to Amazon or other partners; your purchases via these links can benefit Simply Recipes. Read more about our affiliate linking policy.
Recipes
via Simply Recipes https://ift.tt/2F9fkDA
September 18, 2019 at 04:06PM
Easy Green Chicken Chili
https://ift.tt/309B2pN


Recipes
via Simply Recipes https://ift.tt/2F9fkDA
September 18, 2019 at 09:04AM
https://ift.tt/309B2pN
It’s Hatch green chile season here in Colorado, so because my kids love soup (and because I’ve found that’s a good way to introduce them to new flavors!), I decided to make a big pot of green chicken chili to give them a taste of Hatch chiles!
Roasted green chiles don’t have to be spicy. I used mild Hatch chiles, so the soup was kid-friendly but still rich and savory—and with a great chile flavor!
Why Is It Called Green Chili?
Nothing too complicated here: It’s called “green” chili because it calls for (surprise!) green chiles, as opposed to your standard “red” chili, which is made with beef and tomatoes.
I also added a green bell pepper and a few big handfuls of herbs to really play up the “green” factor!
What Kind of Chicken Should I Use?
You can certainly poach your own chicken for this if you want. If you do, use the poaching liquid to make a stock and then use that in the chili. You’ll end up with a really rich and delicious soup.
But perfect is the enemy of good in the kitchen, so I used rotisserie chicken for this quick weeknight chili recipe. A small-to-medium rotisserie chicken will give you about 2 1/2 to 3 cups of shredded chicken meat, which is the perfect amount for this recipe.
The Best Green Chiles for This Soup
There are a lot of options out there for Hatch chiles, especially this time of year. Here’s the hierarchy of chile choice:
- Freshly roasted Hatch chiles: If you live in an area where you can find freshly roasted green chiles, those are far and away the best and should always be your first choice where possible. You can also roast your own chiles at home!
- Frozen roasted Hatch chiles: If you can’t find freshly roasted chiles, opt for frozen roasted chiles, which still have great flavor. Look for them with the other frozen vegetables, especially at Mexican grocery stores or stores that have a good selection of Mexican ingredients.
- Canned or jarred green chilies: If you can’t find either of those two options, then a jar of green chiles is the way to go. You need a lot of green chiles for this recipe, so go for a big 16-ounce jar if you can find it! If you are using canned green chiles, look for Hatch green chiles, but also Old El Paso makes a great canned mild green chile.
How to Make Green Chili In a Slow Cooker
This recipe is meant to be a fast weeknight recipe, but it can also work in a slow cooker.
If you’re doing it this way, place a whole (3ish-pound) raw chicken in the slow cooker. Add the water, onion, garlic, and 1/2 cup each chopped carrot and celery. (The carrot and celery are only called for if you make this in the slow cooker, since I find it helps with the stock’s flavor. It’s not needed if you make the chili on the stove.)
Cook for four hours on high, then strain the stock and use it for your soup. Discard the veggies. Shred the chicken and return it to the slow cooker. Add all the remaining soup ingredients except the cilantro and cannellini beans.
Simmer the soup on low heat for two hours. Meanwhile, in a food processor, blend the cannellini beans with 1/2 cup cilantro and 1/4 cup water. After two hours, stir the blended beans into the soup to thicken it slightly. Done!
How to Store Leftovers
If you like this recipe, I recommend doubling it so you can have some for dinner and plenty to freeze for later! This chili stores well in the fridge for up to five days, and will freeze perfectly for up to three months if stored in a freezer-safe bag or airtight container. Reheat the soup gently on the stovetop.
![Eat Your Food - Dad Add]()
 The DAD ADD: Crispy Corn Chips
These are basically upgraded tortilla chips, but they add some delicious crunch to the chili! I like to add a pinch of sugar to the chips’ seasoning; the sweetness goes really well with the chili’s subtle heat. Make sure to pile them high in your bowl!
![Eat Your Food - The Kid Report]()
 REPORT CARD
My kids love soup, so I hoped this would be a winner. My only concern was that it might be too spicy, even with mild green chiles. Both of my kiddos picked out the chicken first and loved it. Then they slurped the soup a bit, but when they saw my Dad Add chips they proceeded to steal ALL OF THEM for dipping and eating. A dad’s sacrifice is real.
So, yes, kids like this soup! If you want more of a kick, spice up your own bowl with a bit of hot sauce, which I definitely did.
More Great Green Chile Recipes:
This post may contain links to Amazon or other partners; your purchases via these links can benefit Simply Recipes. Read more about our affiliate linking policy.
Recipes
via Simply Recipes https://ift.tt/2F9fkDA
September 18, 2019 at 09:04AM
Easy Tahini Sauce
https://ift.tt/309nXNd

Recipes
via Eating Bird Food https://ift.tt/1L45wsH
September 18, 2019 at 07:06AM
https://ift.tt/309nXNd
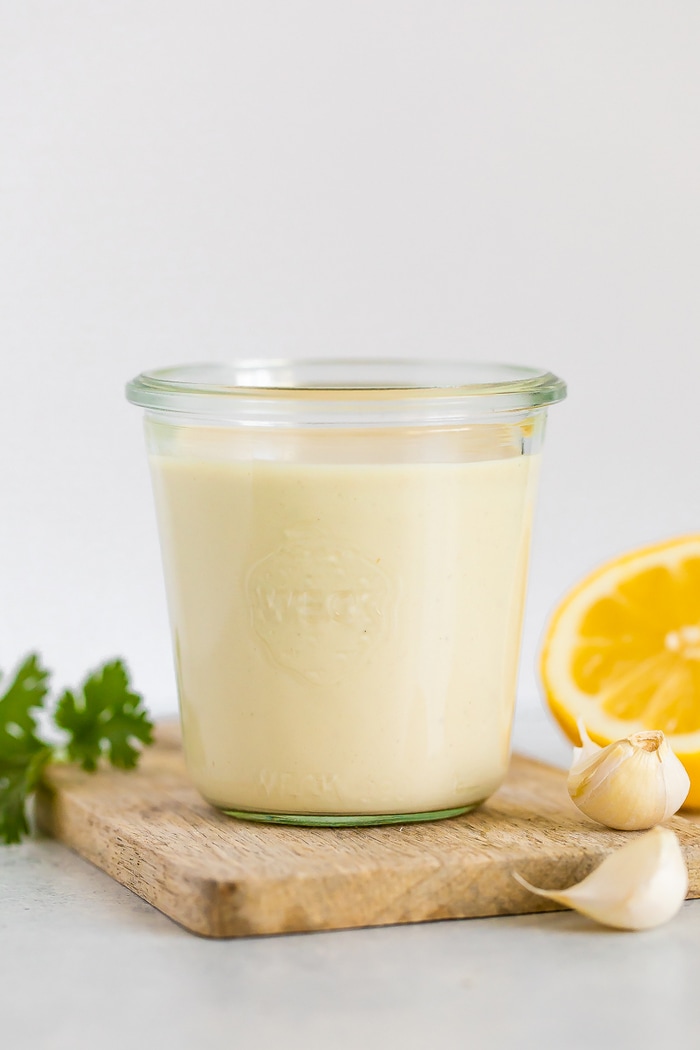
This easy creamy tahini sauce with lemon, olive oil and garlic can be used in so many ways – as a sauce for protein or vegetables, on a buddha bowl, or even as a dressing.
When I first tried tahini, I fell in love. Plain and simple! I love the nutty yet mild flavor that works in a wide variety of recipes. Today I’m using it to create a delicious, creamy vegan sauce.
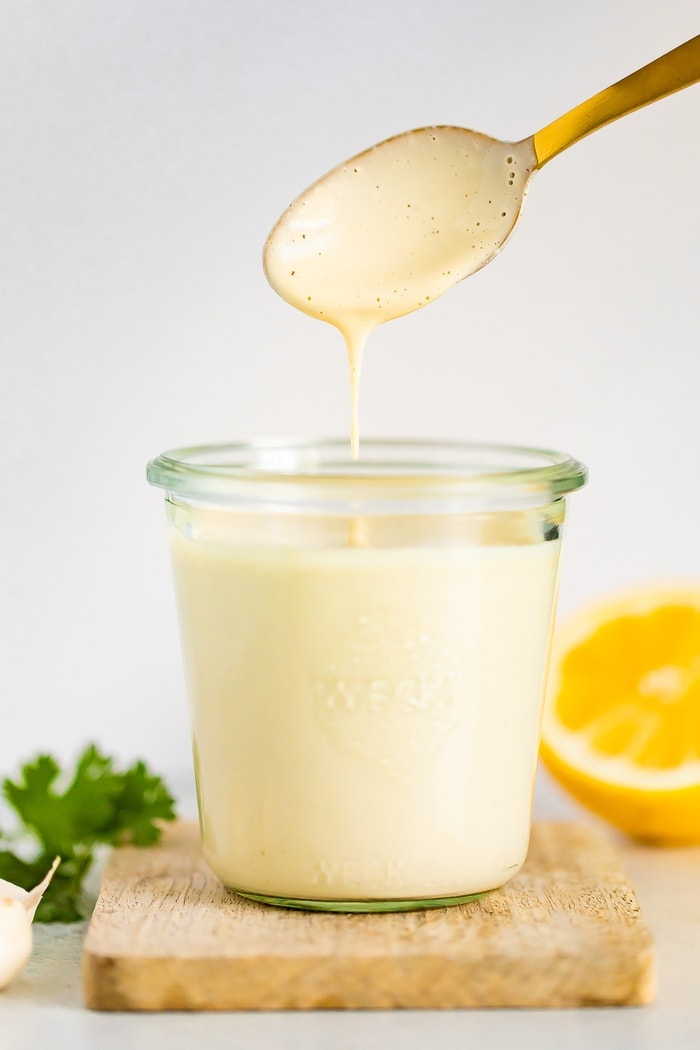
I have already shared an epic oil-free zesty tahini dressing that I love and highly recommend, but I wanted to create a tahini sauce recipe as well. This particular tahini sauce incorporates lemon juice and olive oil and it’s a bit thicker, perfect for drizzling over a buddha bowl or veggies.
I go through phases when it comes to my favorite dressings and staple sauces, but I always love whipping up at least one dressing or sauce on Sundays (literally takes five minutes) so I am set for the week!
I’ll be enjoying this tahini sauce on a butternut squash sheet pan meal, a salad and I’m sure a bowl meal throughout the week.
What is tahini?
Tahini is a paste made from sesame seeds. I’ve actually never made my own but I’ve read that it’s pretty simple! You’ll see tahini used in a lot of Mediterranean sauces and recipes. It works really well with lemon and garlic but is also delicious in baked goods. I told you it was versatile!
You can find tahini near the peanut butter in your local grocery store. I have tried a ton of different tahinis over the years and my personal favorite is the Whole Foods brand of tahini. It’s nutty, flavorful and perfectly creamy without being bitter at all.
Ingredients in this Creamy Tahini Sauce
- tahini
- lemon juice
- olive oil
- garlic cloves
- sea salt
- water
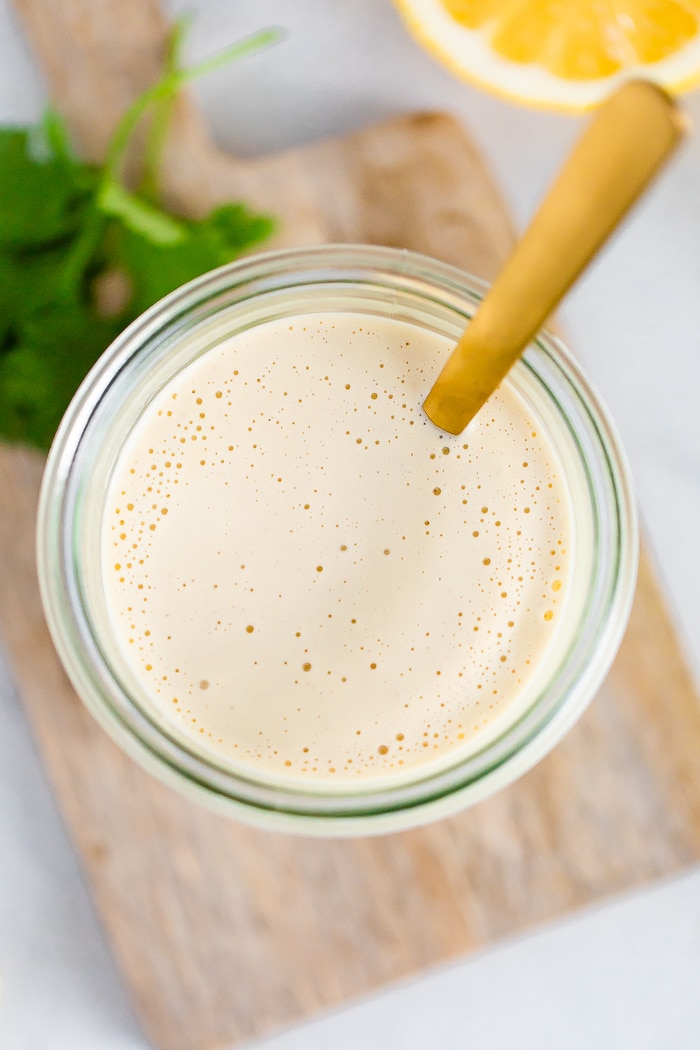
How to Make Easy Tahini Sauce
For this recipe, all you need to do is combine all of the ingredients in a blender or food processor. If needed, you can add more water to get to your desired consistency. The sauce might thicken a little in the fridge so you can always add more water later and shake or blend before serving. Just don’t add too much or your sauce will become diluted.
More Healthy Sauce Recipes:
Love tahini? You’re going to love these recipes too:
- Butternut Squash Pasta with Tahini Sauce
- Golden Turmeric Tahini Dressing
- Oil-Free Tahini Dressing
- Chocolate Chip Tahini Cookies
- Tahini Fig Bars
- Tahini Protein Balls
If you make this tahini sauce recipe, please be sure to leave a comment and star rating below letting me know how it turns out. Your feedback is so helpful for the EBF team and other EBF readers.
PrintEasy Tahini Sauce
- Author: Brittany Mullins
 Prep Time: 10 minutes
- Total Time: 10 minutes
 Yield: 3/4 cup
Description
This easy creamy tahini sauce with lemon, olive oil and garlic can be used in so many ways — as a sauce for protein or vegetables, on a buddha bowl, or even as a dressing.
Ingredients
- 1/4 cup well-stirred tahini
- 4 1/2 Tablespoons lemon juice
- 3 Tablespoons olive oil
- 3 Tablespoons water
- 2 cloves garlic, minced
- 1/4 teaspoon sea salt
Instructions
- Combine all ingredients in a blender or food processor (affiliate link) and blend until smooth.
- Use as a sauce for protein, veggies and more.
 Category: Sauce
 Method: Blend
 Cuisine: Middle Eastern
Nutrition
- Serving Size: 2 Tablespoons
- Calories: 123
- Sugar: 0g
- Sodium: 75mg
- Fat: 12g
- Carbohydrates: 3g
- Fiber: 1g
- Protein: 2g
Keywords: tahini sauce
The post Easy Tahini Sauce appeared first on Eating Bird Food.
Recipes
via Eating Bird Food https://ift.tt/1L45wsH
September 18, 2019 at 07:06AM

The Flat Belly Fix
This is the only 21-day rapid weight loss system that allows you to easily lose an average of 1 lb a day for 21 days without feeling hungry or deprived. The unique and brand new techniques used in this System are proven SAFE. And they do not cause the rebound weight gain common to all the other rapid weight loss systems that are not backed by the latest science. The Flat Belly Fix System takes advantage of a recent scientific discovery that proves the effective weight loss power of an ancient spice. Combined with other cutting-edge ingredients in the patent-pending Flat Belly Fix Tea™ — that you can make right in your own kitchen in minutes — this System is the quickest, easiest and most enjoyable way to quickly get the body you desire and deserve. Click Here
Categories
All
Gluten Free
Pancakes
Protein
Archives
November 2020
October 2020
September 2020
August 2020
July 2020
June 2020
May 2020
April 2020
March 2020
February 2020
January 2020
December 2019
November 2019
October 2019
September 2019
August 2019
July 2019
June 2019
May 2019
April 2019
March 2019
February 2019
January 2019
December 2018
November 2018
October 2018
September 2018
August 2018
July 2018
June 2018
May 2018
April 2018
March 2018
February 2018
January 2018
December 2017
November 2017
 RSS Feed
