Feel Healthy Today
  • Home
  • Recipes
  • Health News
  • Fitness News
  • Weight Loss
  • Contact
  • Subscribe

Recipes

Cheesy Baked Cauliflower

11/11/2020

0 Comments

 
Cheesy Baked Cauliflower
https://ift.tt/36sHwjU

A simple casserole of creamy, cheesy cauliflower makes a sumptuous holiday or weeknight side dish served alongside roasted chicken, pork chops, or steak! Tender, bite-sized florets are covered in a decadent cheese sauce, packed with cheddar and Monterey jack.

To make this a loaded baked cauliflower recipe, add crumbled bacon and sprinkle with chives, and stir in a cup of chopped ham, chopped spinach, or both. To add some texture, top the casserole with buttered panko breadcrumbs. You can keep this cheesy cauliflower dish quick and easy or dress it up with all the fixings. It’s up to you!

WAYS TO ADAPT CAULIFLOWER CASSEROLE

I like to keep things simple, but that also means I’m prone to using what’s on hand. You don’t have to stick with only cauliflower for this dish.

A mix of cauliflower and broccoli is one of my favorite combinations. You can also sub in an entirely different vegetable for the cauliflower. Any lightly roasted, blanched, or steamed vegetable will work well. Brussels sprouts, green beans, and broccoli are all great options.

You can even use frozen vegetables—just cook them according to package instructions, and drain off any excess liquid before you combine them with the sauce.

The cheeses are as easy to substitute as the vegetables. Pretty much any melting cheese—the kind you use in grilled cheese or mac and cheese will work.

I like to use one sharp and one mild cheese to get a balanced flavor. Feel free to use all one type of cheese if you like, and that flavor will really come through. Avoid using soft, spreadable cheeses like brie and camembert, as those will tend to make the sauce too oily.

These are all good choices:

  • Colby
  • Medium or mild cheddar
  • Swiss
  • Gruyere
  • Fontina
  • Provolone
  • Havarti

Scooping Easy Cauliflower Bake out of a glass casserole dish.

TIPS AND TRICKS FOR THE CREAMIEST CHEESE SAUCE

This sauce is pretty foolproof, and it shouldn’t break on you, since it is cooked very gently (it barely comes up to a simmer) and it contains plenty of flour and cornstarch to keep it stable.

Just keep a watchful eye, whisk continuously, and remove it from the heat right when it thickens up, and it will turn out perfectly every time. You can even use a probe thermometer to guide you, removing the pot from the stove when the sauce registers at 200ºF.

Grate the cheese yourself rather than buying it pre-shredded. This is one case in which a convenience ingredient will actually do more harm than good.

The anti-caking agents used in pre-shredded cheeses tend to do funny things to the texture of cheese sauces, making them gloppy and gooey. You’ll get much better results if you grate your own.

HOW TO MAKE CHEESY CAULIFLOWER BAKE AHEAD OF TIME

This casserole can be assembled up to one day in advance, then baked just before serving.

If transferring the casserole directly from the fridge to the oven, you’ll need to bake it for a few additional minutes. Just test with a fork or probe thermometer to make sure it’s piping hot in the middle (about 170°F).

To Freeze: Once cooked, you can freeze individual servings of this casserole in small resealable containers.

To Reheat from Frozen: Microwave on high for about two to three minutes, depending on the wattage of your microwave. Let it sit for a minute or two after removing from the microwave to allow the temperature to even out, then enjoy!

Overhead view of Best Cheesy Cauliflower in a casserole dish with a blue dish towel under it.

MORE COMFORTING SIDE DISHES

Products We Love

This post may contain links to Amazon or other partners; your purchases via these links can benefit Simply Recipes. Read more about our affiliate linking policy.


Recipes

via Simply Recipes https://ift.tt/2F9fkDA

November 11, 2020 at 09:03AM
#recipies
0 Comments

Lightened Up Green Bean Casserole

11/11/2020

0 Comments

 
Lightened Up Green Bean Casserole
https://ift.tt/38xcWrX

Lightened Up Green Bean Casserole

This holiday season enjoy a lighter, healthier version of the classic green bean casserole recipe made from scratch with no canned soup.

Green Bean Casserole

You will love this modern take on the classic! The perfect side dish to accompany your Thanksgiving Turkey along with all the fixins like Sweet Potato Casserole, Cranberry Sauce, Stuffing and Mashed Potatoes. You can see all my Thanksgiving recipes here.

Green Bean Casserole on a plate.

Confession: I strongly dislike mushy green beans. Year after year, I’ve been asked to post a healthy green bean casserole recipe, and I’ve opted out because the thought of mushy green beans in canned soup with fried onions just doesn’t do it for me.  I’m very particular about how I like my green beans. I love them roasted and cooked until tender-crisp, sauteed with a little garlic and oil, and even in a salad. But frozen or out of a can – I can do without them.

I know so many of you love this popular Thanksgiving side dish. After many requests, I was inspired to give it a try only made completely from scratch. I put the dish in the oven and crossed my fingers. When it was done, I served myself a plate and liked it so much that I had two servings. This absolutely delicious green bean casserole is a keeper and would be the perfect addition to your holiday table.

How to Make Green Bean Casserole from Scratch

In this new lighter version, I use fresh green beans in my green bean casserole. I blanched them for two minutes so they wouldn’t turn to mush. If you like them soft, I would boil them for 6-8 minutes.

Tips & Variations:

  • Cut the green beans in half, so it’s easier to serve.
  • To make it gluten-free: Sub gluten free panko for breadcrumbs and use gluten free flour mix in place of all purpose flour.
  • For more flavor, try adding a little bacon or pancetta to the breadcrumb topping.
  • Halve the recipe to feed a family of four.

green beans and mushrooms in a skillt.Green Bean CasseroleGreen Beans on a plate.

More Holiday Side Dishes You’ll Love:


Lightened Up Green Bean Casserole with Shallot Crumb Topping

Prep Time: 30 mins

Cook Time: 30 mins

Total Time: 1 hr

A lightened up, healthier version of the classic green bean casserole made from scratch, no canned soup.

  • 2 lbs green beans, cut in half, trimmed and washed

For The Green Bean Topping

  • 1 tbsp olive oil
  • 1 cup shallots, finely diced
  • 1/2 cup seasoned breadcrumbs
  • 1 tbsp grated Romano or Parmesan cheese
  • 1/2 tsp dried thyme, or 1 tsp fresh

For the green beans:

  • 1 tbsp olive oil
  • 1/3 cup shallots, minced
  • 16 oz sliced mushrooms, (I used cremini)
  • 1/4 cup flour
  • 1 cup reduced sodium chicken stock, or vegetable for vegetarian
  • 1 cup 2% milk
  • 1/4 cup grated Pecorino Romano cheese
  • Boil a large pot of water, when boiling add green beans and blanch for 2 minutes (or 6-8 minutes if you like them softer). Drain in a colander and rinse under cold water to stop them from cooking.

  • Meanwhile make the topping, heat a medium-sized skillet over medium heat.  Add the shallots and sauté about 3-5 minutes, stirring occasionally until golden brown.

  • Reduce heat to medium-low, add breadcrumbs, grated cheese and thyme; sauté until golden brown, about 5-6 minutes, stirring frequently, careful not to burn.

  • Preheat the oven to 375°. Lightly spray a 13 x 9 inch baking dish.

  • Heat oil in a large sauté pan over medium-high heat. Add shallots and sauté 1 to 2 minutes. Add mushrooms, season with salt and pepper and sauté 6-8 minutes, stirring occasionally.

  • Sprinkle flour over the mushrooms, stir constantly for about a minute, then slowly add chicken stock, then milk.

  • Bring to a low boil, and cook stirring occasionally until thickened, about 3 minutes. Stir in Romano cheese.

  • Add blanched green beans and mix well, season with salt and pepper as needed; pour into prepared baking dish.

  • Top with toasted breadcrumbs and bake about 30 minutes.

Serving: 1/8th of recipe, Calories: 160kcal, Carbohydrates: 22g, Protein: 7g, Fat: 6g, Sodium: 280.5mg, Fiber: 4g, Sugar: 2g

Blue Smart Points: 3

Green Smart Points: 3

Purple Smart Points: 3

Points +: 4

Keywords: best green bean casserole, green bean casserole, green bean casserole from scratch, green bean casserole no soup, how to make green bean casserole

posted November 11, 2020 by Gina

Get new free recipes and exclusive content delivered right to your inbox:


Recipes

via Skinnytaste https://ift.tt/2ix3Luq

November 11, 2020 at 07:45AM
#recipies
0 Comments

Healthy Sweet Potato Pie

11/11/2020

0 Comments

 
Healthy Sweet Potato Pie
https://ift.tt/38st1iO

This easy and healthy sweet potato pie is made with coconut sugar, coconut cream and fresh sweet potatoes. It’s dairy-free, vegan and can easily be made gluten-free as well.

I don’t think you guys are mentally prepared for this recipe! It is SO good I ate it for breakfast the morning after recipe testing. Oops!

My first experience with sweet potato pie was a few years ago when a friend brought his mom’s sweet potato pie to our Friendsgiving celebration. One bite and I was hooked. I’ve always loved pumpkin pie, but if you were to make me choose between pumpkin and sweet potato pie today, I’d pick sweet potato. With sweet potato pie, the filling has more texture and tastes a bit sweeter too, which makes sense given that pumpkin is a bit more watery and bland tasting, in my opinion.

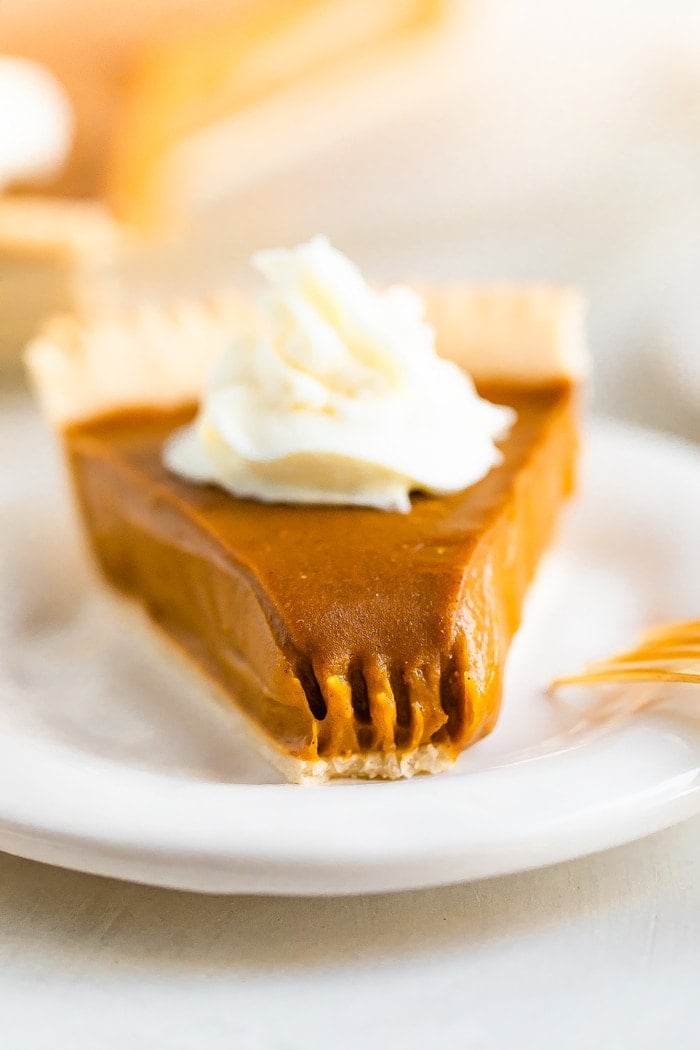
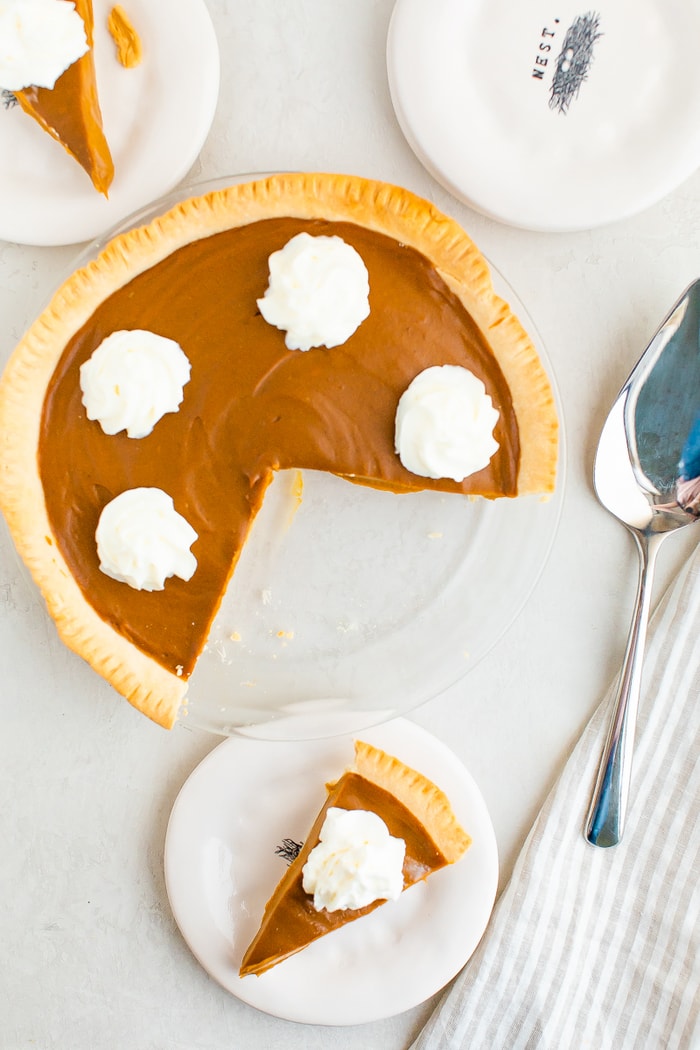
Slice of sweet potato pie topped with whipped cream. A bite is taken out of the pie.

Sweet Potato Pie’s Roots

Sweet potato pie is a holiday staple in African-American and Southern homes. This stems from sweet potatoes and yams being major crops in the South and common go-to options for slaves when preparing food (for themselves and the white families they served). The filling consists of mashed sweet potatoes, evaporated milk, sugar, spices (like nutmeg) and eggs. The texture can be silky smooth or dense, it just depends on the recipe.

Since I adore the sweet potato pie that my friend’s mom makes, I decided it would be fun to try my hand at a vegan version with coconut cream and coconut sugar. After a couple test batches, I landed on this recipe and I have to say, it’s pretty darn good! I need to make one for my friend’s mom to see what she thinks of it. ?

Slice of sweet potato pie topped with whipped cream. A bite is taken out of the pie.

The best part about this pie? It’s crazy simple to make, especially if you use a store-bought pie shell! Once you’ve baked your sweet potatoes, the filling takes no time at all to prepare.

Easy Sweet Potato Pie Ingredients

  • mashed sweet potatoes – I baked two large sweet potatoes and mashed the flesh. You can also boil the potatoes, if needed.
  • coconut sugar – I chose coconut sugar because it’s similar in flavor to brown sugar, but a bit less refined. I haven’t tried this recipe with any other natural sweeteners so I’m not sure how it will work with maple syrup or honey.
  • canned coconut cream – make sure you look for coconut cream specifically! It’s thicker than full-fat coconut milk.
  • vanilla
  • cinnamon
  • nutmeg
  • cornstarch
  • salt
  • unbaked 9″ pie shell – I like using Wholly Wholesome organic pie shells, which are vegan. They also make a gluten-free version if needed! You can also skip the shell and make this a crustless pie if you want! The filling is so good on it’s own. Of course, you can also make your own pie crust if you’d like!

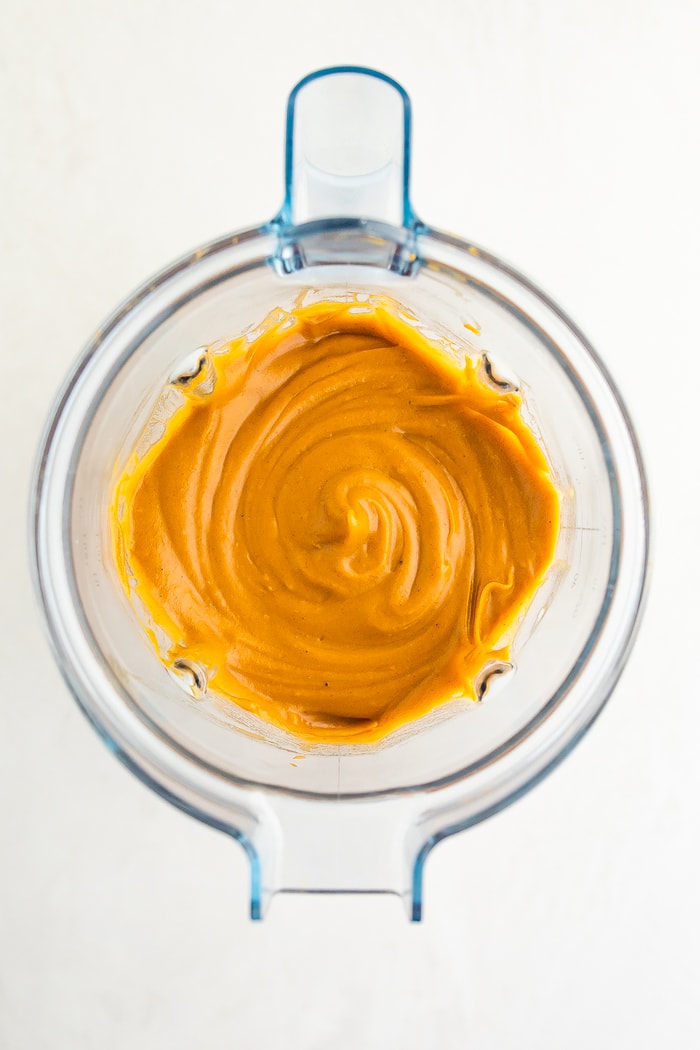
Blender with sweet potato pie mixture.

Buying & Storing Sweet Potatoes

When shopping for sweet potatoes, look for firm, unwrinkled skins. Sweet potatoes come in all different colors – creamy white, deep orange and purple. I usually buy the orange or cream ones most often just because that’s what is typically available at my local store. The orange sweet potatoes are usually sweeter than the cream sweet potatoes. Store you sweet potatoes in your pantry or on the counter top at room temperature. They’ll last about a week before they start to go bad (which usually means getting wrinkly and softer).

4 Ways to Cook Sweet Potatoes Before Mashing

  • Bake – Pierce the sweet potatoes 3-4 times with a fork and place them on a baking sheet and bake at 400ºF for about 45-65 minutes, depending on the size.
  • Boil – Peel and cube the sweet potatoes and place them in a large saucepan and add water to cover the potatoes. Bring to a boil, reduce heat and cook, uncovered until tender. It should take about 15 minutes depending on the size.
  • Microwave – Pierce the sweet potatoes 3-4 times with a fork and place them in a microwave-safe dish and microwave on high for five minutes, flipping halfway through. If your potatoes aren’t tender after 5 minutes, microwave for 30 second increments until softened.
  • Instant Pot – Add one cup of water to the bottom of your Instant Pot. Place the trivet on top and then the sweet potatoes on the trivet. Cook for 18 minutes on high pressure (for medium-sized potatoes), let steam naturally release for 10 minutes and then quick release any remaining pressure.

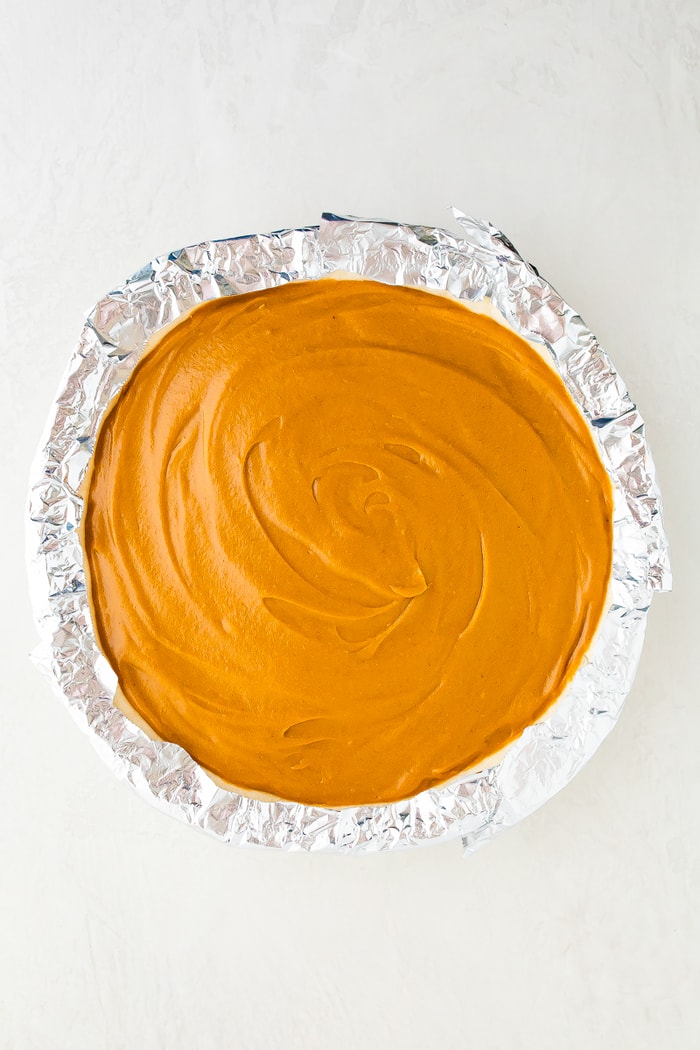
Pie with sweet potato filling before being baked. Foil is crimped over the crust.

How to Make a Vegan Sweet Potato Pie

Mash – If you haven’t already, mash your cooked sweet potatoes. I like to leave some chunks for texture!

Mix – Add the mashed sweet potatoes, coconut sugar, canned coconut cream, vanilla, cinnamon, nutmeg, cornstarch and salt to a stand mixer, blender or food processor and combine until smooth. I combined everything in my Vitamix.

Fill pie shell – If using a pie shell, make sure to pre-bake it according to package/recipe instructions. Pour the filling into the pre-baked pie shell and use a spatula or spoon to smooth out the top. If you’re not using a shell, pour the filling into a greased pie tin.

Bake – Bake at 350ºF for 25-30 minutes.

Cool + chill – Allow the pie to cool and then transfer to the fridge to set up and chill before slicing and serving, for at least 8 hours, preferably overnight.

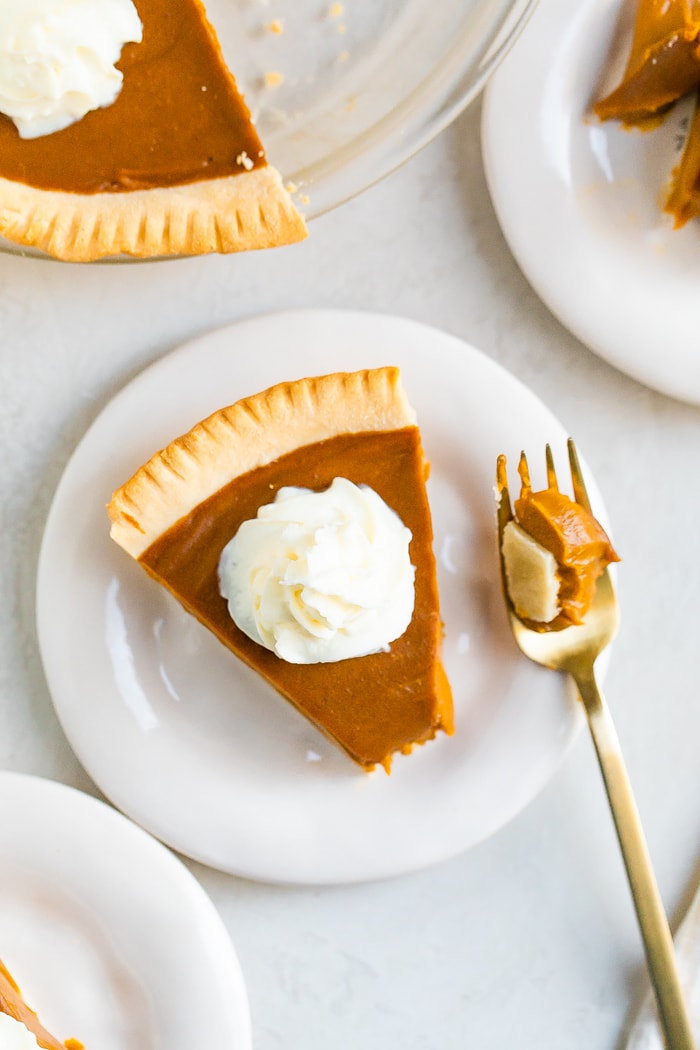
Sweet potato pie topped with whipped cream. A slice is taken out of the pie and is on a plate.

Here Are More Pie Inspired Recipes to Try:

  • Vegan Pumpkin Pie
  • Raw Mini Apple Pies
  • No Bake Pumpkin Pie Bars
  • Pumpkin Pie Smoothie
  • Apple Pie Overnight Oats
  • Key Lime Pie Larabars

If you try this recipe for easy sweet potato pie please be sure to leave a comment and star rating below. Your feedback is super helpful for the EBF team and other readers who are thinking about making the recipe. 

Print
Slice of sweet potato pie topped with whipped cream. A bite is taken out of the pie.

Easy Sweet Potato Pie


  • Author: Brittany Mullins
  • Yield: 8
  • Diet: Vegan
Print Recipe
Pin Recipe

Description

This easy and healthy sweet potato pie is made with coconut sugar, coconut cream and fresh sweet potatoes. It’s dairy-free, vegan and can easily be made gluten-free as well.


Ingredients

  • 2–3 medium/large sweet potatoes, scrubbed and washed
  • 3/4 cup coconut sugar
  • 1 cup canned coconut cream
  • 1 teaspoon vanilla
  • 1 1/4 teaspoon cinnamon
  • 1/4 teaspoon nutmeg
  • 2 1/2 Tablespoons cornstarch
  • 1/4 teaspoon salt
  • 1 unbaked 9″ pie crust (use store-bought or make your own)
  • coconut whipped cream, for topping

Instructions

  1. Bake sweet potatoes: Heat oven to 400°F. Pierce sweet potatoes with a fork several times and place sweet potatoes on baking sheet. Roast 45 minutes or until tender. Let cool and remove skin from the sweet potatoes and discard. Place flesh into medium bowl, mash with a fork and measure 3 cups. Save any extra for another use.
  2. Meanwhile, place pie crust in a 9″ inch pie pan and pre-bake according to package/recipe instructions.
  3. Reduce oven temperature to 350°F.
  4. Combine filling ingredients: you can do this in a stand mixer using the flat beater or in a high powered blender or food processor. If the volume is too much for your blender, you can blend the sweet potato in batches, transfer to a bowl and then mix in the rest of the filling ingredients. I combined everything in my Vitamix.
  5. Transfer filling into the baked pie shell. Cover the crust with aluminum foil or use pie protectors to keep the edges of the crust from getting too brown.
  6. Bake: Bake at 350°F for 25 to 30 minutes or until pie has set.
  7. Cool + Chill: Allow to cool and then transfer to the fridge to set up and chill for at least 8 hours, preferably overnight. Serve chilled with whipped topping.

Equipment

Vitamix on white background.

vitamix blender

Buy Now →
Cuisinart 8-Cup Food Processor on white background.

food processor

Buy Now →

Notes

  • You can also boil the sweet potatoes if you prefer. To do so, peel and cube sweet potatoes. Place in a large saucepan; add water to cover. Bring to a boil. Reduce heat; cook, uncovered, until tender, 15 minutes, depending on size. Drain potatoes, mash until smooth and measure 3 cups for the recipe.
  • Category: Dessert
  • Method: Bake
  • Cuisine: American

Nutrition

  • Serving Size: 1 slice without whipped cream
  • Calories: 313
  • Sugar: 25g
  • Sodium: 185mg
  • Fat: 13g
  • Saturated Fat: 3g
  • Unsaturated Fat: 0g
  • Trans Fat: 0g
  • Carbohydrates: 50g
  • Fiber: 2g
  • Protein: 3g
  • Cholesterol: 5mg

Did you make this recipe?

Tag @eatingbirdfood on Instagram and hashtag it #eatingbirdfood

The post Healthy Sweet Potato Pie appeared first on Eating Bird Food.


Recipes

via Eating Bird Food https://ift.tt/1L45wsH

November 11, 2020 at 07:08AM
#recipies
0 Comments

Thanksgiving Day Made Easy with These 14 Time-Saving Make-Ahead Sides

11/10/2020

0 Comments

 
Thanksgiving Day Made Easy with These 14 Time-Saving Make-Ahead Sides
https://ift.tt/36mo7RB

My husband and I each have our favorite must-have side dishes for Thanksgiving. He loves mashed potatoes and gravy, while homemade dinner rolls and cranberry sauce are a must for me.

We both want stuffing and green beans to have a place at the table. Yet, that still leaves sweet potatoes, soup, and salad off the menu, which I would regret. And the kids? Well, they’re just here for the pie. All told, that is nine sides, plus a turkey, to get on the table all at the same time!

The reality is that with a little planning, I can serve all the sides we crave and still sit down to eat before the hangries set in. The key is to use recipes that can be made ahead of time while taking advantage of the slow cooker and Instant Pot.

We may not sit around the table with extended family and friends this year, but that doesn’t mean we have to forsake the comfort of a classic Thanksgiving meal that includes all the side dishes we look forward to eating all year long.

This post may contain links to Amazon or other partners; your purchases via these links can benefit Simply Recipes. Read more about our affiliate linking policy.


Recipes

via Simply Recipes https://ift.tt/2F9fkDA

November 10, 2020 at 09:05AM
#recipies
0 Comments

Cheesy Risotto with Leeks and Crispy Sage

11/10/2020

0 Comments

 
Cheesy Risotto with Leeks and Crispy Sage
https://ift.tt/2UfhFqa

This post is written in partnership with Cheeses of Europe. 

Risotto is the comfort food we all need right now. And while it can get a reputation for being finicky to make, a simple risotto is easy and adaptable.

Don’t believe the critics: you don’t have to stand over the stove forever tending and fussing; just keep your eye on the pot and stir occasionally.

For this recipe, we’re adding the beautiful nutty and earthy French cheese Mimolette, and topping the dish with crispy sage leaves – this makes a side dish special enough for the holiday table but easy enough to pull off on an average weeknight.

What is Mimolette?

Mimolette is a deep orange-colored semi-hard cow’s milk cheese from France with a distinctive bright color and nutty flavor.

It’s mainly produced in the Northern French county of Flanders around Lille, which closely borders the Flemish region of Belgium.

The creation of the cheese stems from a need to replace the popular Dutch Edam cheese during the late 1600s because of a ban on its import to France imposed during the Franco-Dutch war. The French decided to add their own distinctive feature to their knock-off version of the cheese, turning it a bright orange color with the addition of annatto, a natural coloring derived from achiote seeds.

But … enough history! Let’s cook!

Why Mimolette Risotto?

Mimolette is the perfect choice for a decadent risotto; it has a buttery, caramel flavor and a fruity aroma.

It’s firm enough to grate, and in risotto it lends an earthy yet sharp flavor and sweet fragrance.

How to Make Cheesy Risotto

For your risotto, you’ll want to start with Arborio or Carnaroli rice; the short-grain rice releases plenty of starch, which gives the risotto its velvety texture.

Then you’ll need stock, and we recommend homemade vegetable or chicken stock, since one of the key elements in risotto is the broth. A clean tasting, well-salted broth that you would enjoy sipping is what you’re looking for. There’s no shame in using store-bought, just be sure to choose one that has good flavor.

When you’re set to begin cooking, be sure to use a deep saucepan, as opposed to a wide one, to limit evaporation (you want all that liquid to stay put so the rice doesn’t dry out.)

How Long Will Leftover Risotto Keep?

We don’t think this will be a problem! But if for some reason you have leftovers of this addictive side dish, simply refrigerate in a covered container for up to four days.

To reheat on the stovetop, warm over low heat and add a little water (1 tablespoon at a time) to loosen up the risotto, if needed. The sage leaves are best enjoyed the same day they’re made.

This post may contain links to Amazon or other partners; your purchases via these links can benefit Simply Recipes. Read more about our affiliate linking policy.


Recipes

via Simply Recipes https://ift.tt/2F9fkDA

November 10, 2020 at 09:05AM
#recipies
0 Comments

Mashed Sweet Potatoes

11/10/2020

0 Comments

 
Mashed Sweet Potatoes
https://ift.tt/32tmosw

Mashed sweet potatoes

If these mashed sweet potatoes aren’t a perfect holiday side dish, I don’t know what is! They’re creamy, flavorful, and blissfully easy to make. They call for just 8 ingredients (yes, including salt and pepper), and you can even make them in advance. They’re totally gluten-free, and they can be made vegan, too. No matter who you’re serving, these mashed sweet potatoes are guaranteed to be a hit.

I got the idea to make them after developing last year’s sweet potato casserole recipe. Don’t get me wrong, I love its nutty crumble topping, but I was especially smitten with the gingery sweet potato filling. In fact, I liked it so much that I thought it would make a tasty side dish on its own. I amped it up with garlic and rosemary, and voila! It became the smoothest, creamiest, and most flavorful mashed sweet potatoes I’d ever tasted. If you love sweet potatoes, you have to try this recipe!

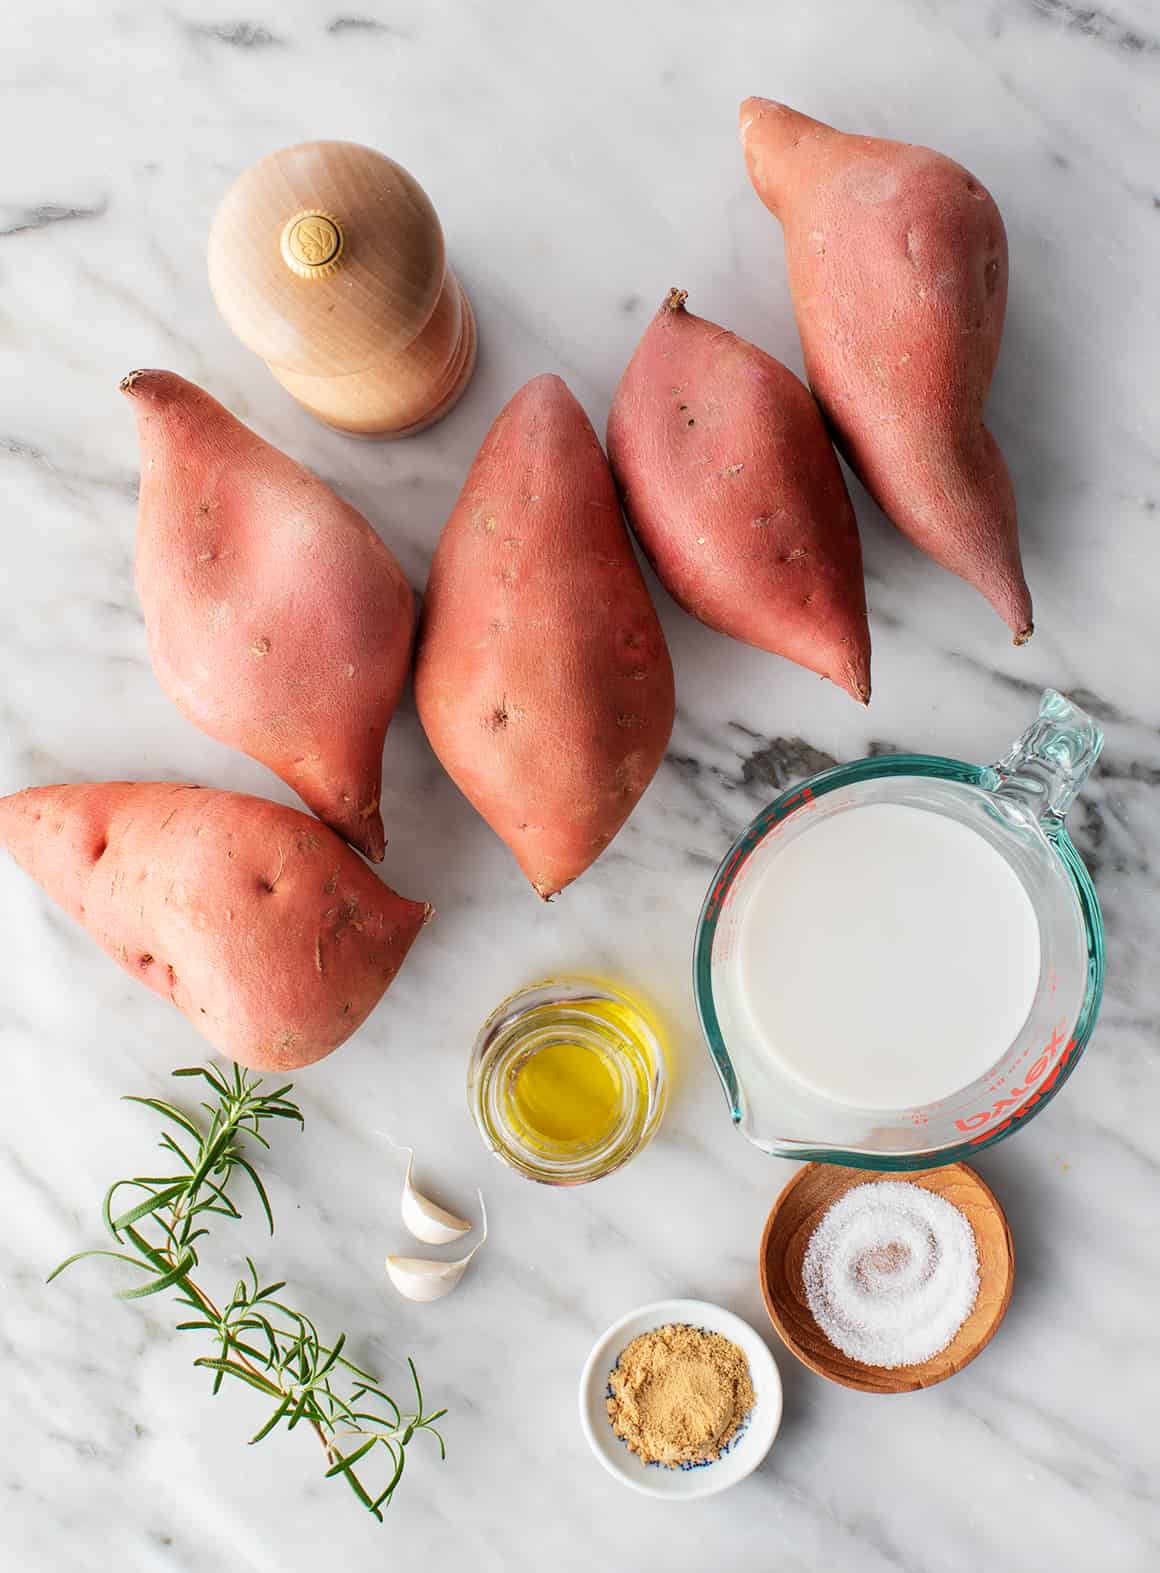
Healthy mashed sweet potatoes ingredients

Mashed Sweet Potatoes Recipe Ingredients

My favorite thing about this recipe is that it really lets the sweet potatoes shine. Unlike in a classic sweet potato casserole, you won’t find any marshmallows, brown sugar, or maple syrup here. The sweetness comes from the potatoes themselves. Then, these ingredients add richness and depth of flavor:

  • Olive oil or melted butter – Take your pick! I love the fruity olive oil in these mashed sweet potatoes, and it makes this recipe vegan. But if you prefer butter, its rich flavor is delicious here too.
  • Milk – I use almond milk because it’s what I keep on hand, but cow’s milk or another type of plant-based milk would work as well.
  • Rosemary – Rosemary and sweet potatoes are one of my favorite cold weather flavor combinations! It makes this mash cozy, aromatic, and complex.
  • Garlic – For sharp, savory depth of flavor.
  • Ground ginger – It adds subtle warmth.
  • And salt and pepper – To make all the flavors pop!

Find the complete recipe with measurements below.

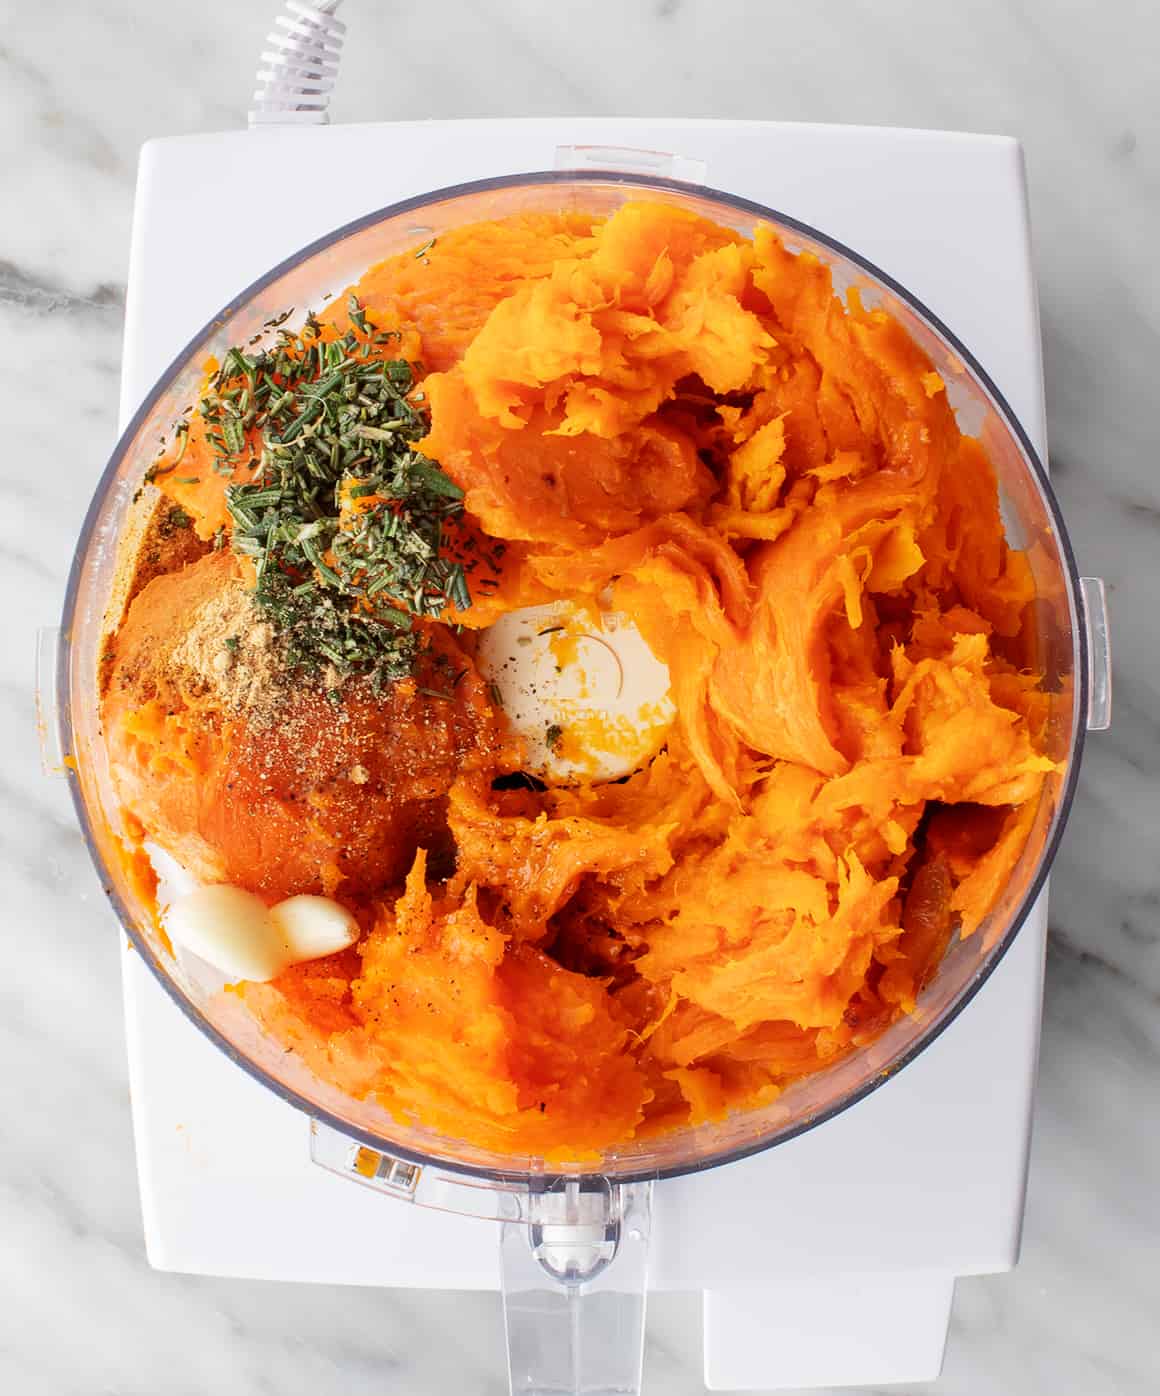
Baked sweet potato flesh and rosemary in a food processor

How to Make Mashed Sweet Potatoes

Like in my mashed cauliflower recipe, I don’t actually mash the sweet potatoes here. Instead, I puree them in a food processor to create a super smooth, creamy texture. If you prefer to use a potato masher to achieve a chunkier texture, feel free, but I adore this method:

First, bake the potatoes. When I make traditional mashed potatoes, I start by boiling the potatoes. But when I’m working with sweet potatoes, I bake them. It concentrates their sweet flavor and makes their flesh smooth and creamy…perfect for mashed sweet potatoes! Wash the potatoes, and poke a few holes in them with a fork. Place them on a foil-lined baking sheet and bake at 425° for 60 minutes, or until tender. You should be able to easily pierce them with a fork.

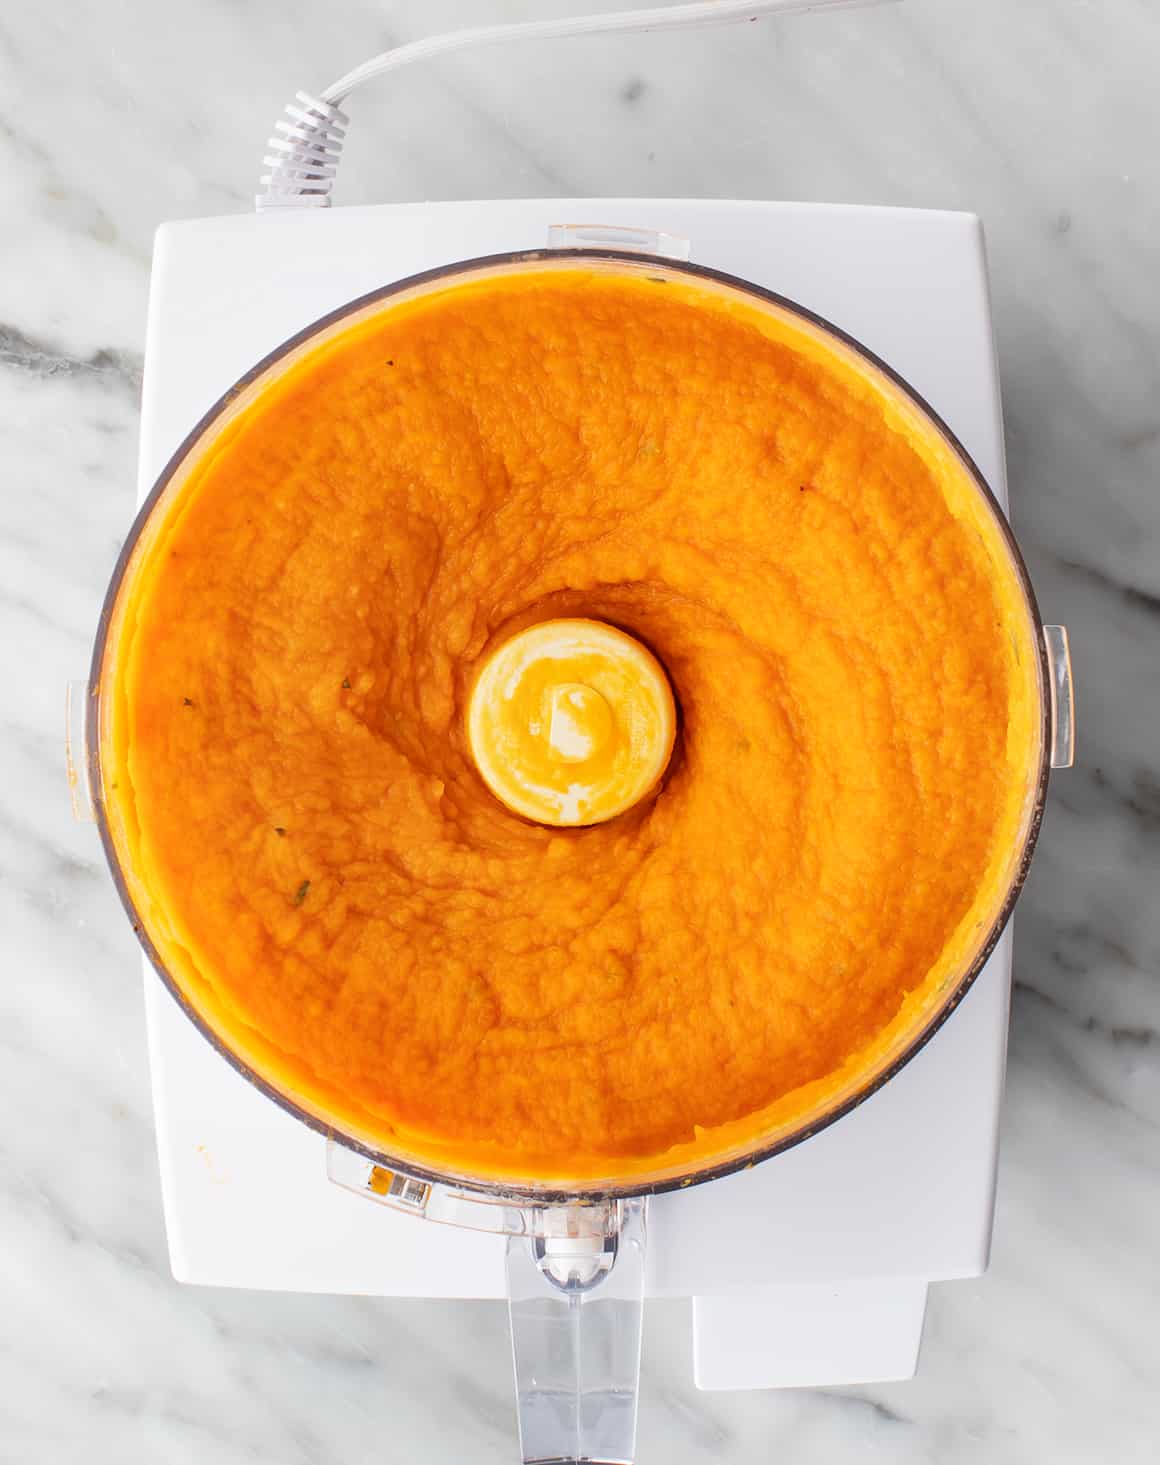
Easy mashed sweet potatoes in a food processor

Next, blend! When the potatoes are cool enough to handle, peel away their skins. Transfer the cooked flesh to a food processor, along with the milk, butter or oil, rosemary, garlic, ginger, salt, and pepper. Process until creamy, and season to taste.

Finally, eat. Serve the mashed sweet potatoes hot, topped with a sprinkle of thyme leaves, a pat of butter, and salt and pepper. Enjoy!

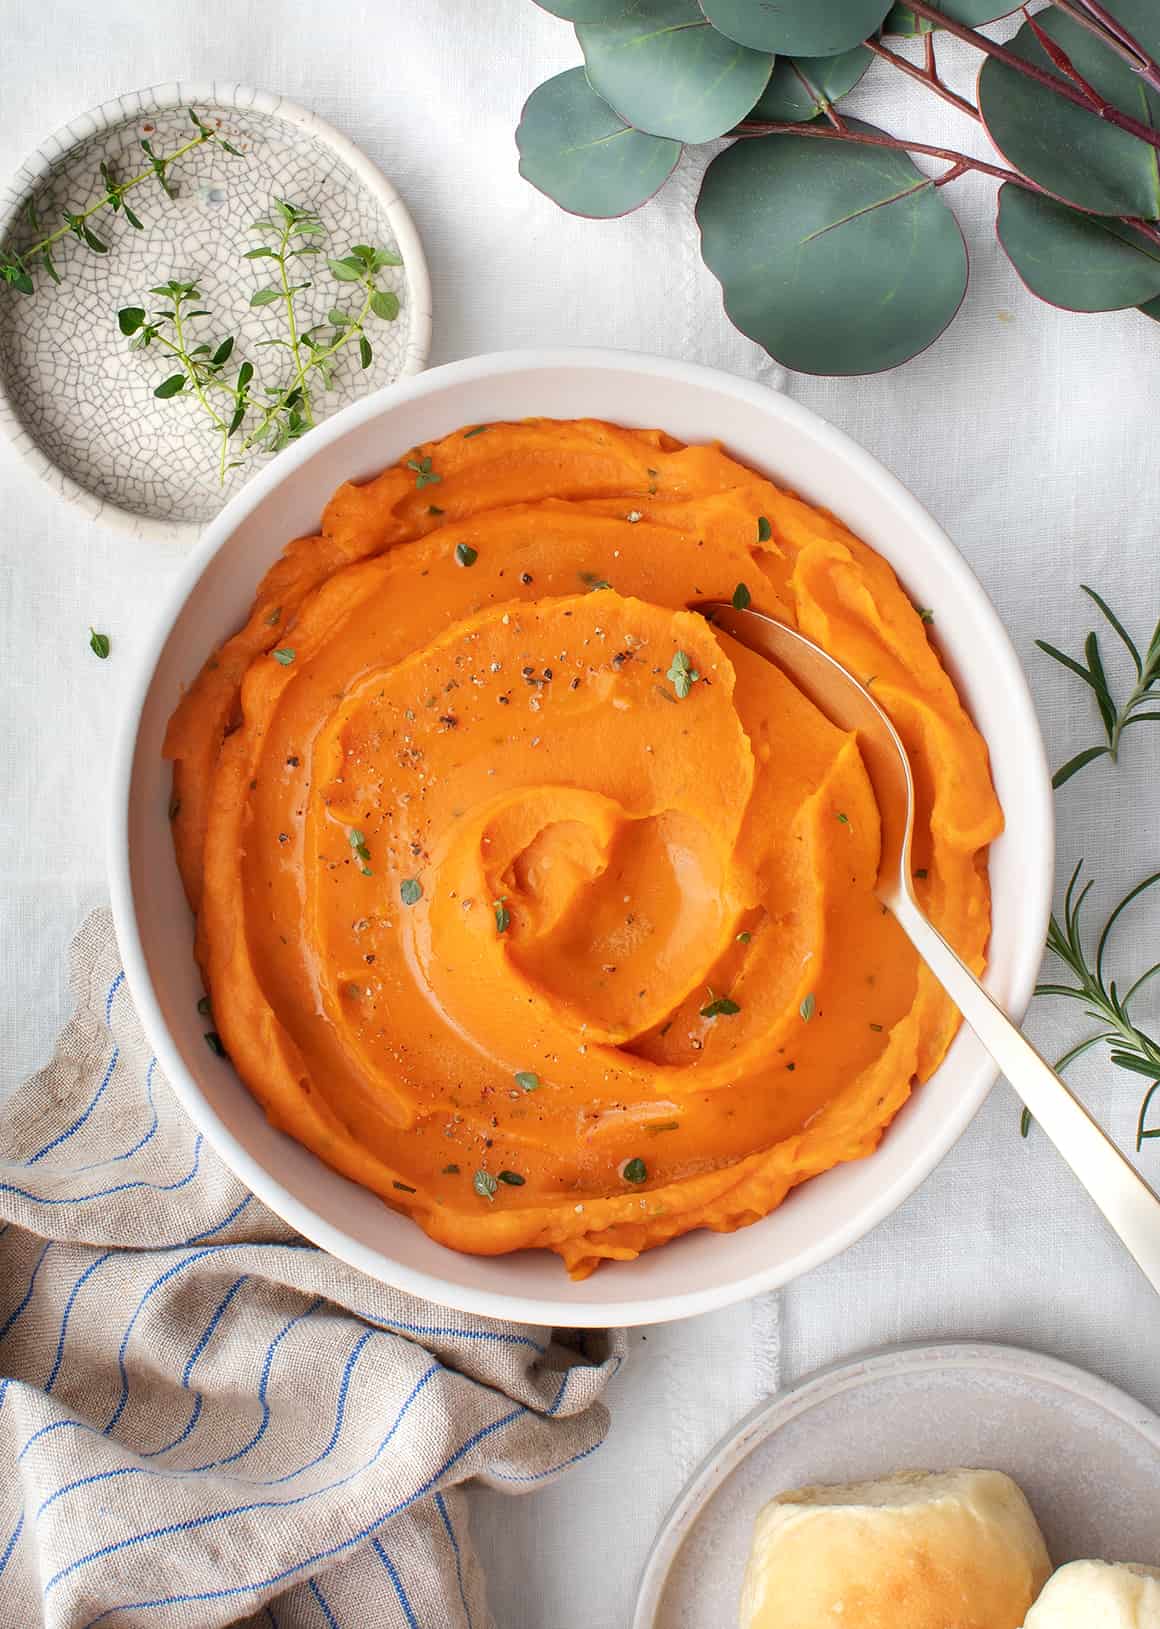
Mashed sweet potatoes recipe

More Favorite Side Dishes

Delicious and easy to make, these mashed sweet potatoes would be a great addition to any fall or winter dinner (Thanksgiving and Christmas included!). Pair them with one or more of these other side dish recipes:

  • Green Bean Casserole
  • Mushroom Gravy
  • Best Stuffing
  • Roasted Brussels Sprouts
  • Shredded Brussels Sprouts Salad
  • Roasted Beets with Citrus
  • Oven Roasted Potatoes
  • Or any of these 50 Thanksgiving Side Dishes!
Click here to browse more recipes!

Other posts you may enjoy...


Butternut Squash Soup


Vegan Broccoli Soup


Parsnip Puree


Kale & Olive Oil Vegan Mashed Potatoes


Roasted Garlic Mashed Potatoes


Pomegranate Rice Salad
Click here to browse more recipes!

The post Mashed Sweet Potatoes appeared first on Love and Lemons.


Recipes

via Love and Lemons https://ift.tt/2h2Uz32

November 10, 2020 at 08:02AM
#recipies
0 Comments

Slow Roasted Pork Shoulder with Apple Gravy

11/8/2020

0 Comments

 
Slow Roasted Pork Shoulder with Apple Gravy
https://ift.tt/3kjQrt7

1 Make the spice rub: Put the fennel seeds, peppercorns, thyme and rosemary leaves, garlic and 2 teaspoons salt into a spice grinder or coffee grinder and grind to a paste. (Alternatively, you can pound the mixture with a mortar and pestle.)

Transfer the mixture into a bowl and stir in 2 tablespoons olive oil.

2 Marinate roast overnight in spice rub: Rub the mixture evenly all over the pork shoulder. If the roast is tied, untie it to rub the inside with the rub mixture as well, then retie it.

Wrap the roast tightly in plastic wrap to hold the rub against the skin and marinate overnight (or up to two days).

Pork roast recipe for oven with herbs and spices sprinkled over the top.

3 Prep apples and onions: Peel, halve, and core the apples. Cut each apple half into about 4 wedges. Peel the onions. Cut in half from tip to root. Trim the root and tip. Cut each onion half into about 12 thin wedges.

Put the onions and the apples together in a bowl, toss with 2 tablespoons of olive oil, and season with a little salt and pepper.

Sliced apples and onions in a glass bowl to make a pork shoulder recipe.

4 Preheat the oven to 450°F (232°C).

5 Place roast on bed of apples and onions: Place the apples and onions in the bottom of a roasting pan or Dutch oven with a cover. Place the marinated pork shoulder on top of the apples and onions.

A dutch oven with a bone in pork shoulder roast set on top of apples and onions.

6 Roast: Roast uncovered for 30 minutes. Turn the oven heat down to 325°F and add the wine. Cover the roasting pan and slow roast for 2 1/2 to 3 hours until the pork shoulder is falling apart tender and pulls apart easily when probed with a fork.

Pork shoulder in oven, cooked in a dutch oven.

7 Make sauce: Transfer the pork shoulder to a serving plate and cover with foil to keep warm. Put the apples and onions into a blender. Add about 1/2 cup water and the mustard and purée.

Check the texture, and add water until you get the desired thickness for the gravy. Press through a sieve for a silky smooth textured gravy. Check the seasoning and correct to taste.

Ingredients in a blender for the sauce for a pork shoulder roast recipe.Overhead view of a blender with sauce inside for a pork shoulder roast recipe.

8 Serve: Cut the roast into pieces and serve with the apple gravy. Leftovers will keep refrigerated for up to 5 days or frozen for 3 months.


Recipes

via Simply Recipes https://ift.tt/2F9fkDA

November 8, 2020 at 04:07PM
#recipies
0 Comments

Best Stuffing

11/8/2020

0 Comments

 
Best Stuffing
https://ift.tt/2QiI4CE

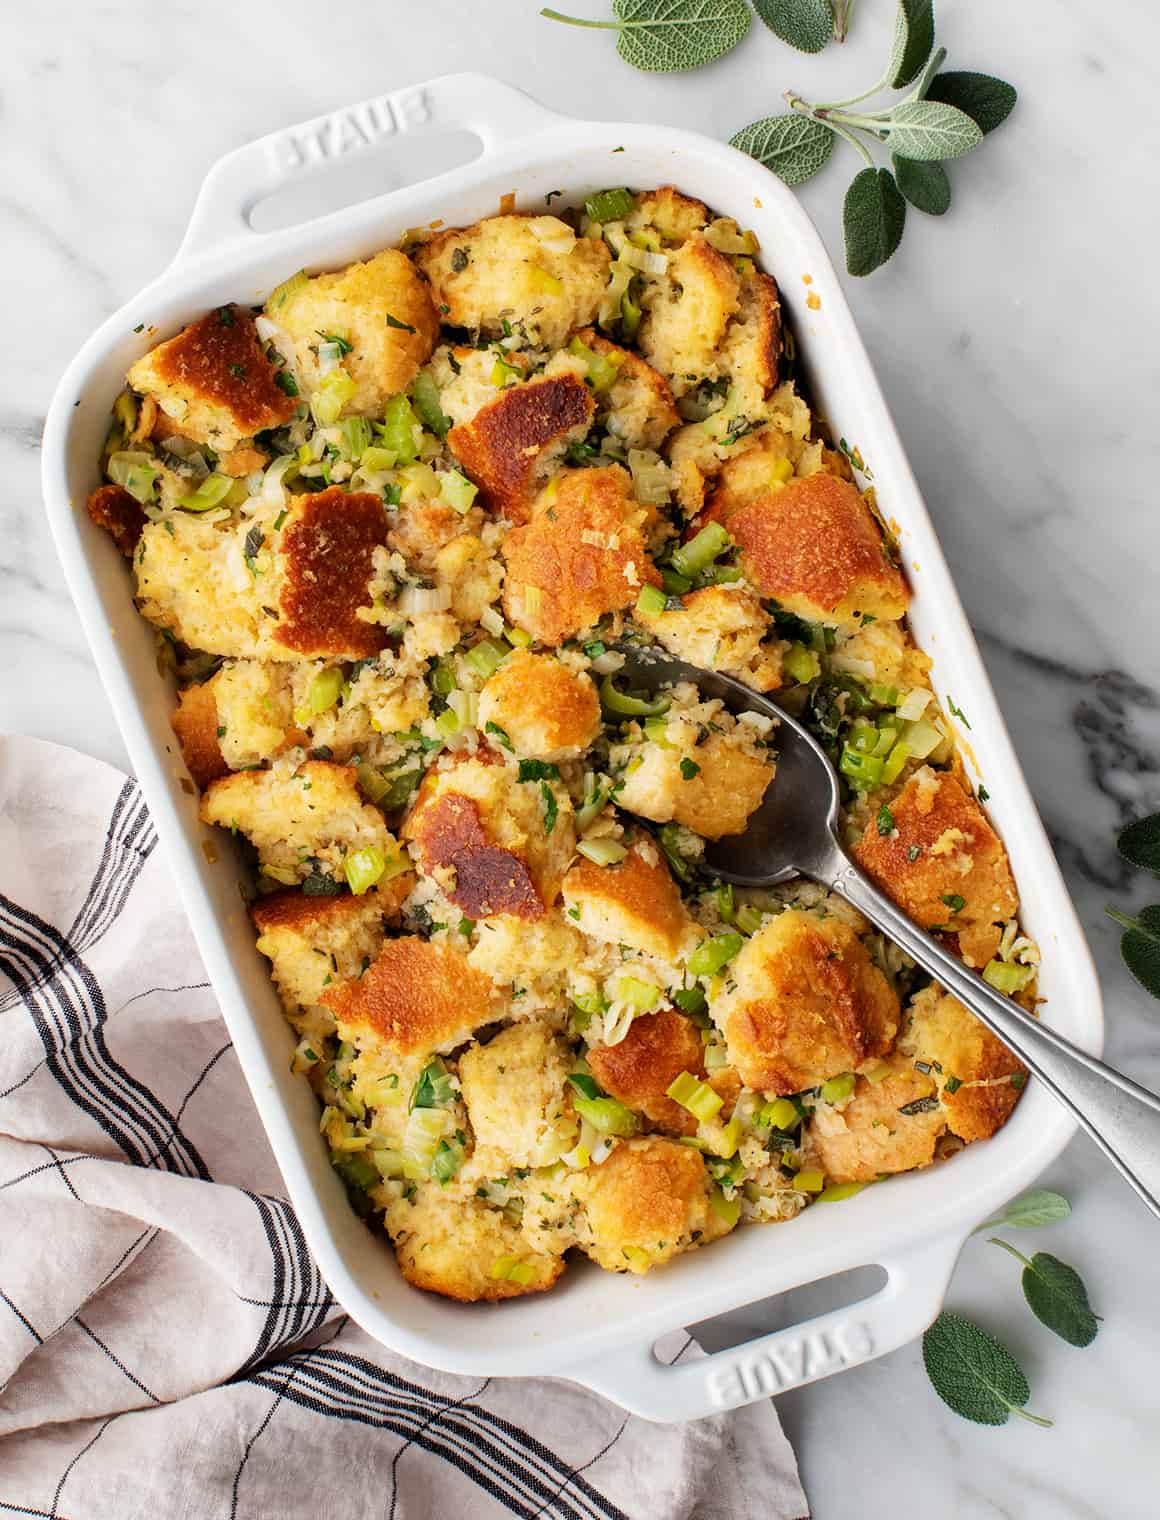
Best stuffing recipe

If I told you that a no-frills, classic stuffing recipe was my favorite part of Thanksgiving, would you believe me? Well, it’s true! As a kid, I fell in love with my grandma’s stuffing recipe. Made with onion, celery, and dried herbs, it was simple and delicious. It had a crisp, golden layer of bread on top, with a moist and gooey center underneath. Rich, savory flavor filled every bite.

My mom still makes this homemade stuffing recipe for my family’s Thanksgiving every year. Because I love it so much, I wanted to develop my own spin to share with all of you! I didn’t make many changes – I swapped the onions for leeks and dried herbs for fresh ones, and I used crusty sourdough bread. I was thrilled with the results, but I was nervous to see what my mom would think. When I shared it with her last weekend, I breathed a huge sigh of relief. After a few bites, she looked up and said, “You took our stuffing recipe, and you made it better!” I hope you love it as much as we do.

Homemade stuffing recipe ingredients

Stuffing Recipe Ingredients

Unlike the stuffing recipes I’ve shared in the past (see here or here), this one is fairly traditional. I make it with these basic ingredients:

  • Bread, of course! Steer clear of pre-sliced sandwich bread for this recipe. You want a loaf that’s crusty and flavorful, preferably sourdough.
  • Butter – It infuses this stuffing with rich, buttery flavor.
  • Leeks – I love their sweet, oniony flavor with the herbs and celery in this recipe. If you don’t cook with leeks often, check out this post to learn how to cut and clean them!
  • Celery – A stuffing essential.
  • Garlic – For sharp depth of flavor.
  • Fresh herbs – Rosemary, sage, thyme, and parsley fill this Thanksgiving stuffing with a mouthwatering mix of earthy, fresh, and savory flavors. You’ll never make stuffing with dried herbs again!
  • Vegetable broth – To moisten the bread.
  • Eggs – They add richness and moisture, helping to create the stuffing’s irresistible gooey center.
  • Extra-virgin olive oil – Drizzle a little on top to help the stuffing brown in the oven.
  • And sea salt and fresh black pepper – To make all the flavors pop!

Find the complete recipe with measurements below.

Crusty bread in a mixing bowl

How to Make Stuffing

This stuffing recipe is super simple to make! Here’s how it goes:

First, tear the bread. Yes, tear with your hands, not cut with a knife! I prefer the look of torn bread to perfect little bread cubes, and I like how the craggy edges catch the melted butter and herbs. After you tear it, place the bread in a very large bowl.

Sautéed leeks in a skillet with wooden spoon

Next, cook the leeks. Melt the butter in a large skillet over medium heat. Stir in the leeks, celery, garlic, salt, and pepper, and sauté for 5 minutes, or until the vegetables soften. I turn the heat to low halfway through to avoid browning the leeks.

Crusty bread and herbs in a mixing bowl

Then, season the bread! Pour the leek mixture over the bread and add the fresh herbs. Use your hands to toss it all together, coating the bread with the butter and herbs. Pour 1 1/2 cups of the broth over the bread, and toss again. Add the eggs, and toss again. At this stage, the bread should be very moist. If it feels dry at all, add an additional 1/2 cup broth.

Hands mixing crusty bread with herbs, leeks, and celery

Finally, bake! Transfer the bread mixture to a greased baking dish and arrange it in a thick, even layer. Drizzle the top with olive oil, cover, and bake for 30 minutes at 350°. If you’re like me, and you like your stuffing to have a crispy top, uncover the dish and bake for 5 to 10 minutes more.

Enjoy!

Homemade stuffing mixture in a bowl

Best Stuffing Recipe Tips

  • Use day-old bread. This stuffing recipe comes out best when you make it with day- (or days) old bread. Because it’s drier than fresh-baked bread, it really soaks up the flavors of the buttery leeks, broth, and herbs. So plan ahead! Buy or make your bread one to three days in advance.
  • Uncover the pan for a crispy top. One of my favorite things about Thanksgiving stuffing is how the crispy top layer of bread contrasts with the moist, gooey middle. To get the top of your stuffing nice and crisp, uncover the casserole dish for the last few minutes of baking.
  • Make it ahead. Who doesn’t love a Thanksgiving recipe that can be made ahead of time?! If you want to prep this recipe a few hours in advance, follow it as written, stopping right before you bake the stuffing. Cover the baking dish, and stick it in the fridge. Pop it in the oven 30-40 minutes before your meal, so that it’s hot when you eat. If you’d rather make your stuffing a full day in advance, that works too! Then, fully bake the stuffing ahead of time, but leave it covered for the entire time it’s in the oven. Refrigerate it overnight. The next day, reheat it, still covered, in a 350° oven until it’s warmed through. Uncover it for the last few minutes of baking to get the top nice and crisp.
  • Double it if you need to. If you’re feeding a crowd of stuffing lovers, or if you want to have plenty of leftovers, go ahead and double this recipe. It’s enough for 8 decent-sized portions, but you might want seconds. At least, I always do. ?

Thanksgiving stuffing recipe

More Favorite Thanksgiving Recipes

You could make this stuffing recipe anytime during the fall or winter, but it’s perfect for Thanksgiving. Round out your feast with one or more of these delicious side dishes:

  • Green Bean Casserole
  • Sweet Potato Casserole
  • Roasted Brussels Sprouts
  • Delicata Squash with Apples and Sage
  • Roasted Garlic Mashed Potatoes
  • Garlic Mashed Cauliflower
  • Mushroom Gravy
  • Or any of these 50 Thanksgiving Side Dishes!

Don’t forget the pumpkin pie for dessert!

Click here to browse more recipes!

Other posts you may enjoy...


Butternut Squash Casserole


Acorn Squash with Chickpeas & Chimichurri


Kale & Olive Oil Vegan Mashed Potatoes


Green Bean Casserole


Caesar Salad


Mushroom Gravy
Click here to browse more recipes!

The post Best Stuffing appeared first on Love and Lemons.


Recipes

via Love and Lemons https://ift.tt/2h2Uz32

November 8, 2020 at 09:40AM
#recipies
0 Comments

What are Leeks? (And How to Cook Them)

11/8/2020

0 Comments

 
What are Leeks? (And How to Cook Them)
https://ift.tt/32pA4Ff

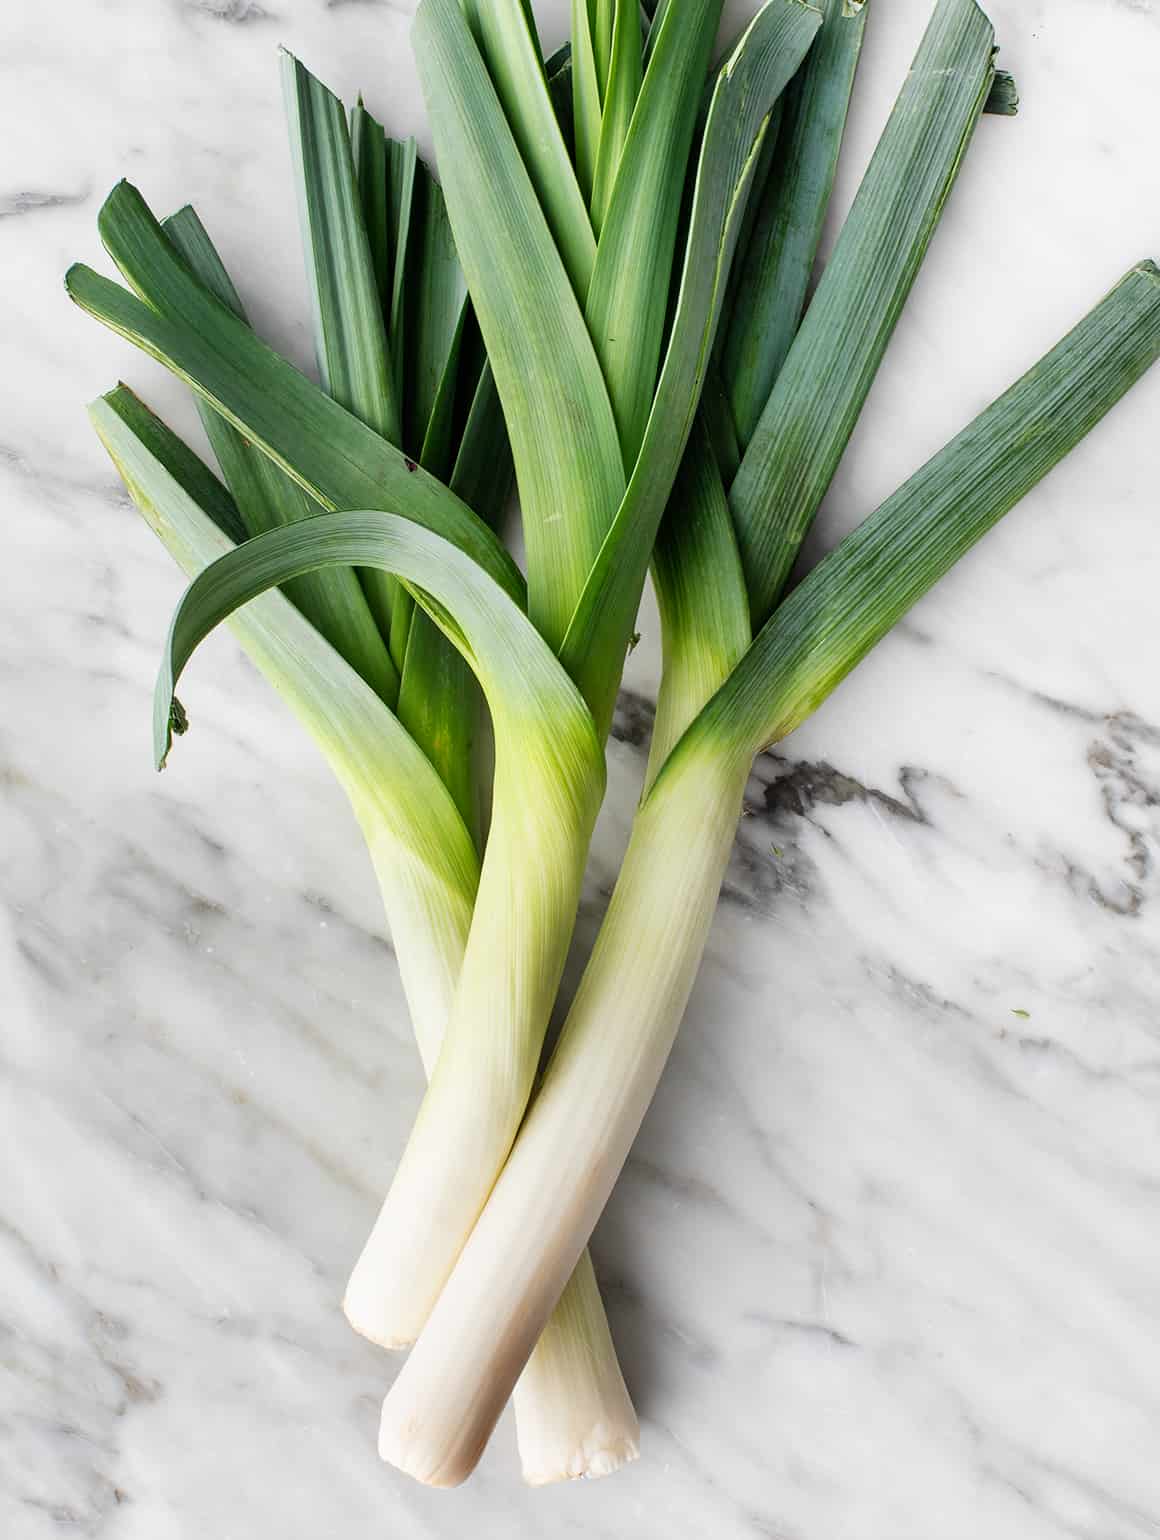
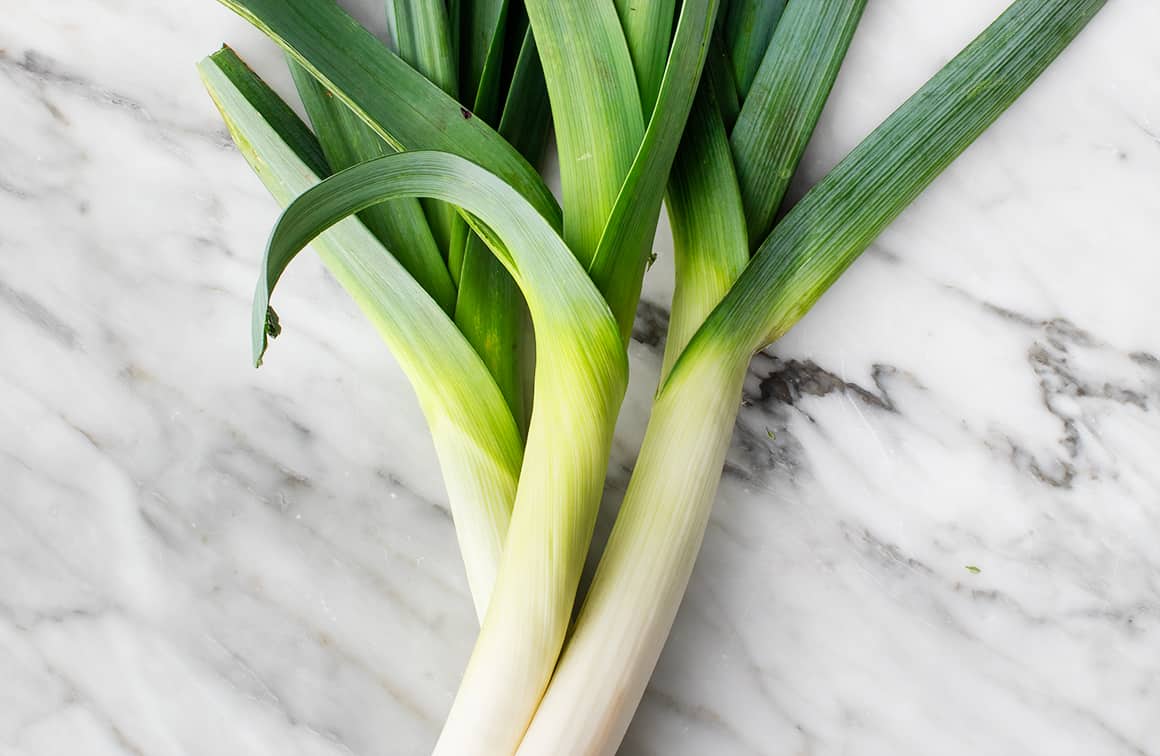
what are leeks

Ever heard of potato leek soup? I thought so! But how often do you cook leeks in other recipes? Have you tried them in pasta, stuffing, or risotto? Have you eaten them on their own? If I had my way, we’d all be eating leeks way more often. They’re incredibly versatile, adding unique, sweet, and mild onion flavor to a huge range of dishes.

To spread the leek love, I’m sharing my go-to methods for how to cut, clean, and cook leeks below, as well as my favorite leek recipes. If you have a leek in your fridge right now, I hope you’re excited. This veggie seems humble, but there’s so much that it can do!

What are Leeks?

Leeks are alliums, so they’re related to garlic, chives, shallots, and onions. Tasting them, you can tell. They have a sweet, oniony flavor that adds depth to soups, stews, pastas, and more! I’ll share more of my favorite leek recipes in the post below, but generally, I use them as I do onions and shallots, to build flavor at the start of a recipe. However, because they’re milder than most other alliums, I also like to enjoy them on their own. Grilled or roasted, they make a surprising, delicious side dish. Heads up – if you choose to serve them this way, look for really fresh, peak-season leeks. They’re at their best in the fall and spring.

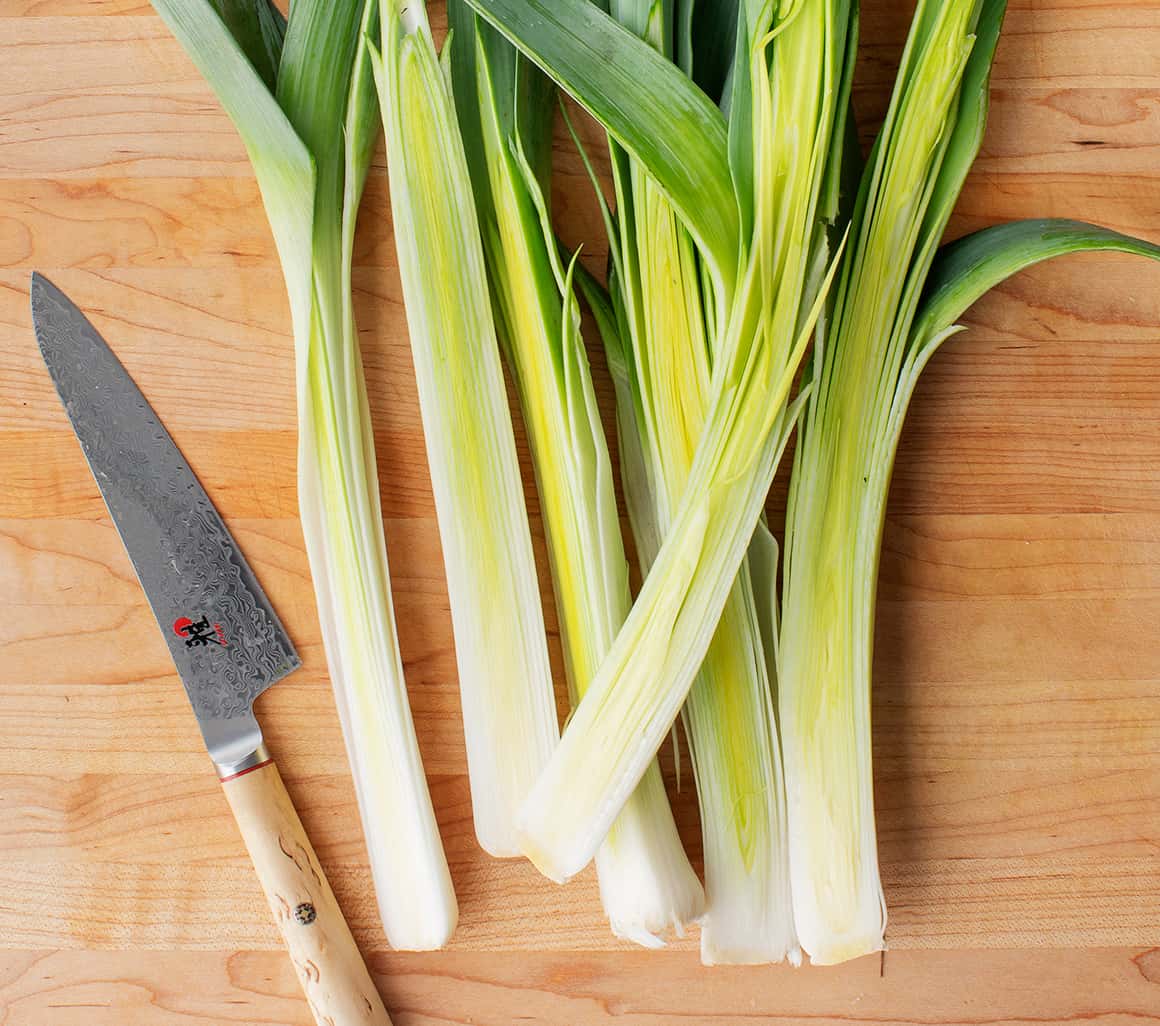
Halved leeks on a cutting board

How to Cut Leeks

How you cut leeks will vary based on how you cook them. This method for how to cut leeks is the one I use most often. It works perfectly anytime you sauté leeks, as you would for a soup, pasta, or risotto. Here’s how it goes:

First, slice the leeks in half lengthwise.

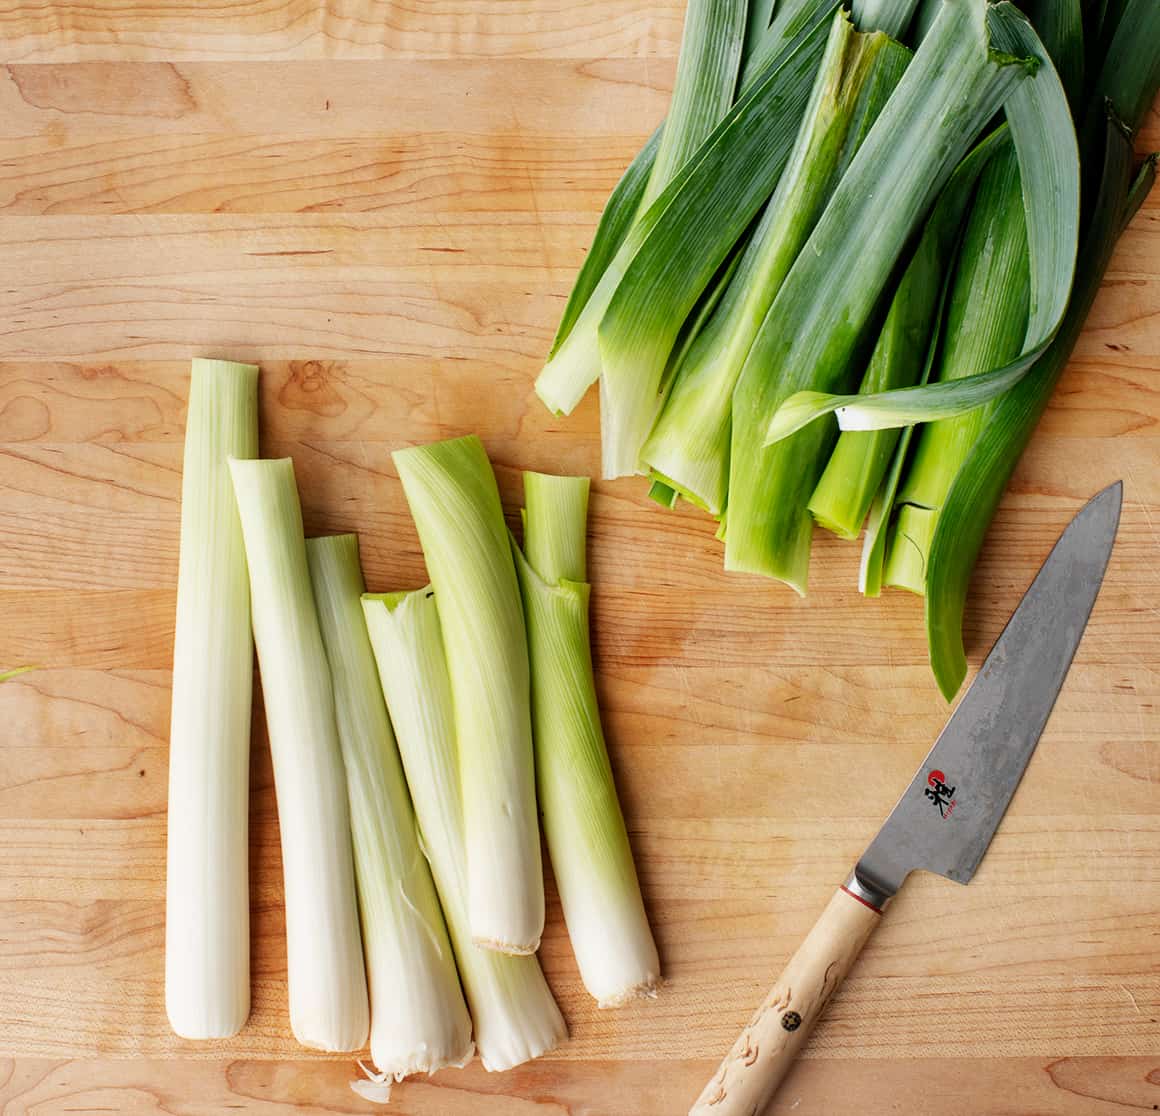
Dark green tops separated from white and light green parts on a cutting board

Then, chop off the stringy roots and dark green leaves. You won’t use the tough tops in most leek recipes, but still, don’t toss them! They add delicious oniony flavor to homemade stock. Store them in an airtight bag in the freezer until you’re ready to make some.

How to cut leeks

Next, continue chopping the white and light green parts. Lay them cut-side-down on your cutting board, and cut them into thin half-moons.

Chopped leeks

Now, you might find that your leeks are pretty dirty inside. That’s totally normal! Leeks are often filled with dirt and sand, so cleaning them is an important part of the cutting process.

Once you’ve cut all the leeks into thin slices, add them to a colander. Rinse them under cool running water, tossing them to remove any dirt or debris. When the chopped leeks are clean, use a paper towel or kitchen towel to blot them dry before you start to cook.

Chopped leeks in a colander

How to Cook Leeks

Now you know how to cut leeks, but what about how to cook them? My favorite methods for how to cook leeks are roasting, grilling, and sautéing. As I mentioned above, you’ll cut them a little differently for each cooking method:

  • To grill them, slice them in half lengthwise, rinse and dry them well, and grill both sides on medium-high until they’re well-charred and tender.
  • If you’re roasting them, halve them lengthwise, chop them into 1-inch chunks, and wash them using the method described above. Then, toss them with olive oil, salt, and pepper and bake at 425° for about 20 minutes, or until they’re tender.
  • To sauté them, follow the cutting method described above, and warm a glug of olive oil in a large skillet over medium heat. Add the leeks and cook, stirring occasionally, until they soften, about 5 minutes.

In each of these methods, you’ll only use the white and light green parts of the leeks, not the dark leaves. Still, don’t toss those tops! They add delectable flavor to homemade vegetable stock. Find my recipe on page 106 of Love & Lemons Every Day.

leek

Favorite Leek Recipes

With these basic cooking methods in your back pocket, you’ll be able to enjoy leeks as a side dish or add them to any leek recipes you like! Need some ideas? Here are a few of my favorite ways to use them:

  • On their own! Grill or roast them and enjoy them as a side dish. Serve them with romesco sauce, basil pesto, or the Mint Pesto on page 179 of The Love & Lemons Cookbook.
  • In soups. Leeks are famous for their ability to add depth to soups, stews, and stock. You’ll find them in this Oyster Mushroom Soup, this Cream of Mushroom Soup, the Spring Leek Soup on page 163 of The Love and Lemons Cookbook, and the Vegan Potato, Leek & Artichoke Chowder on page 91 of Love & Lemons Every Day.
  • In pasta. Use leeks to deepen the flavor in my One-Pot Pasta or Vegetarian Lasagna. Alternatively, showcase them in the Spring Leek & Lemon Pasta on page 185 of The Love & Lemons Cookbook.
  • In risotto. These tender alliums are a classic risotto ingredient. You’ll find them in the Lemon Risotto on page 201 of Love & Lemons Every Day.
  • With eggs. Fold sautéed leeks into an omelet or scrambled eggs, or add them to a veggie frittata. They’re also wonderful in the Leek & Radish Green Tart on page 181 of Love & Lemons Every Day.
  • In stuffing. There’s something about leeks’ sweet, oniony flavor that I just adore in Thanksgiving stuffing. Add them to this Butternut Squash Stuffing or my classic stuffing recipe.
  • On pizza. Add sautéed leeks to any homemade pizza or the Pizza with Apples, Leeks & Lemon Zest Labneh on page 183 of Love & Lemons Every Day.

What are your favorite leek recipes? Let me know in the comments!

More Vegetable Basics

If you loved learning how to cook leeks, check out one of these vegetable guides next:

  • What is Fennel? (And How to Cook It)
  • How to Cook Spaghetti Squash
  • Roasted Garlic
  • How to Cook Asparagus
  • Roasted Brussels Sprouts
  • How to Cook Corn on the Cob
  • Roasted Broccoli
  • Sautéed Kale
Click here to browse more recipes!

Other posts you may enjoy...


How to Make Almond Flour


Gochujang Sauce


How to Cook Beans


Greek Salad Dressing


Roasted Sweet Potatoes


Sautéed Kale
Click here to browse more recipes!

The post What are Leeks? (And How to Cook Them) appeared first on Love and Lemons.


Recipes

via Love and Lemons https://ift.tt/2h2Uz32

November 8, 2020 at 09:40AM
#recipies
0 Comments

Pumpkin Cake with Cream Cheese Frosting

11/8/2020

0 Comments

 
Pumpkin Cake with Cream Cheese Frosting
https://ift.tt/3n3YRGx

1 Preheat the oven and prep the cake pan: Preheat your oven to 350°F (177°C). Grease and lightly flour a 9x13-inch cake pan or spray the pan liberally with nonstick baking spray. Set the pan aside.

2 Sift together the dry ingredients: In a large bowl, use a spatula or whisk to combine the flour, baking powder, cinnamon, baking soda, nutmeg, cloves, ginger, and salt.

Fold a piece of parchment or foil in half and set it next to the bowl. Use a measuring cup to scoop the mixture into a sifter and sift the ingredients together 3 to 4 times over the parchment. When finished, transfer the dry ingredients back to the bowl. Aerating the flour this way helps the cake bake up as light as possible. Set the dry ingredients aside.

Flour and spices in a mixing bowl to make The Best Pumpkin Cake with Cream Cheese Frosting.

3 Combine the eggs and sugar: In the bowl of a stand mixer fitted with the paddle attachment, or in a large mixing bowl, whip together the eggs and sugar on medium-high speed for about 2 minutes. Scrape down the bowl and the beater with a rubber spatula and continue mixing until the eggs and sugar become thick and pale yellow, or about 2 1/2 minutes more.

When properly mixed, the beater should leave ribbons in the egg mixture as it passes through it.

Eggs and sugar added to a metal bowl to make a Pumpkin Snack Cake.

4 Add the butter and pumpkin: To the bowl with the eggs and sugar, add the melted butter and pumpkin puree. Mix on low speed just until combined and no yellow streaks remain, or 1 minute. Scrape down both the bowl and the beater.

Pumpkin mixed into ingredients to make Easy Pumpkin Cake with Cream Cheese Frosting.

5 Add the dry ingredients: Add all of the flour mixture to the wet ingredients and blend on low speed for 30 seconds. Stop the mixer. Using a rubber spatula fold in the rest of the flour until it’s completely mixed in.

Hand-mixing at the end prevents you from overworking the gluten in the flour, which will produce a tough cake. The batter should be the consistency of pancake batter.

5 Fill the cake pan: Use the rubber spatula to scrape the cake batter into the prepared cake pan.

Batter for The Best Pumpkin Cake with Cream Cheese Frosting being poured into a cake pan.

6 Bake the cake: Transfer the cake pan to the oven and bake for 30-35 minutes, or until a toothpick inserted into the center comes out clean and the sides of the cake have pulled away slightly from the pan.

7 Cool the cake: Remove the cake from the oven and place it on a wire cooling rack. Allow the cake to cool in the pan completely, about 1 hour. If you plan to serve the cake on a platter, let it cool in the pan for 5 minutes. Then turn the cake out of the pan onto a cooling rack, allowing it to cool completely.

Pumpkin Snack Cake in a pan and held above a cooling rack.

8 Make the Cream Cheese Frosting: In bowl of your stand mixer fitted with the paddle attachment (or a mixing bowl and using an electric beater), add the butter and cream cheese. Beat on low speed for 1 minute.

Once the cheese and butter are smooth, use a rubber spatula to scrape down the bowl and paddle, then add 3 cups of powdered sugar and vanilla to the bowl. Beat on low speed for 2-3 minutes, or until smooth. Stop the mixer and scrape down, both, the bowl and the paddle.

Add the remaining cup of sugar, if desired to thicken, beating for an additional 1-2 minutes or until fluffy and combined.

The frosting should be thick and hold a peak when the spatula is lifted from it.

Easy Pumpkin Cake with Cream Cheese Frosting baked and set next to a bowl of cream cheese frosting.

9 Frost the cake: After the frosting has been made and the cake has cooled completely, use an off-set spatula to spread the frosting over the surface of the cake. Don’t forget the swoops!

Sprinkle the cake lightly with pumpkin pie spice or grate fresh nutmeg and cinnamon over the surface, if desired.

Though the cake is best served the same day, leftovers may be kept, covered, overnight at room temperature. After 24 hours, it’s best to store it, covered, in the refrigerator.

The Best Pumpkin Cake with Cream Cheese Frosting partially frosted.


Recipes

via Simply Recipes https://ift.tt/2F9fkDA

November 8, 2020 at 09:06AM
#recipies
0 Comments
<<Previous
Forward>>

    The Flat Belly Detox Drink Fix


    The Flat Belly Fix

    This is the only 21-day rapid weight loss system that allows you to easily lose an average of 1 lb a day for 21 days without feeling hungry or deprived. The unique and brand new techniques used in this System are proven SAFE. And they do not cause the rebound weight gain common to all the other rapid weight loss systems that are not backed by the latest science. The Flat Belly Fix System takes advantage of a recent scientific discovery that proves the effective weight loss power of an ancient spice. Combined with other cutting-edge ingredients in the patent-pending Flat Belly Fix Tea™ — that you can make right in your own kitchen in minutes — this System is the quickest, easiest and most enjoyable way to quickly get the body you desire and deserve. Click Here

    Categories

    All
    Gluten Free
    Pancakes
    Protein

    Archives

    January 2020
    December 2019
    November 2019
    October 2019
    September 2019
    August 2019
    July 2019
    June 2019
    May 2019
    April 2019
    March 2019
    February 2019
    January 2019
    December 2018
    November 2018
    October 2018
    September 2018
    August 2018
    July 2018
    June 2018
    May 2018
    April 2018
    March 2018
    February 2018
    January 2018
    December 2017
    November 2017

    RSS Feed

(C) FeallHealthy2day.com 2017 - 2018
Some photos and content used under Creative Commons
  • Home
  • Recipes
  • Health News
  • Fitness News
  • Weight Loss
  • Contact
  • Subscribe