
|
Skinnytaste Meal Plan (March 25-March 31)
https://ift.tt/2TPPbFs A free 7-day flexible weight loss meal plan including breakfast, lunch and dinner and a shopping list. All recipes include calories and Weight Watchers Freestyle™ SmartPoints®.
I am so exited for Spring and all the seasonal vegetables that will start being available to us! Every week, I will be adding more seasonal recipes to the list, but you can also see my Spring Recipes here for inspiration. If you’re new to my meal plans, I’ve been sharing these free, 7-day flexible healthy meal plans (you can see my previous meal plans here) that are meant as a guide, with plenty of wiggle room for you to add more food, coffee, beverages, fruits, snacks, dessert, wine, etc or swap recipes out for meals you prefer, you can search for recipes by course in the index. You should aim for around 1500 calories* per day. There’s also a precise, organized grocery list that will make grocery shopping so much easier and much less stressful. Save you money and time. You’ll dine out less often, waste less food and you’ll have everything you need on hand to help keep you on track. Lastly, if you’re on Facebook join my Skinnytaste Facebook Community where everyone’s sharing photos of recipes they are making, you can join here. I’m loving all the ideas everyone’s sharing! If you wish to get on the email list, you can subscribe here so you never miss a meal plan! Also, if you don’t have the Skinnytaste Meal Planner, now would be a great time to get one to get organized for 2019! There was a print error last year, but it’s perfect now! You can order it here! THE DETAILS:Breakfast and lunch Monday-Friday, are designed to serve 1 while dinners and all meals on Saturday and Sunday are designed to serve a family of 4. Some recipes make enough leftovers for two nights or lunch the next day. While we truly believe there is no one size fits all meal plan, we did our best to come up with something that appeals to a wide range of individuals. Everything is Weight Watchers friendly, I included the updated Weight Watcher Freestyle Points for your convenience, feel free to swap out any recipes you wish or just use this for inspiration! The grocery list is comprehensive and includes everything you need to make all meals on the plan. I’ve even included brand recommendations of products I love and use often. Cross check your cabinets because many condiments you’ll notice I use often, so you may already have a lot of them. And last, but certainly not least, this meal plan is flexible and realistic. There’s plenty of wiggle room for cocktails, healthy snacks, dessert and dinner out. And if necessary, you can move some things around to make it work with your schedule. Please let me know if you’re using these plans, this will help me decide if I should continue sharing them! MONDAY (3/25) Totals: Freestyle™ SP 13, Calories 810** TUESDAY (3/26) Totals: Freestyle™ SP 16, Calories 881** WEDNESDAY (3/27) Totals: Freestyle™ SP 16, Calories 889** THURSDAY (3/28) Totals: Freestyle™ SP 20, Calories 965** FRIDAY (3/29) Totals: Freestyle™ SP 14, Calories 1,069** SATURDAY (3/30) Totals: Freestyle™ SP 13, Calories 595** SUNDAY (3/31) Totals: Freestyle™ SP 23, Calories 919** *Prep salad and waffles (freeze for the week) Sunday night, if desired. **This is just a guide, women should aim for around 1500 calories per day. Here’s a helpful calculator to estimate ***Prep Wednesday night, if desired. Recipes via Skinnytaste https://ift.tt/2ix3Luq March 23, 2019 at 11:00AM
0 Comments
Creamy Baked Mac and Cheese
https://ift.tt/2JJgwVs Bakeware for the photos in this post provided by Le Creuset. Mac and cheese is comfort food at its finest. Loaded with carbs, ooey, gooey, creamy cheese sauce, and crunchy topping—it’s practically begging you to put on yoga pants and stay in for the night! For this version, I wanted something quick and simple. I also wanted it to look similar in color to the box of Kraft Mac and Cheese my children have grown to idolize. They are a little older now, so I’m ready to migrate to a more grownup version! 
WHAT IS THE BEST PASTA FOR MAC AND CHEESE?You want something that is sturdy and will hold the sauce within the pasta. Shapes with folds or tubes are better than bows or straight noodles. My top two choices are:
My distant second favorites are:
WHAT IS THE BEST CHEESE FOR MAC AND CHEESE?I prefer to shred my own cheese for two reasons. First, I can buy higher quality cheese, and second, I get a smoother texture when I shred it myself. From what I’ve read, pre-shredded cheese is less smooth because anti-caking agents are added. Will pre-shredded cheese work? Absolutely! If you’re in a hurry, go for it. But if you have a few extra minutes, shredding the cheese yourself will make the dish that much better! Pick two or three:
SKIP THE ROUX!Traditionally, macaroni and cheese starts with a roux and a béchamel sauce. Béchamel in the most basic modern sense is a combination of butter, flour, and milk. When you add cheese to the sauce, it becomes Mornay. I realize it’s sacrilege to skip a foundational sauce like this when making mac and cheese, but I did it for a couple of reasons. First, pasta is already starchy. I didn’t really need more starch in the form of flour. Second, if I can skip a step and still make tasty mac and cheese on a weeknight, I’m going to. I value my time, and so should you. THREE STEPS FOR EASY CHEESE SAUCE
SHORT ON TIME?Skip the baking step! Pour the noodles into the cheese sauce, stir to combine, and serve as-is. If you still want the crispy top on your stove-top mac and cheese, combine the ingredients for the topping, and toast in a skillet over medium heat. Sprinkle over your bowl and serve. STORING AND REHEATING MAC AND CHEESEThere is no easy way to tell you this: This particular baked macaroni and cheese will not reheat to its previous glory. Which doesn’t mean it isn’t good; it’s just different. You can reheat it in the oven to re-crisp the breadcrumb topping, but the mac and cheese part won’t be as creamy as it was when you first made it. Keep mac and cheese covered in your fridge, and microwave the leftovers for up to a week. HOW TO MAKE AHEAD AND FREEZEYou can freeze this unbaked casserole and then bake it later, but the mac and cheese isn’t quite as creamy as it would be if you baked it straight away. I, however, don’t mind exchanging a little creaminess for knowing I have a freezer meal waiting. To freeze, make the recipe up to the point where you combine the sauce and the noodles, but don’t bake it. Instead, let the mac and cheese cool in the pan on the counter. Cover with a layer of aluminum foil. Then plastic wrap. Then freeze. It will keep for one month in the freezer. Bake from frozen for one hour. Top with breadcrumb topping and place under the boiler for 15 minutes, or until the crumbs are golden. CAN’T GET ENOUGH MAC AND CHEESE?!This post may contain links to Amazon or other partners; your purchases via these links can benefit Simply Recipes. Read more about our affiliate linking policy. Recipes via Simply Recipes https://ift.tt/2F9fkDA March 23, 2019 at 09:04AM
Simply Recipes Meal Plan: March Week 4
https://ift.tt/2U4fjvB  Simply Recipes Meal Plan: March Week 4This week our meal plans are EASY and DELICIOUS! Paella in the pressure cooker? Yes, please! Ham and Asparagus Quiche? Absolutely! Tasty Vegetarian Chili? It can be done! This month, please welcome back Aaron Hutcherson and his meal plans! Aaron is a regular contributor here on Simply Recipes and the blogger behind The Hungry Hutch. Here we are again: the end of another month! Did you accomplish the things you wanted to get done? If not, I wouldn’t stress too much, there’s always next month. (But don’t forget about taxes!) My weekends in April have already started to fill up with conferences, my college reunion (go Bears!), and a friend’s wedding, so I need to remind myself not to fill up my schedule too much ahead of that in order to conserve some energy. Thankfully they’re all events that I’m looking forward to. It could certainly be worse! Cheers to ending off the month strong — have a great week, everyone! This post may contain links to Amazon or other partners; your purchases via these links can benefit Simply Recipes. Read more about our affiliate linking policy. Recipes via Simply Recipes https://ift.tt/2F9fkDA March 23, 2019 at 09:04AM
Healthy Banana Bread
https://ift.tt/2Wb7Kka
While bananas may not be my favorite fruit, banana bread is a whole other story. When I bake banana bread, I lose all control. Just knowing that a loaf is sitting on the kitchen counter will make me come back for just one more slice all day long. It’s the perfect afternoon snack with a cup of coffee, and I love how wonderful it makes the house smell. Side note: this bread freezes well, which is how I was able to exhibit any sense of portion control as we tested loaf after loaf. ?
Why I Love This Vegan Banana BreadI could go on and on about why I love this banana bread. In an effort to show some restraint, though, I’m just listing my top 3 reasons here:
Get Creative with This Healthy Banana Bread Recipe!Make this easy banana bread recipe once, and you’ll make it again and again. If you want to change it up, feel free to experiment with different mix-ins. Chocolate chips, pecans, or chopped dried fruit would all be delicious in place of the walnuts. You could also vary the spices – try cardamom or ginger instead of nutmeg!
And once you make it, freeze slices to have on hand for busy mornings or on days when you need an afternoon pick-me-up. I like to make a double batch so that I can freeze one loaf and enjoy the other straight out of the oven.
If you love banana baked goods, make these vegan banana pancakes or these vegan banana muffins next! And if you’re a quick bread fan, check out my pumpkin bread and zucchini bread. Let me know what you think of this banana bread recipe in the comments, and happy baking! Other posts you may enjoy...
The post Healthy Banana Bread appeared first on Love and Lemons. Recipes via Love and Lemons https://ift.tt/2h2Uz32 March 22, 2019 at 10:06AM
Shrimp, Peas and Rice
https://ift.tt/2HOLvge I love this quick and easy Shrimp, Peas and Rice dish, which can be made with white or brown rice.
This dish always brings back memories of my childhood. My Dad used to make this with white rice and lots of grated cheese at the end, almost like a risotto, but not. My Dad used a lot more butter when he made it, but this lightened up version is just as delicious. The brown rice cooks in chicken broth giving it lots of flavor. Recipes via Skinnytaste https://ift.tt/2ix3Luq March 22, 2019 at 08:37AM
Flexible Dieting + Counting Macros 101
https://ift.tt/2Fs2fYL If you’ve heard of flexible dieting or counting macros, it was likely from a fitness guru on Instagram or a friend who is working with a coach to slim down. A few of you have expressed interest in learning more about this health trend, so I thought I would break it down for you and share my experience with tracking macros! What are macros and why count them?Let’s start with the basics: what are macros? “Macros” is short for macronutrients. The three macronutrients are carbohydrates, fat, and protein. Alcohol is actually a fourth macronutrient, but we’re going to save that topic for another day. When trying to lose weight, some nutrition experts suggest that instead of focusing on calorie counting alone, you should also track your macronutrient intake to get a better idea of what you’re consuming. This is important because if you’re not eating a balanced amount of macronutrients (carbohydrates, fat, and protein), you might not see the results you’re looking for or feel as good as you’d like. The idea behind macro counting is that you’re allotted a specific number of carbohydrate, fat, and protein grams each day (depending on your body composition and health goals).
The Three MacronutrientsCarbohydrates – “Carbs” have a bad rap in the health world but the truth is, our bodies need carbs! Carbohydrates fuel our brains and muscles. We want to stick to nutrient-dense carbs, like fruits, veggies, and whole grains – foods that have a good amount of fiber and lower glycemic load – so they won’t spike your blood sugar as much. Carbs to limit include processed bread, crackers, chips, and candy. Some examples of healthy carbs to incorporate into your diet including whole grains (rice, oats), starchy vegetables (sweet potato, white potato, squash), fresh fruit, and legumes. Fat – Fat has also gotten a bad rap in the health world! It’s so strange that these huge overarching nutrients are looked down upon by some. Sure, we want to limit certain fats (trans fat specifically) and eat more healthy fats, but in general, fat is good! Fat helps with vitamin absorption and brain function. It also helps insulate and protect our bones and organs. It’s a precursor for many hormones and acts as a backup fuel source. Some examples of fats to incorporate into your diet include nuts, seeds, oils (coconut, avocado, olive), nut butters, avocado, salmon, and coconut. Protein – Protein is the one macronutrient that has always been seen in a positive light in the health world – let’s keep it that way! Protein is made up of amino acids, the building block of muscles. It also supports our organs, skin, blood, hormones, and helps with satiety. Some examples of healthy proteins include lean meats and poultry (chicken breast, turkey, low-fat beef), fish (tuna, tilapia, cod, salmon, shrimp), protein powder, Greek yogurt, cottage cheese, tofu, and tempeh. Calories in Macronutrients1 gram of carbohydrate = 4 calories How do I figure out my macros?My recommendation here is to work with a coach that specializes in macros! There are websites (like this one) that you can use to figure out a ballpark range – but to get actual numbers personalized to you, your body, your activity level, and your health goals, I recommend working with a coach. I’ve experimented with a ton of different macronutrient ratios over the years, but lately I’ve been focused on 40% carbs, 30% carbs, and 30% fat. This seems to feel really balanced and achievable for me! Benefits of Flexible Dieting and Tracking Macros
Downsides of Tracking MacrosLike everything, there are two sides of the story – including the following disadvantages of tracking macros:
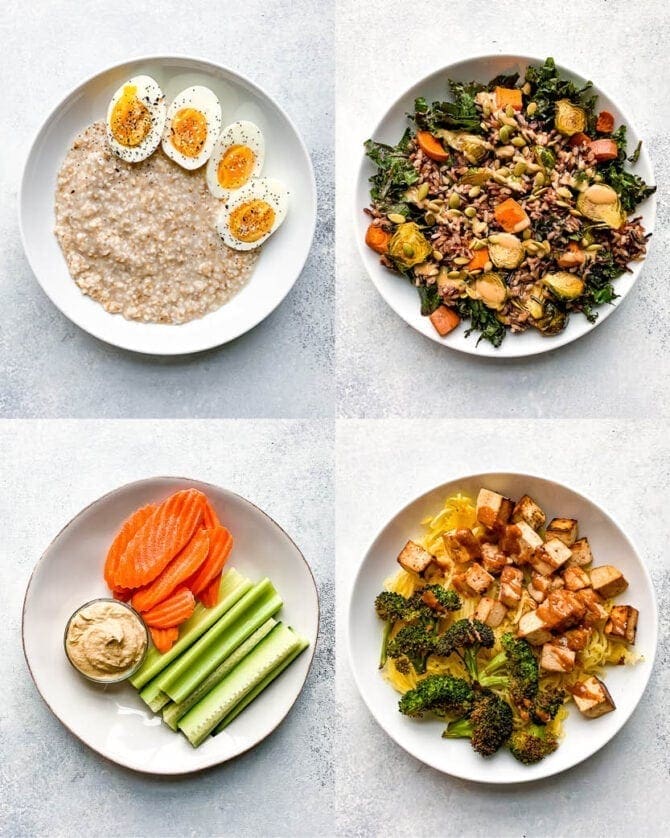
How to Count MacrosThe most precise way to track macros involves measuring or weighing your food and tracking your food intake through an app (like MyFitnessPal), a spreadsheet if you’re super into math, or good ol’ pen and paper. If you’re not super familiar with macronutrients (what they are and how to categorize foods) using a tracking app will be easiest for you. If you can easily identify what macronutrient a food item is, feel free to weigh it! For example, when I’m making a simple dinner of grilled chicken and roasted veggies, I can weigh the chicken to see how many grams of protein I’m eating, veggies to see how many grams of carbohydrates I’m eating, and oil to coat and roast the veggies to see how many grams of fat I’m eating. If I’m eating a casserole or soup, I enter all of the ingredients or the full recipe into MyFitnessPal and it will calculate how many grams of carbs, fat, and protein I’m eating. All of the recipes here on EBF have nutrition facts (and most are already on MyFitnessPal) so you can easily track the macronutrients and add them to your daily journal. The Best Tools for Tracking MacrosMeasuring cups + measuring spoons: I’m sure you likely already have a set of measuring cups and spoons, but if not, it’s time to invest in these babies because you’ll definitely need them for measuring and tracking the food you eat. Some recommended options: dry measuring cups, liquid measuring cups, measuring spoons. Digital food scale: Some foods (like chicken breast, for example) are way easier to measure by weight on a scale instead of trying to fit them into measuring cups. Food scales are also super handy if you do a lot of baking because the measurements are more accurate. I recently purchased this one. Apps: There are a ton of apps out there, but here a few that I’ve heard of or used include MyFitnessPal, LoseIt, and Cronometer. My Experience with Tracking MacrosI’ve experimented with a few different ways to track macros. The first involves having a coach help me come up with my macro needs and using MyFitnessPal to track. I’ve used MyFitnessPal on and off for years, but until about 5 years ago I had never used it to track my intake regularly. Overall, every time I’ve tried this method, it’s felt too daunting and overwhelming to stick with long term. I will track for a week or so, but will eventually forget to track one day and then sort of fall off the tracking wagon. I’ve done this so many times that I’ve realized that tracking every single thing I eat might not be the best method for me. Luckily, through the tracking process, I have learned how to eyeball portion sizes of each macronutrient so that I can build macro-balanced meals without having to track every item I eat. Sometimes I’ll still break out my food scale, just to be sure I’m getting the appropriate amount of protein or to measure a serving size of foods that are easy to overeat (like trail mix), but overall I’ve become pretty good at knowing which foods fall into which macronutrient category and I can build balanced meals without having to track every item. The main thing I learned when I first started tracking was that although I was eating the appropriate number of calories each day, I was eating a lot of carbs and fat but not enough protein. Once I started adding in more protein-rich foods to get my protein intake up, I noticed that I wasn’t hungry all the time, I had more energy at the gym, and I noticed my body composition changing as well. Some of My Favorite Macro-Balanced Meals:
Want to learn more about different diets and trends? Check out the following articles:
The post Flexible Dieting + Counting Macros 101 appeared first on Eating Bird Food. Recipes via Eating Bird Food https://ift.tt/1L45wsH March 22, 2019 at 06:14AM
Brown Sugar Baked Ham with Pineapple
https://ift.tt/2HztHWO Bakeware and platters for the photos in this post provided by Le Creuset. I have to admit my brother, Aaron, is the ham maker in our family. He uses a hybrid version of my grandmother’s old-fashioned ham dotted with pineapple rings and cherries, and my cousin Edward’s approach of thoroughly rubbing the whole thing down with loads of brown sugar–no last-minute glazing required. This ham is easy, loved by all, and requested every year for Christmas and Easter. That’s a winning recipe in my book! For this version I added a little ground clove to the sugar, and I skipped the cherries, but feel free to add them if you want to go retro. 
WHICH HAM IS THE RIGHT HAM?
HOW MUCH HAM DO YOU NEED?When selecting the proper-sized ham, keep in mind it’s nice to have to some to send home with guests, as well has having enough for leftovers for yourself for a couple of days. I prefer bone-in hams, as mentioned above. They taste better, cook nicer, and you can use the bone to make ham and potato soup. Remember a bone adds weight, but you can’t eat it. I like to estimate about 3/4 of a pound per person. With that as my guide, a 15-pound bone-in ham will provide a meal for 10 guests with enough remaining for leftovers. The USDA recommends:
WHY COOK HAM AT ALL?Ham is the cured leg of pork. They can be fresh, cured, smoked, or cooked. If you are in the United States, most likely the ham you are buying for your holiday table has been cured and is labeled ready to eat. Hams that still need to be cooked will have safe handling instructions. Our goal with cooking a cured ham is to warm it up and season it to create an enhanced dining experience. HOW TO SCORE A HAMScore the ham to allow the fat to render and for the flavor to penetrate into the meat. Using a sharp chef’s knife, cut slits through the skin of the ham only 1/4-inch-deep, crossing the entire ham. Make each row about an inch apart then repeat the pattern across the original slits so you have a diamond pattern. 
GIVE YOUR HAM A RESTThis ham is best when it has 24 hours to sit in its brown sugar bath. The saltiness of the ham draws the sugar into the meat and creates tender, sweet, and salty flavor explosion that is only enhanced by time. If you don’t have an overnight to spare, then rub the ham with brown sugar at least eight hours before you plan to cook your ham. If timing and a busy schedule dictates you must cook the ham right away without the additional curing time, then might I suggest our glazed baked ham. HOW LONG AND AT WHAT TEMPERATURE TO BAKE HAMLow and slow is the name of the game when it comes to creating a juicy, succulent roasted ham.
HOW DO YOU SLICE HAM?Slicing a bone-in whole or half ham can take a little practice. Just remember you’re feeding people who are happy you are feeding them. Ham slices need not be perfect.
HOW TO KEEP LEFTOVERSOnce you’ve high-fived your partner for pulling off a holiday dinner that will go down in holiday dinner history as the best one ever, eye-ball the amount of ham you have remaining and determine your next pork-centric move. If you only have enough for a few leftovers, keep the sliced ham in the fridge for about 3 to 5 days, or you can keep in the freezer for 1 to 2 months. I like to pour the juices from the roasting pan over the sliced ham before I freeze it. That way as I thaw and reheat it, it doesn’t dry out. HOW TO USE UP YOUR LEFTOVERSBest Side Dishes to go with Ham
This post may contain links to Amazon or other partners; your purchases via these links can benefit Simply Recipes. Read more about our affiliate linking policy. Recipes via Simply Recipes https://ift.tt/2F9fkDA March 21, 2019 at 09:01AM
Shrimp Risotto
https://ift.tt/2JsooKB 1 Heat the clam juice and water: Add the clam juice to 4 cups of water in a pot, heat until steamy. Do not let it boil. 2 Sauté shallots; In separate pot (thick-bottomed), heat 2 tablespoons butter over medium heat, and sauté the minced shallots for 2-3 minutes, until just translucent.
3 Add the rice to the pot. Stir-fry the rice for 2-3 minutes, until all the grains are well coated in butter and are beginning to toast.
4 Add white wine and stir: Increase the heat to high and add the white wine. With a wooden spoon, stir the rice vigorously. Once the wine boils, turn the heat down until the wine is just simmering gently. Stir almost constantly. You are doing this to agitate the rice, which releases its starch and creates the creamy sauce you want in a risotto. 5 Add two ladles of clam juice water mixture: When the wine is almost cooked away – under no circumstances should you let the rice sizzle on the bottom of the pot – pour in two ladles of the hot clam broth-water mixture. Stir well to combine, and add a healthy pinch of salt. 6 Stirring almost constantly, let this liquid reduce until it is almost gone, then add another ladle of broth. Continue this until the sauce coats the back of a spoon. Taste the spoon and see if the risotto needs salt. If so, add a small pinch.
This much risotto rice should need about 4-5 cups of liquid total (including the wine) to come together, so start tasting the rice at the 3rd cup. If it is almost there – firm in the center but translucent on the outside, and fully surrounded with a creamy sauce – add one more cup of broth, stir well, and taste one more time for salt. (If not, you have old rice and you’ll need to go one more cup and let it cook away.) 7 Now add in the shrimp, the parsley, and the remaining tablespoon of butter. Stir constantly until this last cup of broth is about half gone: Remember you want this risotto to be loose and creamy.
Right before you serve, add in the lemon zest and serve at once. Best served with bowls and spoons rather than plates and forks. Recipes via Simply Recipes https://ift.tt/2F9fkDA March 21, 2019 at 08:07AM
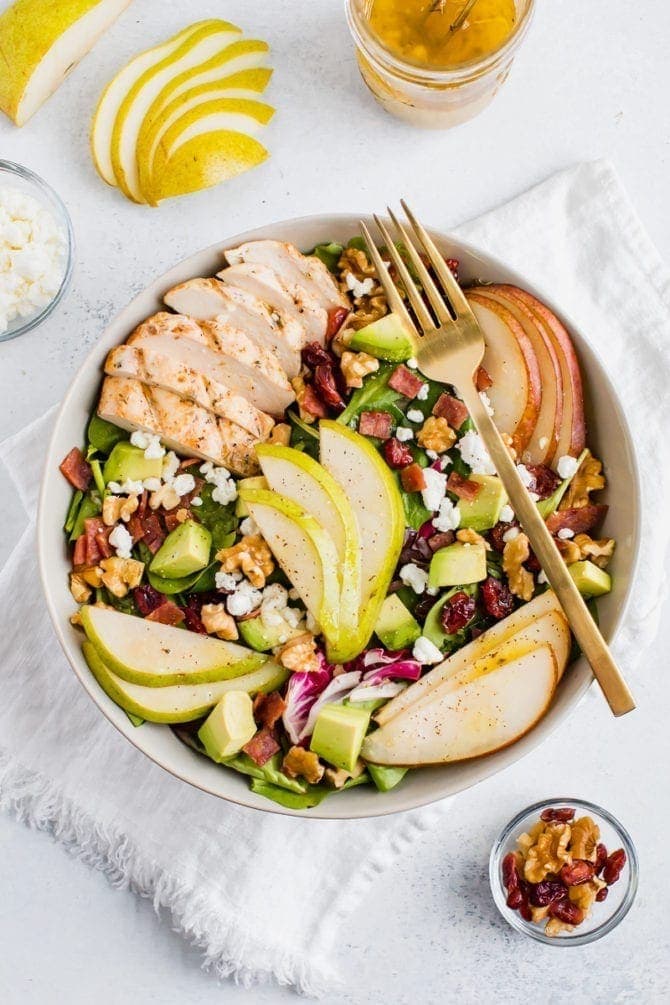
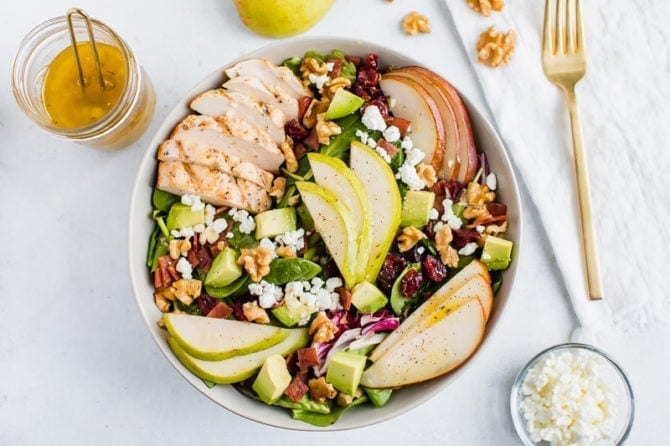
Pear Salad with Walnuts, Avocado and Grilled Chicken
https://ift.tt/2CxNYbo A refreshing pear salad that is perfect for spring. I complimented the flavor of pears with walnuts, avocado and grilled chicken for a satisfying meal-sized salad. This post is sponsored by USA Pears. It’s pear season! I love pears and have been dreaming up a pear salad recipe for you that is perfect for spring. Ya’ll know I love my salads, but it’s been a minute since I’ve shared any salad recipes so I’m excited to share this meal-sized salad today. I created this salad by starting with the main ingredient: pears. Pears are nutrition powerhouses yet I feel like they can be overlooked in the health world!
What are the health benefits of pears?One pear has six grams of fiber and is a good source of vitamin C. They’re low calorie and don’t contain any fat or cholesterol. They’re naturally sweet and are great to add to a variety of recipes to add natural sweetness – I love using pears in oatmeal, baked goods, salads and smoothies. This Pear and Avocado Smoothie is one of my faves. Learn more about pear nutrition here.
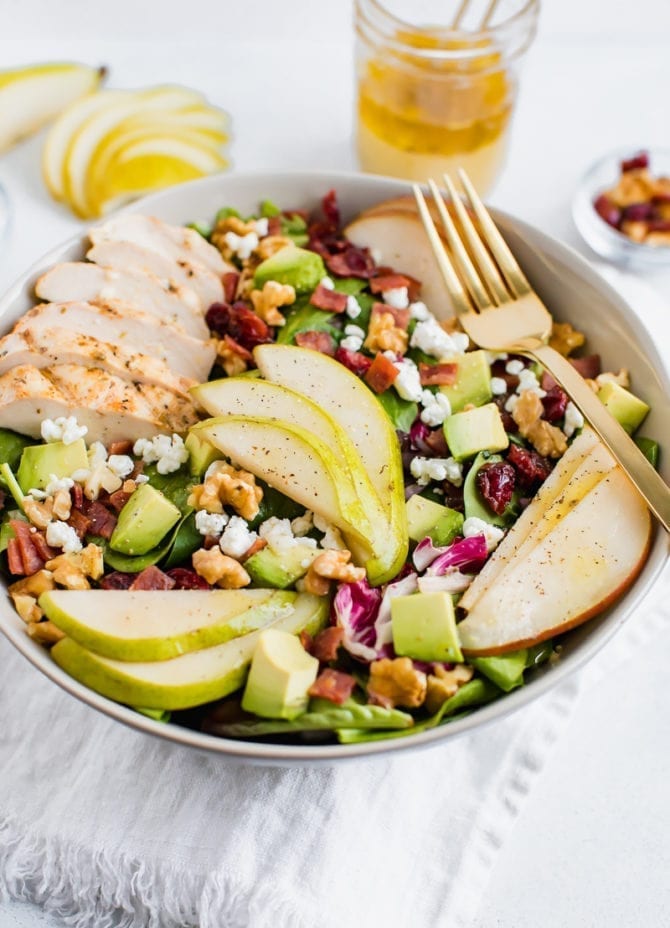
How can I tell if a pear is ripe?I’m excited to share a new trick I learned! I used to just give pears a little squeeze or judge off of the color (LOL!), but I’ve learned that you can press at the top of the pear near the stem. If it presses in a little, it’s ripe and ready to eat! If your pear isn’t quite ripe yet, just let them sit at room temperature. If you have ripe pears but aren’t quite ready to eat them yet, you can put them in the fridge to slow down ripening.
Ingredients for a pear saladI loved dreaming up the flavor combinations for this pear salad! I combined sweet and savory, different textures and a variety of flavors to make a satisfying, protein and fiber packed smoothie that will keep you full for hours!
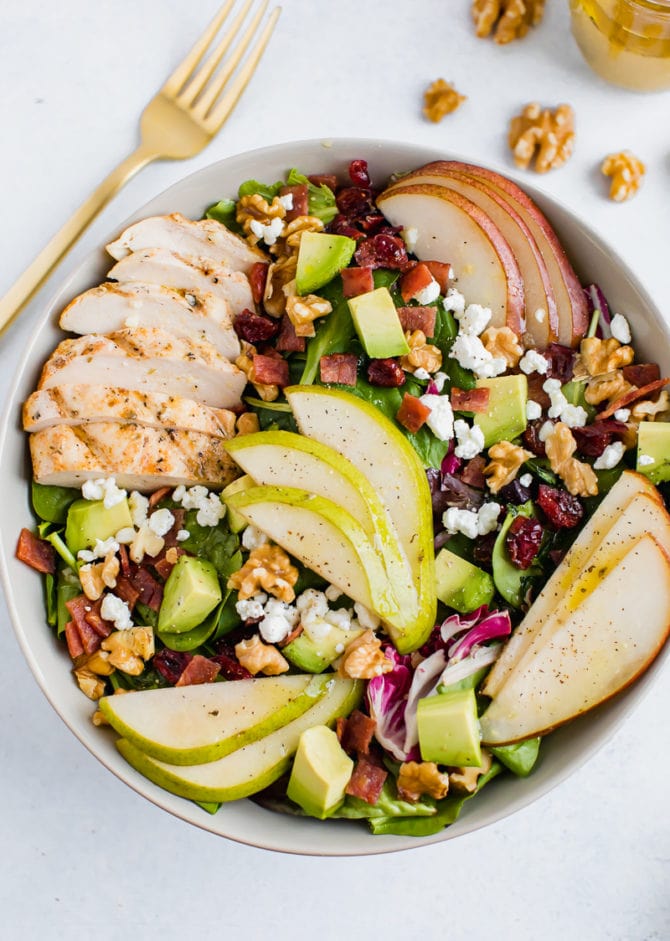
I love this salad and find myself craving it often! Pears are in season right now so it’s the perfect time for this salad but honestly, I can see myself enjoying this year round.
If you make this chopped pear salad, please be sure to leave a comment and star rating below letting me know how it turns out. Your feedback is so helpful for the EBF team and other EBF readers. Print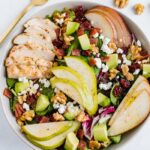 Ingredients
Maple Balsamic Dressing
Instructions
Notes
Nutrition
Keywords: pear salad The post Pear Salad with Walnuts, Avocado and Grilled Chicken appeared first on Eating Bird Food. Recipes via Eating Bird Food https://ift.tt/1L45wsH March 21, 2019 at 06:09AM
Creamy Chipotle Sauce
https://ift.tt/2UNkCwK
I say this all the time, but I truly believe that the key to a great veggie meal (or any meal, really) is a great sauce! With a great sauce on hand, you can use whatever veggies/grains/proteins you have to easily make salads, bowls, tacos, or sandwiches any night of the week. This smoky, creamy chipotle sauce is one of my absolute favorites to punch up any meal. It started as a sauce to the cauliflower tacos in my first cookbook and now I love it on everything from burrito bowls to breakfast tacos. It’s also great as a sweet potato fries dipping sauce, as it’s pictured here today. Keep reading for how to make it (and yes, there’s a vegan version!).
How to Make the Best Chipotle SauceWhat’s the secret to making a great chipotle mayo? Canned chipotle peppers in adobo sauce. They have an amazing smoky, spicy flavor that makes them one of my go-to ingredients in savory recipes. If you’ve never used chipotles in adobo, don’t worry – they’re not hard to find. Most grocery stores carry them in the Mexican aisle. After you make this recipe, use your leftover chipotles in BBQ jackfruit sliders or creamy vegan nacho cheese! In this recipe, I balance the heat of the chipotles with sweetness from honey, richness from Greek yogurt & mayonnaise, and brightness from lime to make an addictive sauce that’s a bit lighter than a traditional chipotle aioli. And no need to worry if you’re vegan – maple syrup and vegan mayo work perfectly in place of the honey, yogurt, and traditional mayonnaise.
How to Use Chipotle SauceOk, you’ve made your chipotle sauce. Now what do you do with it? I love to use it as a sweet potato fries dipping sauce, and it’s great to have on hand for quick no-recipe meals. Drizzle it over a burrito bowl or roasted veggies, or dollop it onto tacos like the cauliflower tacos in our first book! You could also slather it onto a sandwich or use it to top your favorite veggie burger. In addition, it would be delicious in any of these recipes:
Other posts you may enjoy...
The post Creamy Chipotle Sauce appeared first on Love and Lemons. Recipes via Love and Lemons https://ift.tt/2h2Uz32 March 20, 2019 at 09:35AM |
|


 RSS Feed
