
|
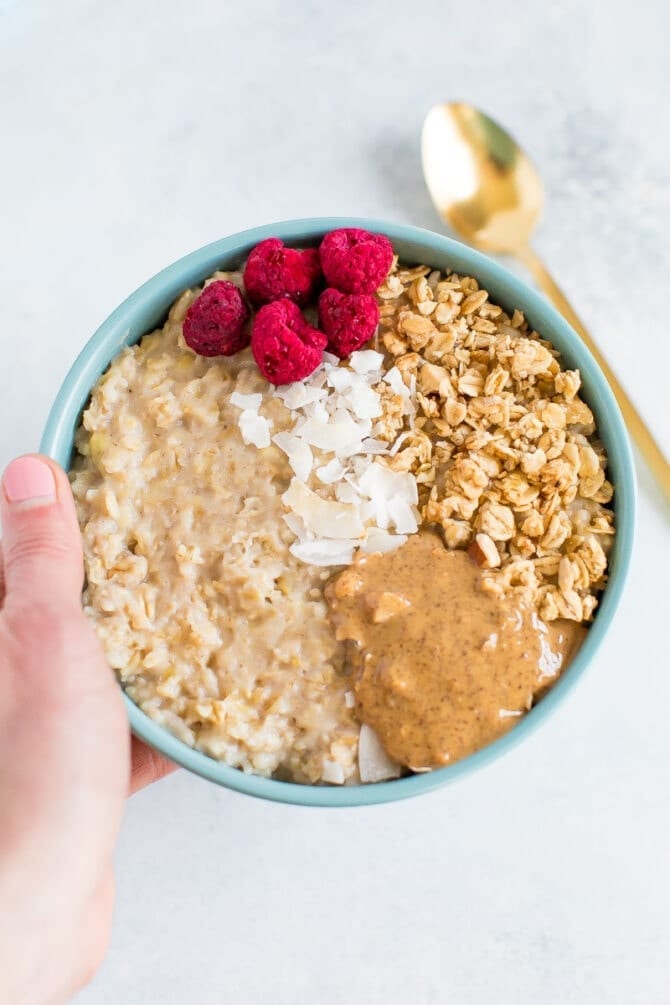
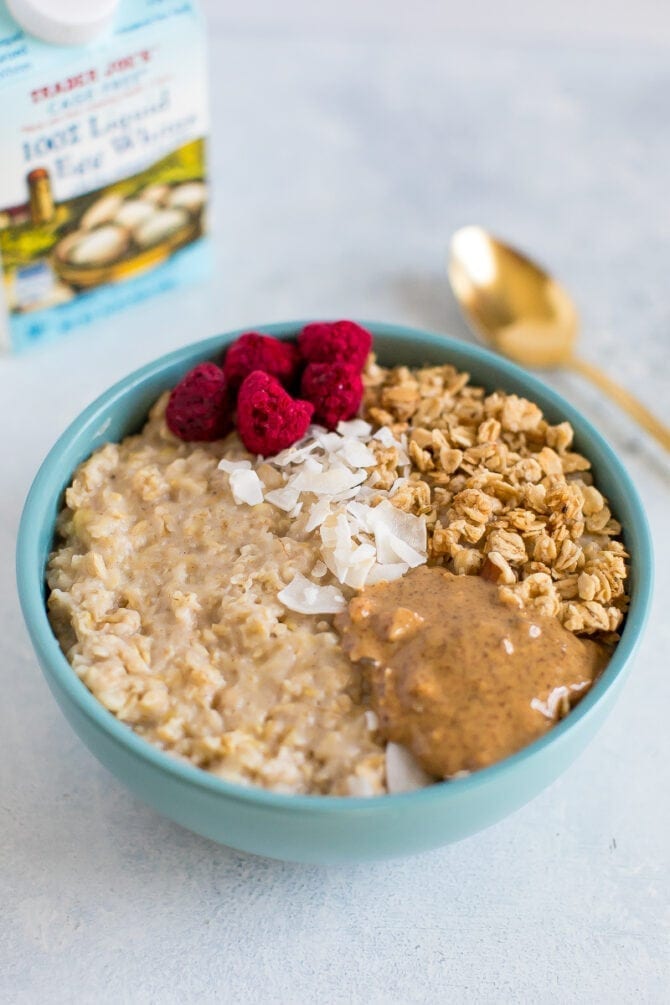
Egg White Oatmeal
http://bit.ly/2IYBZYt Add protein to your oats by stirring in egg whites while they cook. The end result is a bowl of thick, fluffy and filling egg white oatmeal. This is the third and final post to our high protein oatmeal series! First we share cottage cheese oatmeal, then greek yogurt oatmeal and now we’re wrapping things up with my favorite high protein oatmeal recipe: egg white oatmeal. Are any of these ideas new to you? Have you tried any out already?
Egg Whites 101When I say “egg whites”, I’m referring to the thick, clear liquid when you crack open an egg. The yellow part of the egg is the yolk. It’s fairly simple to separate the two out – I crack the egg in half over a small bowl and then pass the yolk back and forth between the two shell halves. The yolk will stay in the shells and the white will separate out into the bowl. If you don’t want to crack a bunch of eggs and separate the whites from the yolks, you can also buy egg whites in a carton at the grocery store. I usually always have a carton of organic egg whites in my fridge because I use them for so many things including egg white oatmeal, my egg and oat combo bowl and these blueberry protein pancakes.
Egg White NutritionEgg whites are high in protein and low in calories. According to Healthline, 67% of the protein found in eggs is found in the egg whites. This doesn’t make them better or worse than the egg yolk (the yolks have a lot of great nutrition too!), but if you want a high protein, low-calorie meal, egg whites are your friend.
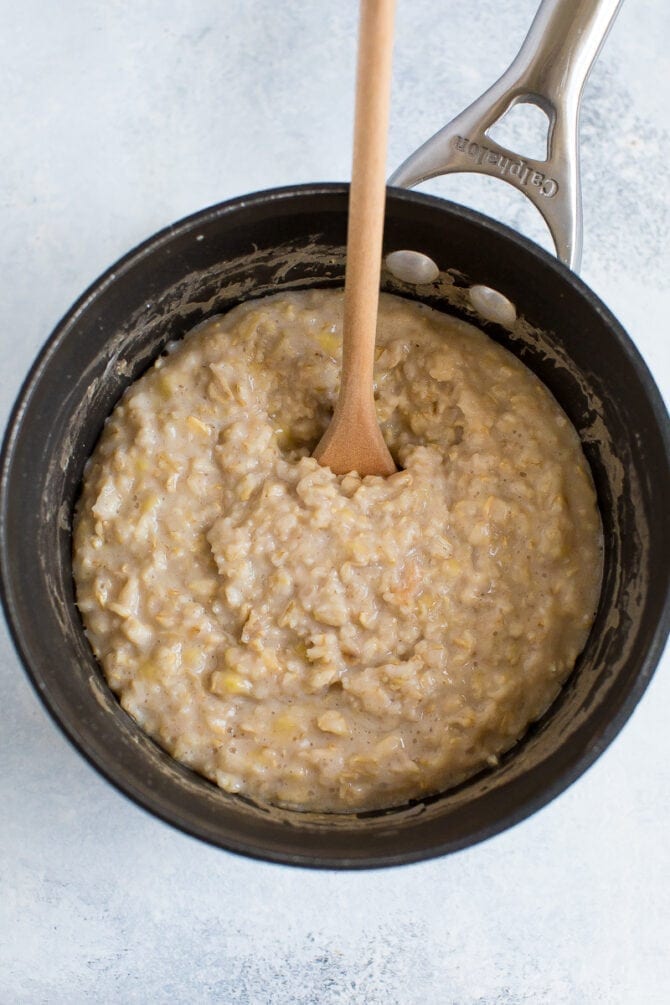
Egg White OatmealAs mentioned in the previous high-protein oatmeal posts, oatmeal on its own doesn’t have much protein. This is why you are usually hungry a couple of hours after a bowl of plain oats. Not anymore! When you add protein (and healthy fats) to your breakfast, you’ll stay full and satisfied much longer. Adding egg whites to your oatmeal works best with hot oats. Don’t stir in egg whites to your overnight oats, please! Start by cooking your oats with the liquid until all of the liquid has been absorbed. Whisk in the egg whites and stir constantly. This will keep the eggs from scrambling and will result in thick, fluffy oats. You can also add to baked oatmeal to increase the protein! Mix egg whites into your usual baked oatmeal mixture and bake as usual. If you make this egg white oatmeal, please be sure to leave a comment and star rating below letting me know how it turns out. Your feedback is so helpful for the EBF team and other EBF readers. Print Egg White Oatmeal
DescriptionAdd protein to your oatmeal by adding egg whites. The end result is a bowl of thick, fluffy and filling oatmeal. Ingredients
Instructions
Notes
Nutrition
Keywords: egg white oatmeal The post Egg White Oatmeal appeared first on Eating Bird Food. Recipes via Eating Bird Food http://bit.ly/1L45wsH April 24, 2019 at 07:29AM
0 Comments
Vegetable Pakora – two ways
http://bit.ly/2UT74np Pakora is an Indian street snack where vegetables are covered in a chickpea flour batter and then fried in oil and served with chutney or other dip sauces. We use white cabbage, carrot and zucchini here and share the recipe for one pan-fried version and one baked. Recipes via Green Kitchen Stories http://bit.ly/2VeTpX1 April 24, 2019 at 04:22AM
Lamb Curry
http://bit.ly/2L7ADNo This lamb curry is made by slow cooking lamb shanks and chunks of lamb shoulder in a flavorful curry base with chopped apple, potatoes, onions, garlic, lemon, and raisins until it is fall apart tender. It’s so good! The apples, onions, and raisins give the lamb curry some sweetness, while a couple slices of lemon add some acidity and bitter to balance the flavors of the dish. I first encountered this lamb curry at my friend Elizabeth Abbott’s parent’s house and begged her mother Maria for the recipe, which, thankfully, she gave me. I’ve played around with it over the years, upped the spices, added raisins, cooked it on the stovetop, cooked it in an Instant Pot. It all works. The Secret to Great Lamb CurryThe key is slow cooking the tougher cuts of lamb. Both the shanks and the shoulders of a young lamb get plenty of exercise, which makes the meat much more flavorful than, say, a delicate lamb chop. But this activity also makes the meat tough, and so you need to cook it for a longer amount of time to soften the connective tissue and make it tender. Those 1-hour lamb stews? Chewy. You need at least 2 to 2 1/2 hours to get the meat so tender that it is falling off the bone. Want to speed up the process? You can cut the time in half if you use a pressure cooker. 
Lamb Curry in the Instant PotYou can easily make this lamb curry in a stovetop pressure cooker or Instant Pot. Brown the lamb and onions as directed on the stovetop or using the sear function of the Instant Pot. Cook the curry for 50 minutes on high pressure. Then release the pressure, add the potatoes, and cook for another 10 minutes at high pressure. Lamb Curry in a Slow CookerTo make in a slow cooker, brown the lamb and onions as directed on the stovetop, then put all of the ingredients into a slow cooker. Slow cook for 6 hours on low, then add the potatoes and cook on high for 45 minutes more before serving. Bone-in or Boneless Lamb?I typically use bone-in lamb shanks, shoulder, and stew meat for lamb curry because of the additional flavor and marrow goodness you can get from the bones. By the end of cooking the meat just falls off the bones making it really easy to pick out the bones before serving. That said, use boneless if that is what you like and you don’t want to deal with bones. Just make sure you are using meat from the more flavorful cuts like a lamb shoulder or shank. Tip for Cooking RiceThis curry is great served over rice. For extra-flavorful rice, try this tip: If you are using ghee or butter to brown the lamb, add a couple tablespoons to the rice with the water when you prepare it. For example, put a cup of basmati rice, 2 Tbsp of butter or ghee, 1 1/2 cups of water in a saucepan. Bring to a boil, lower the heat to a simmer, cover and cook for 15 minutes. Remove from heat, let sit for 10 minutes and fluff with a fork. How to Store and Freeze LeftoversThis curry will keep in the fridge for at least five days, and like many stews, the flavors continue to improve with time. This recipe also freezes quite well, though the potatoes might be a little on the soft side once thawed. Freeze for up to three months, thaw in the fridge overnight, and reheat over low heat on the stovetop to serve. Looking For More Indian Favorites?Updated April 23, 2019 : We spiffed up this post to make it sparkle with new photos and updates to the headnotes. No changes to the original recipe. Enjoy! This post may contain links to Amazon or other partners; your purchases via these links can benefit Simply Recipes. Read more about our affiliate linking policy. Recipes via Simply Recipes http://bit.ly/2F9fkDA April 23, 2019 at 04:07PM
Use it Up! A Mini Meal Plan to Turn Leftovers Into Meals
http://bit.ly/2PpbfS1  Use it Up! A Mini Meal Plan to Turn Leftovers Into MealsNeed a little help using up leftover ingredients? This meal plan is all about making the most of the eggs, broccoli, and bread you have on hand! Meal planning is about looking ahead with an eye toward flexibility. If I have three or four solid dinner ideas (or breakfast, for that matter), I know I’ll have enough to make it through the week, even when plans change. Sometimes we aren’t that hungry, or one person works late, or one of my children decides to eat dinner with a friend. Three or four dinner ideas per week will usually do the trick. When I’m able to repurpose those meals and ingredients into something new, it means more family time and less time doing dishes. It’s a win all the way around. This week’s Use It Up is all about flexibility and adaptability This post may contain links to Amazon or other partners; your purchases via these links can benefit Simply Recipes. Read more about our affiliate linking policy. Recipes via Simply Recipes http://bit.ly/2F9fkDA April 23, 2019 at 09:02AM
Ramp and Parsley Pesto
http://bit.ly/2Vmj0xp If you find ramps at your local farmer's market, make this ramp pesto! Ramps have a bright, garlicky flavor that is perfect for pesto. Toss it with pasta, spread on sandwiches, or swirl it into a spring soup. Photography Credit: Elise Bauer Please welcome Hank as he shares one of his favorite things to make with wild foraged ramps, ramp and parsley pesto. Outstanding with pasta, though I ate half of this straight with a spoon. So good. ~Elise Ramps arrive in the East Coast well before good basil can be found, so I’ve adapted a classic cool-weather pesto from Liguria, in Northern Italy, that uses walnuts and parsley instead of basil and pine nuts. Only, in this case, I am substituting the garlic in that pesto for fresh ramps, which are a kind of wild onion that has a pronounced garlic flavor. 
How to Keep Your Pesto Green!I blanch the greens first to keep them vivid; if you don’t do this, your pesto will oxidize and turn brown in a few hours unless you cover it in olive oil. Substitutes for RampsIf you can’t find ramps, use green garlic. Both are available at farmer’s markets in spring, although ramps are tough to locate west of Minnesota. 
What to Do with Ramp PestoIn the photo above, the ramp pesto served with white ends of ramps, sautéed in olive oil and sprinkled with lemon zest. Use can also your ramp pesto just as you would any other pesto: toss it with pasta or in a risotto, spread it on burgers and sandwiches, swirl it into a bowl of soup, or serve it with eggs. How to Store Ramp PestoKeep the pesto covered in the fridge with a thin layer of olive oil over it, and use within a few days. For longer storage, freeze for up to three months. More Ways to Enjoy Pesto Year RoundRamp and Parsley Pesto RecipePrintServe this pesto like you would any other: With pasta or in risotto, on crusty bread or as a dollop in soup. Ingredients
Method1 Toast the walnuts: In a dry frying pan over medium heat, toast the walnuts. Toss from time to time, until you can smell them, about 5-7 minutes. 2 Blanch the parsley and ramp greens: Bring a large kettle of salty water to a rolling boil. Fill a large bowl with ice water. Blanch the parsley in the boiling water for 1 minute, then submerge it in the ice water (shocking the parsley with ice water will keep it bright green). Cut the leaves off the ramps, leaving the white parts for another use. Blanch the ramp leaves in the boiling water for 30 seconds. Douse in the ice water. 3 Wring out excess water: Drain the parsley and ramp leaves, then put them in a kitchen towel. Wrap the towel around the greens, and twist one end of the towel one way, and the other end of the towel the opposite way. Wring out the parsley and ramps tightly. You want as much water as you can to drain away. 4 Blend in food processor: Chop the parsley and ramps well and put into the bowl of a food processor. Chop the walnuts well and put them in, too. Add the parmiggiano cheese and a healthy pinch of salt. Pulse the mixture together a few times, then, with the motor running, drizzle in the olive oil slowly. Stop the food processor immediately after the oil is incorporated. Taste for salt, and add if needed. Serve within a couple days. For storage, keep covered in the fridge with a thin layer of olive oil over it. Freeze if you will have any left over after 3 days. Hello! All photos and content are copyright protected. Please do not use our photos without prior written permission. If you wish to republish this recipe, please rewrite the recipe in your own unique words and link back to Ramp and Parsley Pesto on Simply Recipes. Thank you! PrintThis post may contain links to Amazon or other partners; your purchases via these links can benefit Simply Recipes. Read more about our affiliate linking policy. Recipes via Simply Recipes http://bit.ly/2F9fkDA April 22, 2019 at 04:06PM
Creamy Pasta Pomodoro
http://bit.ly/2Gs2oLm
Is there anything better than creamy pasta? How about creamy tomato pasta! I’m so excited about this recipe because it is basically everything I want to eat for dinner any night of the week. Big, hearty, rigatoni noodles are coated in a tangy, luscious creamy tomato sauce. Plus, it’s a healthy bowl of pasta because there are quite a few yummy sautéed vegetables mixed in here as well. This post is in partnership with Mutti Tomatoes, Italy’s #1 tomato brand, which is perfect timing because we are really craving summer food over here… even though it’s only April and summer is still a while away. Thanks to Mutti, we can dream of Italian summer nights with their fresh-tasting 100% Italian tomatoes, which are picked at their peak ripeness and packed with only a pinch of sea salt. This recipe is a two parter. The first part is my go-to Marinara sauce. Aside from using it to make the creamy pasta sauce in this final recipe, it’s a simple, quick pantry-based recipe that you should keep in your back pocket. It’s delicious on pasta, pizza, or even spaghetti squash. Everyone needs a basic marinara recipe and this one is mine.
Creamy Pasta PomodoroNow to make marinara just a little bit more exciting… we’re blending it into a creamy pasta sauce! Oh, and I forgot to mention, we’re not using cream or cheese… but no one has to know that. To make the creamy tomato sauce, simply blend the marinara with cashews and tomato paste. For this recipe I use Mutti Double Concentrated Tomato Paste. This is not any ordinary tomato paste – this tomato paste is so wonderful because it comes in a tube instead of a tiny can! I often like to use just a little bit of tomato paste to dramatically punch up flavors in sauces and soups. It’s SO convenient to be able to use a tablespoon and store the rest (it lasts a really long time) without having to make use of an entire can.
Because this is a vegetable blog, I like to serve my pasta with equal parts vegetable. Zucchini, spinach, arugula, fresh thyme, and Mutti Cherry Tomatoes make this creamy pasta pomodoro light and fresh.
Take a look at that creamy sauce!
I hope you love this recipe, but that’s not all I have for you today – we’re giving away a fun tomato prize pack to one lucky winner! The giveaway: includes a wide variety of 100% Italian tomatoes and other fun gifts from Mutti. To enter: Leave a comment below telling me what you love to make with tomatoes! We’ll choose a winner at random on 4/30/19. US addresses only. Other posts you may enjoy...
The post Creamy Pasta Pomodoro appeared first on Love and Lemons. Recipes via Love and Lemons http://bit.ly/2h2Uz32 April 22, 2019 at 02:57PM
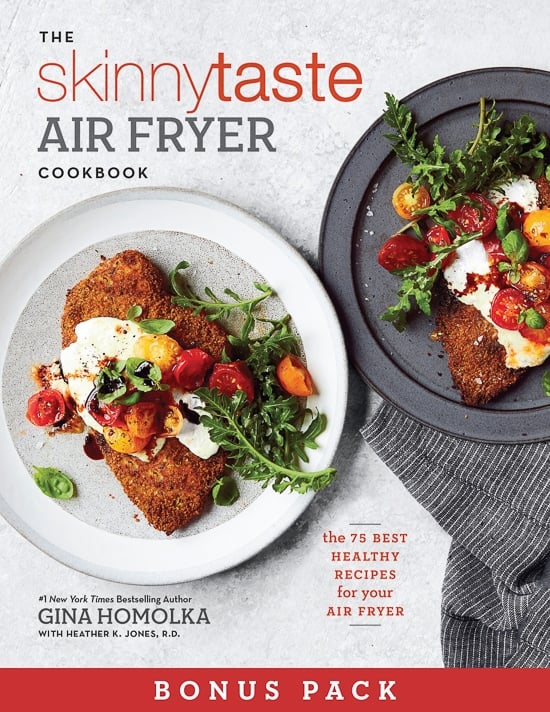
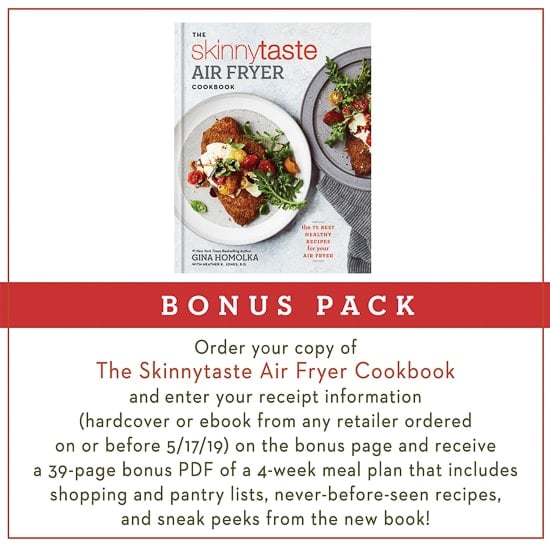
Skinnytaste Air Fryer Cookbook: Get a Free 39-Page Bonus Download with Your Pre-Order
http://bit.ly/2IBthQb I’m beyond excited that in just a few short weeks my new cookbook The Skinnytaste Air Fryer Cookbook will finally be hitting bookstores May 7, but it’s available to pre-order now!!
This week, as an added bonus (and a thank you to everyone who has already pre-ordered the book!), if you pre-order the Skinnytaste Air Fryer Cookbook from your retailer of choice, you will get access to a FREE 39-page bonus pack downloaded today with a 4-week dinner plan using recipes from all 4 of my cookbooks and my blog, a few sneak peaks from the new cookbook (Air Fryer Tortilla Shrimp Tacos with Cilantro-Lime Slaw, Air Fryer Herbed Cornish Hen for Two and Air Fryer Cheesy Green Chile–Chicken Chimichangas), an updated pantry list, a weekly grocery list, and 2 new exclusive air fryer recipes that you won’t see anywhere else! No worries if you already pre-ordered, simply use your proof of purchase!
Recipes via Skinnytaste http://bit.ly/2ix3Luq April 22, 2019 at 12:33PM
Chorizo and Egg Breakfast Tacos
http://bit.ly/2VmbH8Q The first time I ate a breakfast taco, it was one of those “Why didn’t I think of this before?” moments. It’s everything you want to eat for breakfast, all packaged nice and tidy in a tortilla that you can eat with your hands. I make mine with Mexican chorizo, scrambled eggs, avocado, and cheese. Mexican vs. Spanish ChorizoChorizo is my go-to choice for breakfast tacos, because it’s packed full of spices and flavors that go well with a taco. Chorizo sausage is common in a lot of different cultures, and there are a number of sausages that go by the name of chorizo. But the most common ones you will likely find at a grocery store are Mexican and Spanish. They aren’t interchangeable.
The Best Chorizo for TacosIn my breakfast tacos, I opt for Mexican-style chorizo, because I like its spicy flavor and soft texture in the tacos. If you find raw Spanish chorizo, feel free to use it in place of the Mexican for the breakfast tacos—but realize it will be more garlicky, smokier in flavor, and less tender, because the pork is chopped, not ground. If you end up with cured Spanish chorizo, just chop it into small cubes and toss it into the scrambled eggs at the end to warm it up. You can also easily swap the chorizo out for bacon or breakfast pork sausage. The tacos will be just as great, albeit with a different texture and flavor. Keep in mind, however, that regardless of which chorizo you choose, the spice and salt factor could vary quite a bit—that’s why I’ve called for a modest amount of salt and pepper for the scrambled eggs. Season, cook, and taste, and then season again if needed. 
Make-Ahead Tacos!These breakfast taco are easy to make for breakfast if you prep a few ingredients the night before:
If you prep all the ingredients ahead of time, all you need to do in the morning is scramble the eggs and warm up the tortillas, then assemble the tacos for an easy, hot breakfast. You can also easily double this recipe to feed guests or a brunch crowd! Customize Your ToppingsOf course, for a fancier weekend brunch, you can up the ante and make a buffet of toppings. I’ve added my favorites below in the recipe, but the list is endless.
Create a spread and have your guests pick and choose their own toppings for their own customized breakfast tacos! What Kind of Tortilla Should You Use?Like everything else, the choice of tortilla is up to you. I like a tortilla that is made with a mix of corn and flour, like this one. The flour gives the tortilla “bendability” while the corn adds flavor. But if you are a fan of corn (or want to keep the breakfast taco gluten-free) just go with a corn tortilla. You might want to double the tortillas though (stack two on top of each other before filling) in case the top tortilla cracks when you pick it up. Flour tortillas aren’t as liable to crack. The Best Way to Warm TortillasMy preferred method for heating up tortillas is in a dry, hot skillet. They only take 15 to 30 seconds per side, and the surface gets a little crisp and charred. There’s plenty of time to do this as you scramble the eggs. If you prefer a softer tortilla or want to heat them all up at once, just stack them all on a plate, cover with a damp paper towel or cloth, and microwave for 30 to 60 seconds. Leave them stacked and covered while you assemble the tacos. MORE FAVORITE MEXICAN BREAKFAST IDEAS!This post may contain links to Amazon or other partners; your purchases via these links can benefit Simply Recipes. Read more about our affiliate linking policy. Recipes via Simply Recipes http://bit.ly/2F9fkDA April 22, 2019 at 09:05AM
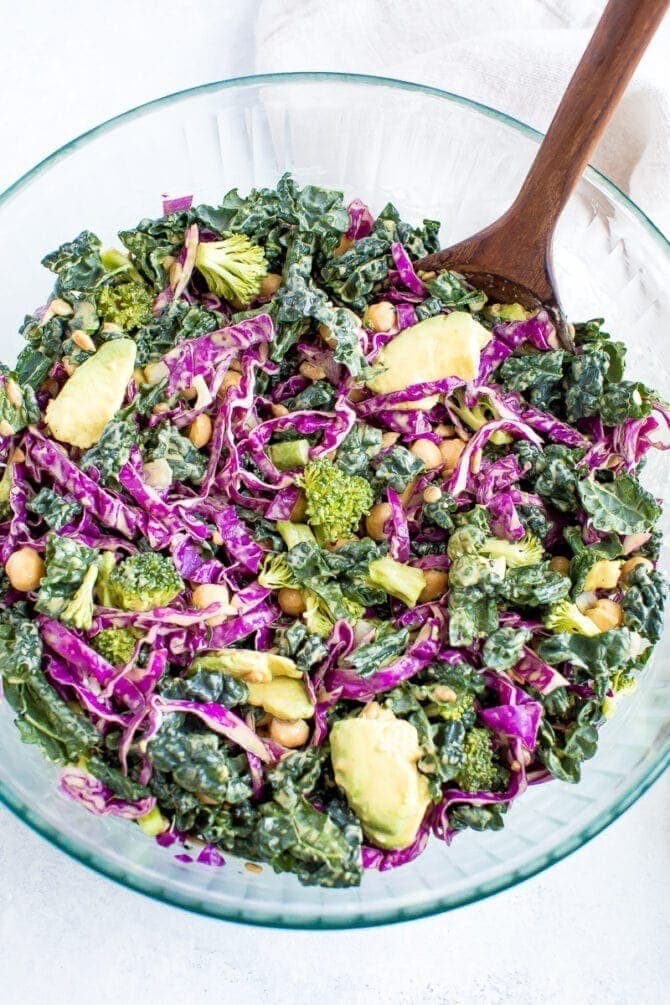
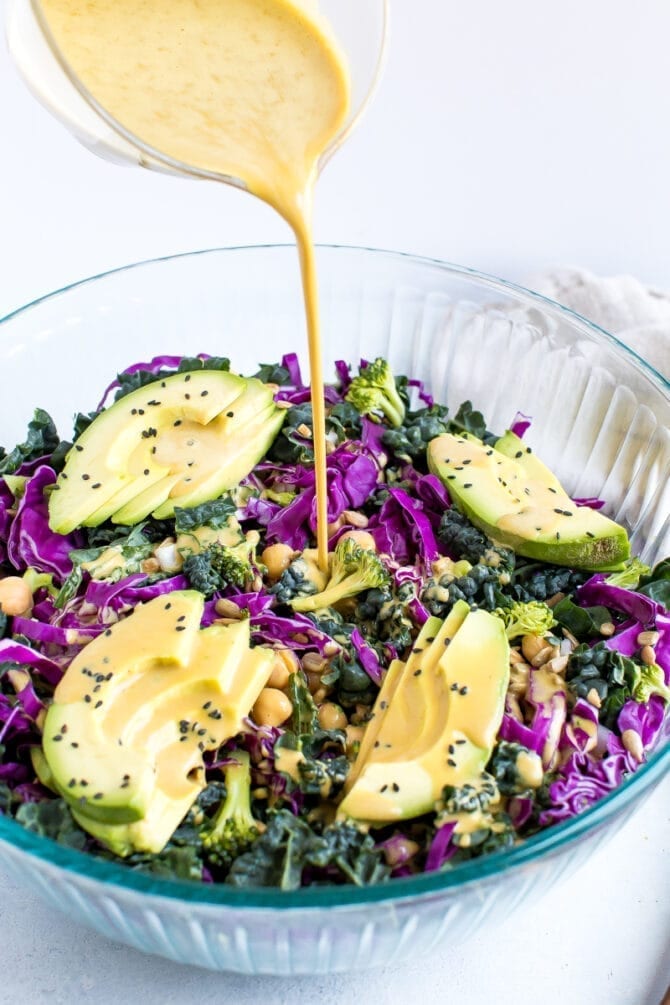
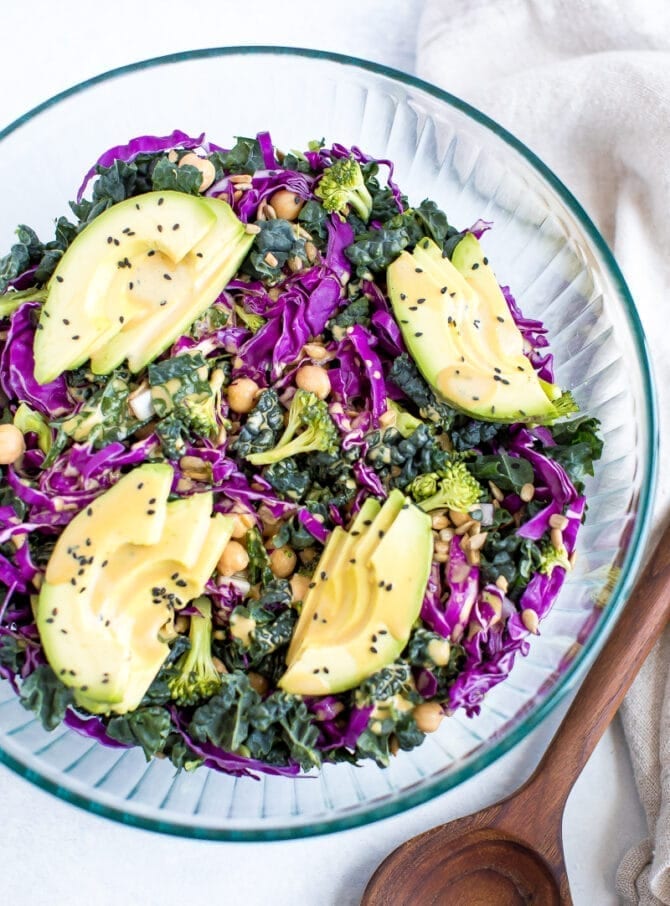
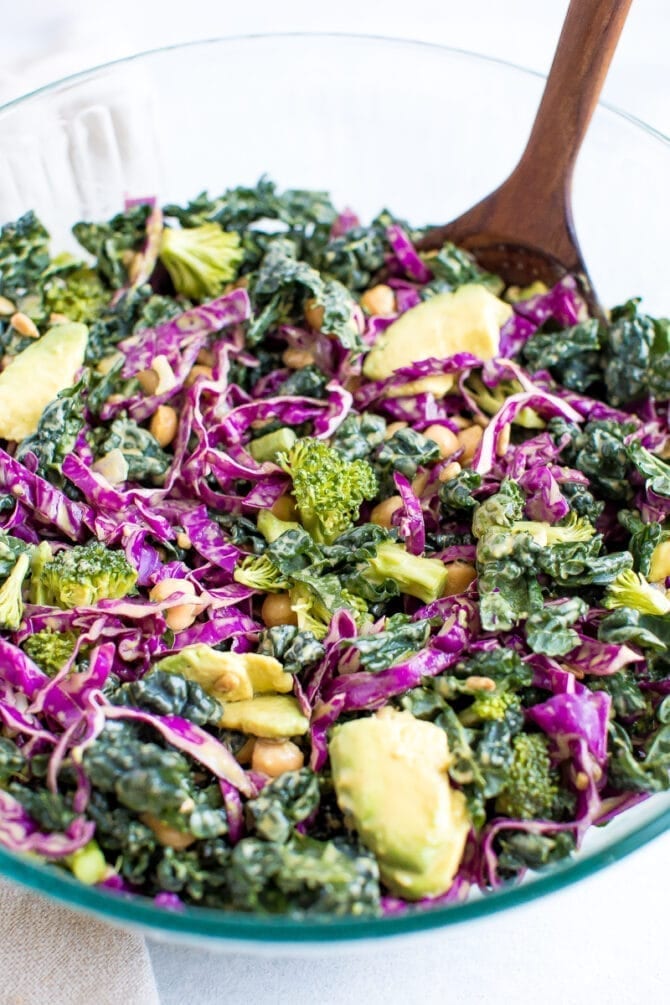
Kale and Cabbage Salad
http://bit.ly/2VXTWdj A crunchy kale and cabbage salad with broccoli florets, chickpeas and sunflower seeds all coated with a light nutritional yeast dressing. Vegan, gluten-free and paleo! In case you haven’t noticed, I have a tiny crush on kale. I like to have it on hand every week to make something green. Some of my favorites include this garlicky kale salad, this detox salad, a kale and feta quiche or even a green juice or green smoothie… I’ll stop there because I think you get my drift. Anyhow, this week I decided to stray from my normal kale recipes and I came up with something new.
It’s not revolutionary as it’s just a kale and cabbage salad, but the ingredients are quite cleansing and the dressing is super simple to make, yet still robust with flavor. I think you’re going to love it!
Benefits of Cruciferous VegetablesOne awesome thing about this salad is that it is loaded with a cruciferous vegetables, which are known for their health benefits. These vegetables are nutrient dense and low in calories. Each vegetable has a different nutrition profile but in general cruciferous vegetables are usually packed with vitamin A, vitamin C, vitamin K and dietary fiber. In addition, they contain glucosinolates, sulfur-containing compounds that provide cancer-fighting properties. Side Affects of Cruciferous VegetablesI should also mention that although cruciferous veggies are packed with nutritional benefits there are some side affects. The first is that all the fiber in these veggies can cause gas and bloating. And when eaten raw these veggies release goitrogens through the digestion process. Goitrogens can increase the need for iodine and can cause damage to the thyroid gland. This is usually only an issue if you’re eating large amounts of cruciferous vegetables or if you have an iodine deficiency or thyroid disfunction. If this is the case you should only eat cooked cruciferous vegetables and limit your consumption. And as always talk to your doctor about this if you have any concerns.
Save Time With Cruciferous CrunchThere are a ton of veggies in the cruciferous family including cabbage, kale, brussels sprouts, broccoli and cauliflower. For this salad we’re using kale, cabbage and broccoli. This blend is similar the Cruciferous Crunch salad mix, one of my go-to healthy staples from Trader Joe’s. Cruciferous Crunch has the same combo of veggies but also includes brussels sprouts. Pro tip: If you’re running low on time and want to skip all the chopping, you could totally use 2 bags of the Cruciferous Crunch to make this salad!
What to do With Leftover Dressing?The recipe for the nutritional yeast dressing makes more than enough to dress the salad so you’ll have some leftover to use on other salads or as a topping for another dish. I can attest to the fact that this dressing tastes delicious on tofu, steamed veggies and quinoa. It would be delicious on this sweet potato brown rice bowl. If you make this kale and cabbage salad be sure to leave a comment and star rating below letting me know how it turns out. Your feedback is super helpful for the EBF team and other readers! Print Kale and Cabbage Salad
DescriptionA lovely kale cabbage salad with broccoli florets, chickpeas and sunflower seeds coated with a creamy nutritional yeast dressing. Ingredients
Instructions
Nutrition
Keywords: kale and cabbage salad The post Kale and Cabbage Salad appeared first on Eating Bird Food. Recipes via Eating Bird Food http://bit.ly/1L45wsH April 22, 2019 at 07:20AM
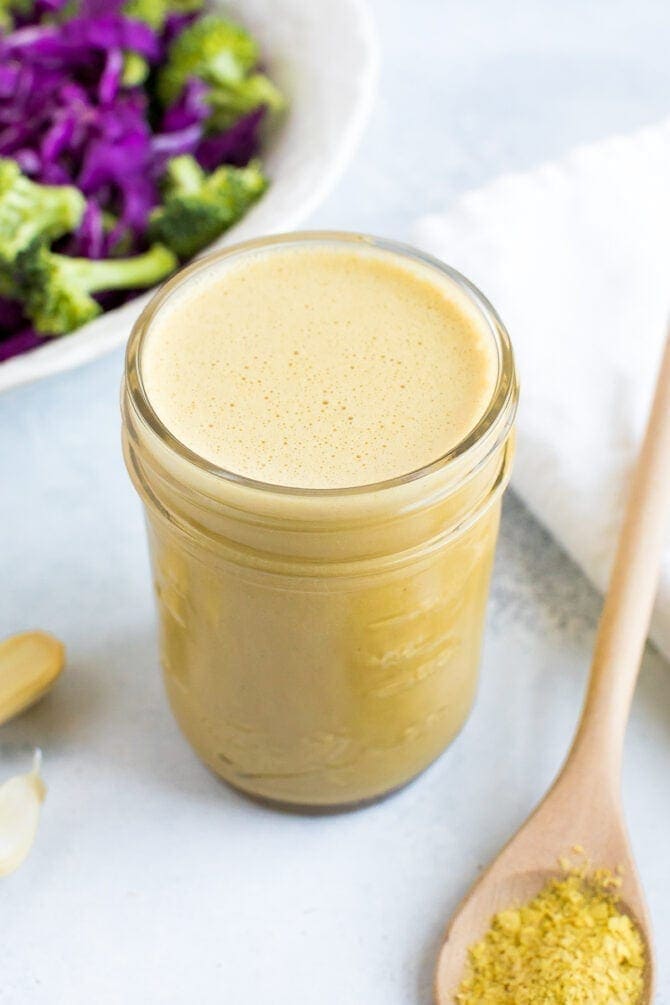
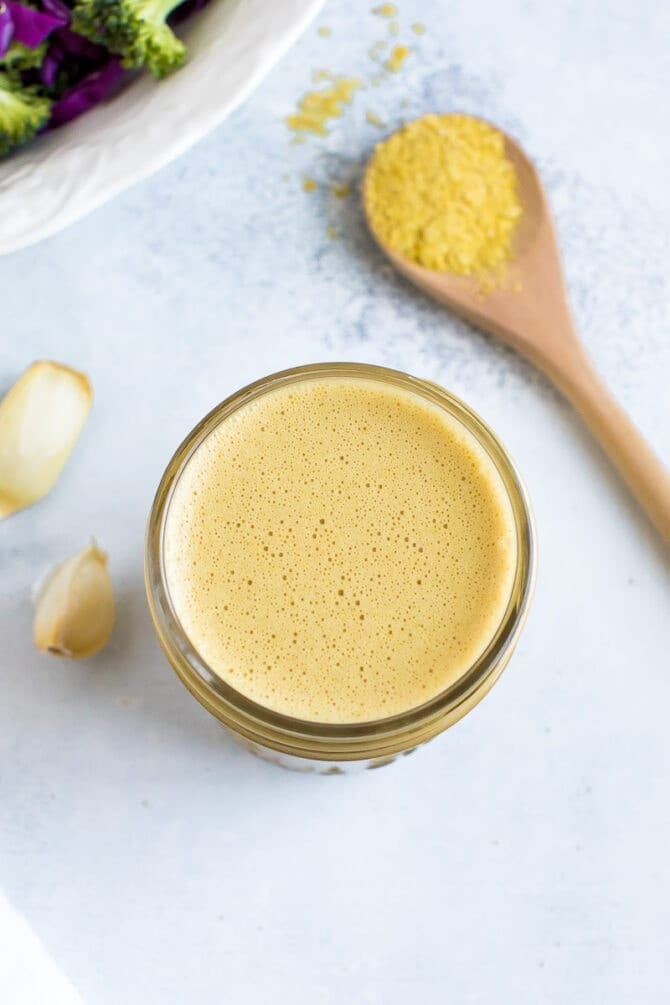
Creamy Nutritional Yeast Dressing
http://bit.ly/2DCDAjd Nutritional yeast, alongside apple cider vinegar and garlic, gives this dressing an umami-rich flavor you can’t resist. You’ll find yourself wanting to drizzle it on everything! I’m a huge fan of homemade dressings and have posted a ton over the years! One of my favorites has always been this oil-free zesty tahini dressing with nutritional yeast. And this dressing is a spin-off of that one, only without the tahini and even more nutritional yeast. I originally created it as a dressing for my kale and cabbage salad but honestly, it’s delicious on just about anything. I like using it as a drizzle for steamed veggies and as a dip for baked chicken tenders. |
|


 RSS Feed
