
|
Easy Healthier Butterfingers
https://ift.tt/37JnnZ1
To say I’m excited to share this recipe would be the understatement of the year. Isaac loves Butterfingers so I don’t know why it’s taken me so long to make an upgraded version. I originally made full-sized Butterfinger bars, but they were super rich so I decided to make mini Butterfingers instead. I don’t know about you, but I love a good bite-size treat.
These upgraded treats are made with only six ingredients. The recipe does take a little patience as certain parts need to set in the freezer, but I promise the wait is 100% worth it! Plus, it doesn’t get much better than homemade Butterfingers.
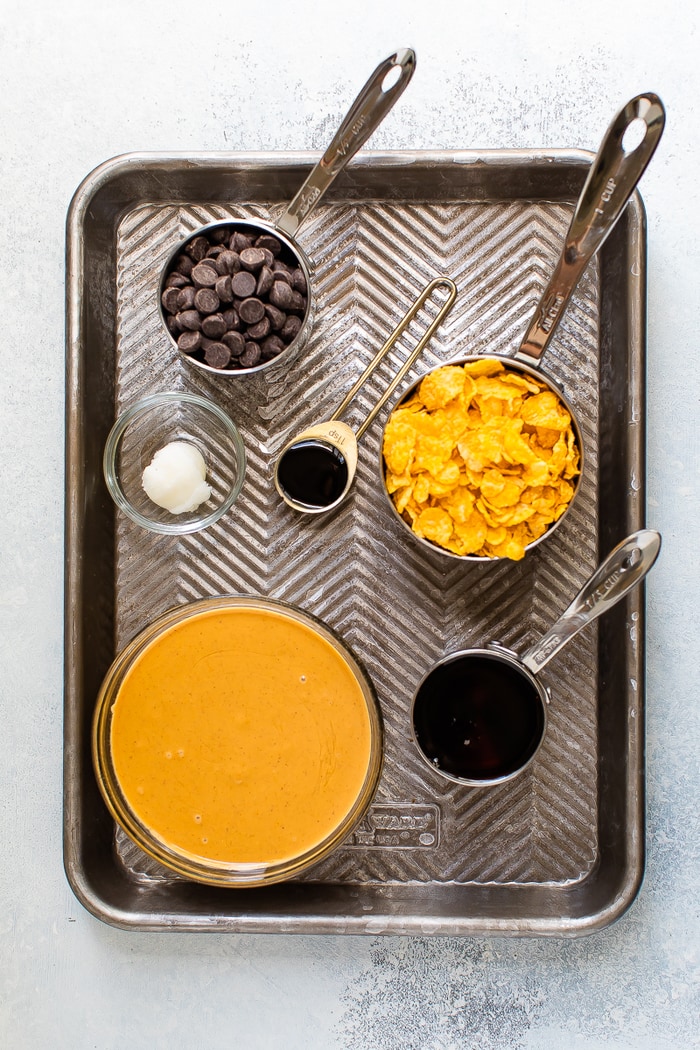
Healthier Butterfingers Ingredients
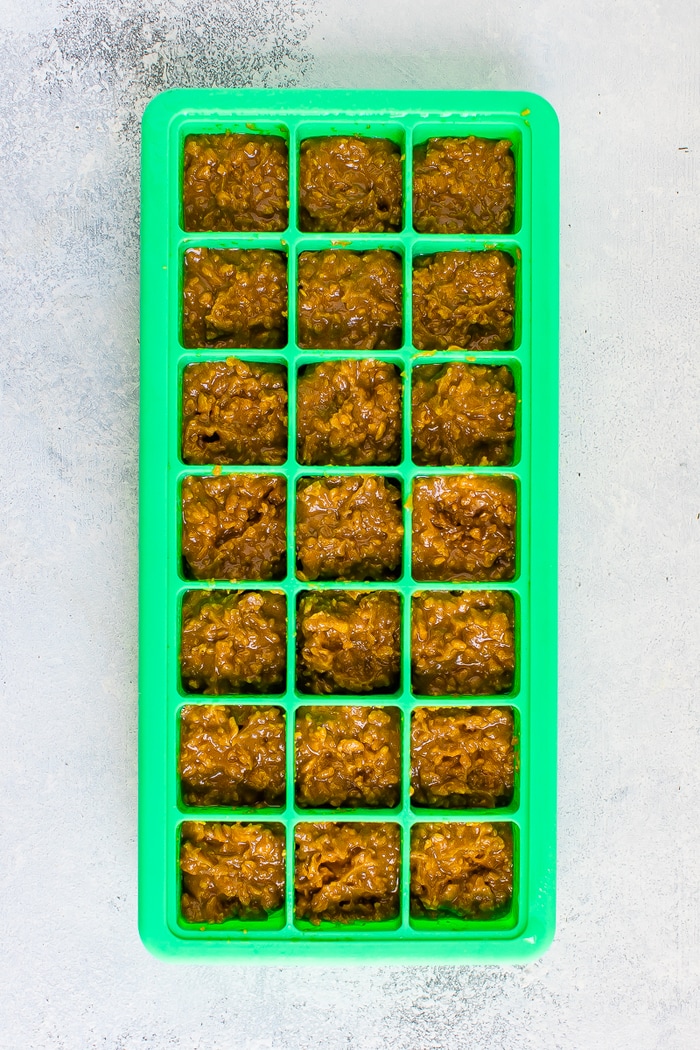
How to Make Homemade ButterfingersCrush cornflakes – Place cornflakes in a small lunch-size plastic bag and crush into small pieces. I used the bottom of a glass jar to pound/crush the flakes. Heat peanut butter – Heat the peanut butter, maple syrup and molasses (if using) over low-medium heat. Stir until the mixture is combined – don’t overheat or you’ll risk scorching the peanut butter! After the ingredients are combined, remove from the heat and stir in the crushed corn flakes. Make bites – Spoon the coated cornflakes into a silicone ice cube tray, filling each cavity about halfway full. Place the ice cube tray in the freezer for the bites to harden. This took about 2 hours for me. If you don’t have a silicone ice cube tray you can simply spread the mixture evenly over a parchment lined baking sheet. Let set in the freezer and then chop into small squares.
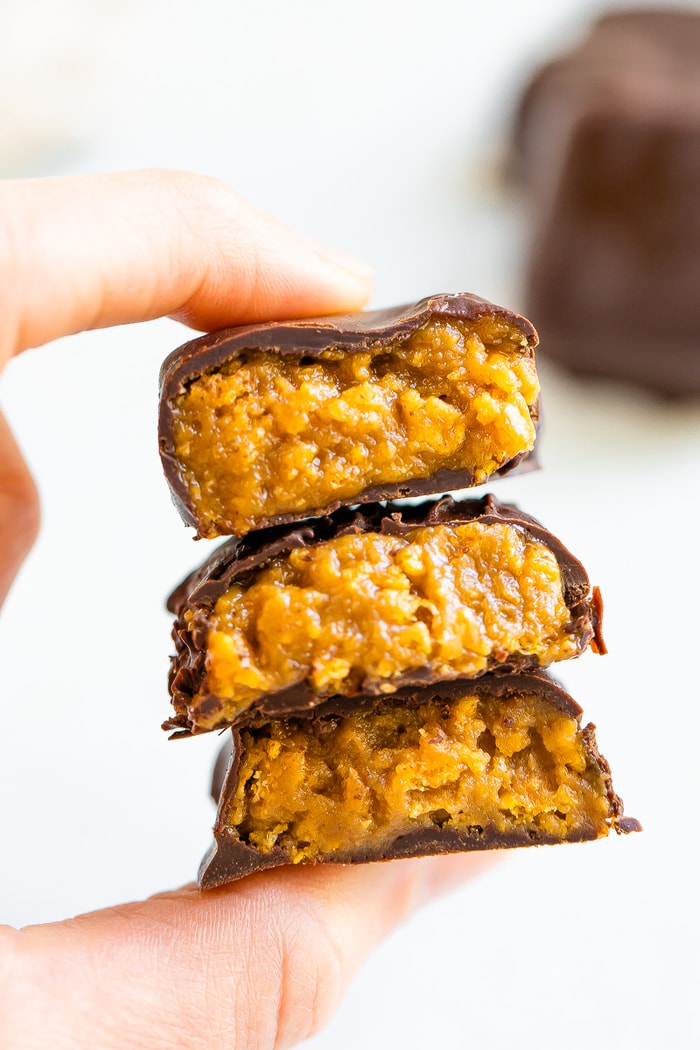
Melt chocolate – Once the bites have hardened, place the chocolate and coconut oil in a microwave safe bowl and melt in the microwave in 15 second increments, stirring between each. It shouldn’t take longer than 1-2 minutes total for the chocolate to melt. Coat candy – Pop the frozen bites out of the ice cube tray and place each into the melted chocolate. Use a spoon to coat until completely covered. Let excess chocolate drip off and place the chocolate covered candy on a platter lined with parchment paper. Repeat until all pieces are coated. If some of your bites start to soften during the process, pop them back in the freezer. Freeze – Place the tray of bites back into the freezer to let the chocolate harden. Once chocolate has set, it’s time to enjoy!
How to Store Healthy Butterfinger BitesI recommend storing these bites in an airtight container in the freezer. They should last 1-2 months… but I bet they’ll be gone in a week! Ha! I recommend enjoying them straight from the freezer so they’re nice and crisp.
More Healthy Treats to Try:
If you make these healthy butterfinger bites be sure to leave a comment and star rating below letting me know how they turned out for you. Your feedback is so helpful for the EBF team and our readers! Print Healthier Butterfingers
DescriptionThese healthier Butterfingers are made with only six simple ingredients. They’re crunchy, peanut-buttery and taste like the real deal. Ingredients
Instructions
Notes
Nutrition
Keywords: butterfingers The post Easy Healthier Butterfingers appeared first on Eating Bird Food. Recipes via Eating Bird Food https://ift.tt/1L45wsH October 26, 2020 at 07:00AM #recipies
0 Comments
5 Comfort Food Recipes Reinvented
https://ift.tt/2ToSi4J This month welcome Sara Bir. Sara Bir is the author of two cookbooks, Tasting Ohio and the IACP award-winning The Fruit Forager’s Companion. She also moderates and replies to your comments here on Simply Recipes. Follow her @sausagetarian. When the going gets tough, the tough want comfort. It’s okay. What makes a comfort food, anyway? For some, it’s happy childhood associations, while for others it’s simply food that’s not too taxing to make. Things you don’t have to think hard about. And yes, for some it’s food with loads of fat, salt, and carbs. I wanted to replenish my comfort meter without diving into garbage food territory. So, to shake things up, we put together a week of dinners that look at comfort food classics through a new lens. A few are the likes of what you’d see at an upscale 21st-century diner, while others harken back to pages of no-frills cookbooks from decades ago. Either way, they’re all about fun. One last thing: Looking for dinner ideas? You’re in the right spot! We just launched our new paid meal plan service. We have delicious meal plans to suit every taste and lifestyle—Healthy Eating, Family Favorites, and Vegetarian just to name a few. These one-week plans are $1.95 and, with them, you get a dessert and weekend prep recipe and a shopping list. They’re beautifully designed and perfect to print and save or simply load and cook right from your computer! This post may contain links to Amazon or other partners; your purchases via these links can benefit Simply Recipes. Read more about our affiliate linking policy. Recipes via Simply Recipes https://ift.tt/2F9fkDA October 25, 2020 at 09:09AM #recipies
Breakfast Casserole with Butternut Squash and Kale
https://ift.tt/35AeWgb 1 Preheat the oven and prepare your baking sheets and casserole dish: Preheat your oven to 400°F and line two sheet pans with foil, and lightly grease your 9x13 baking dish. 2 Prep the bread: Tear or cut the bread into bite-size pieces and arrange in a mostly single layer on the sheet pans. Lightly coat the pieces of bread with olive oil, then season evenly with garlic powder, dried ground sage, and black pepper. The oil will help it stick. 3 Toast the bread: Place the baking sheets in the oven, and toast until the bread is golden brown, with some dry edges, about 5 minutes. There is no need to rotate the pans or toss the bread cubes.
4 Whisk your custard: While the bread is toasting, in a large bowl whisk together the eggs, milk, pumpkin puree, turmeric (if using), and salt. 5 Remove the bread and let it cool: Once the bread is toasted, remove it from the oven, and let it cool for 5 minutes. Once the toasted bread has cooled, add 1/2 of it to the egg mixture, stirring to coat. The bread will collapse slightly, then you can then add the rest, stirring to coat. Set that aside to soak. It won’t be out too long, so you don’t need to worry about covering it. 6 Bake the squash: Add the diced butternut squash to the same foil-lined pan you toasted the bread on and place on the center rack of your oven. Let it roast for 22 minutes, or until golden and tender. Remove the squash from the oven to cool slightly and assemble the strata.
7 Assemble the dish: Into the 9x13 baking dish, add half the soaked bread and press it down into the dish. Add the roasted butternut squash in a nice even layer, then the kale. Next, add the shredded cheese. Top that with the remaining soaked bread and any liquid in the bowl, pressing that down gently. Sprinkle grated Parmesan cheese evenly over the top. Cover the whole dish with a sheet of foil. You can refrigerate or freeze the strata at this point and bake it the following day or bake it right away.
8 Bake the casserole: Place the casserole on a baking sheet, then place in the oven and bake for 25 minutes. Remove the foil and continue to bake for 20 more minutes, until the top is crispy and golden. Serve: When the strata is finished baking, let it cool on the counter for up to 30 minutes, then cut into squares and serve warm or at room temperature. Leftovers! After it’s cooled, wrap and refrigerate the casserole for up to three days. Recipes via Simply Recipes https://ift.tt/2F9fkDA October 25, 2020 at 09:06AM #recipies
Vegan Mushroom Soup
https://ift.tt/2FXeiAB Updated! This Vegan Mushroom Soup, aka my No-Cream of Mushroom Soup with hints of garlic, rosemary and spicy black pepper has been one of my favorite blender soups for the past eight years. I posted this recipe back in November 2012, and have updated it a bit based on all the many times I have... The post Vegan Mushroom Soup appeared first on HealthyHappyLife.com. This is a summary, images and full post available on HHL website! Recipes via HealthyHappyLife.com https://ift.tt/2X1PMCd October 24, 2020 at 11:11PM #recipies
Root Vegetable Pot Pie
https://ift.tt/34pLRog This rustic take on a pot pie combines the classic fall flavors of carrots, sweet potatoes, rosemary, and sage in a creamy sauce that is rich and bold flavored, even without chicken stock. Enjoy this pot pie as a vegetarian holiday entree or a hearty side dish to a meat-centered meal. How to Make Vegetable Pot PieThis pot pie is prepped on the stove, baked in the oven, and served directly in the skillet—which saves time doing dishes! For those looking to save time upfront, a pre-made pie crust works as well as a freshly prepared one. If it cools before everyone comes to the table, you can pop it directly back into the oven to keep it warm until everyone is ready. While it isn’t the fastest recipe, its presentation and taste stand up to a casual family dinner or an elegant meal. THE PERFECT POT PIE FILLINGIf you find working with a traditional roux stressful, you’ll be happy to know that this recipe breaks down the process into a more foolproof one: Just add butter to the empty pan, sauté the vegetables, sprinkle the flour over the vegetables, then whisk in the liquid. Simmer until thickened. When the pot pie goes in the oven, it will bake just long enough to cook the crust on top, and the filling won’t thicken much further. PIE CRUST TIPS AND TRICKSThe less time you spend on it the better—fork tines pressed all around, fingertip patterns, and other normally-great decor touches should be avoided, as they will melt the crust further.
BEST HERBS FOR POT PIESWhen it comes to flavor, rosemary and sage were chosen for their fall, holiday feel in this pot pie. Use either fresh or dried herbs; using one fresh and one dried is our suggestion, so you don’t have to have two types of fresh herbs on hand at once. To substitute fresh or dried herbs or vice versa: Half tablespoon of fresh for one half teaspoon of dried. If rosemary and sage aren’t your favorite flavors, you can also use:
POT PIE VEGETABLE TIPS AND SWAPSThis pie is easy to adapt to your personal taste, but I do recommend sticking to mostly root vegetables here, because they all have similar cook times. If you swap in a green vegetables like broccoli or zucchini, they will overcook. A half to three quarter-inch dice for all root vegetables will ensure even cooking, and since this is a rustic dish, there is no need for perfect cubes. As far as root vegetables go, the underground world of tubers is at your disposal! Keep it simple with our selection of sweet potatoes, carrots, and potatoes, or make a colorful exchange with beets. You could also use parsnips, turnips, or rutabagas, if available. Whatever combo you choose, stick to only one or two sweet root veggies (beets, sweet potatoes or yams, parsnips) with at least one savory (potatoes, rutabaga, turnip), to equal a total of four cups. Even though white sweet potatoes are slightly firmer than yellow, both work equally well here. Peas are added for green color and a customary pot pie flavor; they can be omitted or swapped for lima beans, should you have friends or family who enjoy that embattled veggie. No Cast Iron Skillet? No ProblemThe fun of this dish will not be lost if you can’t cook and serve it all in one vessel! If you don’t have a cast iron skillet, cook the filling on the stove, then pour it into a deep dish pie plate, top with the crust, and bake that way. We used a 10-inch cast iron pan, so a 10-inch deep dish pie plate is ideal. If you don’t have a pie plate, cooking in a shallow 9×11-inch casserole pan will work. HOW TO MAKE AHEAD AND FREEZE POT PIEThis dish reheats well and can be made a day ahead, then popped back into the oven at 350°F for 25-30 minutes to reheat. Note that you do not want to keep it in the cast iron pan for more than two days, or you’ll risk the vegetables turning grey from the pan. It also freezes nicely. Freeze individual portions or the entire pie in Tupperware containers, not the cast iron pan itself. While the pie crust may soften slightly, reheating in the oven instead of the microwave will help it re-crisp. NEED MORE POT PIE IN YOUR LIFE? TRY THESE RECIPES!Recipes via Simply Recipes https://ift.tt/2F9fkDA October 24, 2020 at 09:03AM #recipies
Apple Cake
https://ift.tt/2IYXMB7
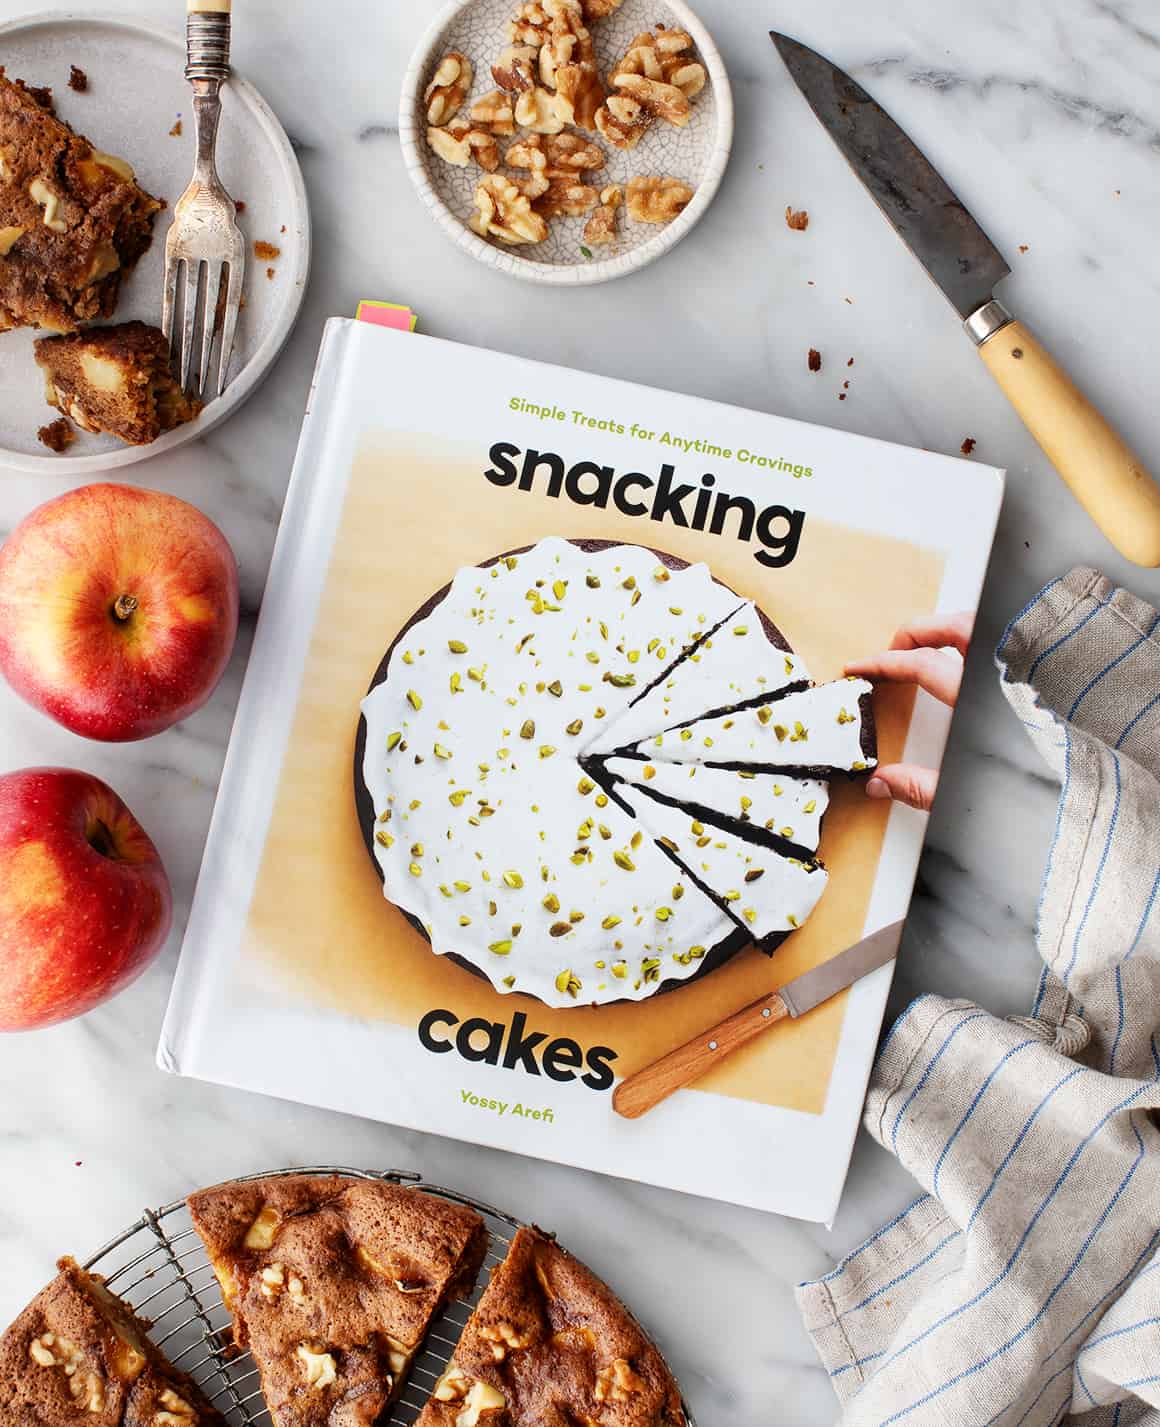
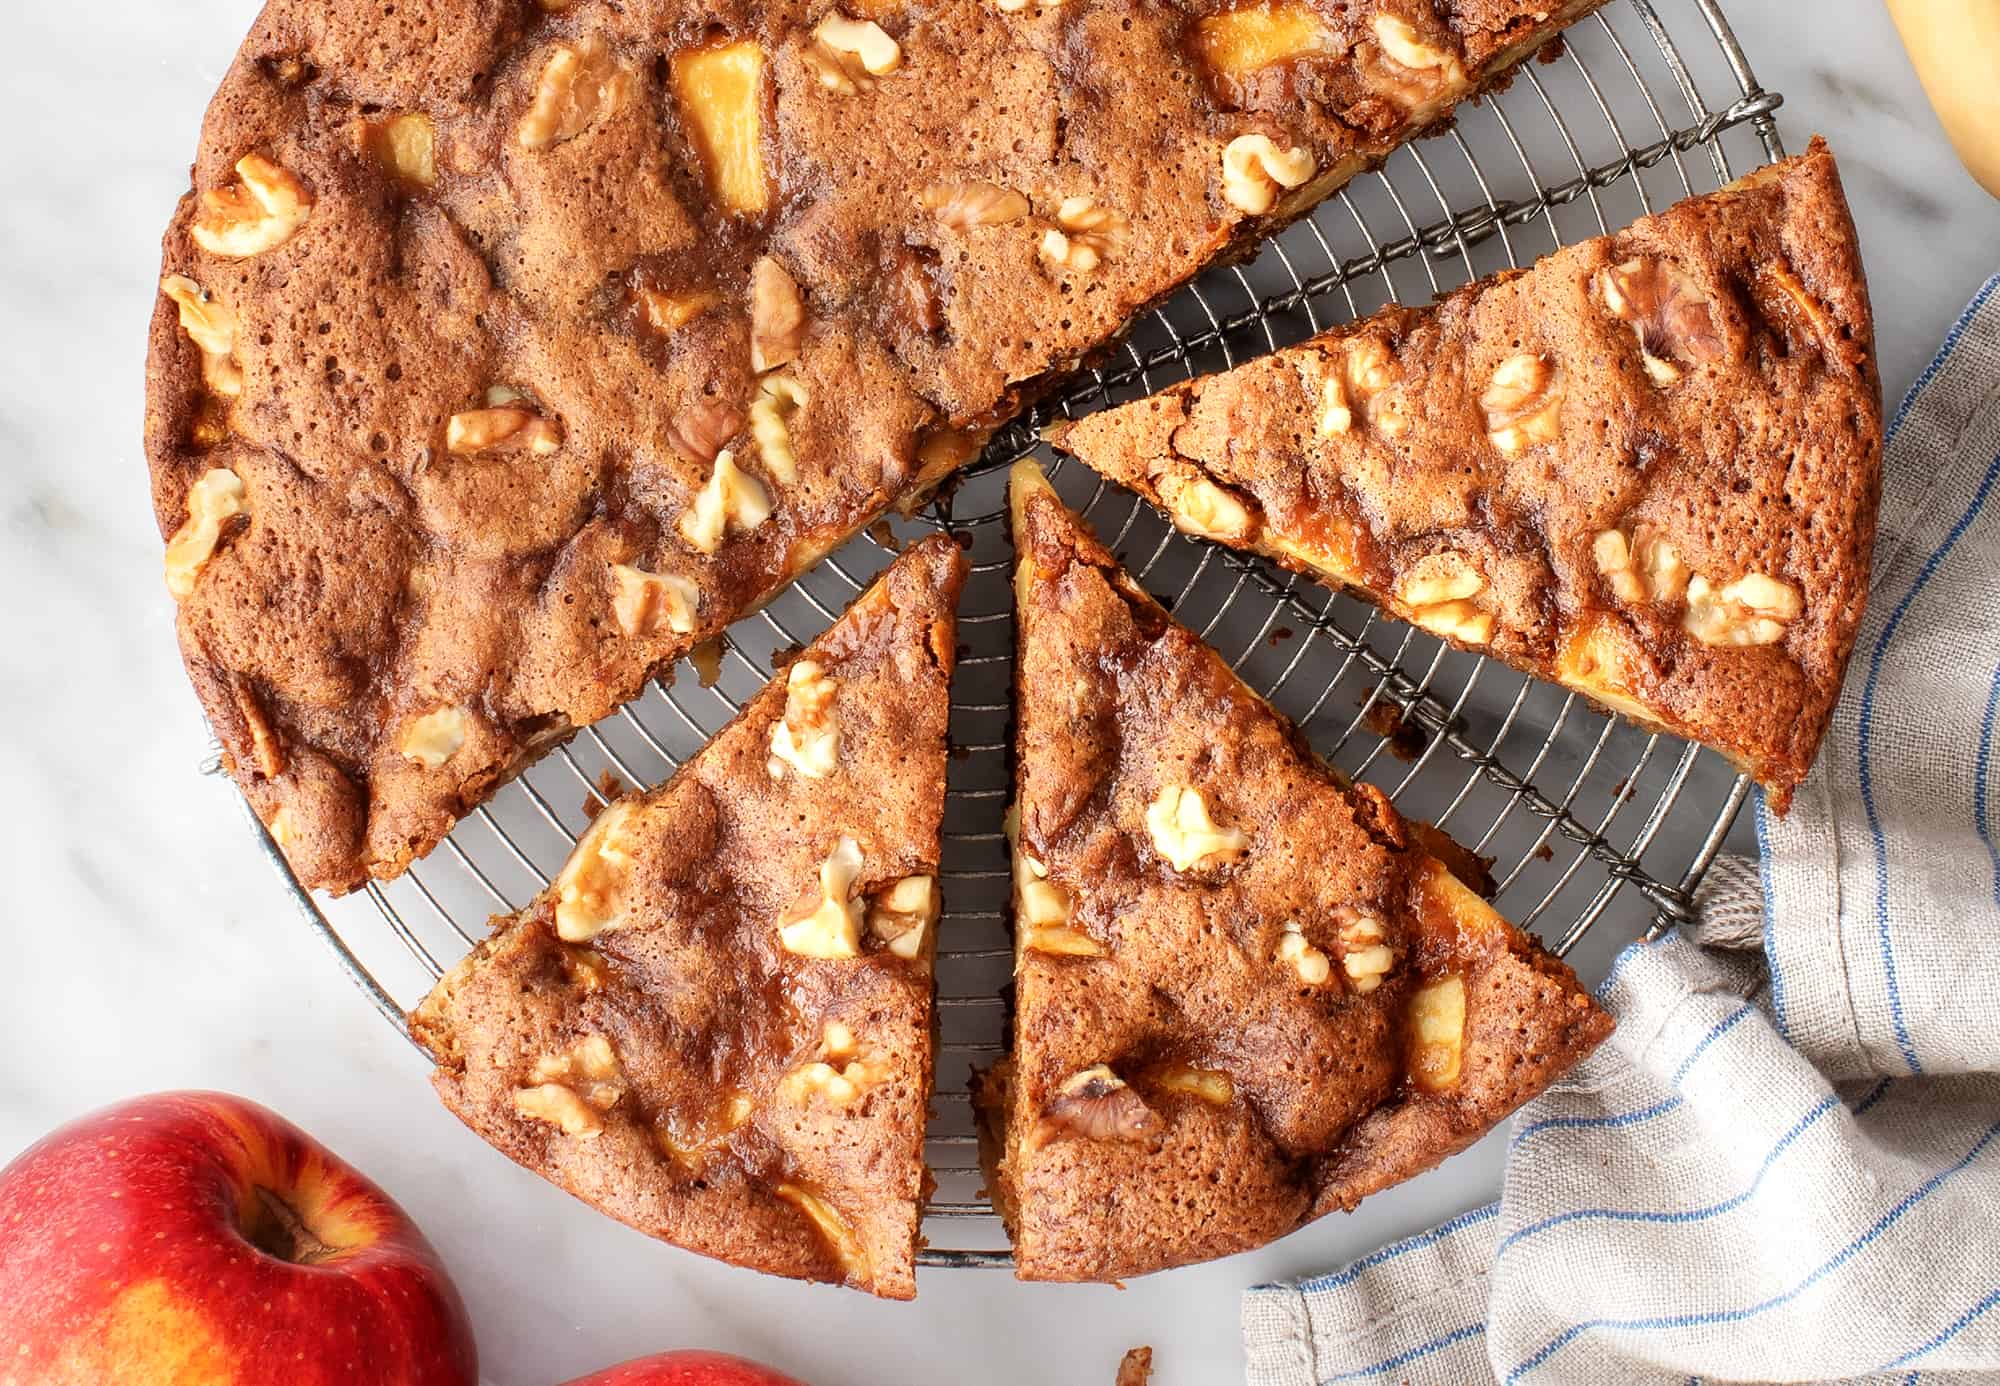
I first tried this apple cake recipe on a gray, rainy Monday. I had a mountain of work to plow through, but I managed to carve out enough time to chop the apples, whisk together the batter, and pop the cake in the oven. Like magic, it transformed my day! There’s something about a really simple, really good baking recipe that can brighten my mood in an instant, and this apple cake recipe did just that. It’s a breeze to make, and it yields a moist, tender cake that’s perfect for dessert, breakfast, or an afternoon treat. It’s jam-packed with apples, and brown sugar and cinnamon fill it with rich, spiced flavor. If you ever need a way to lift your spirits on a fall day, make this apple cake. The recipe comes from Yossy Arefi’s new book Snacking Cakes: Simple Treats for Anytime Cravings, which comes out on Tuesday, but you can pre-order it now! It’s a gorgeous collection of 50 snacking cake recipes that are easy to make and acceptable to eat at any time of day. When you get your hands on it, you won’t be able to choose what to make first. Each of Yossy’s cakes looks more fun and delicious than the next. In addition to this apple cake recipe, I have my eye on her Almond Butter Banana Cake, Citrusy Almond Cornmeal Cake, Simple Sesame Cake…I could list the whole book! More than anything, this book will make you want to bake. In the introduction, Yossy writes, “It’s a simple luxury to bake a snacking cake for yourself or your friends and family. I hope this book inspires you to do it often, and with abandon.” Let’s make apple cake!
Apple Cake Recipe IngredientsAccording to Yossy, a snacking cake should be “low stress,” and it shouldn’t “require much besides a reasonably stocked pantry, a bowl, and a whisk.” Living up to the snacking cake standard, this easy apple cake recipe calls for basic pantry ingredients:
Find the complete recipe with measurements below.
How to Make Apple CakeBecause Yossy’s cakes are intended to be simple, everyday treats, almost all of them are made in a single bowl. That includes this easy apple cake recipe! Here’s how it goes: First, peel and dice the apples. The pieces can vary in size a little based on the natural shape of the apples; aim for 1/4- to 1/2-inch chunks.
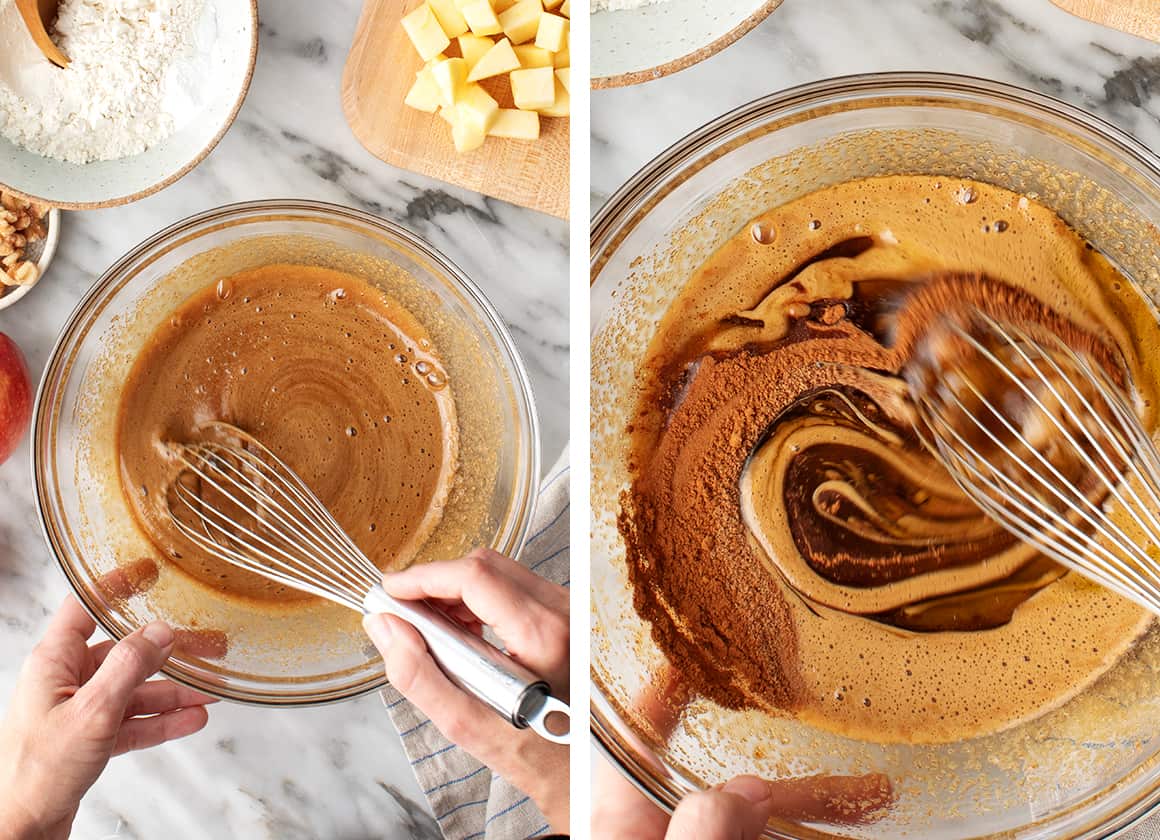
Second, whisk the brown sugar with the eggs until they’re pale and foamy, about 1 minute. Then, whisk in the oil, spices, vanilla, and salt.
Next, add the flour, baking powder, and baking soda, and whisk until well-combined and smooth.
Use the edge of the whisk to scrape the bottom and sides of the bowl to make sure your batter is evenly mixed.
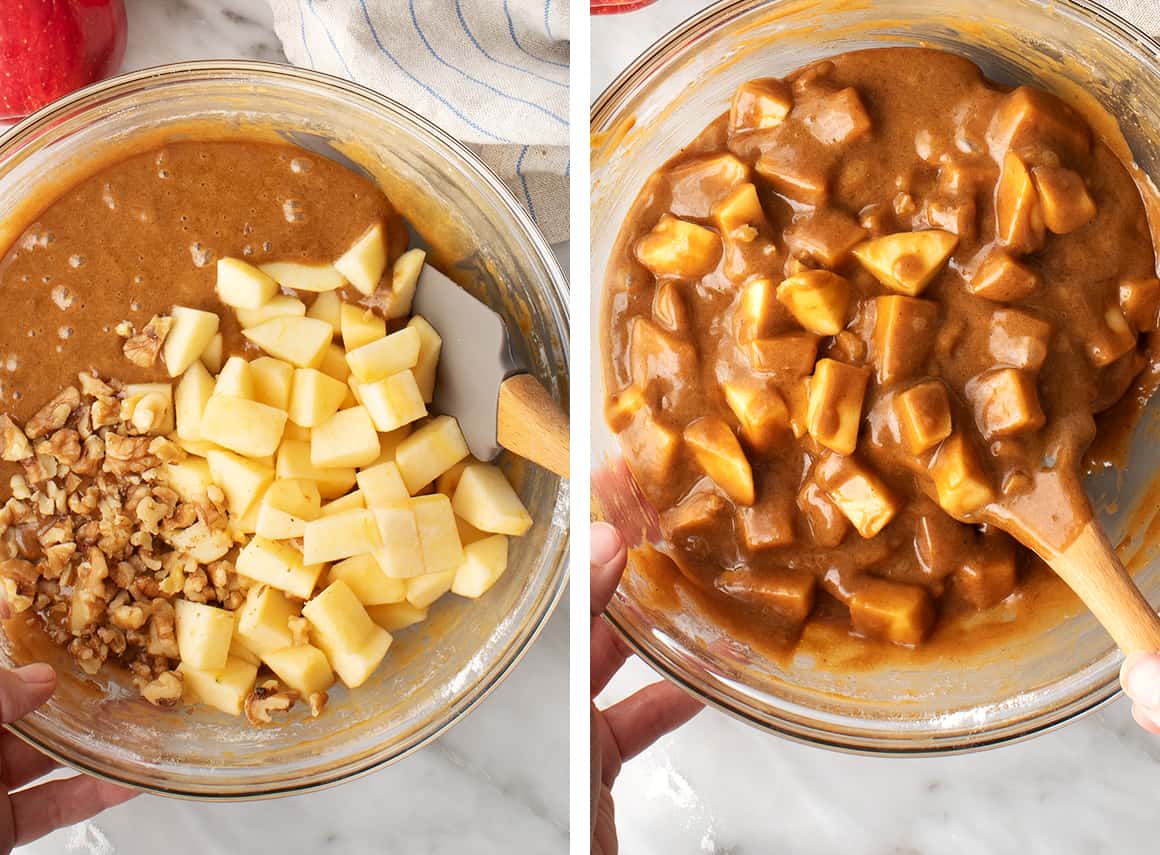
Then, add the apples and HALF the walnuts. (I accidentally dumped them all in at first – oops!) Use a rubber spatula to fold them into the batter.
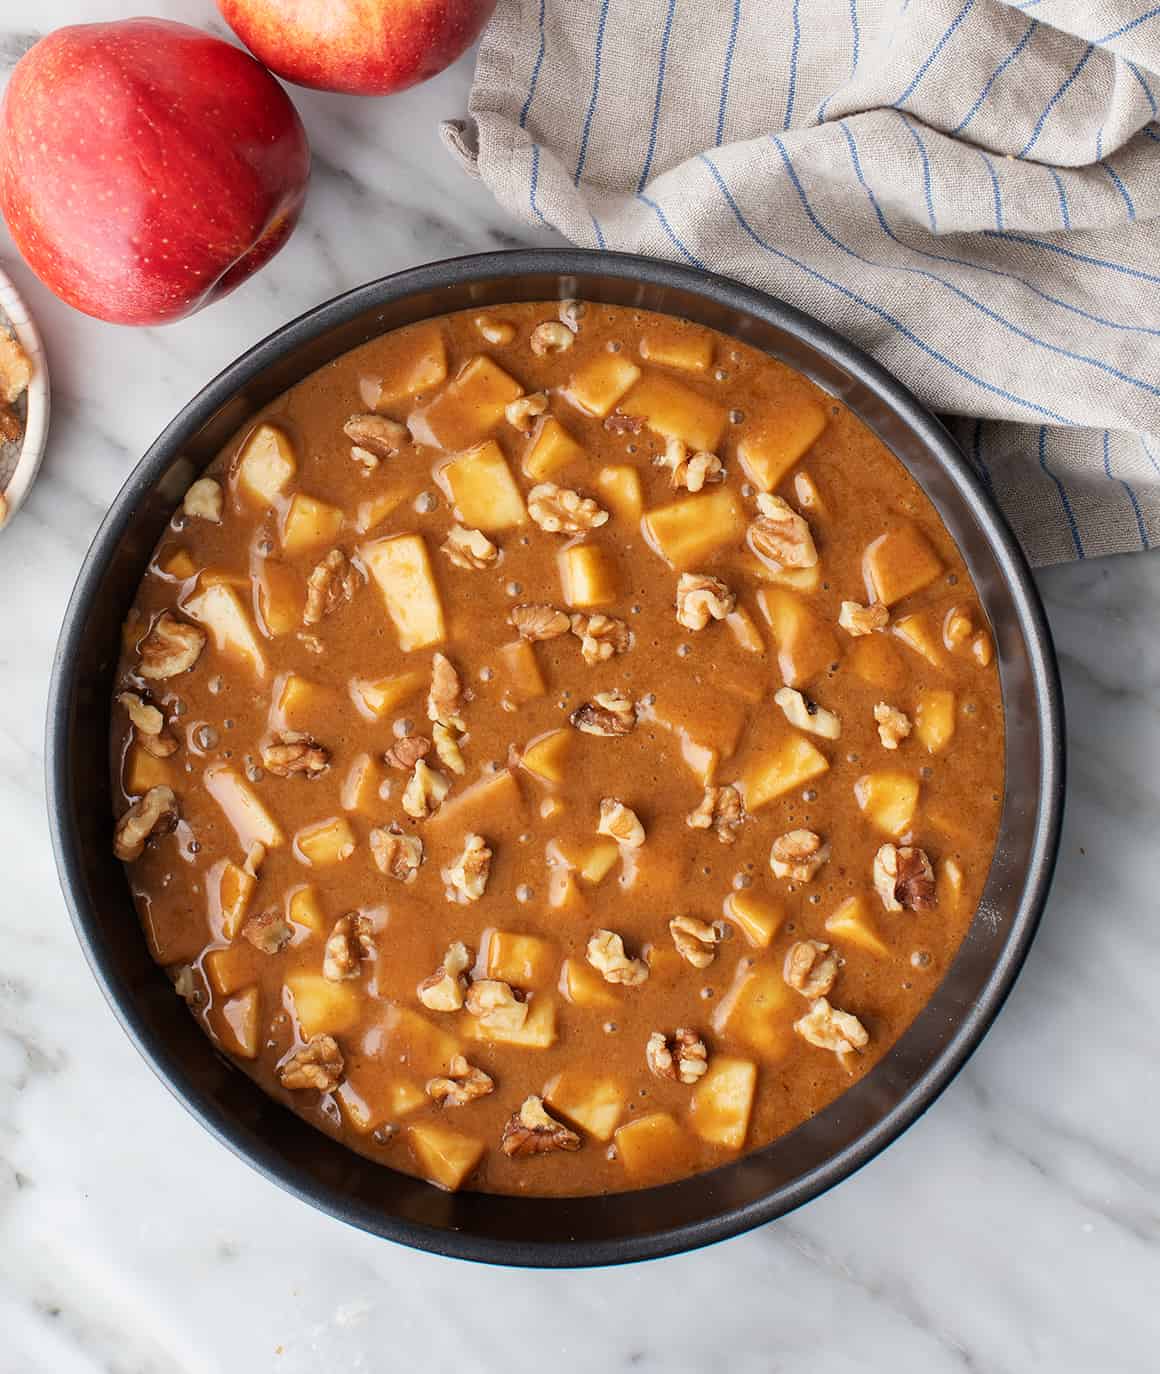
Pour the batter into a prepared baking pan, and use an offset spatula to gently smooth the top. Finally, sprinkle the remaining walnuts over the cake, and bake! Find the complete recipe with measurements below.
Apple Cake Recipe Tips
Serving SuggestionsI’m always happy eating a slice of this cinnamon apple cake plain, with or without a cup of coffee or tea to go with it. However, if you’re craving something a little more decadent, don’t hesitate to dress it up! Yossy recommends serving it with the Crème Fraîche Whip on page 180 or the Maple Coffee Glaze on page 91 of her book. It’d also be fantastic with a dollop of coconut whipped cream or traditional whipped cream, a scoop of vanilla ice cream, or a dusting of confectioner’s sugar.
Apple Cake Recipe VariationsTrust me, you’re going to love this fresh apple cake recipe as written, but if you don’t have the right size pan, or if you’re craving another fruit, don’t worry! Here are a few ways you can change it up:
Let me know what variations you try!
More Favorite Fall TreatsIf you love this cinnamon apple cake recipe, check out Snacking Cakes: Simple Treats for Anytime Cravings! I’m obsessed with this book, and I think you will be too. ? In the meantime, enjoy one of these cozy fall treats next:
Happy baking! Other posts you may enjoy...
The post Apple Cake appeared first on Love and Lemons. Recipes via Love and Lemons https://ift.tt/2h2Uz32 October 24, 2020 at 08:12AM #recipies
7 Day Healthy Meal Plan (Oct 26-Nov 1)
https://ift.tt/3dRw4Sg 7 Day Healthy Meal Plan (Oct 26-Nov 1)posted October 23, 2020 by Gina A free 7-day, flexible weight loss meal plan including breakfast, lunch and dinner and a shopping list. All recipes include calories and updated WW Smart Points. 7-Day Healthy Meal Plan
Why Should Everyone Meal Plan?Meal planning is a great way to organize your meals for the week ahead. You also save time and money in the supermarket! And of course, planning ahead helps you stick to your goals! About The 7-Day Healthy Meal PlanIf you’re new to my meal plans, I’ve been sharing these free, 7-day flexible healthy meal plans (you can see my previous meal plans here) that are meant as a guide, with plenty of wiggle room for you to add more food, coffee, beverages, fruits, snacks, dessert, wine, etc or swap recipes out for meals you prefer, you can search for recipes by course in the index. You should aim for around 1500 calories* per day. There’s also a precise, organized grocery list that will make grocery shopping so much easier and much less stressful. Save you money and time. You’ll dine out less often, waste less food and you’ll have everything you need on hand to help keep you on track. Lastly, if you’re on Facebook join my Skinnytaste Facebook Community where everyone’s sharing photos of recipes they are making, you can join here. I’m loving all the ideas everyone’s sharing! If you wish to get on the email list, you can subscribe here so you never miss a meal plan! Also, if you don’t have the Skinnytaste Meal Planner, now would be a great time to get one to get organized for 2020! There was a print error last year, but it’s perfect now! You can order it here! THE DETAILS:Breakfast and lunch Monday-Friday, are designed to serve 1 while dinners and all meals on Saturday and Sunday are designed to serve a family of 4. Some recipes make enough leftovers for two nights or lunch the next day. While we truly believe there is no one size fits all meal plan, we did our best to come up with something that appeals to a wide range of individuals. Everything is Weight Watchers friendly, I included the updated WW Blue SP for your convenience, feel free to swap out any recipes you wish or just use this for inspiration! The grocery list is comprehensive and includes everything you need to make all meals on the plan. I’ve even included brand recommendations of products I love and use often. Cross check your cabinets because many condiments you’ll notice I use often, so you may already have a lot of them. And last, but certainly not least, this meal plan is flexible and realistic. There’s plenty of wiggle room for cocktails, healthy snacks, dessert and dinner out. And if necessary, you can move some things around to make it work with your schedule. Please let me know if you’re using these plans, this will help me decide if I should continue sharing them! MONDAY (10/26) Totals: WW Points 20B 25G 18P, Calories 1,038** TUESDAY (10/27) WEDNESDAY (10/28) THURSDAY (10/29) Totals: WW Points 17B 21G 13P, Calories 900** FRIDAY (10/30) Totals: WW Points 11B 13G 8P, Calories 536** SATURDAY (10/31) Totals: WW Points 13B 20G 13P, Calories 870** SUNDAY (11/1) Totals: WW Points 17B 24G 17P, Calories 990** *Freeze any leftover you/your family won’t eat. ***Prepare oats with water according to package directions. Use leftover salmon from Wed dinner. Shopping List Produce
Meat, Poultry and Fish
Grains*
Condiments and Spices
Dairy & Misc. Refrigerated Items
Canned and Jarred
Frozen
Misc. Dry Goods
*You can buy gluten free, if desired posted October 23, 2020 by Gina Recipes via Skinnytaste https://ift.tt/2ix3Luq October 23, 2020 at 02:31PM #recipies
Homemade Chocolate Bitters
https://ift.tt/3jqmy9T Bitters are extraordinary, essential, and potent flavor extracts that transform any drink in which they’re mixed. They will also transform anyone able to make their own into a proper home mixologist. Whether you want to round out your home bar or give a gift to someone you clearly treasure, making your own bitters is as easy as it is sexy and addictive. THE INGREDIENTS FOR CHOCOLATE BITTERSMost bitters recipes are a balance between bittering and flavoring agents. For today’s chocolate bitters, you’ll use gentian, wild cherry bark, and black walnut leaf to embitter your alcohol, while cacao nibs, cardamom, vanilla bean, and a cinnamon stick add the complexity, flavoring, and chocolate notes. Not to discourage you from foraging for these (or any other) ingredients in the wild, but they can be easily ordered from Dandelion Botanicals, Tenzing Momo,or Mountain Rose Herbs. In general, use organic, whole ingredients when possible – they’re better for you and are far easier to strain out of the mix. THE BEST ALCOHOL FOR CHOCOLATE BITTERS
More important than which particular brand of spirit you use is the proof of the alcohol. Alcohol will pull essential oils (and flavors and aromas) from your ingredients, and using high-proof spirits will not only extract more of that flavor, but do so more quickly. While vodka is typically used for bitters because its flavor neutral and versatile, for our Chocolate Bitters, I’m calling for a high-proof bourbon (or rye). This is a great compliment to our warm flavor profiles. You should purchase the highest-quality spirits you can afford, as you want the most (and best) flavor to make it through to bottling. Knob Creek’s 120-proof single barrel bourbon, or the 100-proof ryes from Rittenhouse or Old Forester will always serve you well, especially if you have any left over. HOW TO MAKE HOMEMADE BITTERS
Having gone through the work of sourcing all of your herbs, roots, flowers, barks, fruit peels, and bittering agents, it’s all (almost) all over but for the steeping: Combine your dry ingredients with a high proof alcohol and let them sit for a bit. Since different spices infuse at different rates, the steeping time will vary depending on the recipe. In the case of this recipe you’re waiting two weeks total, adding a second batch of herbs and spices halfway through. You’ll also need to shake the glass jar in which everything sits once each day. There in that jar, day by day, the infusion will become more pronounced, flavorful, and complex, until – diggity doo – you have a true batch of bitters on your hand. HOW TO BOTTLE HOMEMADE BITTERS
Now that you’ve put all that work into sourcing and infusing and waiting, you’re only a well-chosen bottle away from enjoying these bitters (or giving them away). Boston round glass bottles, with their handy droppers and range of sizes, are the best combination of affordable, sourceable, and usable. This said, you can also go with more specialty bottles, too. Note that bright light can alter the flavor of the bitters, so dark (amber) bottles are best, or you can store them in a dark place. As you’re not likely to use these Chocolate Bitters as often as Angostura or orange bitters, you can aim for smaller-size (2- or 4-ounce) bottles. If you’re giving these as a gift, a well-chosen larger bottle may make a better impression. Specialty Bottle and Amazon are both good sources for a range of Boston Rounds, but Cocktail Kingdom has the truly specialty bottles you might be after if you are planning to give these away as gifts, or just show off. OTHER HELPFUL EQUIPMENT
HOW TO USE YOUR BITTERS
Whereas a standard like Angostura acts as an aromatic bitters, providing a bridge between your base spirit and your sweetener, these chocolate bitters fall on the “savory” side, adding layers of complexity while amplifying your base spirit. These chocolate bitters are ideal for cocktails with brown spirits – accompanying an aged rum, or a good bourbon, for example. It can even be paired with a citrus bitters (orange, perhaps) to both brighten and deepen a spirit. If you’re looking for more particular recommendations, try adding these to a Fall-Spiced Old-Fashioned, pairing it with sherry in the Chocolate Adonis, or going full chocolate for the Chocolate Sidecar. HOW LONG WILL THESE BITTERS LAST?
The good news – if you’re someone who tends to use bitters sparingly – is that bitters will likely never go bad. You can check in on them in five years if you’d like, but because of the high-proof alcohol, they’ll have much longer than that in them. Best would be to enjoy often. You may as well. More DIY Projects!Recipes via Simply Recipes https://ift.tt/2F9fkDA October 23, 2020 at 09:02AM #recipies
One Simply Terrific Thing: Turbinado Sugar (Sugar in the Raw)
https://ift.tt/37yil1F
Because of my job as a baker and recipe developer, I have a well-stocked pantry full of specialty ingredients most folks don’t use on a regular basis. But for anyone wanting to take their baked goods up a notch, I recommend getting some turbinado sugar. This specialty ingredient can take a regular home-baked good to the next level! WHAT IS TURBINADO SUGAR?
Turbinado sugar (sometimes sold by its brand name Sugar in the Raw) came onto the scene back in the 90s where it started to appear at coffee shops across the nation. But it wasn’t until the last 10 to 15 years that you could buy it in bags at regular grocery stores, like white and brown sugar. This specialty sugar is a blond-colored coarse crystal sugar that is less refined that table sugar. Unlike white granulated sugar, which is refined and boiled several times to remove all the molasses, turbinado sugar is boiled once and then processed through a centrifuge to spin off the excess moisture. The centrifuge, called a turbine, is what gives turbinado sugar its name! HOW TO BAKE WITH TURBINADO SUGAR
Due to its unrefined nature, turbinado sugar has a slight molasses flavor that is more rounded and complex than regular white sugar’s simple sweetness. It’s great in hot beverages like coffee and tea, and adds a great crunch and texture when sprinkled over oatmeal or yogurt. Turbinado sugar also makes a fantastic addition to baked goods! Sprinkle a tablespoon over pies before baking for a professional look and taste; top muffins with a generous pinch to give them a “bakery-style” appearance; or try adding a tablespoon to a crumble, crisp, or on top of a cobbler. You can even use a tablespoon or two of turbinado sugar in place of white granulated sugar in cookies like sugar cookies, chocolate chip cookies, or oatmeal raisin cookies. The sugar’s large crystals won’t melt so the cookies get some extra texture and crunch, making them all the more special. Unlike brown sugar, turbinado sugar won’t harden, which means it will last until you use it up. (And a bag often lasts a long time, especially if you are only using one or two tablespoons of it at a time.) You can find turbinado sugar online, as well as at well-stocked grocery stores or specialty stores like Trader Joe’s. Go get some! This post may contain links to Amazon or other partners; your purchases via these links can benefit Simply Recipes. Read more about our affiliate linking policy. Recipes via Simply Recipes https://ift.tt/2F9fkDA October 23, 2020 at 08:44AM #recipies
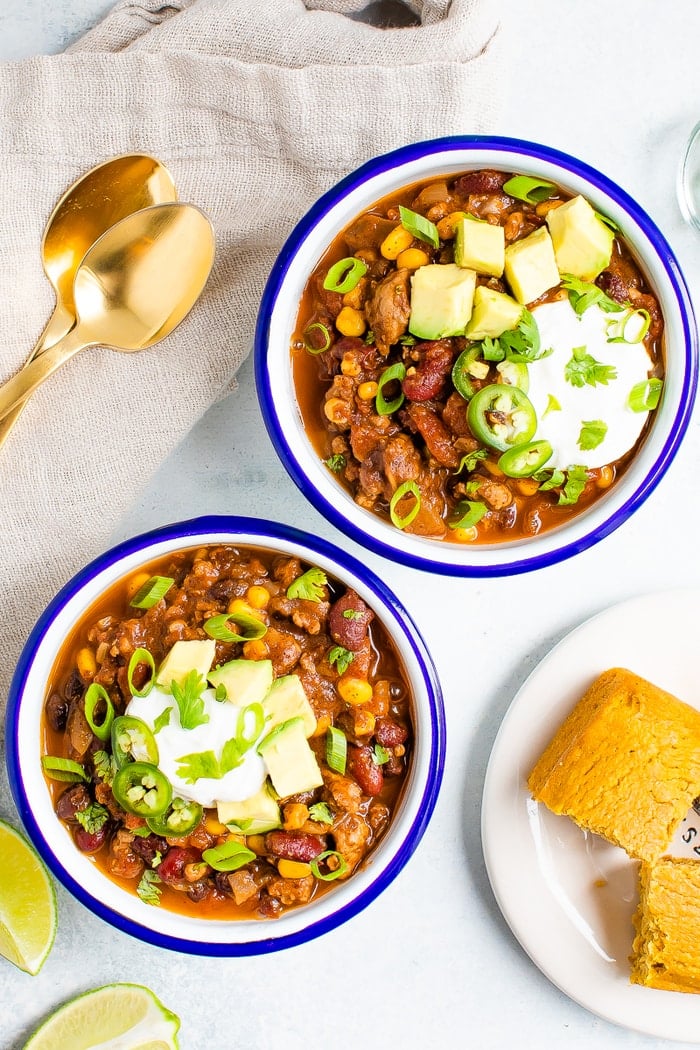
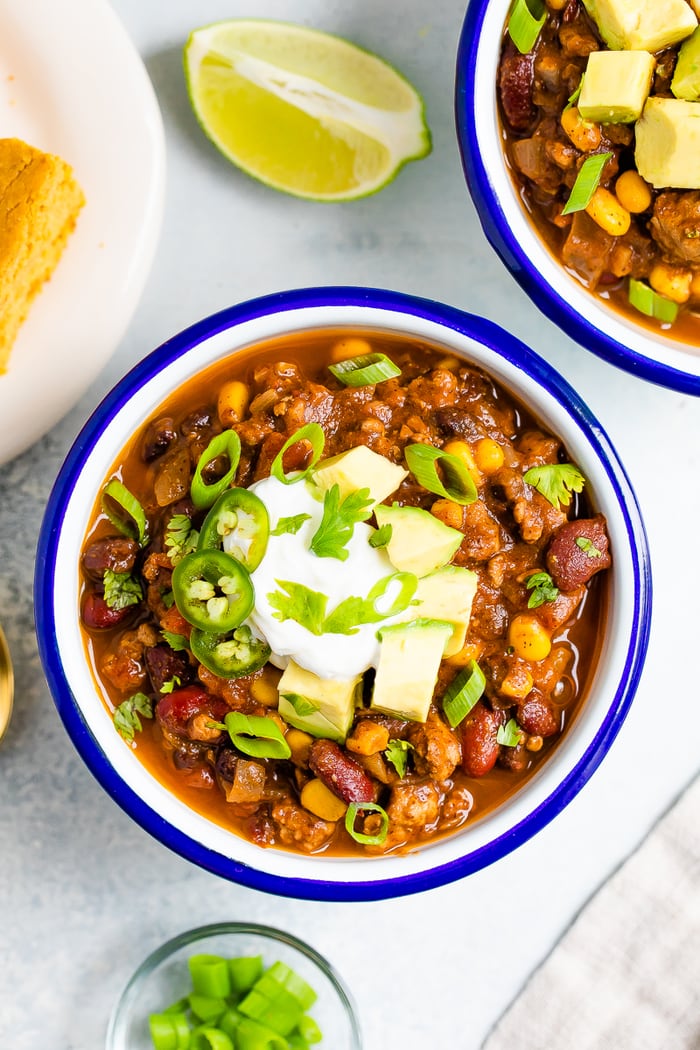
Healthy Turkey Chili
https://ift.tt/31BO91Q
I don’t know about you, but the second cool weather hits, I crave chili! I love all types of soups and stews, but I think chili takes the cake. I love how hearty and filling it is. Comfort food in a bowl! It doesn’t hurt that it’s super easy to throw together and packed with healthy ingredients.
I love making chili because it feels like you just dump a bunch of ingredients into a pan, let them cook and marinate. The end result is so flavorful and only minimal effort was made! Few things are better than one-pot meals, am I right?
Healthy Turkey Chili Ingredients
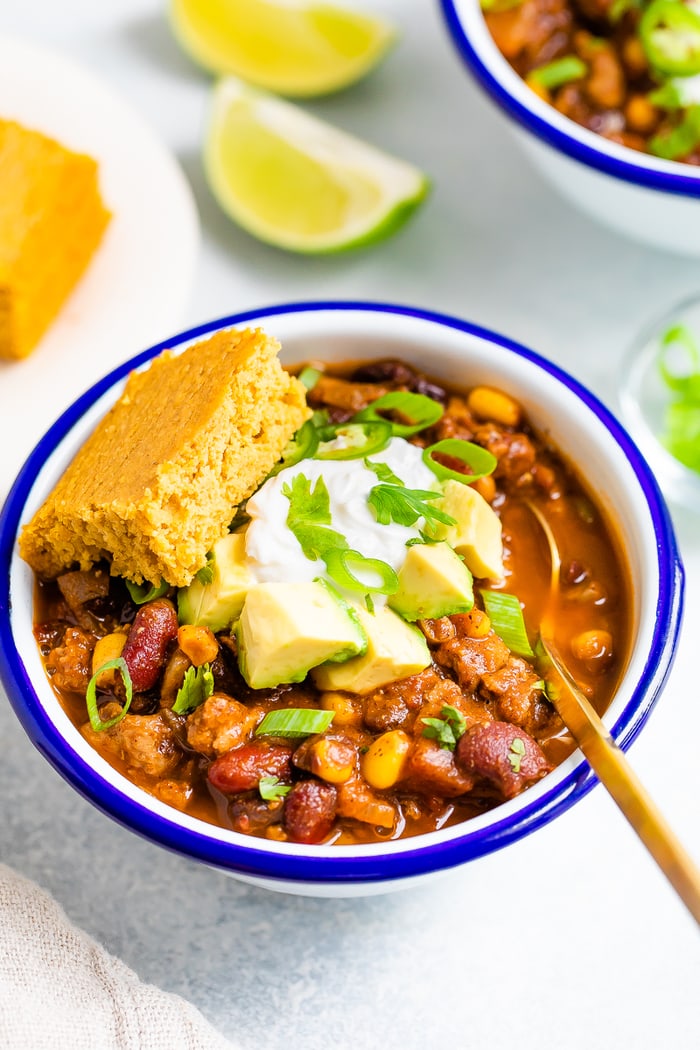
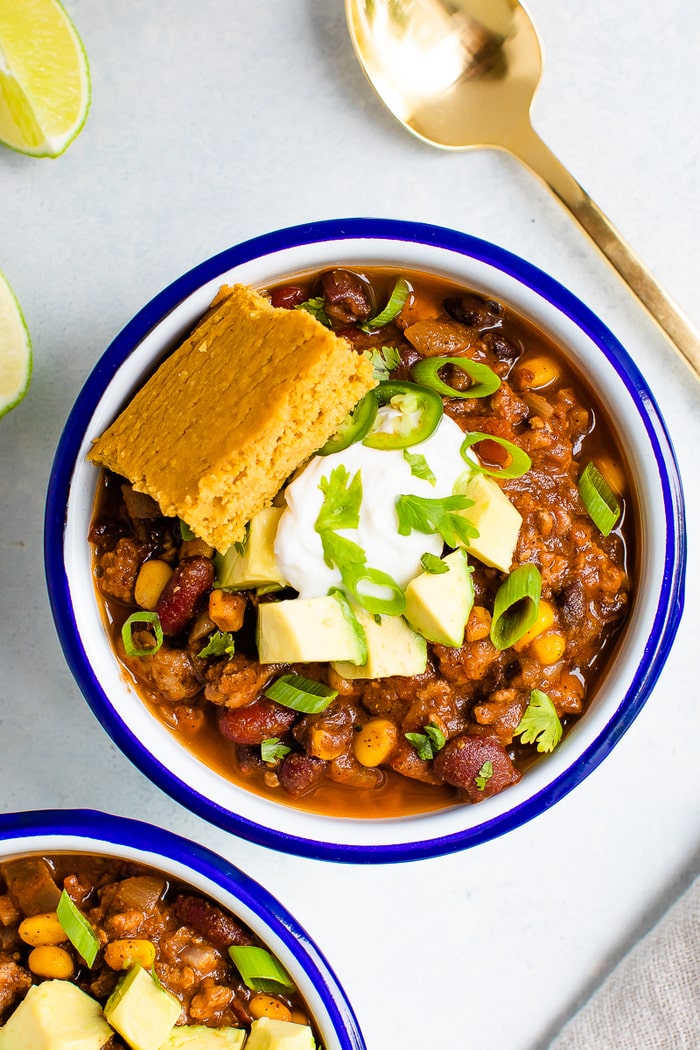
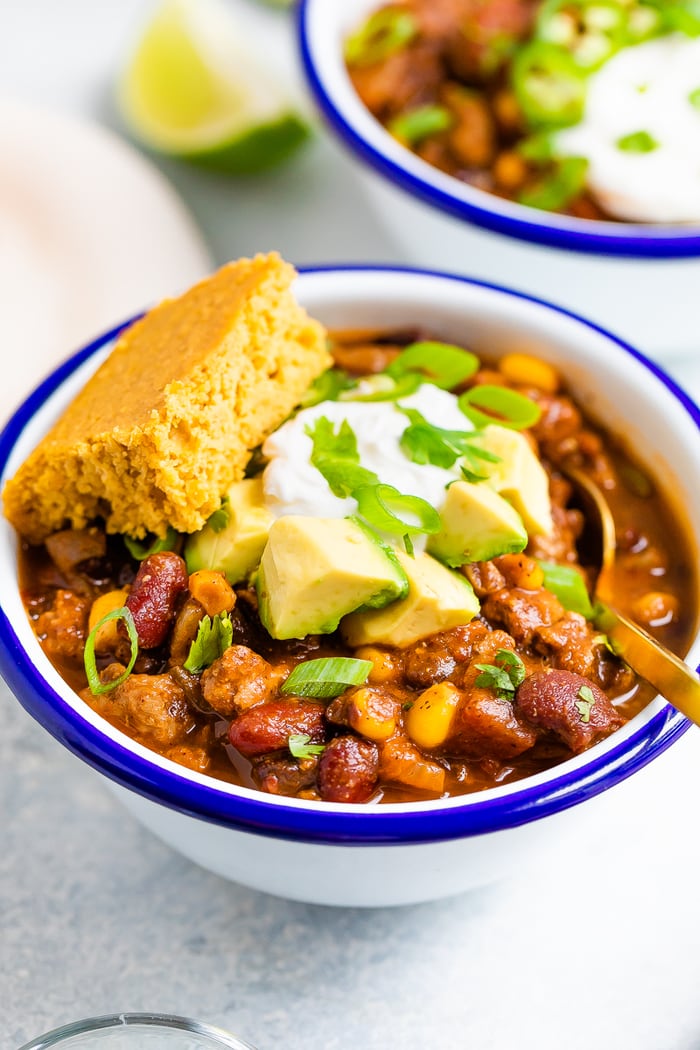
How to Make Healthy ChiliAs I mentioned above, making a flavorful chili is so easy. Here’s how: Sauté – Start by heating the oil in a large pot or dutch oven over medium heat. Add in the onion and garlic and sauté, stirring frequently until the mixture is fragrant and the onion is translucent. Add in the ground turkey, salt and pepper and cook until the turkey is browned evenly and cooked through. Add ingredients and simmer – Add the stock, tomatoes, beans, corn, and spices. Bring the mixture to a boil, reduce heat to low, cover and simmer for 20 minutes. Serve – Serve the chili warm with toppings of choice. I love serving mine with avocado, sour cream and cornbread.
How to Serve ChiliChili is a hearty enough recipe to be a meal in one! Having said, I love eating it with my pumpkin cornbread muffins. It’s also delicious served with bread, crackers (I love my almond crackers) or even tortilla chips. It can also be served with a salad… I have a ton of salad recipes to choose from, but something light and fresh like this garlicky kale salad would be perfect. How to Store LeftoversLet the chili cool slightly before transferring to an airtight container. Store in your refrigerator for up to 5 days. If you need to store it longer, let the chili cool completely in the fridge and then transfer to the freezer for up to 3 months.
More Chili Recipes to Try:
If you make this healthy chili be sure to leave a comment and star rating below letting me know how it turned out for you. Your feedback is so helpful for the EBF team and our readers! Print Healthy Turkey Chili
DescriptionThis lightened up turkey chili is made with a blend of kidney and black beans as well as corn. It’s the perfect meal to serve for game day or as an easy dinner! Ingredients
Instructions
Nutrition
Keywords: healthy turkey chili The post Healthy Turkey Chili appeared first on Eating Bird Food. Recipes via Eating Bird Food https://ift.tt/1L45wsH October 23, 2020 at 07:03AM #recipies |
|


 RSS Feed
